
1. Introduction
The JOYO MONOMYTH R-26 is a versatile bass simulator effect pedal designed for bass guitarists. It combines overdrive, a 6-band graphic equalizer, and noise reduction features to enhance your tone in various musical settings. This manual provides detailed instructions for proper setup, operation, and maintenance of your pedal.

Image 1.1: The JOYO MONOMYTH R-26 Bass Simulator Pedal. This image displays the pedal's top view, showcasing its controls and overall design.
2. Safety Information
- Use only a DC 9V (center negative) power supply with a current consumption greater than 200mA. Incorrect power supply may damage the unit.
- Do not expose the unit to extreme temperatures, humidity, or direct sunlight.
- Avoid dropping or subjecting the unit to strong impacts.
- Do not attempt to disassemble or repair the unit yourself. Refer all servicing to qualified personnel.
3. Product Overview
3.1. Controls and Functions

Image 3.1: Labeled controls of the JOYO MONOMYTH R-26 pedal. This image highlights the VOICE, BLEND, LEVEL, DRIVE knobs, and the HI BOOST and GAIN BOOST switches.
- VOICE Knob: Adjusts the brightness of the tone. Turning clockwise increases brightness.
- BLEND Knob: Adjusts the level of sound blend between the dry signal and the effected signal.
- LEVEL Knob: Adjusts the overall output volume of the pedal.
- DRIVE Knob: Adjusts the degree of overdrive effect.
- HI BOOST Switch: Engages a high-frequency boost for the tone.
- GAIN BOOST Switch: Engages an additional boost to the overdrive gain.
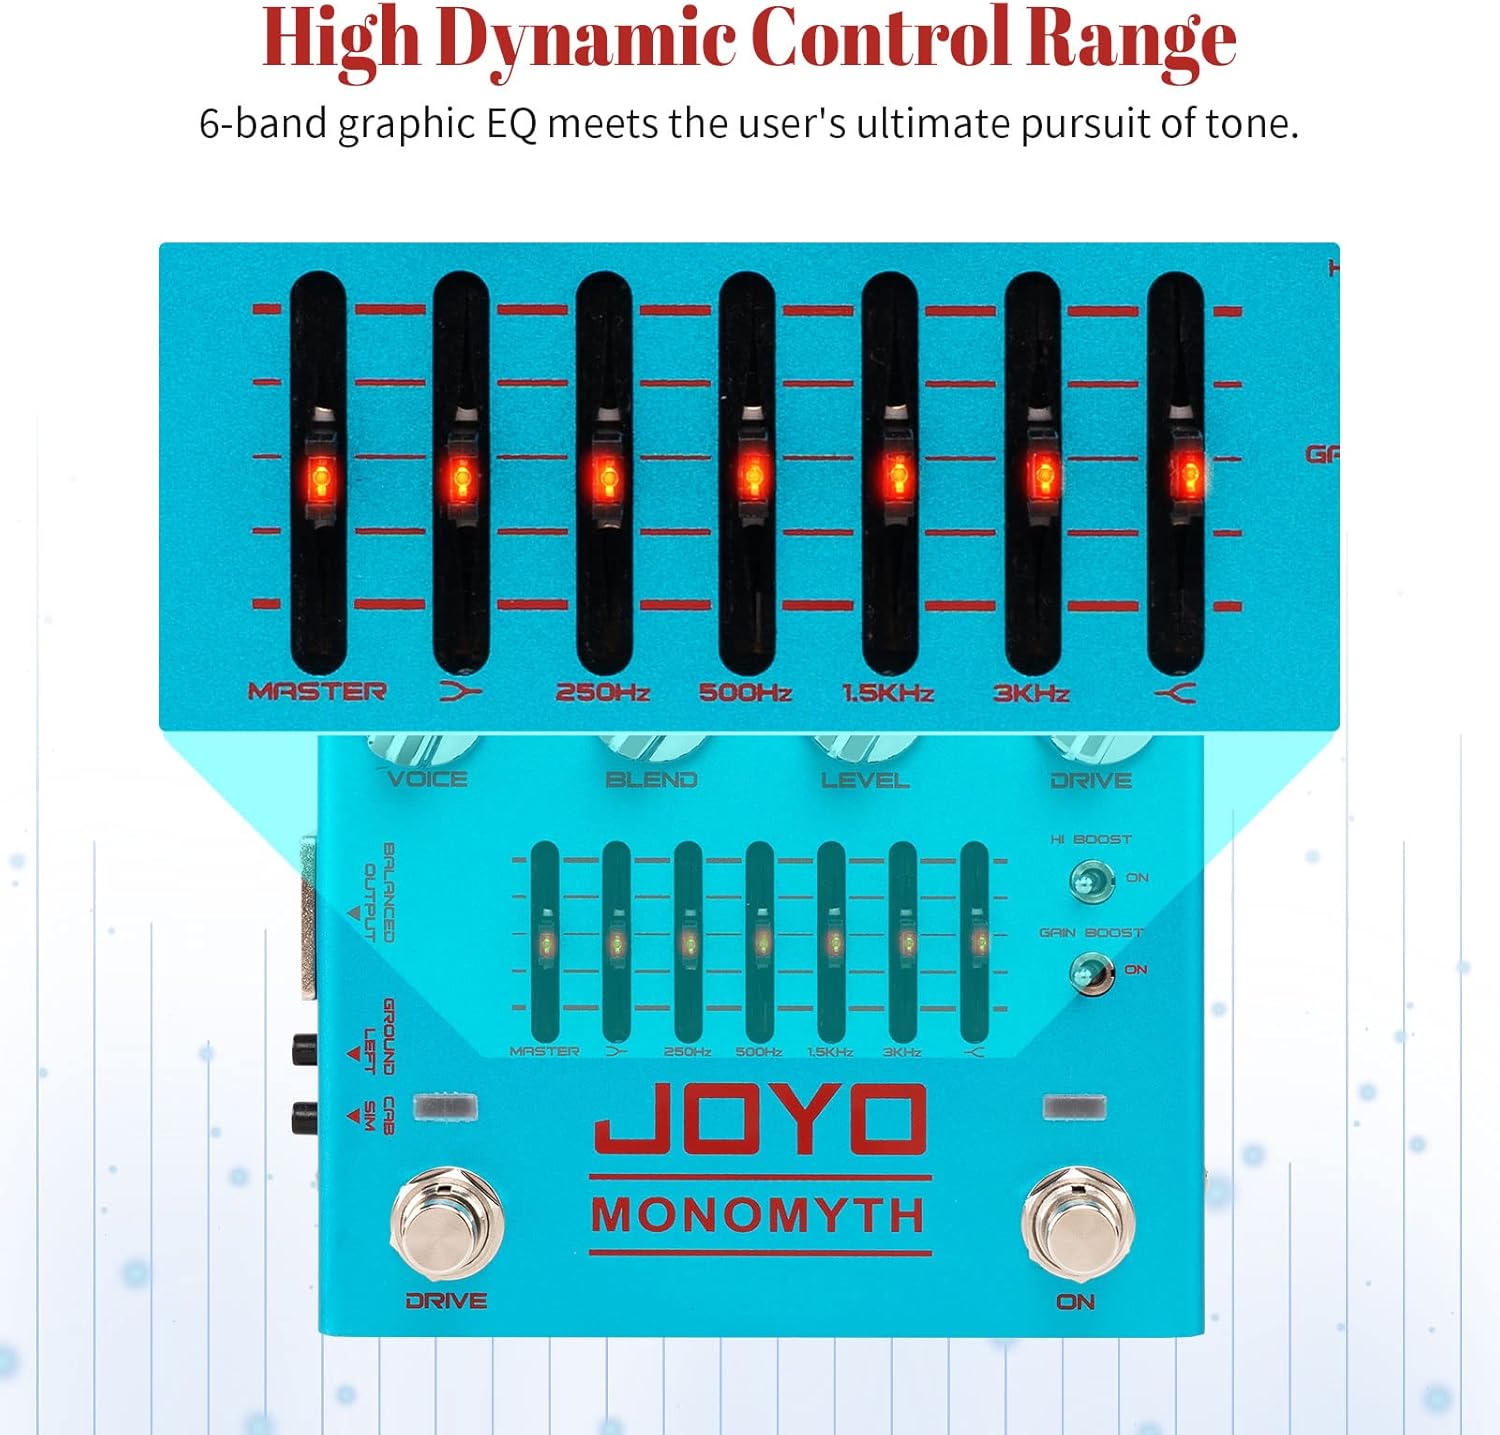
Image 3.2: Close-up of the 6-band graphic EQ section. This image shows the sliders for MASTER, 250Hz, 500Hz, 1.5KHz, and 3KHz frequency bands.
- 6-Band Graphic EQ: Provides precise control over various frequency bands (MASTER, 250Hz, 500Hz, 1.5KHz, 3KHz, and an additional high-frequency band). Use the sliders to cut or boost specific frequencies.
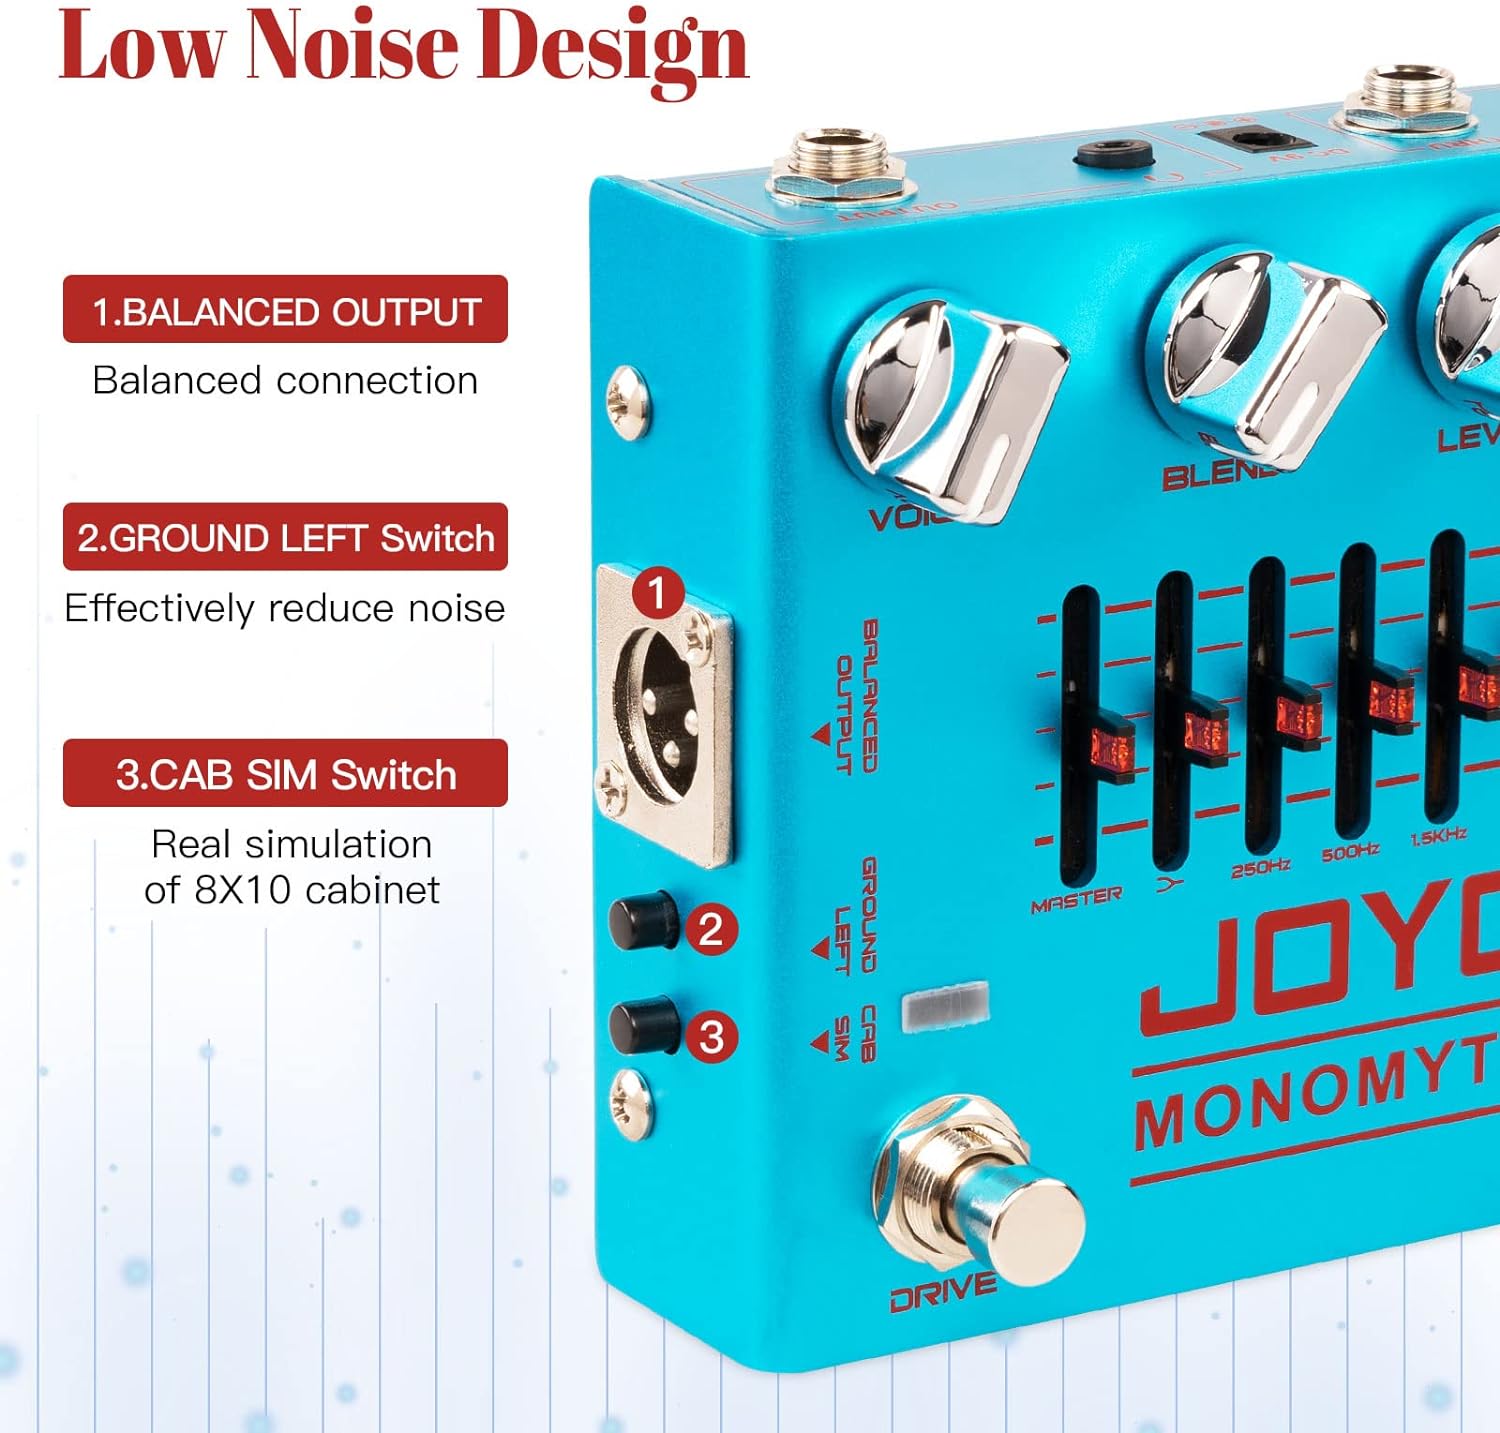
Image 3.3: Side view showing the Balanced Output, Ground Left, and CAB SIM switches. This image details the switches located on the left side of the pedal.
- BALANCED OUTPUT: XLR output for balanced connection to mixing consoles or audio interfaces.
- GROUND LEFT Switch: Helps reduce noise caused by ground loops.
- CAB SIM Switch: Activates an 8x10 bass cabinet simulation for a realistic amplified tone.

Image 3.4: Input, Output, THRU, and DC 9V power connections. This image illustrates the various jacks on the rear of the pedal for signal and power.
- INPUT Jack: 1/4-inch mono input for your bass guitar.
- OUTPUT Jack: 1/4-inch mono output to your amplifier or next pedal.
- THRU Jack: 1/4-inch mono output for a dry signal pass-through.
- DC 9V Input: Power input for a 9V DC (center negative) adapter.
- DRIVE Footswitch: Activates or deactivates the overdrive effect.
- ON Footswitch: Activates or deactivates the overall pedal effect.
4. Setup
4.1. Power Connection
- Ensure the pedal is switched off.
- Connect a DC 9V (center negative) power adapter to the DC 9V input jack on the pedal.
- Plug the power adapter into a suitable power outlet.
4.2. Audio Connections
- Connect your bass guitar to the INPUT jack using a 1/4-inch instrument cable.
- Connect the OUTPUT jack to your amplifier or the input of another effect pedal using a 1/4-inch instrument cable.
- For balanced output to a mixing console or audio interface, use an XLR cable from the BALANCED OUTPUT.
- If you wish to send a dry signal to another destination, connect a cable from the THRU jack.
5. Operating Instructions
5.1. Basic Operation
- After connecting power and audio, press the ON footswitch to activate the pedal. The LED ambient lights will illuminate.
- Start with all knobs at their middle position (12 o'clock) and EQ sliders flat (center).
- Adjust the LEVEL knob to achieve a suitable output volume.
5.2. Overdrive Control
- Press the DRIVE footswitch to engage the overdrive effect.
- Use the DRIVE knob to adjust the intensity of the overdrive.
- Experiment with the HI BOOST and GAIN BOOST switches to further shape the overdrive character.
5.3. Tone Shaping with EQ
- Adjust the VOICE knob to control the overall brightness of your tone.
- Utilize the 6-band graphic EQ sliders to fine-tune specific frequencies. Boost lower frequencies for more bass, or cut harsh high frequencies.
- The MASTER slider controls the overall level of the EQ section.
5.4. Cabinet Simulation
- Engage the CAB SIM switch for an 8x10 bass cabinet simulation, ideal for direct recording or connecting to a PA system.
5.5. Noise Reduction
- If experiencing hum or noise, try engaging the GROUND LEFT switch to mitigate ground loop issues.

Image 5.1: Animated illustration of knob adjustments. This image demonstrates the rotation of the VOICE, BLEND, LEVEL, and DRIVE knobs.
6. Maintenance
- Cleaning: Use a soft, dry cloth to clean the pedal. Do not use abrasive cleaners or solvents.
- Storage: Store the pedal in a dry, cool place away from direct sunlight when not in use. Disconnect power and cables.
- Footswitches and Jacks: Periodically check footswitches and input/output jacks for any debris or loose connections.
7. Troubleshooting
- No Sound:
- Check all cable connections (input, output, power).
- Ensure the pedal is powered on and the ON footswitch is engaged.
- Verify your amplifier is on and its volume is up.
- Check the LEVEL knob on the pedal; ensure it is not set to minimum.
- Excessive Noise/Hum:
- Ensure you are using a JOYO 9V DC pedal power supply.
- Engage the GROUND LEFT switch to reduce ground loop noise.
- Check for faulty cables or power supply.
- Ensure no other electronic devices are causing interference nearby.
- Overdrive Not Engaging:
- Ensure the DRIVE footswitch is engaged.
- Check the DRIVE knob setting; increase it to hear the effect.
8. Specifications
| Feature | Specification |
|---|---|
| Model | MONOMYTH R-26 |
| Item Weight | 14.5 ounces (410 Grams) |
| Product Dimensions | 5.12 x 4.33 x 1.97 inches (130mm L x 110mm W x 50mm H) |
| Body Material | Alloy |
| Color | Blue |
| Compatible Devices | Bass, Effect Pedals, Guitar Combo, Guitar Amplifier, Pedal Controller |
| Connector Type | 1/4-Inch Straight |
| Hardware Interface | 1/4-inch Audio |
| Signal Format | Analog |
| Power Source | Corded Electric |
| Voltage | 9 Volts (DC) |
| Current Consumption | >200mA |
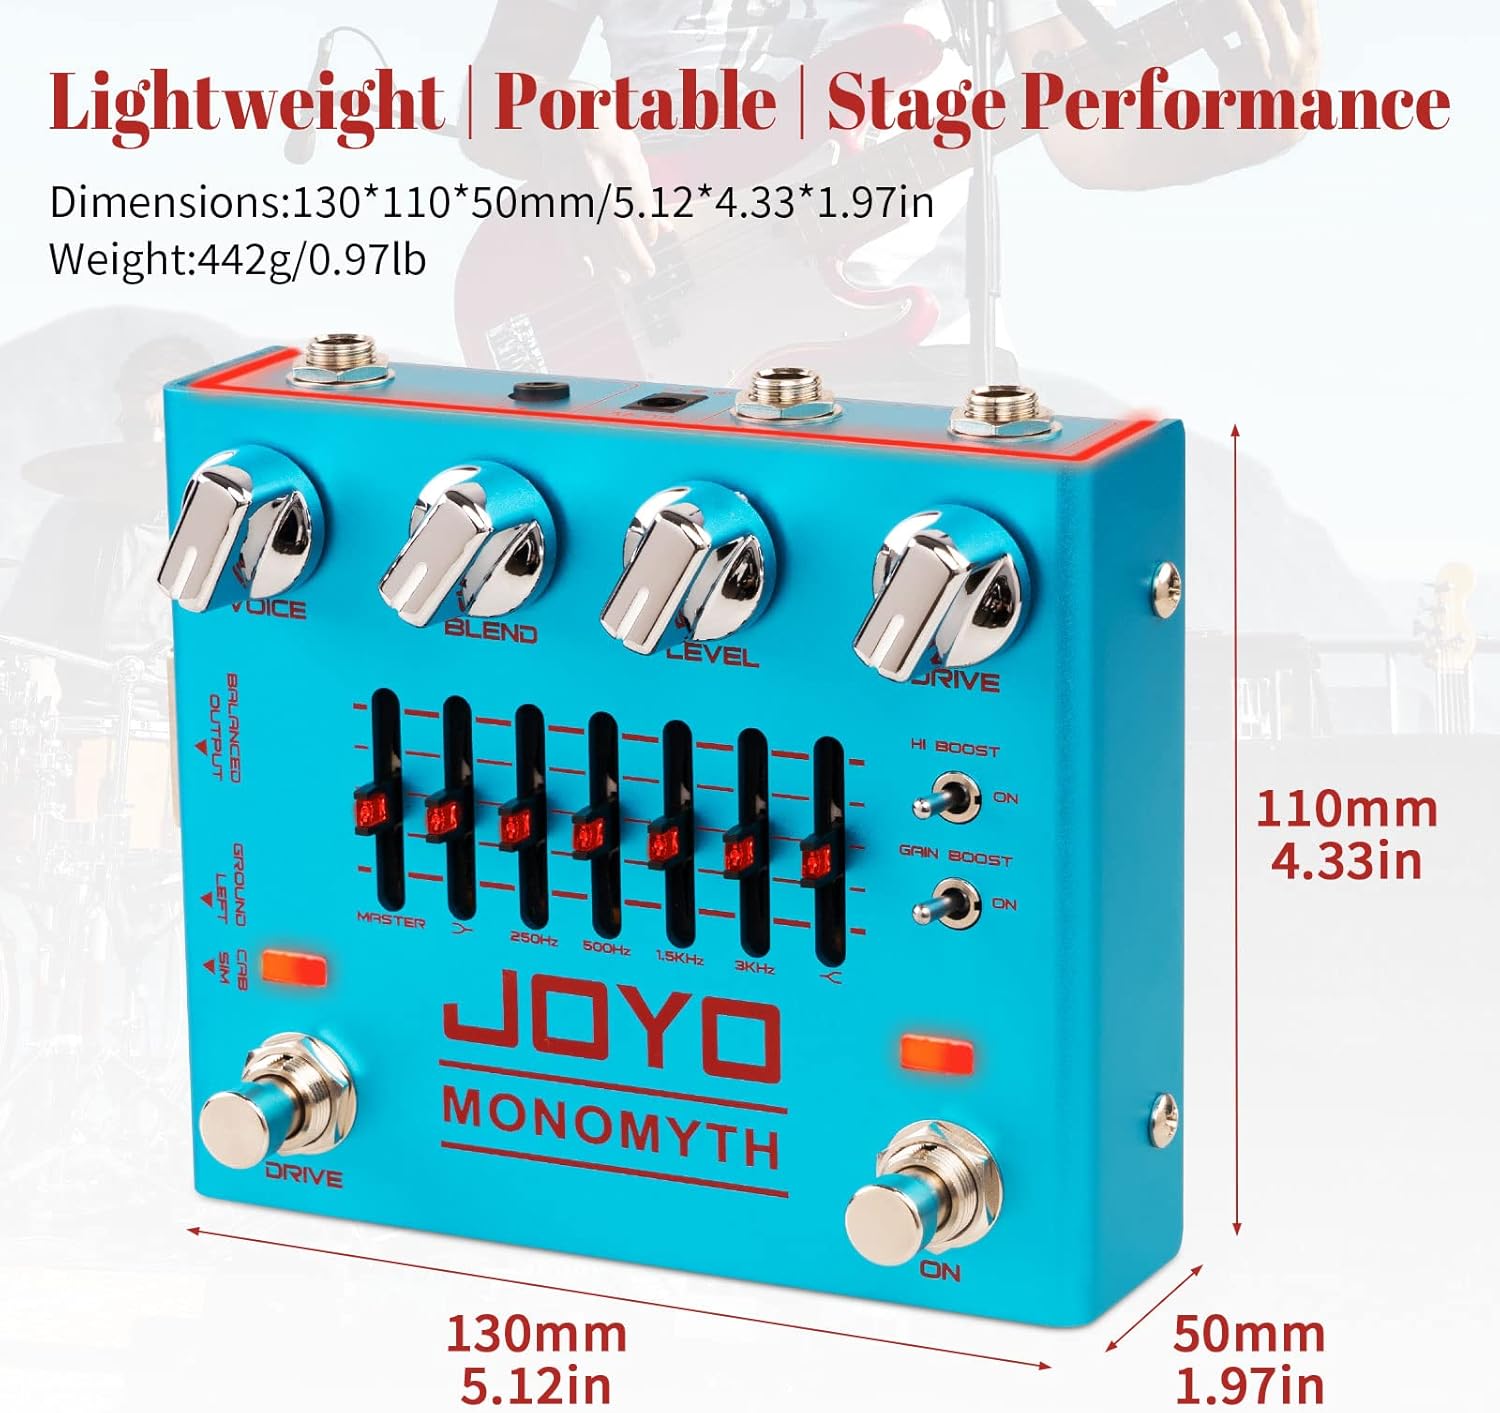
Image 8.1: Dimensions and weight of the JOYO MONOMYTH R-26 pedal. This image provides a visual representation of the pedal's physical size.
9. What's in the Box
- JOYO MONOMYTH R-26 Effect Pedal
- User Manual (this document)
10. Warranty and Support
JOYO products are designed for reliability and performance. This product comes with a standard manufacturer's warranty against defects in materials and workmanship. For specific warranty details, please refer to the warranty card included with your purchase or contact JOYO customer support.
For technical support, troubleshooting assistance, or warranty claims, please contact JOYO customer service through their official website or the retailer where the product was purchased.


