
1. Introduction and Overview
The Thmosz 2.8 Cuft Depository Safe with Drop Slot is designed to provide secure storage for cash, receipts, documents, and other valuables. Its robust construction and advanced locking mechanisms ensure protection against theft. This manual provides essential information for setup, operation, and maintenance of your safe.

Figure 1: The Thmosz 2.8 Cuft Depository Safe, illustrating its capacity for various valuables such as cash, jewelry, documents, firearms, and passports.
2. Safety Information
- Always keep emergency keys in a secure location, separate from the safe, and never inside the safe itself.
- Ensure the safe is securely mounted to the floor or wall using the provided expansion bolts to prevent unauthorized removal.
- Do not share your password with unauthorized individuals.
- The safe features an automatic lock function that activates after 3 incorrect entries, blocking the keypad for 20 seconds.
- The front deposit drawer is equipped with a saw-tooth edge tilting baffle to prevent contents from being fished out.
3. Included Components
Please verify that all components are present before beginning installation:
- Depository Safe (1)
- Emergency Key (2)
- User Manual (1)
- External Power Box (1)
- Expansion Bolt (4)

Figure 2: Overview of the safe's dimensions and the accessories included in the package.
4. Setup
4.1 Battery Installation
The safe requires 4 AA batteries (not included) for the digital keypad to function. To install the batteries:
- Open the safe door using the emergency key (refer to Section 5.2).
- Locate the battery compartment on the inside of the safe door.
- Insert 4 AA batteries, ensuring correct polarity (+/-).
- Close the battery compartment cover.
Video 1: A demonstration of the Depository Safe with Drop Slot, including how to open the safe and install the batteries.
4.2 Mounting the Safe
For enhanced security, it is highly recommended to mount the safe to a floor or wall using the provided expansion bolts.
- Choose a suitable location for the safe.
- Mark the drilling points through the pre-drilled holes on the back or bottom panel of the safe.
- Drill holes into the floor or wall at the marked points.
- Position the safe and secure it using the expansion bolts.
5. Operating Instructions
5.1 Unlocking with Digital Keypad (Initial Password)
The initial password for the safe is "159#".
- Enter "159" on the keypad.
- Press the "#" key.
- Turn the knob clockwise within 5 seconds to open the safe door.

Figure 3: Instructions for quick access using the keypad and emergency key for initial setup or forgotten codes.
5.2 Unlocking with Emergency Key
In case of forgotten password or dead batteries, the emergency key can be used.
- Locate the keyhole hidden behind the digital keypad's knob cover.
- Gently remove the knob cover.
- Insert the emergency key into the keyhole and turn it counter-clockwise.
- While holding the key turned, rotate the main knob clockwise to open the safe door.
5.3 Unlocking with External Power Box
If the internal batteries are depleted and you do not have the emergency key readily available, the external power box can be used for temporary power.
- Connect the external power box cable to the port located on the digital keypad.
- Enter your password on the keypad.
- Press the "#" key.
- Turn the knob clockwise within 5 seconds to open the safe door.
5.4 Setting a Personal Password
You can set a personal password of 1 to 8 digits.
- With the safe door open, press the red reset button located on the inside of the safe door, near the hinge.
- The keypad will beep, and the display will show "PROG" or a similar indicator.
- Enter your desired 1-8 digit password on the keypad.
- Press the "#" key to confirm. The display will show "GOOD" or a similar confirmation.
- Test your new password with the door open before closing it.
Video 2: A step-by-step guide on how to set a personal password for your safe.
5.5 Using the Deposit Slot
The deposit slot allows you to drop items into the safe without opening the main door.
- Lift the top flap of the deposit slot.
- Place cash, envelopes, or small items into the slot.
- Close the flap. The items will drop into the main compartment of the safe.
- The internal baffle prevents items from being retrieved through the slot.

Figure 4: Detail of the anti-fishing design, highlighting the hinged drop door and the jagged edge baffle within the deposit slot.
6. Maintenance
- Battery Replacement: Replace batteries annually or when the low battery indicator appears on the display.
- Cleaning: Clean the exterior of the safe with a soft, damp cloth. Avoid abrasive cleaners or solvents.
- Regular Checks: Periodically check the mounting bolts to ensure they are secure.
7. Troubleshooting
| Problem | Possible Cause | Solution |
|---|---|---|
| Keypad is unresponsive or beeping continuously. | Low batteries or keypad locked due to incorrect entries. | Replace batteries. If locked, wait 20 seconds for the keypad to reset. Use emergency key or external power box if necessary. |
| Safe does not open after entering correct password. | Knob not turned within 5 seconds, or batteries are too low. | Ensure the knob is turned immediately after entering the password. Replace batteries or use external power box. |
| Cannot set new password. | Reset button not pressed correctly, or password format is incorrect. | Ensure the red reset button is pressed firmly. Enter a password between 1 and 8 digits. |

Figure 5: The safe's smart alarm system, which provides a low battery reminder and activates an alarm after multiple incorrect password attempts.
8. Specifications
| Feature | Detail |
|---|---|
| Product Dimensions | 13.78"D x 15.75"W x 20.47"H |
| Capacity | 2.8 Cubic Feet |
| Item Weight | 42 Pounds |
| Lock Type | Electronic Combination Lock, Key |
| Material | Alloy Steel |
| Special Features | Sensor Light, Combination Lock, Anti-Theft, Deposit Slot |
| Mounting Type | Floor or Wall Mount |
| Color | Black |
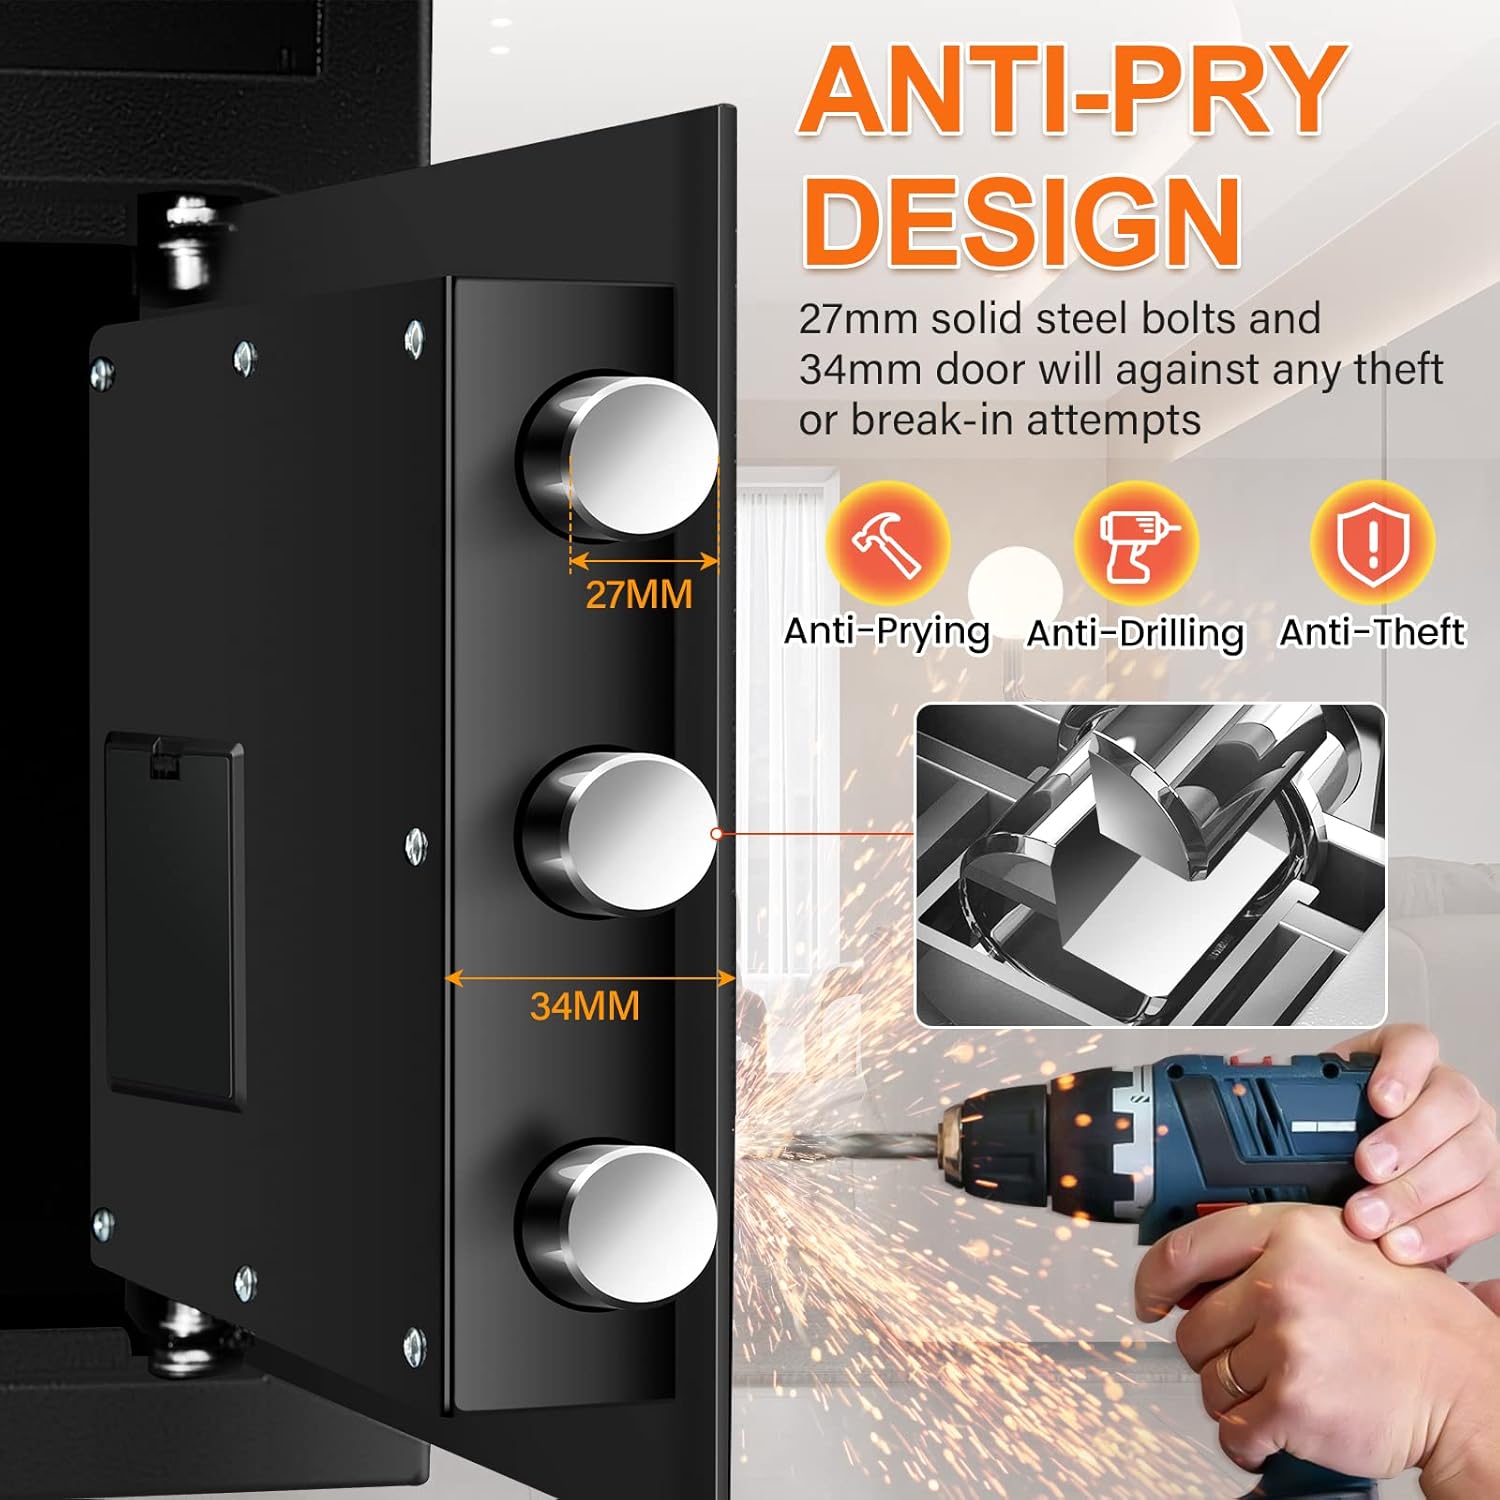
Figure 6: The robust anti-pry design of the safe, featuring solid steel bolts and a thick door for enhanced security.
9. Warranty and Support
Thmosz provides lifetime warranty service and technical support for your depository safe. If you encounter any issues or have questions regarding your product, please contact Thmosz customer service for assistance.
For further information or support, please visit the official Thmosz Store: Thmosz Store on Amazon.