
1. Introduction
This manual provides detailed instructions for the installation and use of your SENLEG Anti-Theft Door Mount, specifically designed for the Blink Video Doorbell (2nd Gen). This innovative mount offers a secure, no-drilling solution for your doorbell, ensuring it remains protected while maintaining full functionality.

A black anti-theft door mount securely holding a Blink Video Doorbell, attached to the side of a light wooden door frame.
2. Compatibility Requirements
The SENLEG Anti-Theft Door Mount is specifically designed for the All-new Blink Doorbell (2nd Gen). It is not compatible with the Blink Doorbell (1st Gen) or other doorbell models.

An image illustrating the compatibility of the mount, showing a checkmark next to the Blink Doorbell (2nd Gen) and an 'X' next to the Blink Doorbell (1st Gen), indicating it is only compatible with the 2nd Gen model.
Door Size Requirements:
- Door Thickness: 1.37 inches to 2.3 inches
- Door Frame Gap: Greater than 0.1 inch
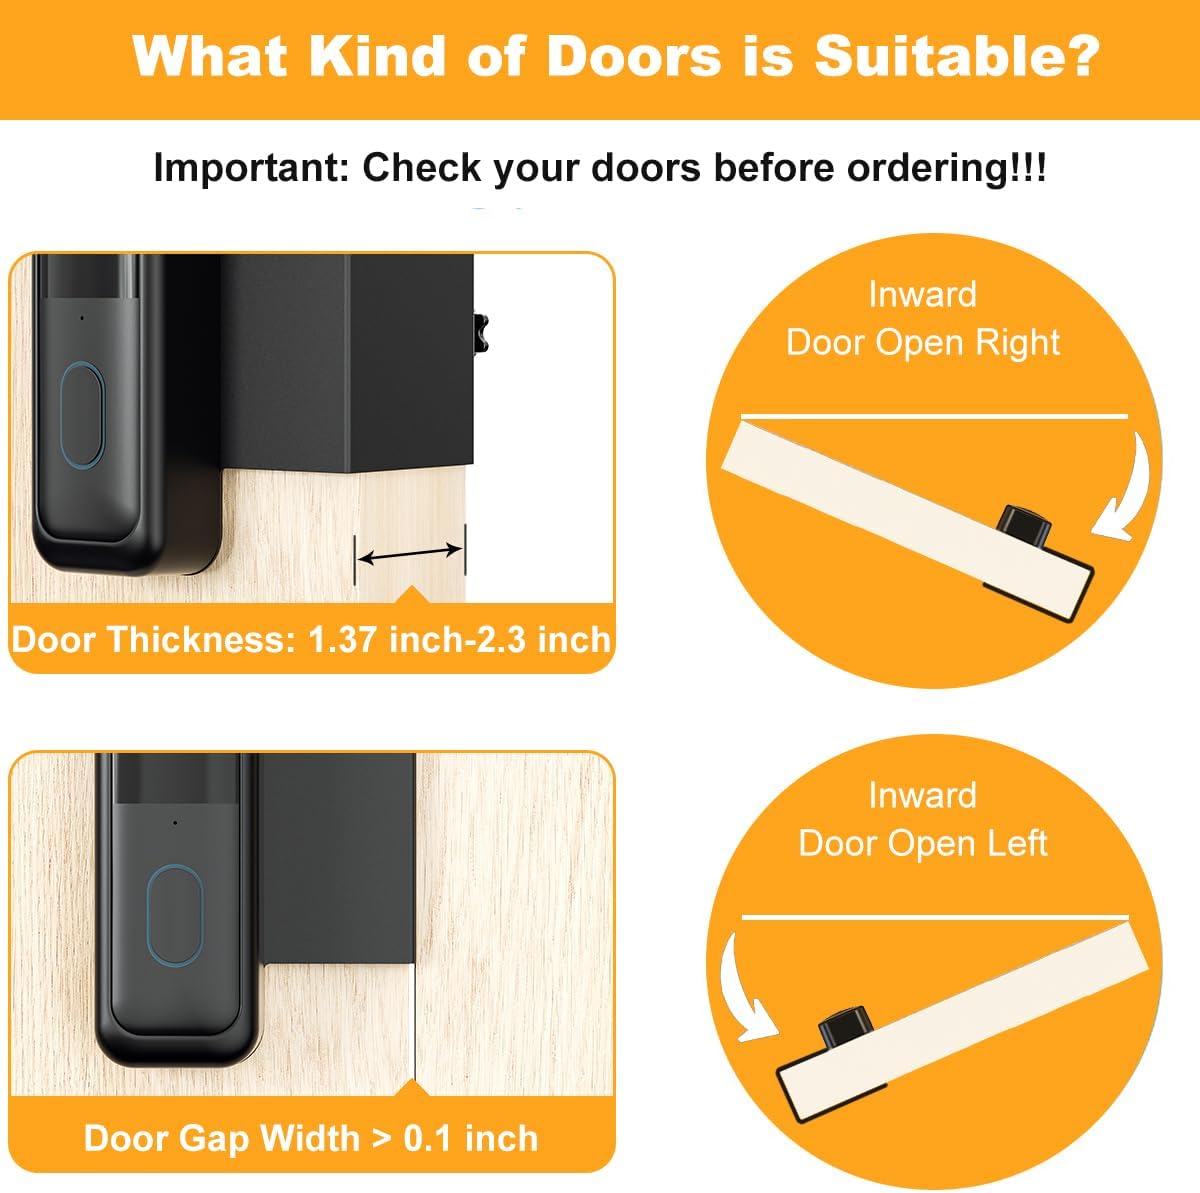
Diagrams showing the required door thickness (1.37 to 2.3 inches) and door frame gap (>0.1 inch) for proper installation of the mount.
Door Swing Type:
- The mount is suitable for inward-opening doors only.
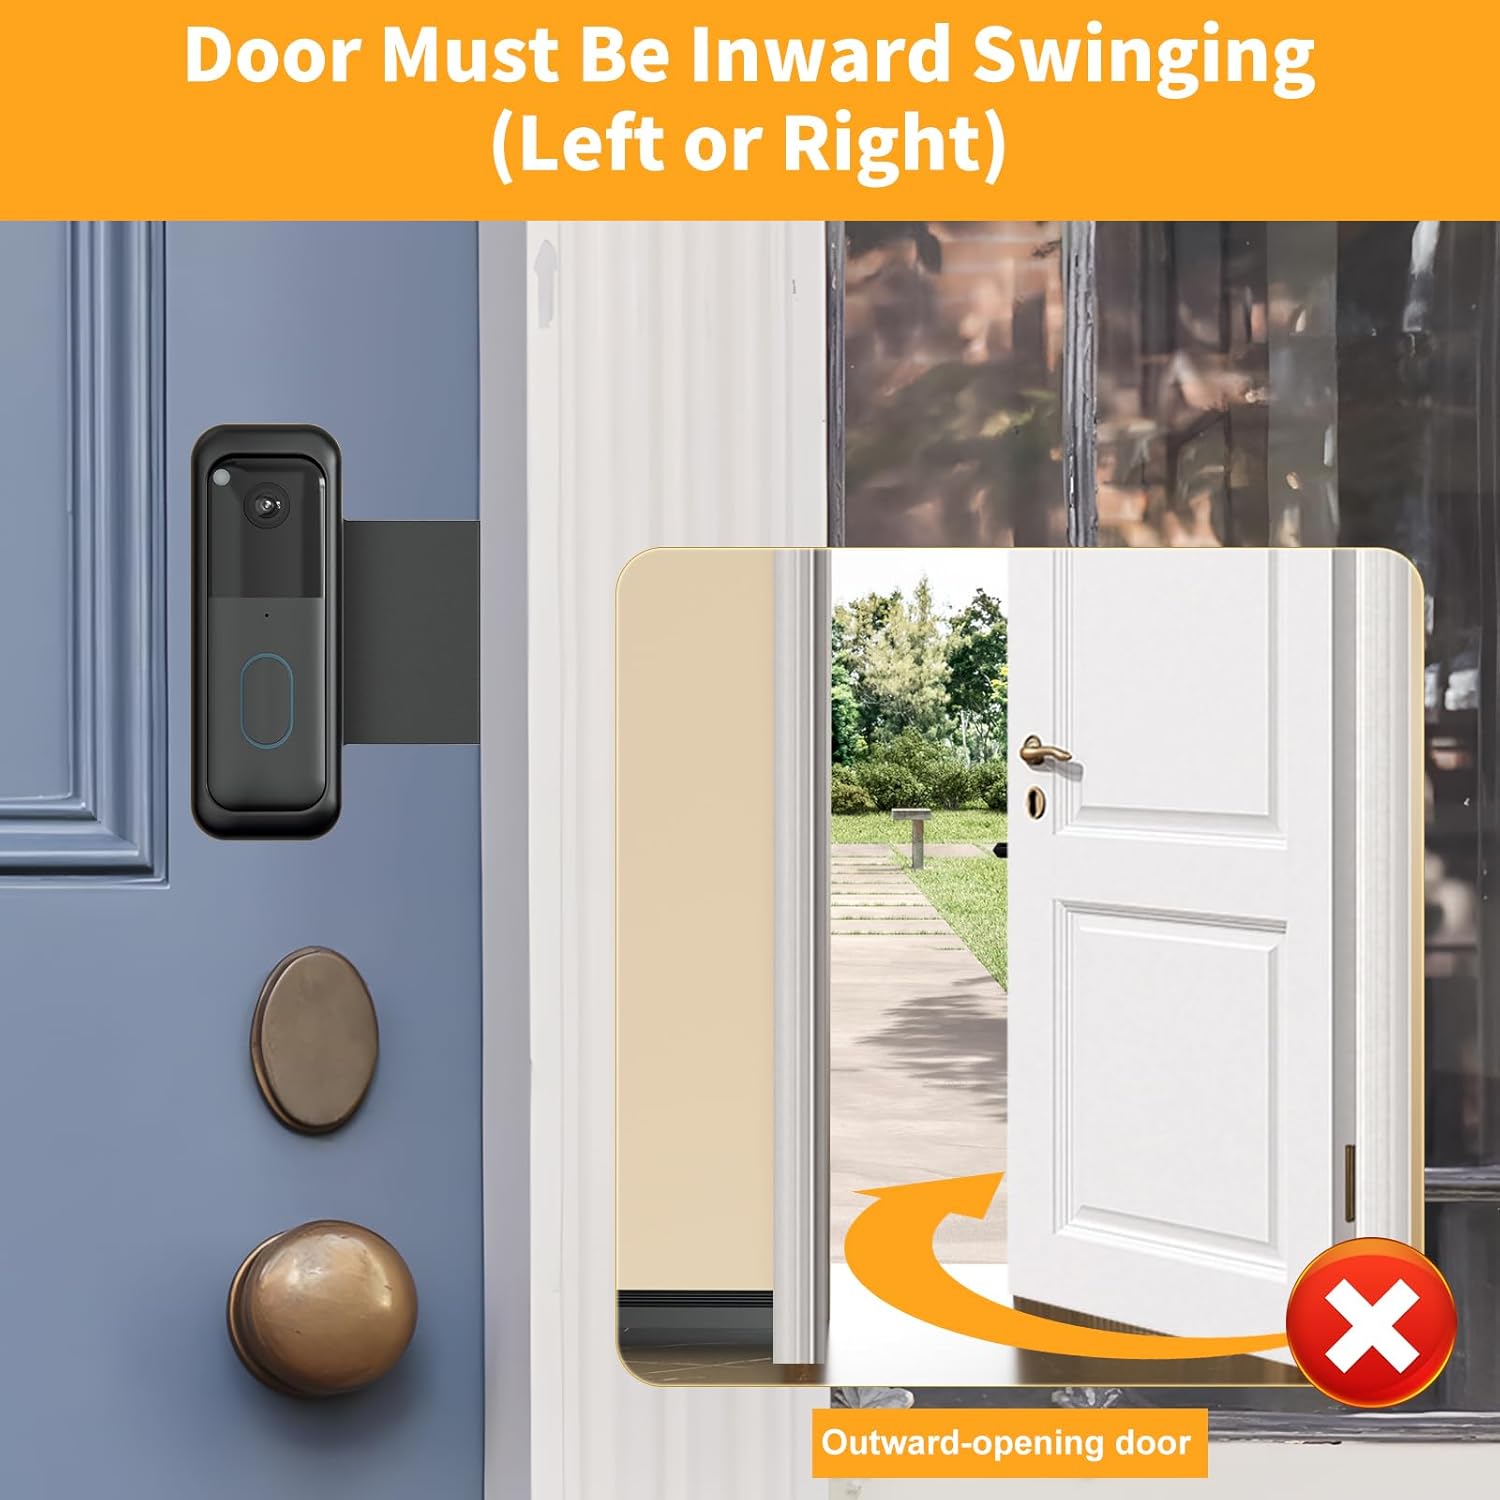
An illustration demonstrating that the door mount is suitable only for inward-opening doors, showing both left and right inward-opening door examples.
Unsuitable Door Types:
- Not suitable for iron security doors.
- Not suitable for storm doors.
- Not suitable for screened doors.
- Not suitable for outward-opening doors.
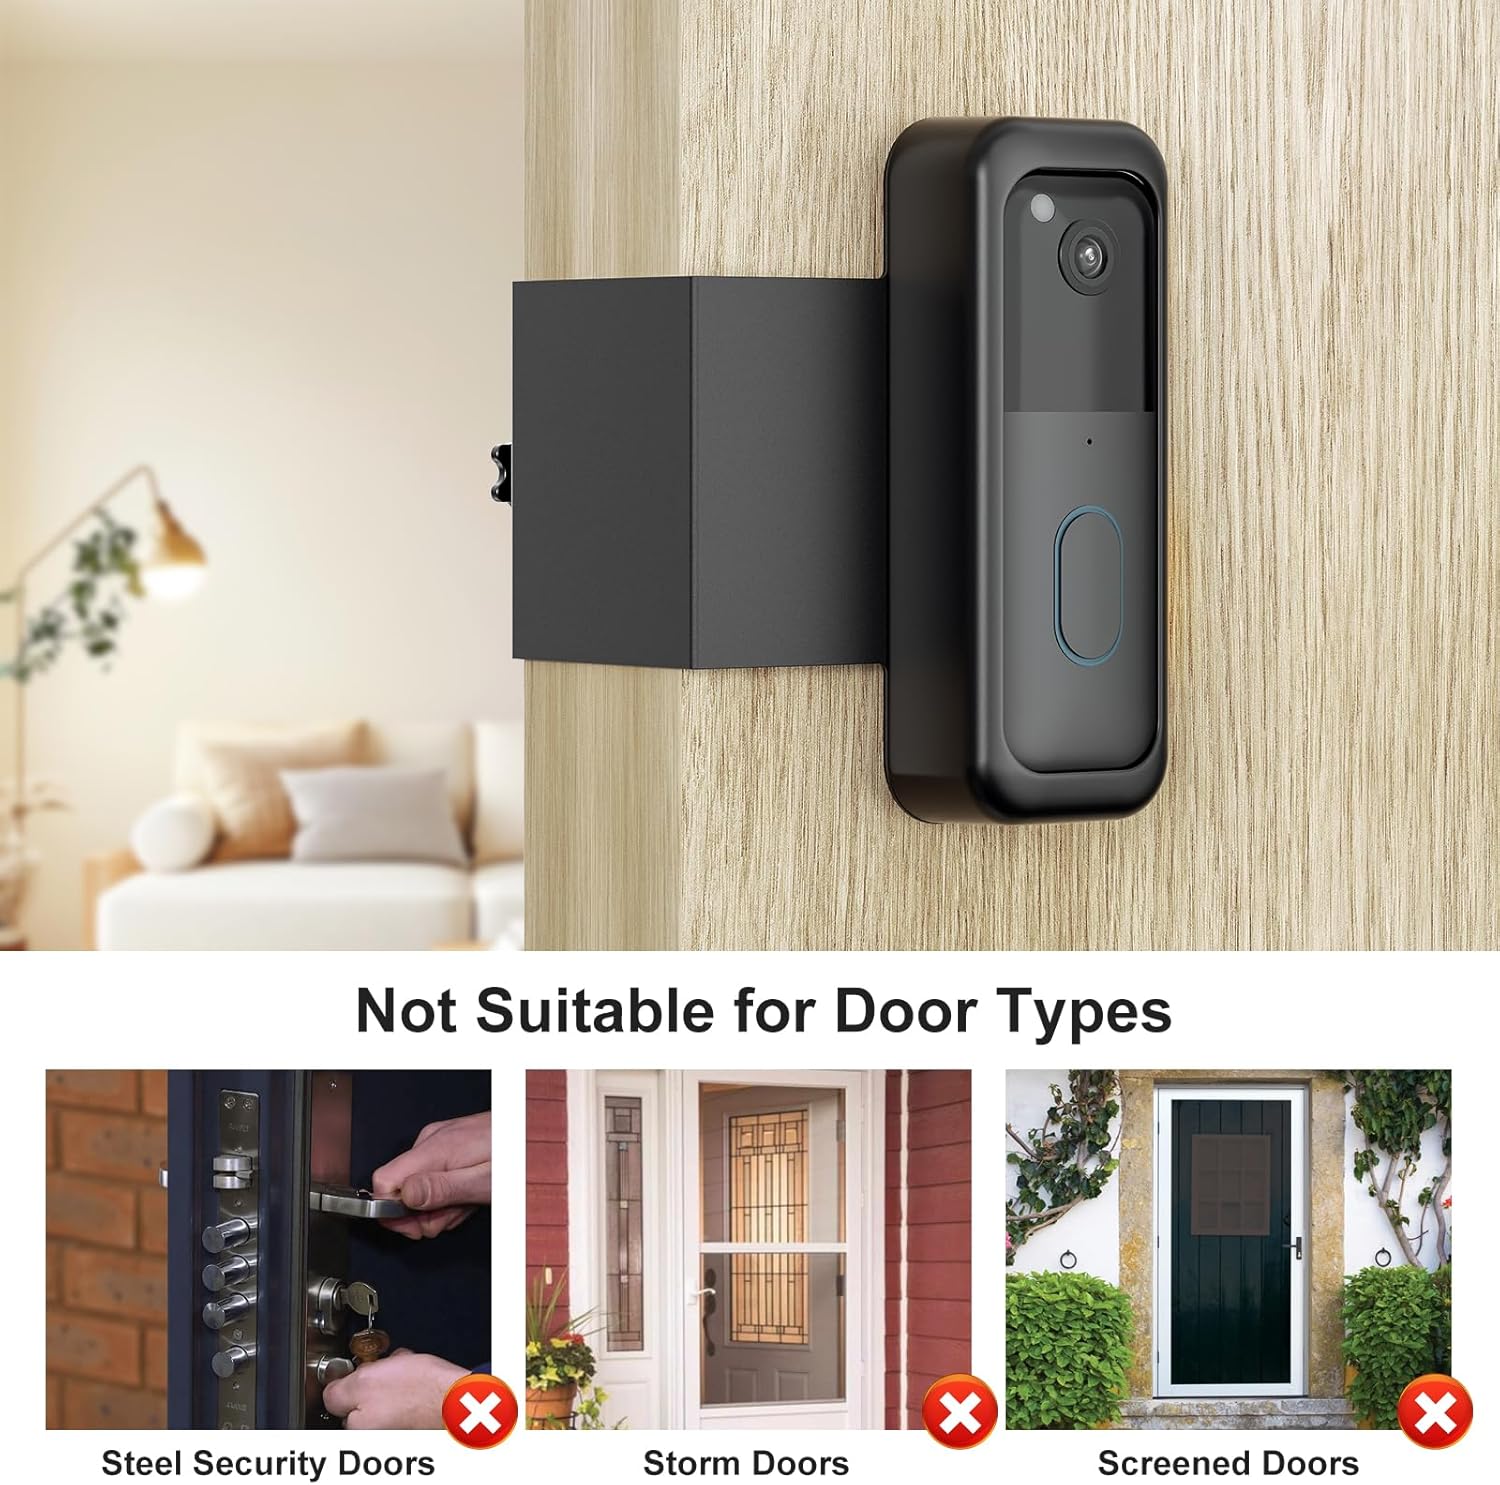
Images depicting door types that are not suitable for the mount, including steel security doors, storm doors, and screened doors.
3. Package Contents
Please ensure all the following items are included in your package:
- 1 x Blink Doorbell Camera Mount (Front Case)
- 1 x Metal Mount (Bracket)
- 1 x Screwdriver
- 6 x Small Screws
- 1 x Thumb Screw
- 1 x Doorbell Key
- Installation Instructions
Note: The Blink doorbell camera is sold separately and is not included with this mount.

An image displaying all components included in the package: 1 Front Case, 1 Metal Mount, 1 Screwdriver, 6 Small Screws, 1 Thumb Screw, and 1 Doorbell Key.
4. Setup & Installation
Follow these steps to securely install your SENLEG Anti-Theft Door Mount with your Blink Video Doorbell (2nd Gen):
- Prepare the Doorbell: Remove the original back plate of your Blink Doorbell (2nd Gen) using the included Blink key tool.
- Insert Doorbell into Mount: Place the Blink Video Doorbell (2nd Gen) inside the front case of the mount. Ensure it fits snugly.
- Secure Doorbell to Bracket: Use the provided small screws and screwdriver to secure the Blink doorbell to the metal bracket. There are designated holes for this purpose.
- Attach Thumb Screw: Screw the thumb screw into the designated hole on the metal bracket. This screw will be used to adjust the mount's grip on the door.
- Slide onto Door: Carefully slide the assembled mount onto the side of your inward-opening door. The mount should sit flush against the door edge.
- Adjust and Tighten: Once the mount is in position, slowly tighten the thumb screw until the mount is firmly secured to the door. Ensure it does not move or wobble.

A four-panel image showing the installation steps: 1. Secure the Blink doorbell to the bracket with 4 small screws. 2. Screw the thumb screw into the bracket. 3. Slide the bracket onto the door and tighten the screws slowly. 4. Fixed on the door and finished.
Installation Videos:
Video: How to Install Blink Video Doorbell 2nd Gen. An official seller video demonstrating the step-by-step installation process of the Blink Video Doorbell 2nd Gen mount on a door.
Video: Anti-Theft Blink Doorbell 2nd Gen Door Mount. An official seller video showcasing the anti-theft design and secure fitting of the Blink Doorbell 2nd Gen mount.
Video: Anti Theft Blink Doorbell Mount. An official seller video demonstrating the secure installation and anti-theft capabilities of the Blink Doorbell mount.
5. Features
- Anti-Theft Design: The mount securely encases your Blink Doorbell, preventing removal unless the door is open.
- No Drilling Required: Attaches securely to your door in seconds without the need for tools or permanent modifications.
- Motion Sensor & Audio Unblocked: All holes are precisely designed to ensure the doorbell's motion sensors and two-way audio functionality are not obstructed.
- Durable Construction: Made from high-quality plastic housing and metal for a tight and secure fit.
- Easy Installation & Uninstallation: Simple to install and remove, making it ideal for various living situations.

An image highlighting key features: All Around Protection, Anti-Theft, Easy Install & Uninstall, and No Drilling Needed, with the mount installed on a door.
6. Usage Scenarios
The SENLEG Anti-Theft Door Mount is versatile and suitable for various environments where permanent installation is not desired or permitted:
- Homes
- Apartments
- Rental Properties
- School Dorms
- Businesses

A collage of images showing the mount used in various settings: School Dorm, Rental, Apartment, and Business, emphasizing its adaptability.
7. Specifications
| Feature | Detail |
|---|---|
| Brand | SENLEG |
| Model Name | ML-01 (Item model number: DM-01) |
| Color | Black |
| Material | Acrylonitrile Butadiene Styrene (ABS) Metal |
| Item Weight | 10.2 ounces (0.29 Kilograms) |
| Product Dimensions (L x W x H) | 4.28 x 6 x 2.35 inches |
| Mounting Type | Door Mount (No Drilling) |
| Recommended Uses | Outdoor Security |
| Special Feature | Portable, Anti-Theft |
| UPC | 761228622817 |
8. Troubleshooting
- Issue: The mount feels loose on the door.
Solution: Ensure the thumb screw is tightened sufficiently. The mount should be snug against the door frame. Re-check your door's thickness against the compatibility requirements. - Issue: The door does not close properly after installation.
Solution: This mount is designed for a door gap greater than 0.1 inch. If your door gap is too small, the mount may interfere with closing. Verify your door gap measurement. - Issue: Motion sensor or two-way audio is blocked.
Solution: The mount is designed with precise cutouts to avoid blocking these features. Ensure the Blink doorbell is correctly seated within the mount and that no part of the mount is misaligned. - Issue: The mount appears bent or damaged.
Solution: While made of sturdy materials, excessive force during tightening or an incompatible door thickness can cause stress. Ensure you are not overtightening and that your door meets the specified thickness.
9. Warranty & Support
The SENLEG Anti-Theft Door Mount comes with a lifetime product warranty. For any questions, concerns, or support needs, please contact our customer service team.
Contact Information:
Email: support@senleg.com
Website: www.senleg.com/support
We are committed to providing quick solutions and ensuring your satisfaction.