Introduction
This manual provides detailed instructions for the assembly, operation, and maintenance of your Yaheetech 13x13 Pop-up Patio Gazebo Tent. This hexagonal gazebo is equipped with 25 solar LED lights, all-around mesh sidewalls, and offers three adjustable height settings for optimal versatility. Its double-vented roof ensures good air circulation, and its compact, portable design makes it easy to store and transport.
Important Safety Information
This product should be used on a stable, flat surface. Do not use in strong winds, continuous light/heavy rain, or extreme weather conditions. Always anchor the gazebo tent to the ground when in use. Keep away from open flames and heat sources. Do not exceed the maximum weight capacity. Refer to the product manual for proper assembly and maintenance instructions.
Setup and Assembly
Components Checklist
Before beginning assembly, ensure all components are present. Refer to the image below for a visual guide of included parts:

Figure 1: Included Components
- Metal Frame
- Solar Panel
- Stakes (with two sizes)
- Rope
- USB Cable
- Top Cover Cloth
- Small Cover Cloth
- Mesh Sidewall
- Carrying Bag
- Remote Control (with battery)
Step-by-Step Assembly
- Step 1: Unpack and Prepare
Unpack all components from the carrying bag. Lay the folded frame on a flat surface. This video segment shows the unpacking process and initial frame setup.
Video 1: Unpacking and Initial Frame Setup (0:00-0:07)
- Step 2: Frame Expansion
Gently expand the metal frame by pulling the legs outwards. Ensure the frame is partially open before attaching the canopy.

Figure 2: Easy Setup Steps (Steps 1 & 2)
Video 2: Expanding the Gazebo Frame (0:07-0:10)
- Step 3: Attach Canopy and Solar Panel
Place the main canopy over the partially expanded frame. Secure the canopy to the frame using the Velcro straps. Connect the LED light wire from the canopy to the solar panel and then twist the solar panel to secure it to the top of the gazebo.
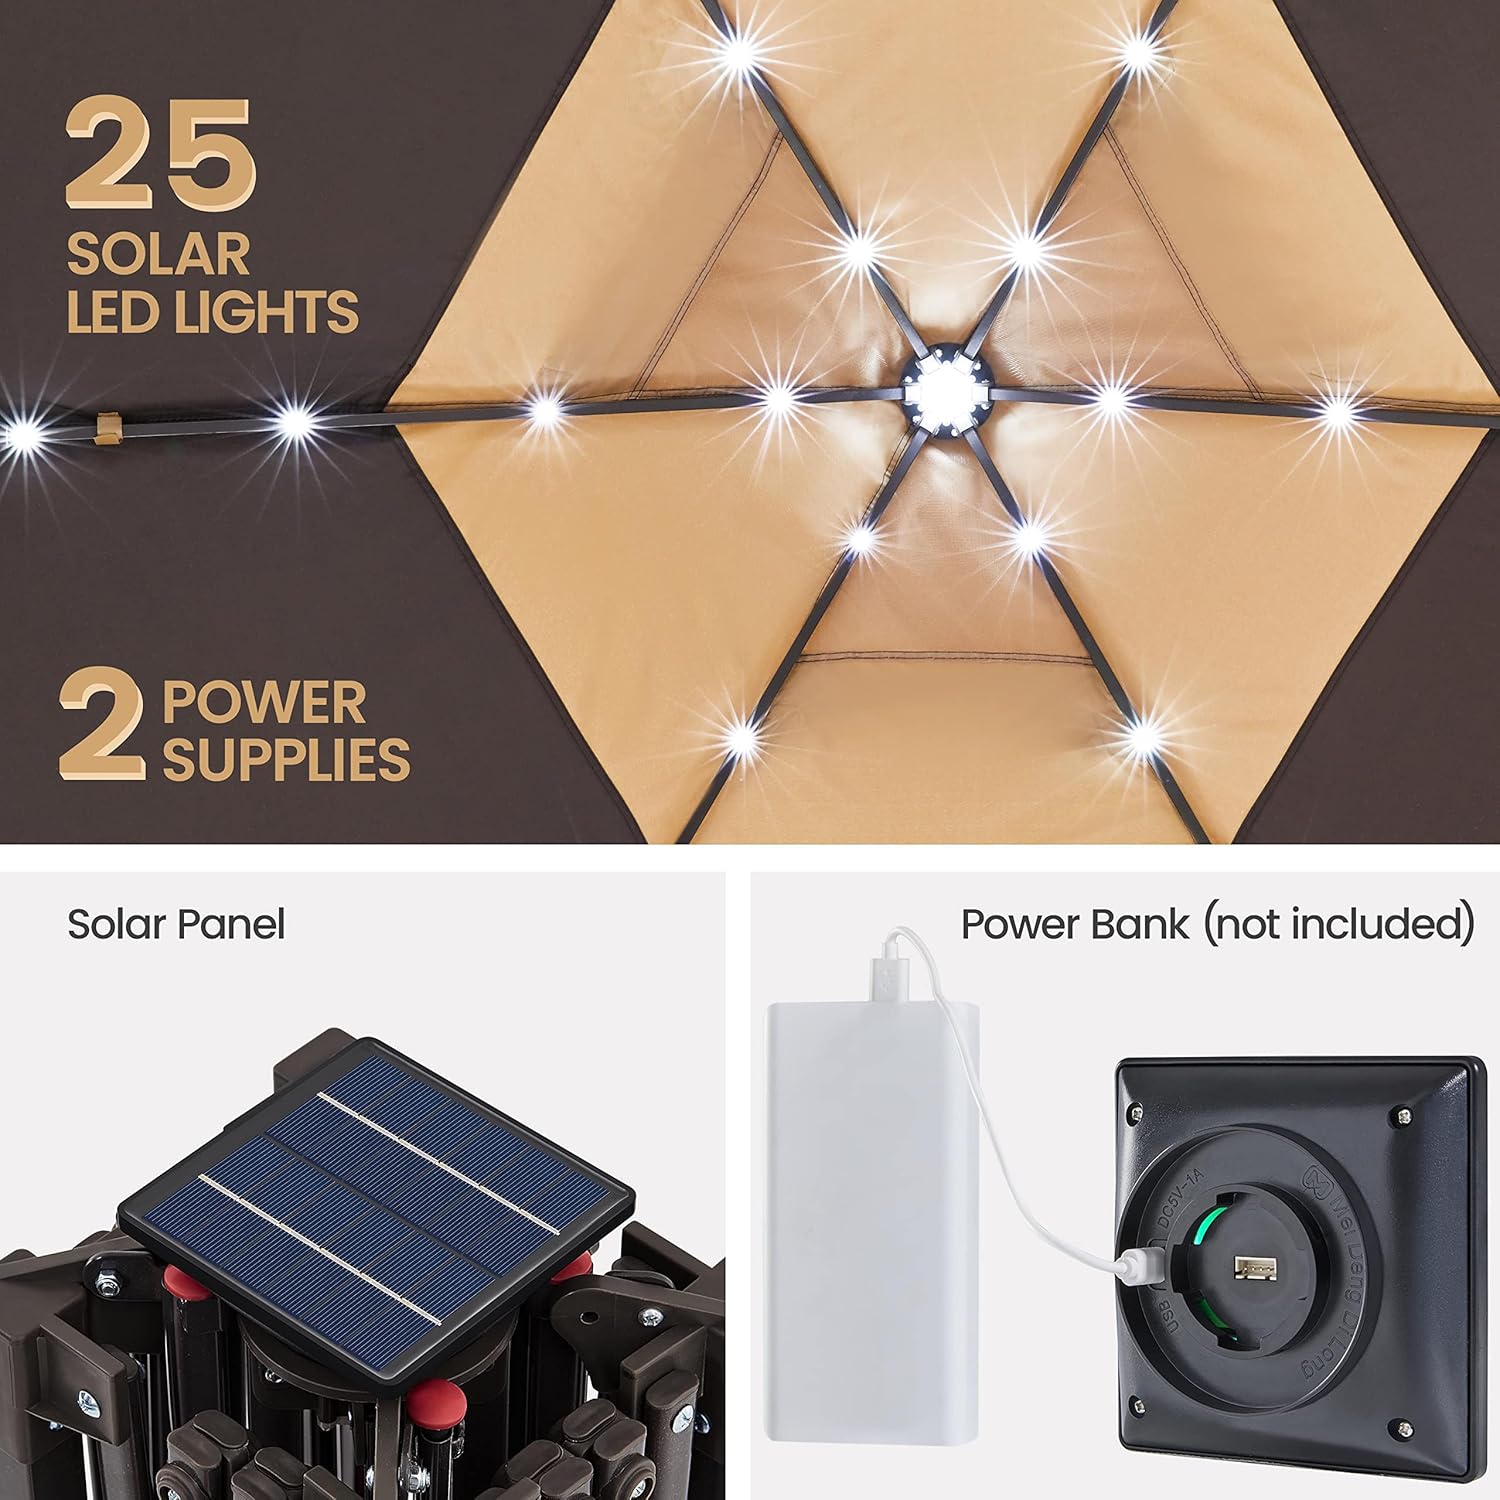
Figure 3: Solar Panel and Power Supplies
Video 3: Attaching Canopy and Solar Panel (0:10-0:42)
- Step 4: Extend Legs and Lock Frame
With the canopy attached, push the red buttons on the telescopic legs and extend them upwards until they click and lock into place. The gazebo offers three height adjustable settings.

Figure 4: Leg Locking Mechanism
Video 4: Extending and Locking Gazebo Legs (0:42-1:14)
- Step 5: Attach Mesh Sidewalls
Once the main structure is up, attach the mesh sidewalls. Use the Velcro straps at the top to secure them to the frame. The sidewalls feature zippers to connect them to each other, providing all-around protection.

Figure 5: Gazebo with Mesh Sidewalls (Day & Night)
Video 5: Attaching and Securing Mesh Sidewalls (1:14-1:59)
- Step 6: Secure with Stakes and Ropes
For added stability, especially in light breezes, use the provided metal ground stakes to anchor the gazebo's feet. Additionally, tie the ropes from the canopy corners to the ground stakes.

Figure 6: Ground Stakes for Stability
Video 6: Securing Gazebo with Stakes and Ropes (1:59-2:22)
Operating Instructions
Solar LED Lights Operation
The gazebo is equipped with 25 LED lights powered by a solar panel located on the top. Ensure the solar panel is exposed to direct sunlight for optimal charging. The lights can also be powered by a power bank (not included) via the provided USB cable.
Figure 7: Solar LED Lights and Power Options
Remote Control
The lights are operated via a remote control. Insert the provided battery into the remote control. The remote allows you to turn the lights on/off and adjust brightness.
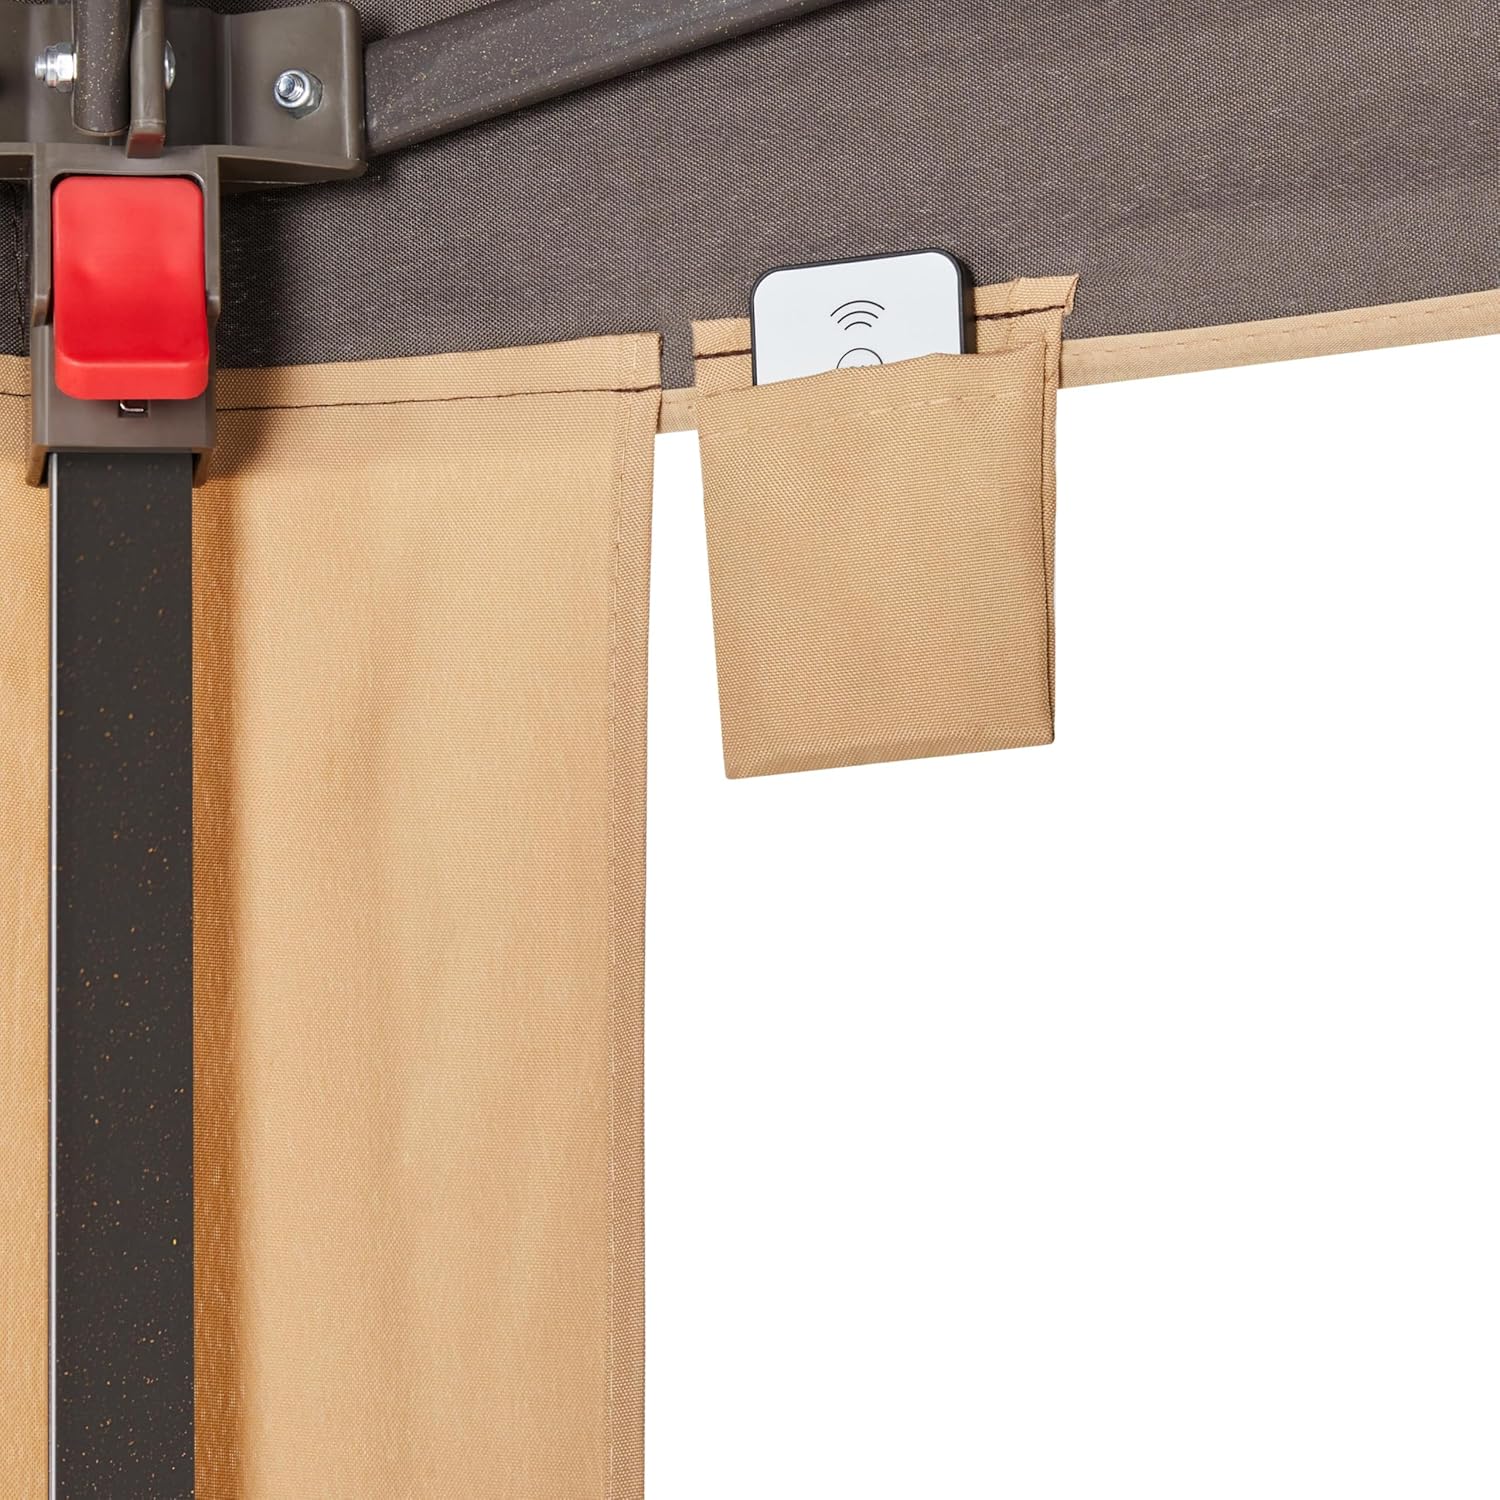
Figure 8: Remote Control Storage Pocket
Video 7: Remote Control Battery Installation (2:22-2:31)
Adjustable Height
The gazebo features three height adjustable settings. To adjust the height, press the red quick-release buttons on each leg and slide the leg to the desired position until it locks securely.
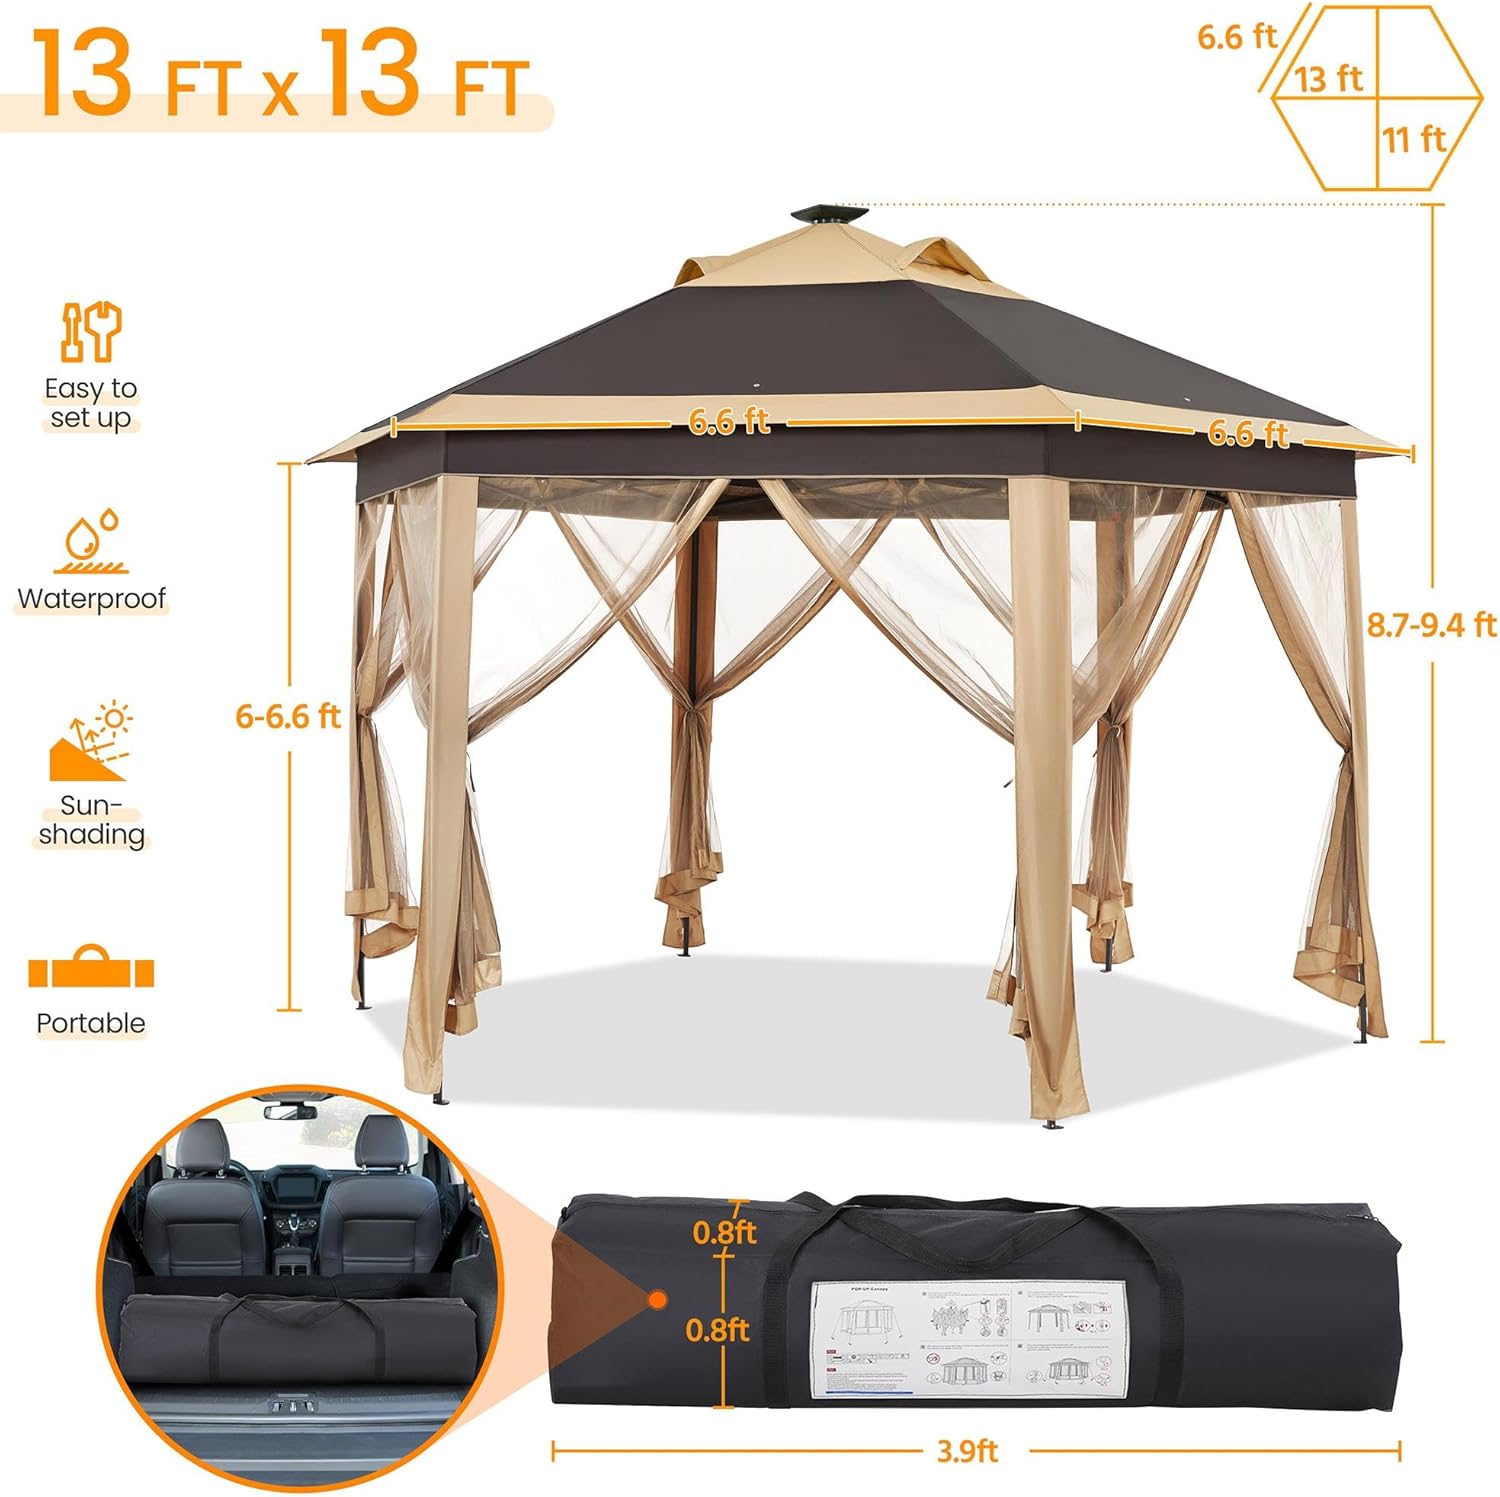
Figure 9: Gazebo Dimensions and Adjustable Height
Maintenance
Cleaning
To clean the canopy and mesh walls, use a mild soap solution and a soft cloth. Rinse thoroughly with water and allow to air dry completely before storage. Avoid using harsh chemicals or abrasive cleaners, as these may damage the fabric.
Storage
When not in use, especially during strong winds or extreme weather, it is recommended to disassemble the gazebo and store it in its compact carrying bag. This will prolong the lifespan of the product.
Figure 10: Compact Storage for Portability
Troubleshooting
Gazebo Instability
- Ensure all legs are fully extended and locked into place.
- Verify that all provided stakes and ropes are correctly used to anchor the gazebo to the ground.
- Do not use the gazebo in strong winds, heavy rain, or other extreme weather conditions.
Lights Not Working
- Check the connection of the solar panel to the LED light wire.
- Ensure the solar panel has received sufficient direct sunlight for charging.
- Verify that the remote control battery is correctly installed and functional.
Specifications
| Attribute | Value |
|---|---|
| Brand | Yaheetech |
| Model | YTddsm0001001 |
| Material | Polyester Fabric, Powder-coated Steel, Mesh |
| Product Dimensions | 157.87"L x 133.46"W x 112.59"H |
| Item Weight | 41.93 Pounds |
| Frame Material | Alloy Steel |
| Water Resistance Level | Water Resistant |
| Shape | Hexagonal |
| Ultraviolet Light Protection | Yes |
| Assembly Required | Yes |
| Color | Khaki/Brown |
Warranty and Support
Warranty Information
This product comes with a standard manufacturer's warranty. Please refer to the product packaging or contact Yaheetech customer service for specific warranty details and terms.
Customer Support
For further assistance, product inquiries, or troubleshooting not covered in this manual, please visit the official Yaheetech Store or contact their customer support directly.


