
Introduction
The LEM Products MightyBite #8 Meat Grinder is a compact and powerful electric meat grinder designed for efficient processing of various meats. Its robust construction, featuring long-lasting gears and sturdy aluminum, ensures reliable performance for both wild and domestic meat preparation.
This grinder is engineered for speed, capable of processing approximately 4-5 pounds of meat per minute. It operates with a 500-watt, 120-volt, permanently lubricated motor, incorporating a built-in circuit breaker for enhanced safety during operation.
Important Safety Information
WARNING: To reduce the risk of injury, always follow these basic safety precautions:
- Read all instructions thoroughly before operating the appliance.
- Keep hands and utensils away from moving parts during operation to prevent personal injury or damage to the grinder.
- Never push meat into the grinder with your fingers. Always use the provided meat stomper.
- Ensure the grinder is unplugged from the electrical outlet before assembling, disassembling, or cleaning.
- Do not operate the grinder with a damaged cord or plug, or after the appliance malfunctions or has been damaged in any manner.
- Avoid using attachments not recommended or sold by the manufacturer, as this may cause fire, electric shock, or injury.
- Do not immerse the motor unit in water or other liquids.
- This appliance is not intended for use by children. Close supervision is necessary when any appliance is used near children.
Package Contents
Your LEM MightyBite #8 Meat Grinder package includes:
- 1 x LEM MightyBite #8 Meat Grinder Motor Unit
- 1 x Grinder Head Assembly (including auger, knife, and grinding plates)
- 3 x Stainless Steel Grinding Plates (4.5mm, 10mm, and a stuffing plate)
- 1 x Meat Stomper
- 1 x Goofproof One-Way Stainless Steel Knife
- 3 x Plastic Stuffing Tubes (1/2", 1", and 1 3/8" OD)
- 1 x Stainless Steel Meat Pan

Figure 1: All components of the LEM MightyBite #8 Meat Grinder.
Setup Instructions
Follow these steps to assemble your meat grinder before use:
- Attach the Grinder Head: Align the grinder head with the motor unit's opening. Insert the head and rotate it clockwise until it locks securely into place.
- Insert the Auger: Place the auger (worm gear) into the grinder head. Ensure it slides in completely.
- Position the Knife: Place the cutting knife onto the square shaft of the auger. Ensure the sharp edges of the knife face outwards, towards the grinding plate.
- Add the Grinding Plate: Select your desired stainless steel grinding plate (4.5mm for fine, 10mm for coarse, or stuffing plate). Place it over the knife, ensuring the notch on the plate aligns with the pin on the grinder head.
- Secure with Retaining Ring: Screw the retaining ring onto the end of the grinder head. Tighten it firmly by hand, but do not overtighten.
- Place the Meat Pan: Position the stainless steel meat pan on top of the grinder head.

Figure 2: Fully assembled LEM MightyBite #8 Meat Grinder.
Video 1: This video demonstrates the assembly process of a similar electric meat grinder, showing how to correctly install the auger, knife, grinding plate, and retaining ring onto the motor unit.
Operating Instructions
Before operating, ensure all parts are correctly assembled and securely tightened. Prepare your meat by cutting it into pieces that fit easily into the grinder's throat.
- Prepare Meat: Cut meat into strips or cubes that are small enough to fit into the feed tube without forcing. For best results, chill the meat and grinder parts (head, auger, knife, plate) in the freezer for 30-60 minutes before grinding. This helps prevent smearing and ensures a cleaner grind.
- Position Collection Bowl: Place a bowl or container under the grinder head to collect the ground meat.
- Turn On Grinder: Plug in the grinder and turn the power switch to the 'Grind' setting.
- Feed Meat: Place the prepared meat into the meat pan. Use the provided meat stomper to gently push the meat down into the feed tube. Never use your hands or fingers to push meat into the grinder.
- Grinding: The meat will be drawn into the auger, cut by the knife, and extruded through the grinding plate into your collection bowl. Continue feeding meat until all is processed.
- Sausage Stuffing (with stuffing plate and tubes): Replace the standard grinding plate and knife with the stuffing plate and attach the desired stuffing tube. Turn the power switch to the 'Stuff' setting (if available, otherwise use 'Grind' with careful control). Feed the meat mixture into the grinder while guiding the sausage casing onto the stuffing tube.
- Reverse Function: If the grinder becomes clogged, turn the switch to the 'Reverse' setting to clear the blockage. Once cleared, return to 'Off' then 'Grind' or 'Stuff'.
- Finish Grinding: After all meat has been processed, you can feed a slice of bread through the grinder to push out any remaining meat.

Figure 3: Feeding meat into the grinder using the meat stomper.

Figure 4: Ground meat exiting the grinder through the plate.

Figure 5: The grinder being used for sausage stuffing with a plastic tube.
Video 2: This video demonstrates the grinding and sausage stuffing capabilities of a similar electric meat grinder, including proper feeding techniques.
Video 3: This short preview video showcases the grinding and sausage stuffing functions of a #8 meat grinder, highlighting its versatility.
Cleaning and Maintenance
Proper cleaning and maintenance will extend the life of your meat grinder.
- Unplug: Always unplug the grinder from the power outlet before disassembling or cleaning.
- Disassemble: Remove the meat pan, then unscrew the retaining ring, remove the grinding plate, knife, and auger from the grinder head. Detach the grinder head from the motor unit.
- Wash Parts: Hand wash all removable parts (meat pan, grinder head, auger, knife, plates, stuffing tubes) with warm, soapy water. Use a brush to clean small holes in the grinding plates and any crevices. Do not wash any parts in a dishwasher.
- Rinse and Dry: Rinse all parts thoroughly with clean water. Immediately dry all metal parts completely to prevent rust.
- Lubricate (Optional): For long-term storage, lightly coat metal parts with food-grade mineral oil to prevent corrosion.
- Clean Motor Unit: Wipe the exterior of the motor unit with a damp cloth. Never immerse the motor unit in water.
- Storage: Store all parts in a dry place.

Figure 6: Hand washing disassembled metal components of the meat grinder.
Video 4: This video includes a demonstration of cleaning the meat grinder's components after use.
Troubleshooting
| Problem | Possible Cause | Solution |
|---|---|---|
| Grinder does not start | Not plugged in; Power switch off; Circuit breaker tripped | Ensure unit is plugged in; Turn power switch to 'Grind'; Reset circuit breaker (if applicable) |
| Meat is not grinding or is grinding slowly | Meat is too warm; Parts are not assembled correctly; Grinder is clogged; Knife is dull | Chill meat and parts; Reassemble correctly; Use 'Reverse' function to clear clog; Replace knife if dull |
| Grinder makes unusual noise | Parts are loose; Foreign object in grinder; Motor issue | Check assembly and tighten parts; Disassemble and inspect for foreign objects; If issue persists, contact customer support |
| Meat is smearing or mushy | Meat is too warm; Knife is dull; Grinding plate is incorrect size | Chill meat and parts; Replace knife; Use appropriate grinding plate for desired texture |
Specifications
| Feature | Detail |
|---|---|
| Brand | LEM |
| Model Number | 1158 |
| Power | 500 Watts |
| Voltage | 120 Volts |
| Construction Material | Aluminum |
| Product Dimensions | 24"L x 24"W x 17"H |
| Item Weight | 16.53 pounds |
| Grinding Capacity | Approx. 4-5 pounds per minute |
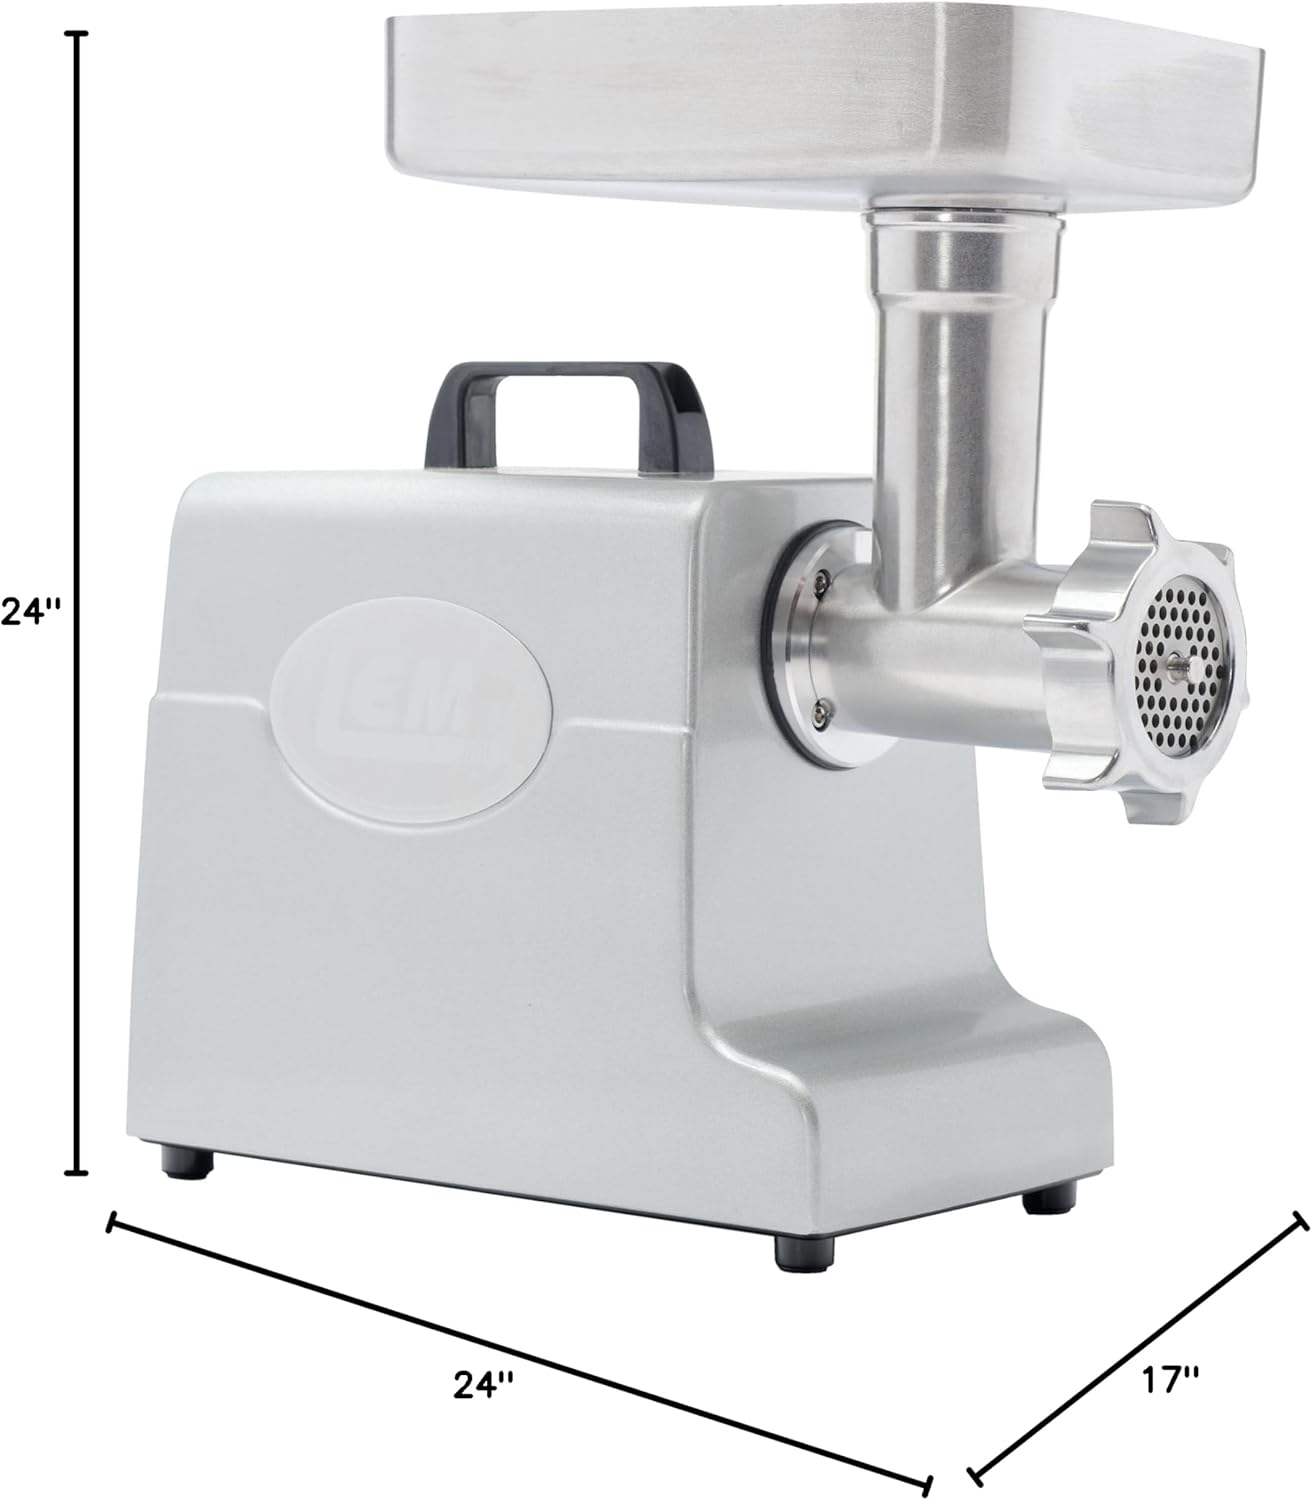
Figure 7: Visual representation of the grinder's dimensions.
Warranty and Customer Support
LEM Products stands behind its products. The MightyBite #8 Meat Grinder comes with a two-year factory warranty. For any questions, assistance, or to inquire about replacement parts, please contact our customer support team. We offer lifetime customer support and carry replacement parts for a wide variety of our current and past products.
For support, please visit the LEM Store or refer to the contact information provided in your product packaging.


