
1. Product Overview
The ChickenGuard One in All automatic chicken coop door opener is designed to provide convenience and security for your poultry. This unit offers multiple operating modes, robust predator protection, and enhanced features for various weather conditions.

Image: The ChickenGuard One in All unit installed on a coop, with a chicken utilizing the open doorway.
2. Setup and Installation
Installation of the ChickenGuard One in All is designed to be straightforward, typically taking less than 10 minutes. No complex wiring is required.
2.1. Mounting the Unit
- Position the unit over the coop's pop-hole opening. Ensure it is level and securely aligned.
- Using the provided mounting screws, attach the unit to the coop wall.

Image: A hand securing the ChickenGuard unit to a wooden coop with a screwdriver.
2.2. Power Options
The ChickenGuard One in All offers flexible power solutions:
- Battery Power: Insert 4 x AA alkaline batteries (included) into the designated compartment.
- Solar Power: Connect a compatible solar panel kit (available separately) with rechargeable NiMH batteries.
- Electric Power: Use a standard 9V DC electric power cable (available separately) for continuous power.

Image: A hand inserting AA batteries into the battery compartment of the ChickenGuard unit.
2.3. Initial Programming
Upon first power-up, a user-friendly setup wizard will guide you through the initial programming steps. Follow the on-screen instructions to set the time and preferred operating mode.

Image: Close-up of the control panel displaying the 'Setup Wizard' during initial programming.
2.4. Extension Kit (Optional)
An extension kit is available separately to allow for remote placement of the control panel. This enables programming and monitoring without needing to access the unit directly on the coop.

Image: The ChickenGuard unit installed on a coop, with its control panel extended and mounted separately for easier access.
3. Operating Modes
The ChickenGuard One in All offers four distinct operating modes to suit your needs:
- Timer Mode: Set specific times for the door to open and close.
- Light Sensing Mode: The door opens at sunrise and closes at sunset, adapting to natural light conditions.
- Dual-Safe Mode: Combines Timer and Light Sensing. The door will close based on whichever condition (pre-set time or sunset) occurs first, ensuring your flock is secured.
- Manual Mode: Operate the door instantly by pressing the UP and DOWN buttons on the control panel.

Image: Visual representation of the four open/close options: Timer, Sensor, Manual, and DualSafe.
3.1. Winter Mode
For snowy or icy conditions, activate Winter Mode. This feature provides a power boost to the motor, assisting the door in breaking free from ice or snow buildup and ensuring reliable operation.

Image: The ChickenGuard unit operating in snowy conditions, with the display indicating 'WINTER MODE'.
4. Safety Features
- Auto-Stop Safety: If the door encounters an obstruction during closing, it will automatically reverse to the open position to prevent injury to poultry. It will then attempt to close again after a short interval.
- Predator Protection: The robust aluminum door, combined with a geared motor, prevents predators from lifting the door once it is closed. The unit features an ASA weatherproof plastic frame and an anti-scratch threshold for durability.
- Safety Light: A red indicator light illuminates when the door is fully closed, providing a visual confirmation of your flock's security.

Image: The auto-stop safety feature demonstrated with a red balloon, showing the door reversing upon obstruction.
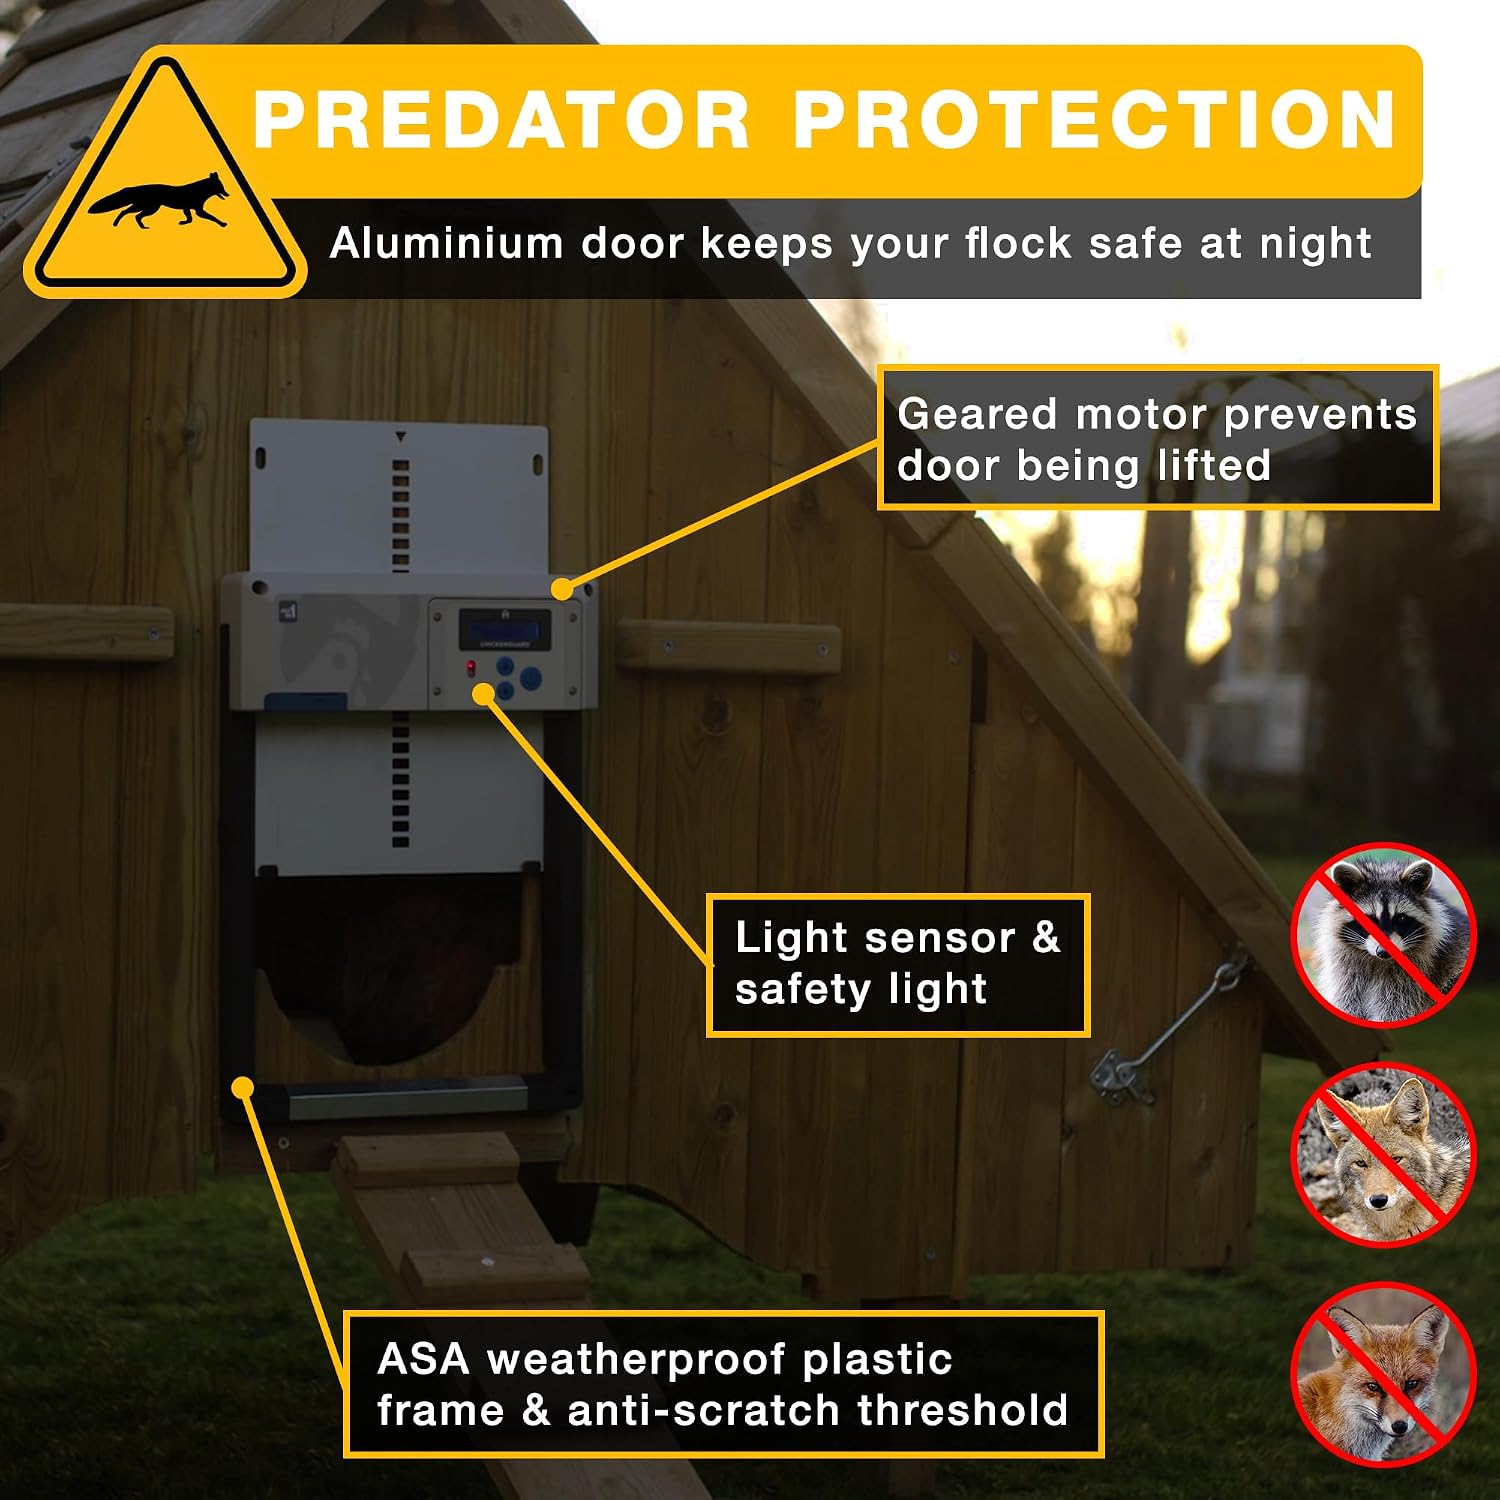
Image: The ChickenGuard unit installed on a coop, illustrating its predator protection features.

Image: Close-up of the red safety indicator light, confirming the door is closed.
5. Maintenance
To ensure optimal performance and longevity of your ChickenGuard One in All unit:
- Regularly check the battery level and replace AA batteries as needed.
- Keep the door tracks clear of debris, dirt, or ice buildup. A soft brush can be used for cleaning.
- Inspect the door and frame periodically for any signs of wear or damage.
- Ensure the unit's exterior is clean to maintain proper light sensor function.
6. Troubleshooting
If you encounter issues with your ChickenGuard One in All unit, consider the following:
- Door Not Opening/Closing: Check power source (batteries, solar, or electric). Ensure the door path is clear of obstructions. If the door was manually interrupted during operation, a recalibration might be necessary (refer to the on-screen menu).
- Inaccurate Light Sensing: Ensure the light sensor is clean and not obstructed by dirt, debris, or external lighting.
- Winter Mode Issues: If the door struggles in extreme cold, ensure Winter Mode is activated. Check for excessive ice buildup that may exceed the motor's boosted power.
- Display Frozen: Try removing and reinserting batteries, or disconnecting and reconnecting the electric power source to reset the unit.
7. Specifications
| Feature | Detail |
|---|---|
| Model Number | Ai1 Grey + Batteries |
| Item Weight | 3.56 pounds (1.62 Kilograms) |
| Item Dimensions (LxWxH) | 12.36 x 2.56 x 17.4 inches |
| Material | Acrylic Styrene Acrylonitrile (ASA), Powder coated Aluminium |
| Power Source | 4 AA batteries (included), Solar compatible, 9V DC Electric compatible |
| Special Features | Auto-Stop Safety, Winter Mode, Multiple Power Options, Flexible Control Panel |
| Breed Recommendation | Chickens, Poultry, Ducks, Geese, Small Turkeys |
| Included Components | One Piece Automatic Coop Door Opener, 4 x AA alkaline batteries, 4 x mounting screws, 6 x AiO fastening screws, AiO instructions |
8. Warranty and Support
8.1. Warranty Information
The ChickenGuard One in All unit comes with a 3-year manufacturer warranty, covering defects in materials and workmanship under normal use.
8.2. Customer Support
For any questions, technical assistance, or warranty claims, ChickenGuard offers:
- Dedicated product support.
- An automated help center for common queries.
- A free, in-house, multilingual customer support team.
Please refer to the official ChickenGuard website or the contact information provided with your product for direct support channels.