
CREATE 132703_275951
CREATE FRYER AIR PRO User Manual
Model: 132703_275951
1. Important Safety Instructions
When using electrical appliances, basic safety precautions should always be followed to reduce the risk of fire, electric shock, and injury to persons, including the following:
- Read all instructions before using the appliance.
- Do not touch hot surfaces. Use handles or knobs.
- To protect against electric shock, do not immerse cord, plugs, or main unit in water or other liquid.
- Close supervision is necessary when any appliance is used by or near children.
- Unplug from outlet when not in use and before cleaning. Allow to cool before putting on or taking off parts.
- Do not operate any appliance with a damaged cord or plug or after the appliance malfunctions or has been damaged in any manner.
- The use of accessory attachments not recommended by the appliance manufacturer may cause injuries.
- Do not use outdoors.
- Do not let cord hang over edge of table or counter, or touch hot surfaces.
- Do not place on or near a hot gas or electric burner, or in a heated oven.
- Extreme caution must be used when moving an appliance containing hot oil or other hot liquids.
- Always attach plug to appliance first, then plug cord into the wall outlet. To disconnect, turn any control to "off", then remove plug from wall outlet.
- Do not use appliance for other than intended use.
- Ensure adequate ventilation around the appliance during use.
2. Product Overview
The CREATE FRYER AIR PRO is a large 1800W oil-free air fryer designed for healthier cooking. It features an innovative 360° airflow system for even cooking and an angled LCD screen for optimal viewing.
Components
- Main Unit with Control Panel
- Removable Frying Basket
- Crisper Plate (inside frying basket)
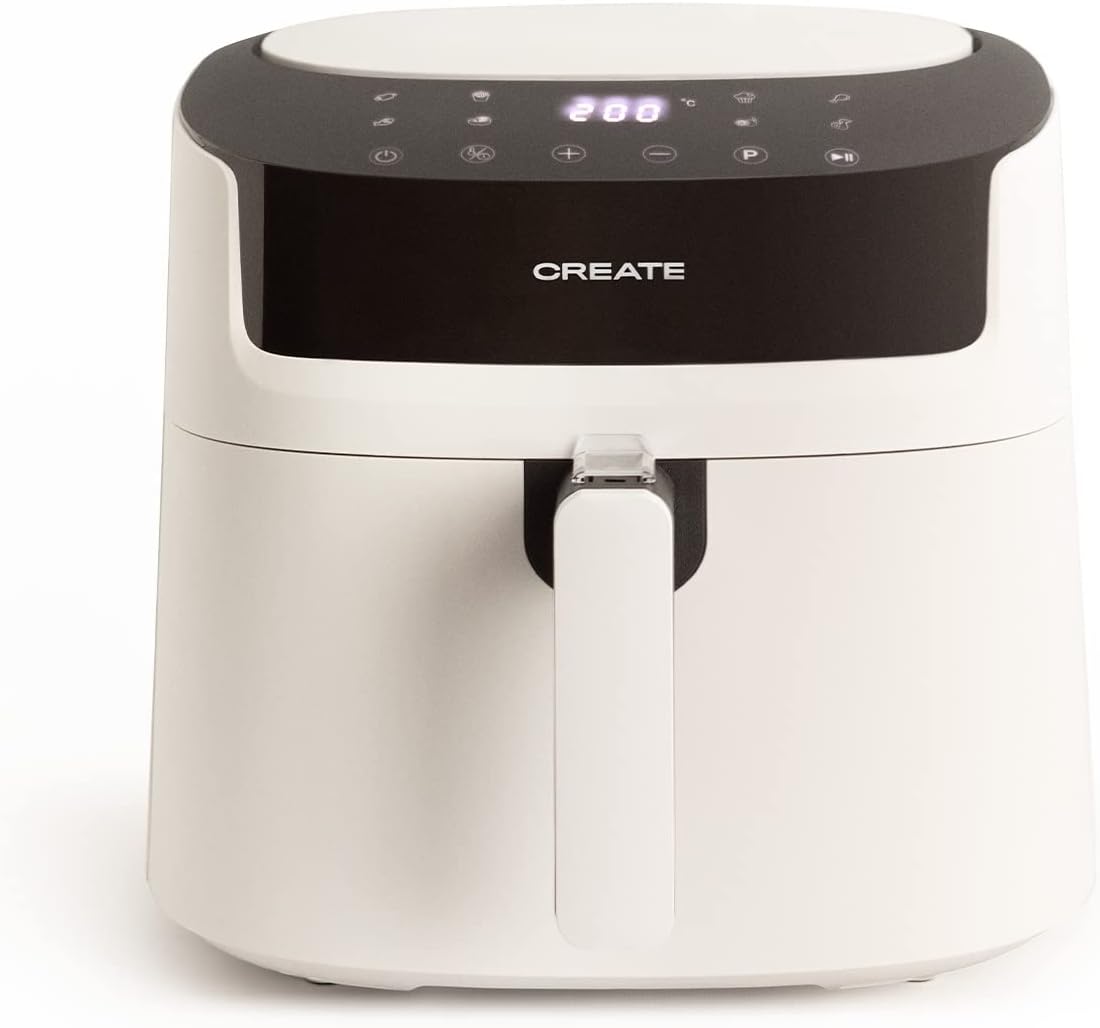
Image: Front view of the CREATE FRYER AIR PRO air fryer.

Image: The main unit with the frying basket and crisper plate disassembled.
3. Setup and First Use
- Unpack the Appliance: Carefully remove all packaging materials and promotional labels from the air fryer.
- Clean Before First Use: Wash the frying basket and crisper plate thoroughly with hot water, dish soap, and a non-abrasive sponge. Wipe the inside and outside of the main unit with a damp cloth. Ensure all parts are completely dry before use.
- Position the Appliance: Place the air fryer on a stable, heat-resistant, and level surface. Ensure there is at least 10 cm (4 inches) of free space on the back and sides, and 10 cm (4 inches) above the appliance to allow for proper air circulation.
- Insert Basket: Slide the frying basket with the crisper plate inserted back into the main unit until it clicks securely into place.

Image: The air fryer with its frying basket partially pulled out, demonstrating its removable nature for cleaning and loading.
4. Operating Instructions
Control Panel
The air fryer features an intuitive touch control panel with an angled LCD screen for easy operation.

Image: Top-down view of the air fryer's control panel with digital display and touch icons.
- Power Button: Turns the appliance on/off.
- Temperature Control (+/-): Adjusts cooking temperature (40°C - 200°C).
- Time Control (+/-): Adjusts cooking time.
- Program Selection (P): Cycles through 8 pre-installed programs.
- Start/Pause Button: Starts or pauses the cooking cycle.
Pre-installed Programs
The air fryer comes with 8 pre-installed programs for common dishes. Select the desired program using the 'P' button.
| Program | Description |
|---|---|
| 1 | Fries |
| 2 | Chicken |
| 3 | Steak |
| 4 | Fish |
| 5 | Shrimp |
| 6 | Cake |
| 7 | Pizza |
| 8 | Vegetables |
Manual Operation
- Plug the air fryer into a grounded wall outlet.
- Press the Power button to turn on the appliance.
- Pull out the frying basket, place your ingredients inside, and slide it back into the air fryer. Do not overfill.
- Use the Temperature (+/-) buttons to set your desired cooking temperature (e.g., 180°C).
- Use the Time (+/-) buttons to set your desired cooking time (e.g., 15 minutes).
- Press the Start/Pause button to begin cooking.
Stir Reminder
For certain recipes, the air fryer will emit a sound reminder during the cooking cycle to prompt you to shake or stir the food for even cooking. Pull out the basket, shake/stir, and reinsert to resume cooking.

Image: The air fryer in operation, with the basket pulled out to show corn being cooked inside.
5. Cleaning and Maintenance
Clean the air fryer after every use to prevent food residue buildup.
- Unplug and Cool Down: Always unplug the appliance and allow it to cool down completely before cleaning.
- Clean the Frying Basket and Crisper Plate: Remove the frying basket and crisper plate. Wash them with hot water, dish soap, and a non-abrasive sponge. For stubborn food residue, soak the basket and plate in hot water with dish soap for about 10 minutes. Note: The basket and crisper plate are NOT dishwasher safe.
- Clean the Interior: Wipe the interior of the air fryer with a damp cloth and mild detergent. Do not use abrasive cleaners or steel wool.
- Clean the Exterior: Wipe the exterior of the air fryer with a damp cloth.
- Storage: Ensure all parts are clean and dry before storing the appliance in a cool, dry place.

Image: Close-up view of the perforated crisper plate inside the air fryer basket, showing its design for air circulation and ease of cleaning.
6. Troubleshooting
If you encounter issues with your air fryer, consult the table below for common problems and solutions.
| Problem | Possible Cause | Solution |
|---|---|---|
| Air fryer does not turn on. | Appliance is not plugged in. | Ensure the power cord is securely plugged into a grounded wall outlet. |
| Food is not cooked evenly. | Basket is overloaded; food not shaken/stirred. | Do not overload the basket. Shake or stir ingredients halfway through cooking. |
| White smoke comes from the appliance. | Greasy residue from previous use; cooking fatty food. | Clean the basket and crisper plate thoroughly. For fatty foods, absorb excess oil before cooking. |
| Food is not crispy. | Too much moisture; not enough oil (for certain foods). | Pat food dry before cooking. For some foods, a light spray of oil can help achieve crispiness. |
7. Specifications
| Feature | Detail |
|---|---|
| Brand | CREATE |
| Model Number | 132703_275951 |
| Capacity | 6.2 Liters |
| Wattage | 1800 Watts |
| Voltage | 240 Volts |
| Control Method | Touch |
| Min Temperature Setting | 40 Degrees Celsius |
| Max Temperature Setting | 200 Degrees Celsius |
| Nonstick Coating | Yes |
| Dishwasher Safe (Basket) | No |
| Product Dimensions | 12.56 x 15.24 x 11.93 inches |
| Item Weight | 14.19 pounds |
| Color | White |
| Material | Plastic |
8. Warranty and Support
This CREATE appliance is designed and manufactured to the highest quality standards. For specific warranty terms and conditions, please refer to the warranty card included with your purchase or visit the official CREATE website.
For technical support, troubleshooting assistance, or spare parts, please contact CREATE customer service. Contact information can typically be found on the manufacturer's website or in the product packaging.
Related documents132703_275951


Ask a question about this manual
Ask about setup, troubleshooting, compatibility, parts, safety, or missing instructions. Manuals+ will review the question and use this page’s manual context to help answer it.