
XBERSTAR CXW-200-DJ216/DJ103S/DJ105
XBERSTAR Kitchen Range Hood Pushbutton Switch User Manual
Model: CXW-200-DJ216/DJ103S/DJ105
Introduction
This manual provides comprehensive instructions for the installation, operation, maintenance, and troubleshooting of your XBERSTAR Kitchen Range Hood Pushbutton Switch. This switch is designed for use in industrial control circuits, specifically for controlling solenoid starters, contactors, relays, and other related circuits within kitchen range hood systems. Constructed from solid plastic and alloy materials, it ensures robustness and a long operational life.
Safety Information
Please read and understand all safety instructions before installing or operating this product. Failure to follow these instructions may result in electric shock, fire, or serious injury.
- Electrical Hazard: Always disconnect power to the range hood circuit at the main breaker or fuse box before attempting any installation, maintenance, or repair.
- Qualified Personnel: Installation and wiring should only be performed by a qualified electrician or service technician in accordance with all local and national electrical codes.
- Voltage and Current: Ensure the switch's specifications (4A 250V AC) match the requirements of your range hood system. Do not exceed the rated current or voltage.
- Proper Connection: Verify all wire connections are secure and correctly insulated to prevent short circuits.
- Environmental Conditions: Do not expose the switch to excessive moisture or extreme temperatures. The switch has an International Protection Rating of IP65, indicating protection against dust ingress and low-pressure water jets, but it is not submersible.
Product Overview
The XBERSTAR Kitchen Range Hood Pushbutton Switch is a replacement control board featuring multiple push buttons for various functions of your range hood, such as fan speed control and lighting. It comes pre-wired with a connector for ease of installation.

Figure 1: Top view of the XBERSTAR Kitchen Range Hood Pushbutton Switch, showing the four chrome-finished push buttons and the attached wiring harness with a red connector.

Figure 2: Angled view of the switch, highlighting the transparent plastic housing and the internal circuitry visible beneath the buttons.
Specifications
| Feature | Specification |
|---|---|
| Model | CXW-200-DJ216/DJ103S/DJ105 |
| Operation Mode | Manual |
| Current Rating | 4 Amps |
| Operating Voltage | 250 Volts AC |
| Contact Type | Normally Open |
| Connector Type | Screw (pre-wired harness with plug) |
| Material Type | Metal, Plastic |
| Item Dimensions (L x W x H) | 5 x 1 x 0.07 inches (approx. 13 x 4.1 x 0.18 cm) |
| Item Weight | 3.2 ounces |
| International Protection Rating | IP65 |
| Number of Positions | 2 (referring to the switch mechanism, not number of buttons) |

Figure 3: Diagram showing the approximate dimensions of the switch unit and the length of the wiring harness (68cm).
Setup and Installation
This section outlines the general steps for replacing an existing range hood pushbutton switch. Specific procedures may vary depending on your range hood model. Always refer to your range hood's original manual for detailed disassembly and reassembly instructions.
- Prepare for Installation:
- Ensure the range hood is completely disconnected from the main power supply by turning off the circuit breaker or removing the fuse. Verify power is off using a voltage tester.
- Gather necessary tools, which may include screwdrivers, wire cutters/strippers, and electrical tape.
- Access the Existing Switch:
- Carefully remove any filters, covers, or panels on your range hood that obstruct access to the existing pushbutton switch. This often involves removing screws or releasing clips.
- Disconnect the Old Switch:
- Note the wiring configuration of the old switch. It is highly recommended to take photos of the connections before disconnecting.
- Carefully disconnect the wiring harness from the old switch. If individual wires are connected, label them to ensure correct re-connection.
- Remove the old switch from its mounting location.

Figure 4: Close-up view of the red connector on the wiring harness, which connects the switch to the range hood's main control system.
- Install the New Switch:
- Position the new XBERSTAR switch in the designated mounting area. Ensure it fits securely.
- Connect the wiring harness of the new switch to the corresponding connector in the range hood. Ensure the connection is firm and fully seated.
- If your original switch used individual wires, connect them to the new switch's terminals according to your previous notes or photos. Ensure proper polarity and secure connections.
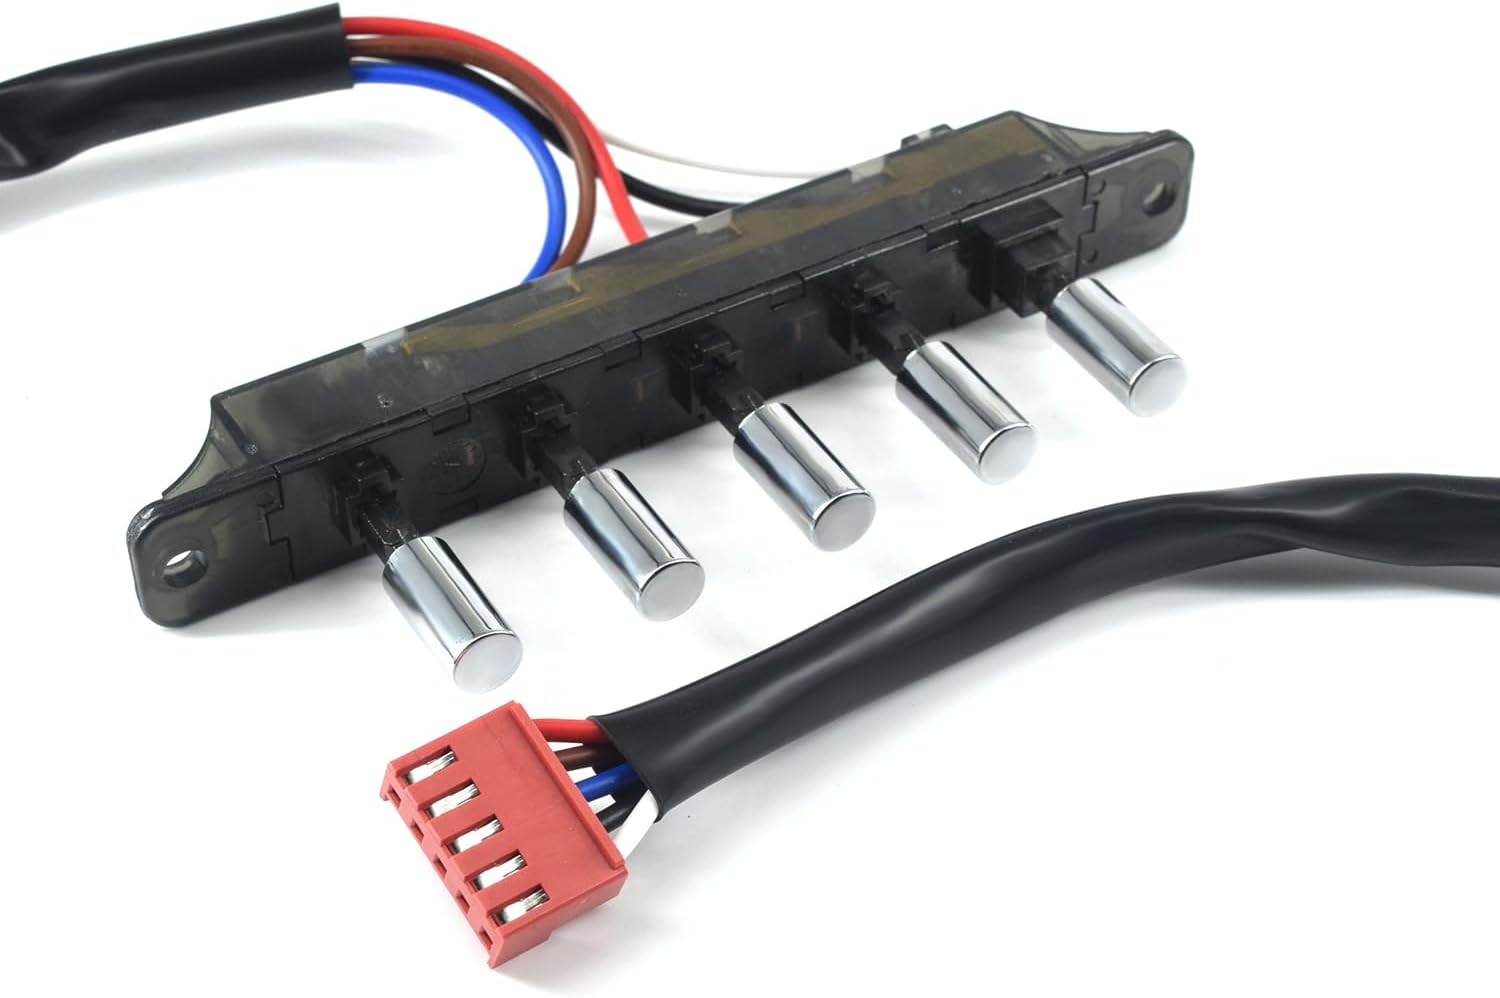
Figure 5: The switch unit with its multi-colored wires leading to the red connector, illustrating the pre-assembled wiring for direct replacement.
- Reassemble and Test:
- Carefully reassemble any panels or covers removed earlier.
- Restore power to the range hood at the main circuit breaker.
- Test all functions of the range hood (fan speeds, lights) to ensure the new switch is operating correctly.
Operating Instructions
The XBERSTAR Kitchen Range Hood Pushbutton Switch provides intuitive control over your range hood's functions. The specific functions assigned to each button depend on your range hood's design and wiring.
- Power On/Off: Typically, one button will control the main power to the fan or light. Pressing it once will turn the function on, and pressing it again will turn it off.
- Fan Speed Control: Multiple buttons may be dedicated to fan speed. Pressing a specific button will activate a corresponding fan speed (e.g., Low, Medium, High). Some systems may use a single button to cycle through speeds.
- Light Control: One button is usually designated for controlling the range hood's lighting. Press to turn lights on or off.

Figure 6: A hand demonstrating the action of pressing one of the chrome-finished buttons on the switch, indicating its manual operation.
Familiarize yourself with the layout and function of each button on your specific range hood model after installation.
Maintenance
The XBERSTAR Pushbutton Switch is designed for durability and requires minimal maintenance. However, periodic checks can help ensure its longevity and proper function.
- Cleaning:
- Before cleaning, always disconnect power to the range hood.
- Wipe the surface of the switch with a soft, damp cloth. Do not use abrasive cleaners, solvents, or excessive water, as these can damage the plastic or internal components.
- Connection Check: Periodically, with power disconnected, inspect the wiring connections to ensure they remain secure and free from corrosion.
- Button Functionality: Test each button regularly to ensure it depresses smoothly and activates its intended function.
Troubleshooting
If you encounter issues with your XBERSTAR Kitchen Range Hood Pushbutton Switch, refer to the following common problems and solutions. Always ensure power is disconnected before performing any inspection or repair.
| Problem | Possible Cause | Solution |
|---|---|---|
| Switch does not respond / No power to range hood functions. |
|
|
| One or more buttons do not work. |
|
|
| Fan or light functions are erratic. |
|
|
If troubleshooting steps do not resolve the issue, it is recommended to consult a qualified technician or contact XBERSTAR customer support.
Warranty and Support
For warranty information or technical support regarding your XBERSTAR Kitchen Range Hood Pushbutton Switch, please refer to the purchase documentation or contact XBERSTAR customer service directly. Contact details can typically be found on the product packaging or the official XBERSTAR website.
When contacting support, please have your product model number (CXW-200-DJ216/DJ103S/DJ105) and purchase date available.
Ask a question about this manual
Ask about setup, troubleshooting, compatibility, parts, safety, or missing instructions. Manuals+ will review the question and use this page’s manual context to help answer it.