1. Introduction
Thank you for choosing the OQIMAX GH8013 Digital Projection Alarm Clock. This manual provides detailed instructions for the proper setup, operation, and maintenance of your device. Please read this manual thoroughly before use and retain it for future reference.
Safety Information
- Do not expose the device to extreme temperatures, direct sunlight, or high humidity.
- Avoid dropping or subjecting the device to strong impacts.
- Use only the provided power adapter or a compatible 5V USB power source.
- Keep out of reach of children.
- Do not attempt to disassemble or repair the device yourself. Contact customer support if issues arise.
2. Package Contents
Please check the package for the following items:
- OQIMAX GH8013 Digital Projection Alarm Clock
- USB Power Cable
- CR2032 Button Cell Battery (for memory backup)
- User Manual

Image: Contents of the OQIMAX GH8013 package, including the alarm clock, USB cable, CR2032 battery, and user manual.
3. Product Overview
Familiarize yourself with the main components and controls of your alarm clock.

Image: Top and bottom view of the alarm clock with labels for SNOOZE/LIGHT, PROJECT, ALARM, SET, DOWN, UP buttons, Speaker, Projection lamp, Power port, and CR2032 battery compartment.
Key Features:
- Large LED display for time and alarm.
- Adjustable display brightness (4 levels).
- Projection function with 3 brightness levels and 180° flip.
- Snooze function (1-60 minutes).
- Three alarm modes (Monday-Friday, Monday-Saturday, Everyday).
- 12/24 hour time format selection.
- Temperature display.
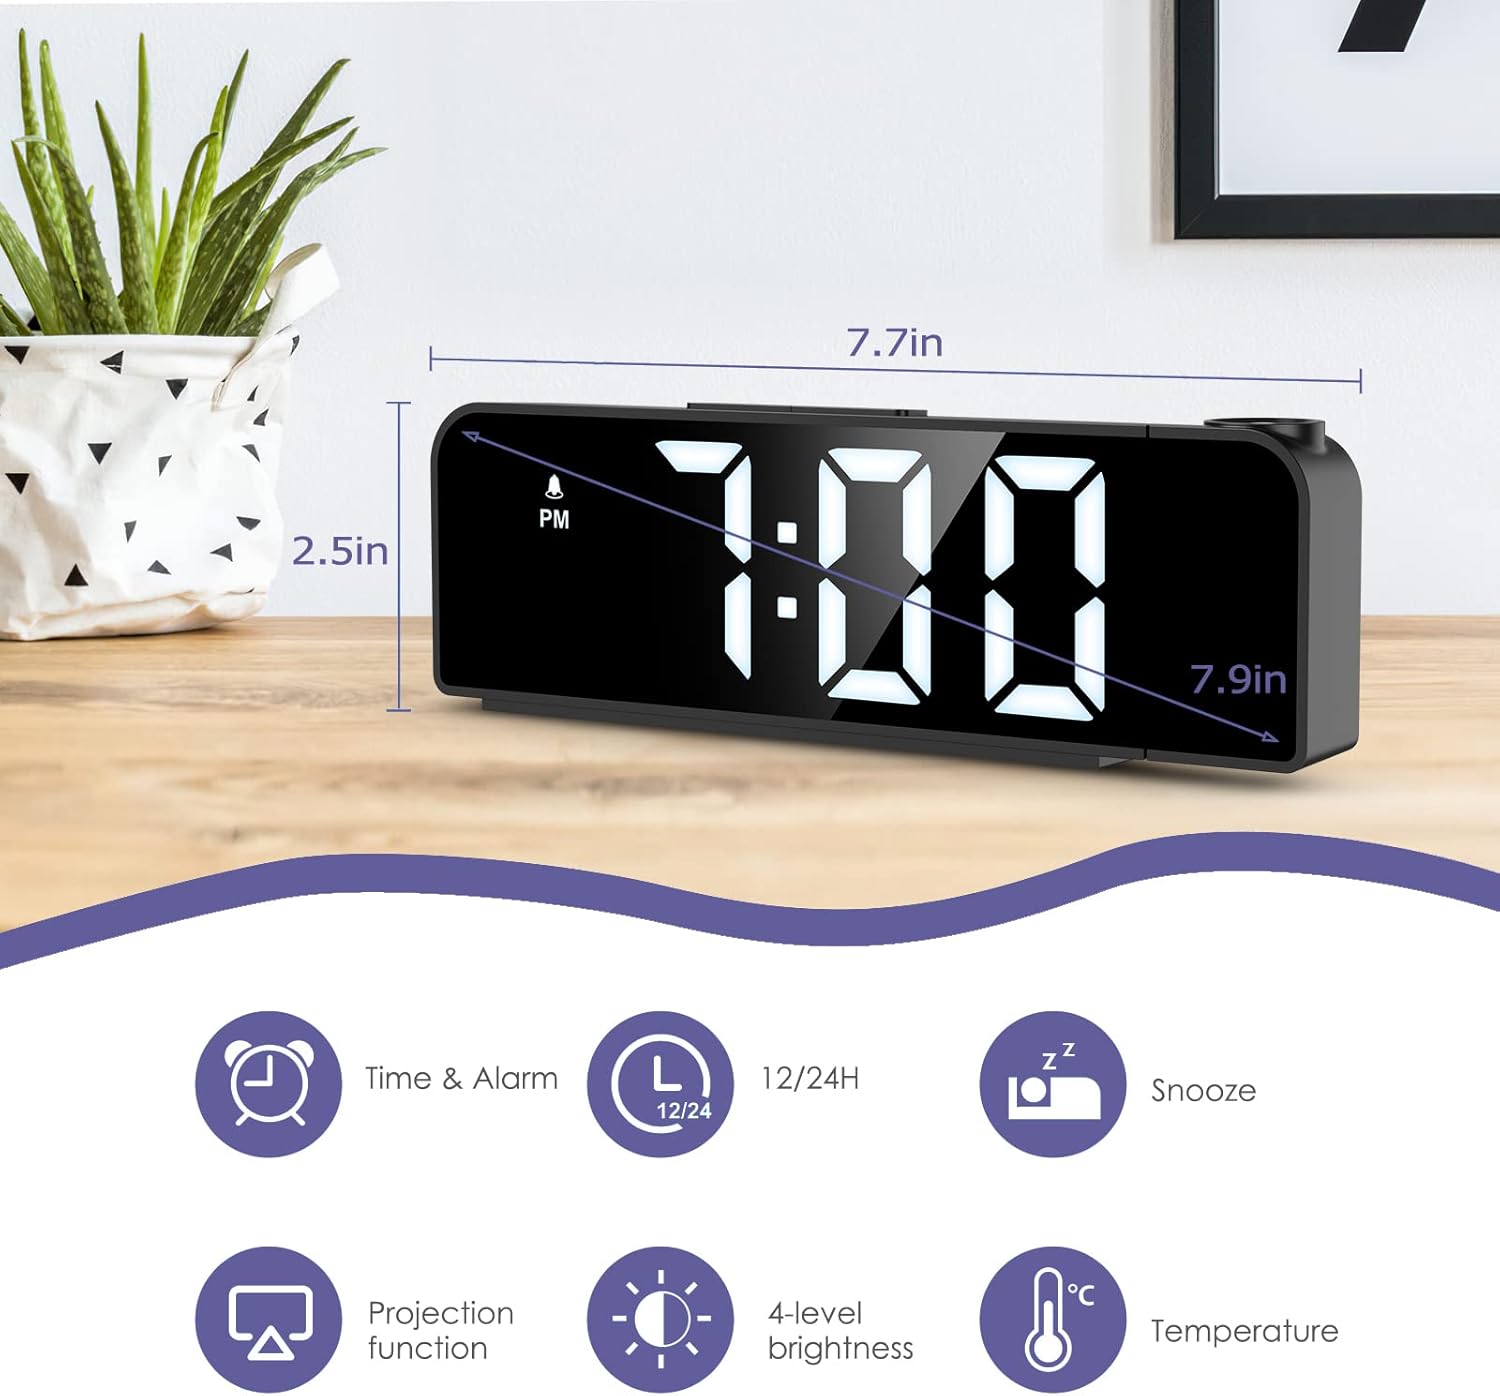
Image: The alarm clock displaying time, with icons indicating Time & Alarm, 12/24H, Snooze, Projection function, 4-level brightness, and Temperature features. Dimensions are shown as 7.7 inches length and 2.5 inches height.
4. Setup
4.1 Powering On
- Insert the CR2032 button cell battery into the battery compartment on the bottom of the clock. This battery provides memory backup for time and alarm settings during power outages.
- Connect the USB power cable to the power port on the back of the alarm clock.
- Plug the other end of the USB cable into a 5V USB power adapter (not included) or a USB port. The display will light up.
4.2 Initial Time Setting
- Press and hold the SET button for 3 seconds to enter time setting mode. The hour digits will flash.
- Use the UP or DOWN buttons to adjust the hour.
- Press SET again to confirm the hour and move to minute setting. The minute digits will flash.
- Use the UP or DOWN buttons to adjust the minute.
- Press SET again to confirm the minute and exit time setting mode.
4.3 12/24 Hour Format Selection
While in normal time display mode, press the UP button to switch between 12-hour and 24-hour time formats. In 12-hour format, "PM" will be displayed for afternoon hours.
5. Operating Instructions
5.1 Setting the Alarm
- Press and hold the ALARM button for 3 seconds to enter alarm setting mode. The alarm hour digits will flash.
- Use the UP or DOWN buttons to adjust the alarm hour.
- Press ALARM again to confirm the alarm hour and move to alarm minute setting. The alarm minute digits will flash.
- Use the UP or DOWN buttons to adjust the alarm minute.
- Press ALARM again to confirm the alarm minute and select the alarm mode.
- Use the UP or DOWN buttons to cycle through the three alarm modes:
- 1-5: Monday to Friday
- 1-6: Monday to Saturday
- 1-7: Everyday
- Press ALARM again to confirm the alarm mode and exit alarm setting. The alarm icon will appear on the display, indicating the alarm is active.
To turn the alarm ON/OFF, short press the ALARM button in normal time display mode. The alarm icon will appear or disappear.

Image: The alarm clock display showing the three alarm modes: 1-5 (Monday to Friday), 1-6 (Monday to Saturday), and 1-7 (Everyday).
5.2 Snooze Function
When the alarm sounds, press the large SNOOZE/LIGHT button on top of the clock to activate the snooze function. The alarm will pause for a set duration (default is 9 minutes, adjustable from 1-60 minutes) and sound again later.
To adjust the snooze duration:
- While the alarm is sounding, press and hold the SNOOZE/LIGHT button for 3 seconds. The snooze time will flash.
- Use the UP or DOWN buttons to set the desired snooze duration (1-60 minutes).
- Press SNOOZE/LIGHT again to confirm and exit.
To stop the alarm completely, press any other button (e.g., ALARM, SET, UP, DOWN) when it is sounding.
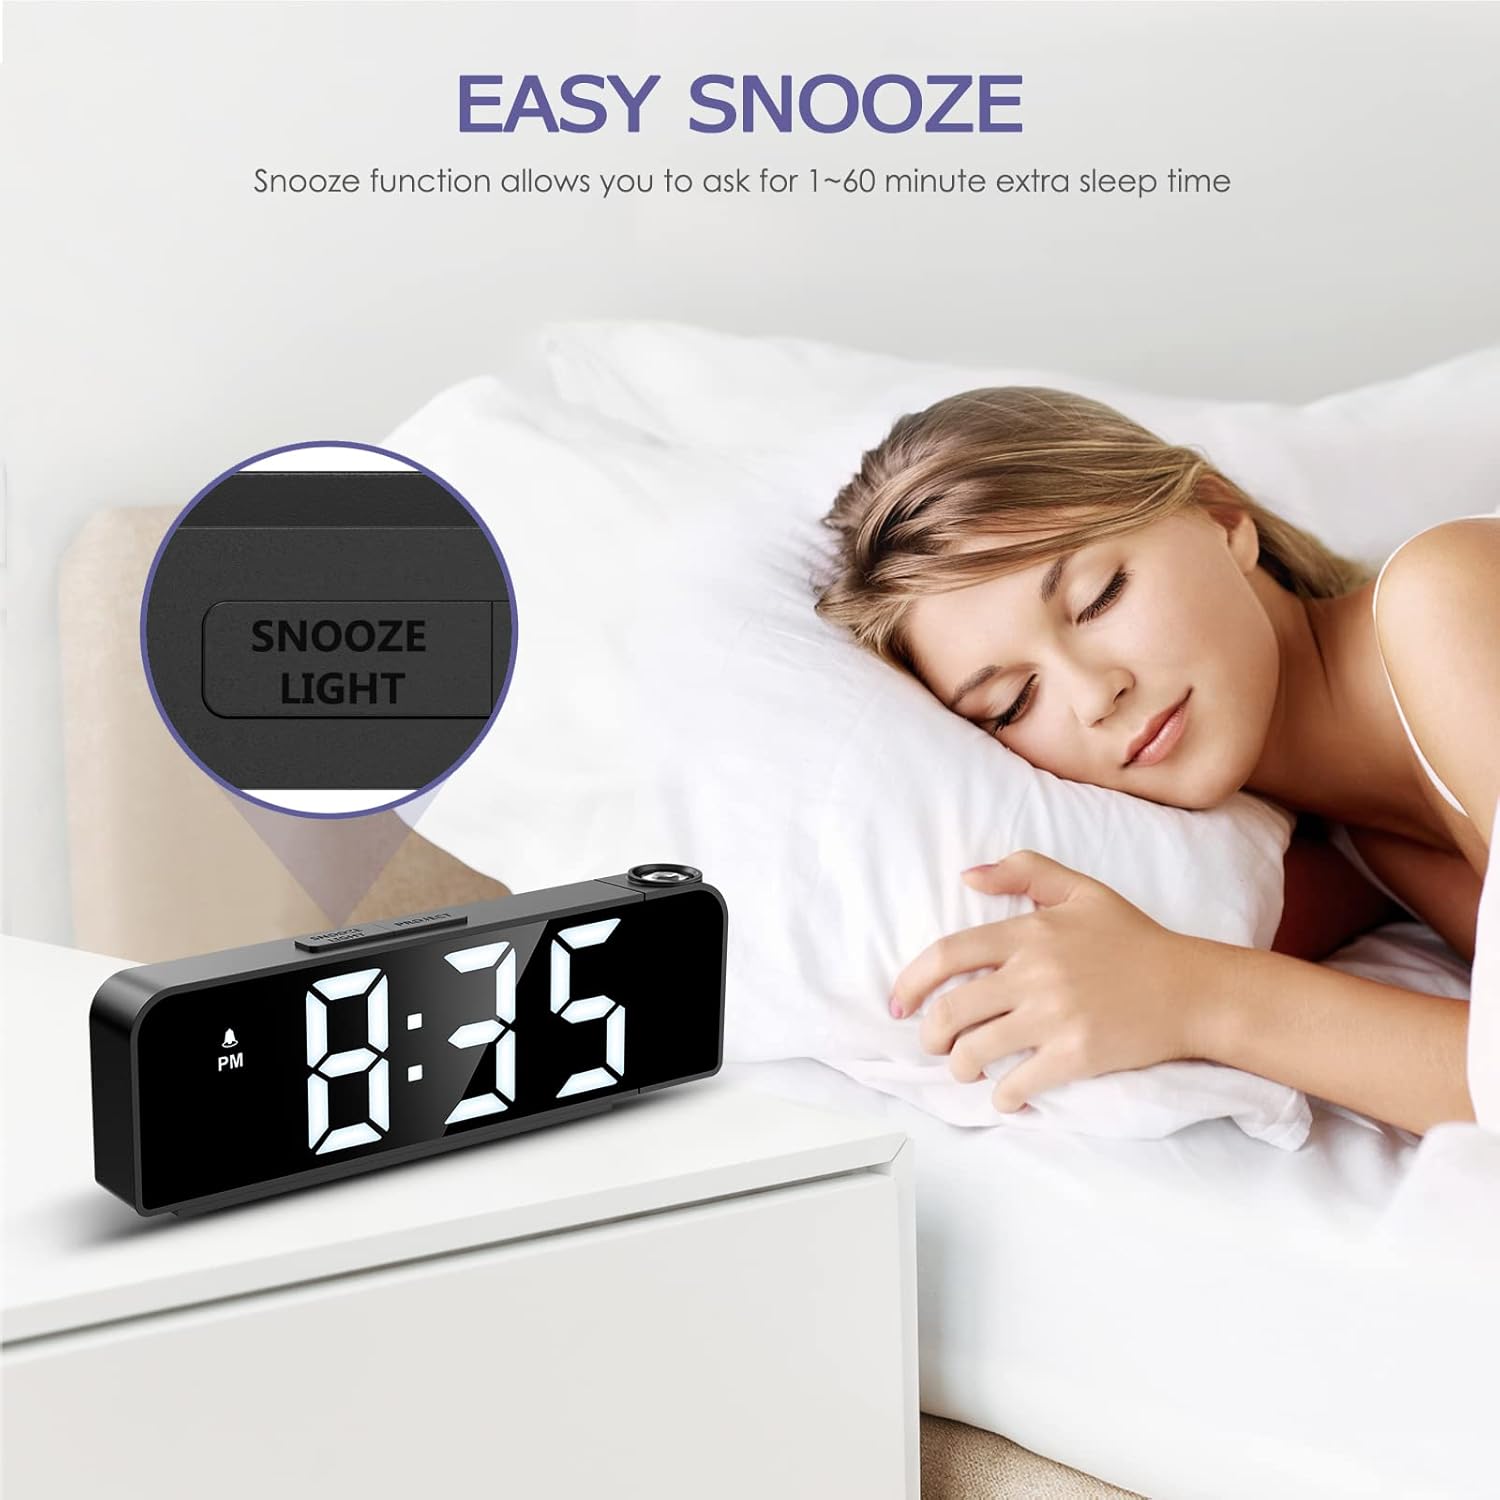
Image: A person sleeping next to the alarm clock, with the "SNOOZE/LIGHT" button highlighted, illustrating the snooze function.
5.3 Display Brightness Adjustment
The main display has 4 adjustable brightness levels (Bright Light, Medium Light, Low Light, OFF).
In normal time display mode, short press the SNOOZE/LIGHT button to cycle through the brightness levels.

Image: The alarm clock display shown at Bright Light, Medium Light, Low Light, and OFF brightness settings.
5.4 Projection Function
The alarm clock can project the time onto a wall or ceiling.
- Press the PROJECT button to turn the projection ON/OFF.
- To adjust the projection brightness (3 levels), press the PROJECT button repeatedly while the projection is active.
- The projection can be rotated 180 degrees for optimal viewing. Manually adjust the projection lens on the side of the clock to change the angle.
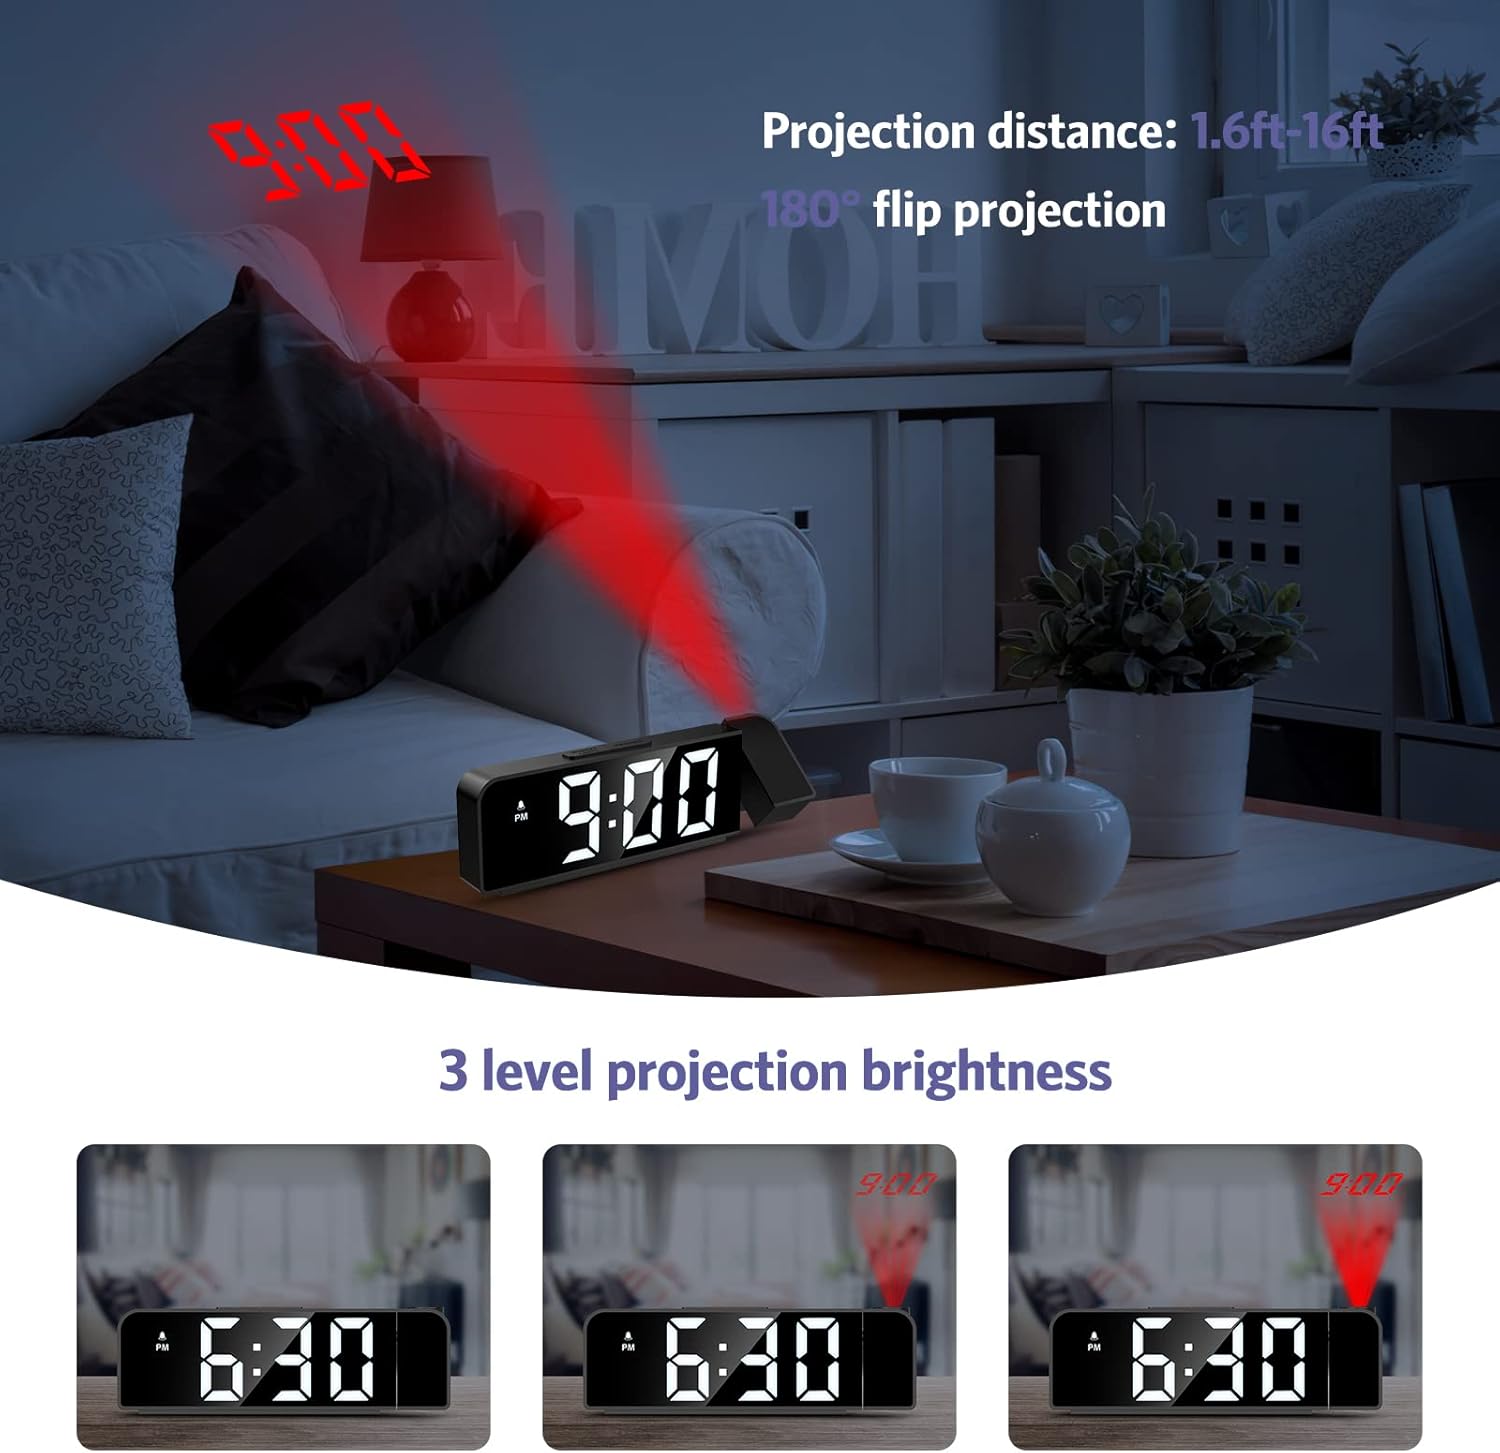
Image: The alarm clock projecting the time "9:00" onto a wall, demonstrating the projection distance (1.6ft-16ft) and 180° flip projection feature. Three levels of projection brightness are also shown.

Image: Four different scenarios showing the alarm clock projecting time onto various surfaces like a wall above a desk, a bedroom wall, and a ceiling while a person is in bed.
5.5 Temperature Display
The alarm clock displays the ambient temperature. This feature is automatic and does not require manual setting.
6. Maintenance
- Clean the device with a soft, dry cloth. Do not use abrasive cleaners or solvents.
- Ensure the device is unplugged before cleaning.
- If the backup battery (CR2032) needs replacement, ensure the clock is powered on via USB to retain settings during the battery change.
7. Troubleshooting
| Problem | Possible Cause | Solution |
|---|---|---|
| Display is off or dim. | No power or display brightness set to OFF. | Ensure the USB power cable is securely connected. Press the SNOOZE/LIGHT button to adjust display brightness. |
| Alarm does not sound. | Alarm is not activated or set incorrectly. | Check if the alarm icon is displayed. If not, short press the ALARM button to activate. Verify alarm time and mode settings. |
| Projection is blurry or upside down. | Projection focus or orientation needs adjustment. | Manually rotate the projection lens to adjust the angle. The device supports 180° flip projection. |
| Time resets after power loss. | CR2032 backup battery is dead or missing. | Replace the CR2032 button cell battery. Ensure it is inserted correctly. |
8. Specifications
- Model: GH8013
- Brand: OQIMAX
- Material: Acrylonitrile Butadiene Styrene (ABS)
- Display Type: Digital LED
- Power Source: USB Cable (DC 5V)
- Backup Battery: CR2032 Button Cell (included)
- Dimensions: 20.9 x 8.4 x 4.7 cm (approx. 7.7 x 3.3 x 1.85 inches)
- Weight: 200 grams (approx. 0.44 lbs)
- Special Features: Adjustable Brightness, Snooze, Projection Function, 12/24H Format, Temperature Display, Multiple Alarm Modes
9. Warranty and Support
OQIMAX products are designed for reliability and performance. For any questions, technical support, or warranty claims, please contact OQIMAX customer service through the retailer where the product was purchased or visit the official OQIMAX website for contact information.
Please have your product model (GH8013) and purchase details ready when contacting support.
