1. Introduction
This manual provides detailed instructions for the setup, operation, and maintenance of your DreamSky DS2201 Wooden Digital Alarm Clock. Designed for bedrooms, this electric desk clock features large, easy-to-read numbers, a convenient USB charging port, and adjustable settings for alarm volume and display brightness. Please read this manual thoroughly to ensure proper use and to maximize the functionality of your device.
2. Key Features
- Large Digital Display: Features 1.8-inch large numbers for clear visibility from a distance.
- Adjustable Brightness: Offers 5 levels of display brightness, including an 'OFF' option, to suit various lighting conditions.
- Battery Backup: Requires 2 AAA alkaline batteries (not included) to maintain alarm function during power outages. The display will not illuminate when operating on battery power alone.
- Customizable Alarm: Provides 5 levels of adjustable alarm volume, suitable for both light and heavy sleepers. The alarm sounds for 2 minutes.
- Snooze Function: A dedicated snooze button on the top allows for an additional 9 minutes of sleep.
- USB Charging Port: Includes a convenient USB port for charging smart devices and other gadgets.
- Daylight Saving Time (DST): Equipped with a manual DST button for easy time adjustments.
- Wood Décor Design: A sleek wooden finish integrates well with various room aesthetics.
3. Package Contents
Upon unpacking, please ensure all items listed below are present and in good condition:
- DreamSky DS2201 Wooden Digital Alarm Clock
- 5V/1A Power Adapter
- User Manual (this document)

Figure 3.1: Package contents including the alarm clock, power adapter, and user manual.
4. Setup
4.1 Power Connection
- Connect the provided 5V/1A power adapter to the DC 5V port on the back of the alarm clock.
- Plug the power adapter into a standard electrical outlet. The clock display will illuminate.

Figure 4.1: Powering the clock and using the USB charging port.
4.2 Battery Installation (Backup)
For alarm backup during power outages, install 2 AAA alkaline batteries (not included) into the battery compartment on the back of the clock. The display will not be active when running on battery power alone; only the alarm function is maintained.
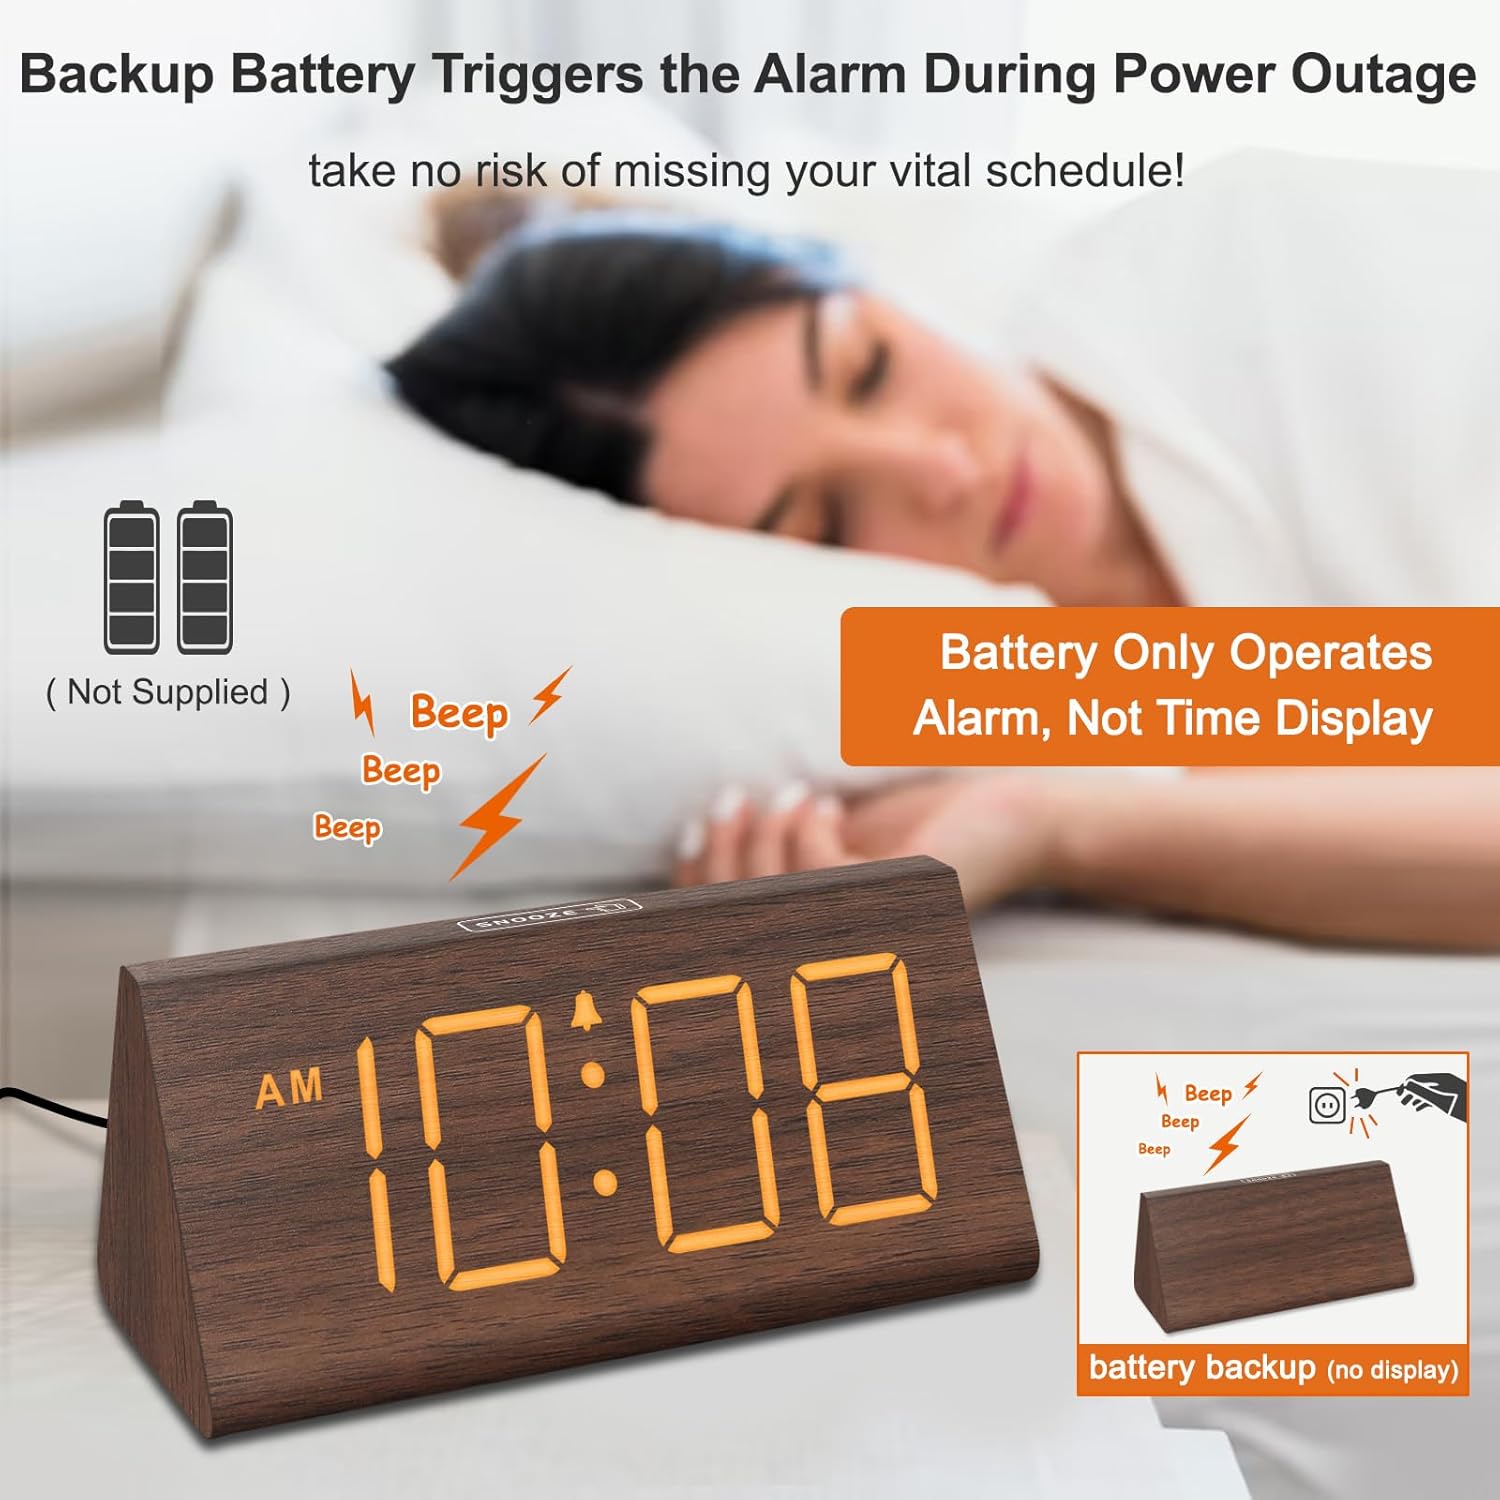
Figure 4.2: Battery compartment for alarm backup.
5. Operating Instructions
5.1 Time Setting
- Press the TIME SET button on the back of the clock. The hour digits will flash.
- Use the + and - buttons to adjust the hour.
- Press TIME SET again to set the minutes. The minute digits will flash.
- Use the + and - buttons to adjust the minutes.
- Press TIME SET a third time to confirm and exit time setting mode.
- To switch between 12-hour and 24-hour format, press the 12/24HR button.
5.2 Alarm Setting
- Press the ALARM SET button. The alarm hour digits will flash.
- Use the + and - buttons to adjust the alarm hour.
- Press ALARM SET again to set the alarm minutes. The minute digits will flash.
- Use the + and - buttons to adjust the alarm minutes.
- Press ALARM SET a third time to confirm and exit alarm setting mode.
- To turn the alarm ON or OFF, press the ON/OFF button. An alarm icon will appear on the display when the alarm is active.
5.3 Snooze Function
When the alarm sounds, press the SNOOZE button located on the top of the clock to temporarily silence the alarm for 9 minutes. The alarm will sound again after 9 minutes. To turn off the alarm for the day, press any button on the back of the clock.

Figure 5.1: Snooze button and alarm volume control.
5.4 Brightness Adjustment
Press the DIMMER button on the back of the clock to cycle through 5 levels of brightness (L01 to L05) and an 'OFF' option for the display.

Figure 5.2: Display brightness levels.
5.5 Volume Adjustment
Use the VOL+ and VOL- buttons on the back of the clock to adjust the alarm volume across 5 available levels.
5.6 Daylight Saving Time (DST)
To activate or deactivate Daylight Saving Time, press the DST ON/OFF button. When activated, the time will advance by one hour, and 'DST' will appear on the display. Press again to revert to standard time.
5.7 USB Charging Port
The USB port on the back of the clock can be used to charge compatible smart devices. Simply connect your device's USB charging cable to the port.
6. Maintenance
- Clean the clock's surface with a soft, dry cloth.
- Avoid using abrasive cleaners, solvents, or harsh chemicals, as these may damage the finish.
- Keep the clock away from direct sunlight, extreme temperatures, and high humidity.
7. Troubleshooting
| Problem | Possible Cause | Solution |
|---|---|---|
| Display is off or dim. | Power adapter not connected; brightness set to OFF or lowest level; running on battery backup. | Ensure the power adapter is securely plugged in. Press the DIMMER button to adjust brightness. Remember, the display does not light up when on battery backup. |
| Alarm does not sound. | Alarm is not activated; alarm volume is too low. | Press the ON/OFF button to activate the alarm (check for alarm icon on display). Adjust volume using VOL+. |
| Time is incorrect. | Time not set correctly; DST setting incorrect. | Follow instructions in section 5.1 to set the time. Check DST setting using the DST ON/OFF button. |
| USB charging not working. | Device not compatible; cable faulty; clock not powered. | Ensure your device is compatible with USB charging. Try a different USB cable. Verify the clock is connected to AC power. |
8. Specifications
- Brand: DreamSky
- Model: DS2201
- Display Type: Digital
- Power Source: Corded Electric
- Product Dimensions: 5.96"W x 2.7"H
- Material: Wood
- Item Weight: 11.1 ounces
- Batteries: 2 AAA batteries required (not included, for alarm backup only)
- Connectivity: USB
9. Warranty and Support
Your DreamSky DS2201 Wooden Digital Alarm Clock comes with a 1-year replacement warranty.
For customer support or inquiries, please contact:
Email: info@dreamsky4u.com


