1. Introduction
This manual provides comprehensive instructions for the safe and efficient operation, installation, and maintenance of your ELECTROLUX COE7P31V SenseCook 700 Series built-in oven. Please read this manual thoroughly before using the appliance and keep it for future reference.
2. Safety Information
Always adhere to the following safety guidelines to prevent personal injury or damage to the appliance.
- Ensure the appliance is correctly installed by a qualified professional before first use.
- Do not allow children to operate or play with the oven. Keep packaging materials away from children.
- The oven becomes hot during operation. Avoid touching heating elements or internal surfaces. Use oven mitts.
- Never use water to extinguish oil or grease fires. Turn off the appliance and cover the flame with a lid or fire blanket.
- Disconnect the appliance from the power supply before performing any maintenance or cleaning.
- Do not use harsh abrasive cleaners or sharp metal scrapers to clean the oven door glass, as they can scratch the surface, which may result in shattering.
3. Setup and Installation
The ELECTROLUX COE7P31V is designed for built-in installation. Proper installation is crucial for safety and performance.
3.1 Unpacking
Carefully remove all packaging materials. Inspect the oven for any signs of damage. Report any damage to your retailer immediately.
3.2 Positioning and Ventilation
Install the oven into a suitable cabinet opening according to the specified built-in dimensions (H x W x D: 600x560x550 mm). Ensure adequate ventilation around the appliance as per installation guidelines provided in the separate installation manual.
3.3 Electrical Connection
The oven comes with a plug and a 1.6m cable. Connect the appliance to a properly grounded electrical outlet. The electrical specifications are: Frequency 50/60 Hz, Current 16 A, Maximum total electrical power 3490 W. Ensure the electrical supply matches these requirements.
3.4 Initial Cleaning
Before first use, clean the oven interior and accessories with warm water and a mild detergent. Then, heat the empty oven for approximately one hour at 250°C to burn off any manufacturing residues. Ensure the room is well-ventilated during this process.
4. Operating Instructions
Familiarize yourself with the oven's controls and functions for optimal cooking results.
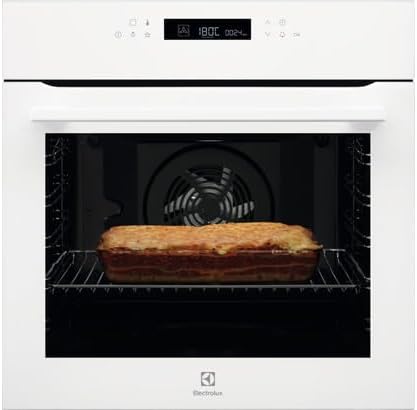
4.1 Control Panel

The oven features a white LCD display and sensitive touch controls for easy operation. Use the touch buttons to navigate menus, select functions, and adjust settings.

4.2 Cooking Functions
The COE7P31V offers a variety of cooking functions to suit different culinary needs. The temperature range is 30°C to 300°C.
- Bottom Cooking: Ideal for baking dishes with a crispy base.
- Traditional Cooking: For conventional baking and roasting.
- Defrost: Gently thaws frozen food.
- Turbo Grill: Combines grill and fan for faster grilling.
- Grill: For grilling smaller quantities of food.
- Keep Warm: Maintains food at serving temperature.
- Moist Rotating Heat: For baking and roasting with added moisture.
- Pizza Function: Optimized for perfect pizza crusts.
- Low-Temperature Cooking: For delicate dishes requiring precise, gentle heat.
- Pulsed Rotating Heat (True Fan Cooking): Ensures even heat distribution for multi-level cooking.
The oven also provides temperature recommendations and displays the current temperature during operation.
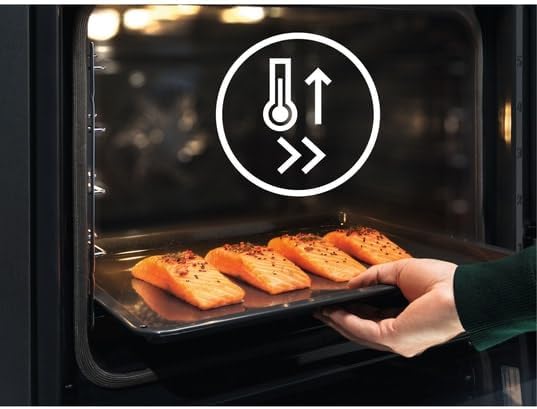
4.3 Integrated Cooking Probe

The integrated cooking probe measures the core temperature of your food, ensuring perfect results. The oven will automatically stop cooking once the desired internal temperature is reached.
4.4 Automatic Recipes
Utilize the pre-programmed automatic recipes for convenient cooking. Select a recipe, and the oven will suggest optimal settings.
4.5 Oven Door and Racks

The oven features a 'Velvet Closing' soft-close door mechanism. It also has a cold door with 3 glasses, which can be disassembled without tools for cleaning. The oven is equipped with telescopic rails on 2 levels for easy and safe handling of dishes.
5. Maintenance and Cleaning
Regular cleaning and maintenance ensure the longevity and optimal performance of your oven.
5.1 Pyrolytic Cleaning

The COE7P31V features pyrolytic self-cleaning, which burns off food residues at high temperatures, turning them into ash that can be easily wiped away. The oven provides a pyrolytic recommendation and offers 3 pre-programmed pyrolytic cycles:
- Cycle 1: Approximately 60 minutes (Conso pyro 1: 2593 Wh)
- Cycle 2: Approximately 90 minutes (Conso pyro 2: 3744 Wh)
- Cycle 3: Approximately 150 minutes (Conso pyro 3: 6096 Wh)
Always remove all accessories (racks, trays, cooking probe) before starting a pyrolytic cycle.
5.2 General Cleaning
For routine cleaning, use a soft cloth and mild detergent. Avoid abrasive cleaners. The oven door's three glass panes can be easily removed without tools for thorough cleaning.
6. Troubleshooting
If you encounter issues with your oven, refer to the following common troubleshooting tips. For more complex problems, contact customer support.
- Oven not heating: Check if the oven is properly plugged in and if the circuit breaker has tripped. Ensure the correct cooking function and temperature are selected.
- Uneven cooking: Ensure food is placed centrally and not overcrowding the oven. Use the recommended shelf position for the selected cooking function.
- Smoke or odor during first use: This is normal due to manufacturing residues burning off. Ensure good ventilation.
- Display not working: Check power supply. If the issue persists, contact service.
7. Specifications
Detailed technical specifications for the ELECTROLUX COE7P31V oven.
| Feature | Specification |
|---|---|
| Model | COE7P31V |
| Brand | ELECTROLUX |
| Color | White |
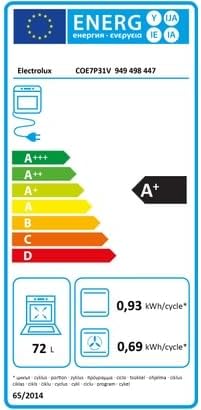
| Oven Volume | XXL 72 Liters |
| Energy Efficiency Class | A+ |
| Energy Efficiency Index (EEI) | 81.2 |
| Energy Consumption (Conventional) | 0.93 kWh/cycle |
| Energy Consumption (Fan-forced) | 0.69 kWh/cycle |
| Maximum Total Electrical Power | 3490 W |
| Grill Power | 2300 W |
| Temperature Range | 30°C - 300°C |
| Number of Cavities | 1 |
| Number of Shelf Positions | 5 |
| Number of Cooking Levels | 3 |
| Cable Length | 1.6 m (comes with plug) |
| Frequency | 50/60 Hz |
| Current | 16 A |
| Product Dimensions (H x W x D) | 594 x 596 x 569 mm |
| Built-in Dimensions (H x W x D) | 600 x 560 x 550 mm |
| Gross/Net Weight | 33 kg / 32 kg |
| Manufactured In | Italy |
| PNC | 949 498 447 |
| EAN Code | 7332543751310 |
| Included Accessories | 1 Multifunction Tray, 1 Grey Enamel Baking Tray, 1 Grid Dish Holder |
8. Warranty and Support
For warranty information, please refer to the warranty card included with your appliance or visit the official ELECTROLUX website. For technical assistance, spare parts, or service requests, please contact ELECTROLUX customer support in your region. When contacting support, please have your model number (COE7P31V) and PNC (949 498 447) ready.


