Introduction
This manual provides comprehensive instructions for the PETLIBRO Automatic Pet Feeder PLAF008. Designed for cats and small to medium-sized dogs, this feeder ensures your pet receives scheduled meals with precision. Please read this manual thoroughly before operating the device to ensure proper function and pet safety.

Image: The PETLIBRO Automatic Pet Feeder PLAF008, black in color, with a stainless steel food bowl filled with kibble. The feeder has a sleek, modern design.
Product Components
The PETLIBRO Automatic Pet Feeder PLAF008 includes the following components:
- Automatic Pet Feeder Unit (2L capacity)
- Food Bowl (Stainless Steel)
- Power Adapter
- User Manual
Note: 3 x D-size alkaline batteries are required for battery operation and are not included.
Setup
1. Power Options
The feeder can be powered in two ways:
- AC Adapter: Connect the provided power adapter to the feeder and a wall outlet. This is the primary power source.
- Battery Backup: For cordless operation or as a backup during power outages, insert 3 D-size alkaline batteries (not included) into the battery compartment at the bottom of the unit. Battery life can last up to 180 days.

Image: An internal view of the PETLIBRO feeder showing the battery compartment designed for three D-size batteries, highlighting its cordless operation capability.
2. Assembly and Food Filling
- Place the stainless steel food bowl securely in front of the feeder's dispensing outlet.
- Open the top lid of the feeder.
- Fill the food tank with dry pet kibble. The feeder supports kibble sizes from 2mm to 15mm.
- Close the top lid firmly. Ensure it is locked to prevent pets from accessing the food. The lid features a sealed silicone strip to maintain food freshness and deter pests.

Image: A close-up of the PETLIBRO feeder's top lid, illustrating the locking mechanism. A hand is shown pressing the center to engage or disengage the lock, indicated by green (locked) and grey (unlocked) icons.
Operating Instructions
1. Control Panel Overview
The control panel is located on the front of the feeder, protected by a cover to prevent accidental presses by pets.

Image: The PETLIBRO feeder's control panel with a protective cover. An arrow indicates how to press the center to open the panel, preventing pets from tampering with settings.

Image: A detailed view of the PETLIBRO feeder's display screen showing various status indicators: "LOW FOOD" for low kibble, "STUCK" for food blockage, and a battery icon for low battery level. The current time and meal schedule are also visible.
2. Setting the Clock
Refer to the detailed instructions in the included user manual for setting the current time on the feeder's display.
3. Programming Feeding Schedules
The feeder allows for customizable feeding schedules:
- Meals per Day: You can program up to 6 meals per day.
- Portions per Meal: Each meal can be set from 0 to 16 portions. One portion is approximately 11ml or 1/24 of a cup.
Follow the on-screen prompts and button controls to set desired meal times and portion sizes. Ensure to save your settings after programming.
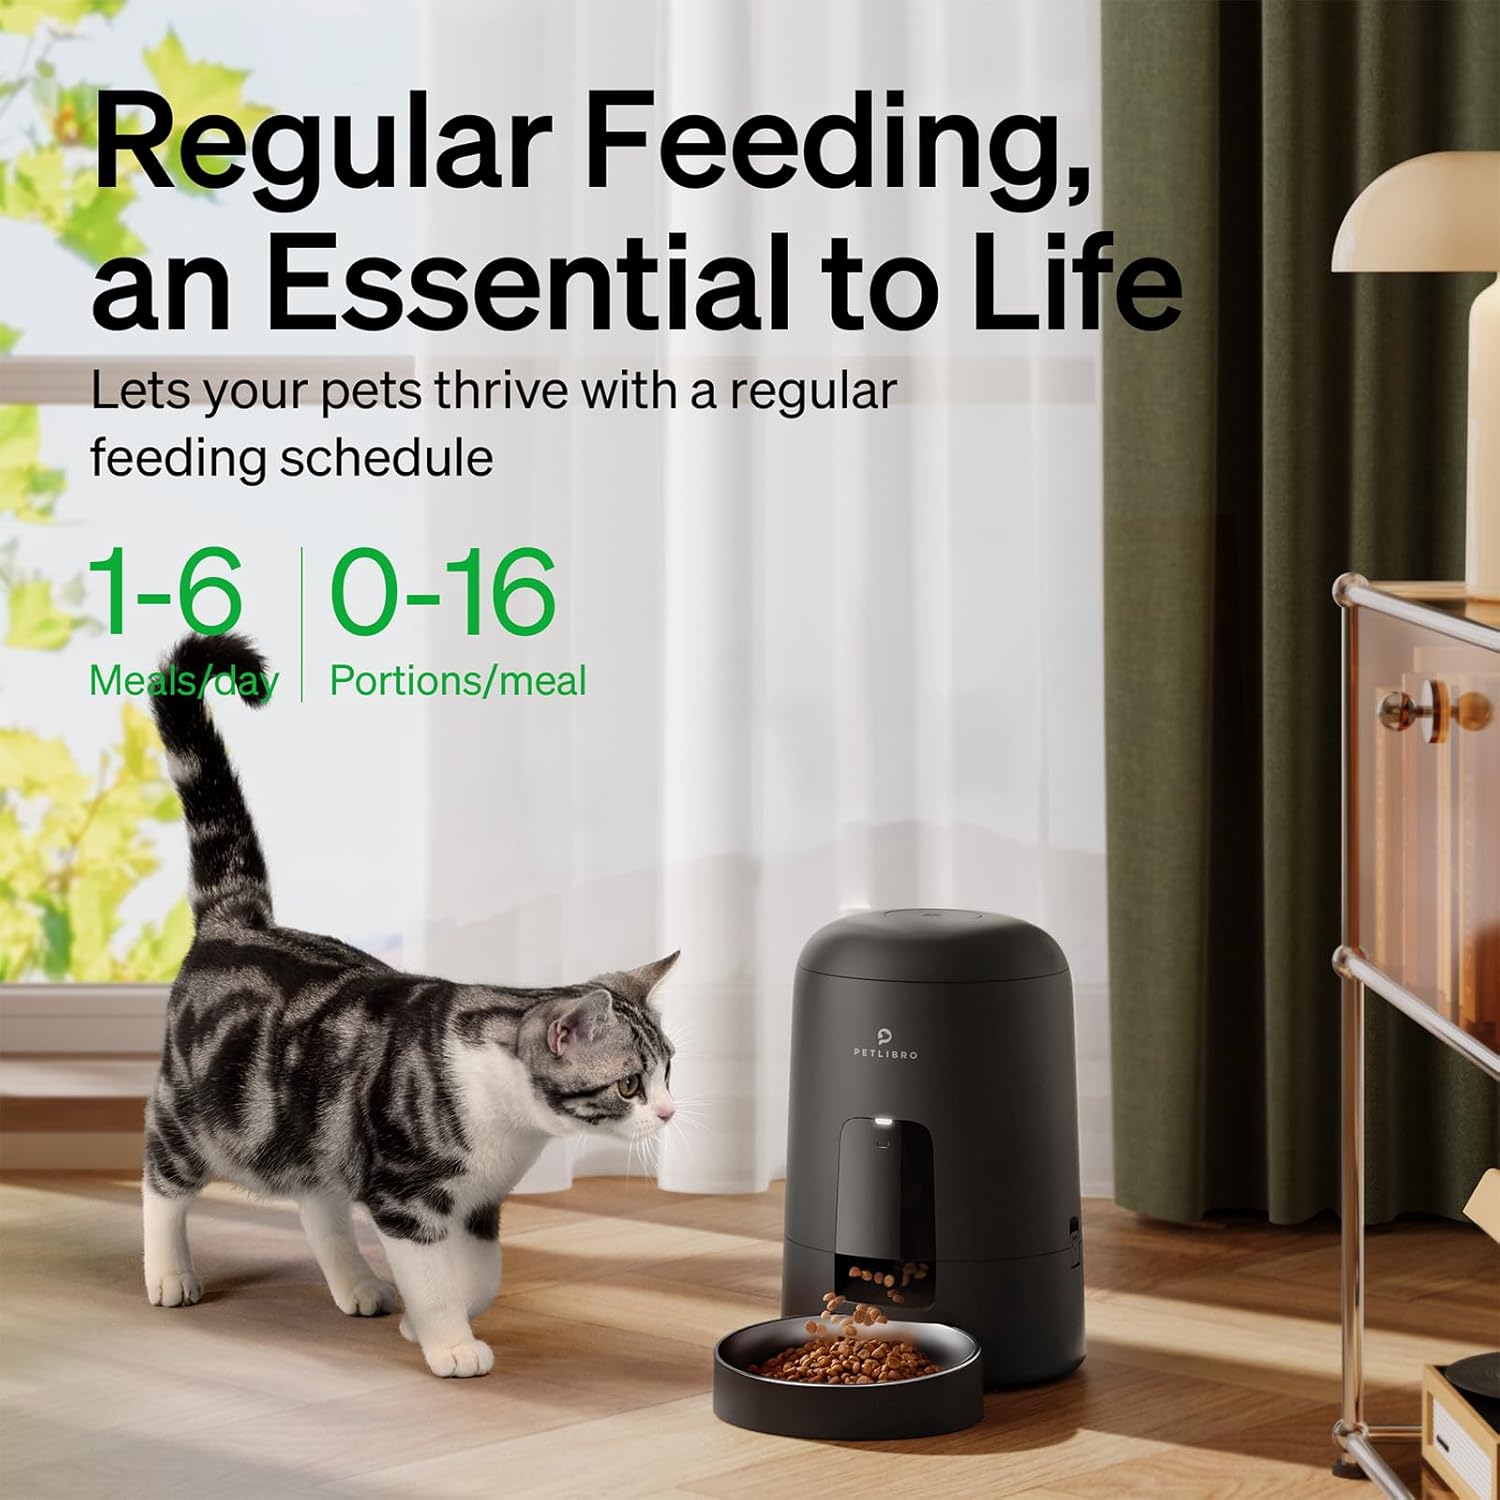
Image: A visual representation of the PETLIBRO feeder's scheduling capabilities, showing "1-6 Meals/day" and "0-16 Portions/meal" settings. A cat is shown walking past the feeder, emphasizing regular feeding.
4. Manual Feeding
The feeder typically includes a manual feed button. Pressing this button will dispense one portion of food immediately. Consult your specific manual for exact button location and function.
Maintenance
Cleaning Instructions
Regular cleaning is essential for hygiene and proper functioning. The lid, food tank, food bowl, and inner rotor are detachable for easy cleaning.
- Disconnect the power adapter and remove batteries before cleaning.
- Detach the food bowl, lid, food tank, and inner rotor.
- Wash the food bowl, lid, food tank, and inner rotor with mild soap and water. Rinse thoroughly.
- Important: The main feeder base is not washable. Wipe the base with a dry cloth only.
- Ensure all parts are completely dry before reassembling and refilling with food.

Image: An exploded view of the PETLIBRO feeder, showing its detachable components: the lid, food tank, food bowl, and inner rotor. This illustrates the ease of disassembly for cleaning.
Troubleshooting
| Problem | Possible Cause | Solution |
|---|---|---|
| Feeder not dispensing food. |
|
|
| "LOW FOOD" indicator is on. | Food level in tank is low. | Refill the food tank. |
| "STUCK" indicator is on. | Food blockage in the dispensing mechanism. | Turn off the feeder, disassemble the food tank and rotor, clear any jammed kibble, and reassemble. |
| Feeder not turning on. |
|
|
Specifications
- Model: PLAF008
- Capacity: 2 Liters
- Dimensions (L x W x H): 18.99 x 19 x 29.5 cm (7.48 x 7.48 x 11.61 inches)
- Weight: 1.62 kg (3.57 lbs)
- Material: ABS and SUS 304 Stainless Steel
- Color: Black
- Power Source: AC Power Adapter (included) or 3 x D-size Alkaline Batteries (not included)
- Battery Life: Up to 180 days (approx. 6 months)
- Recommended Kibble Size: 2mm - 15mm
- Meals per Day: Up to 6
- Portions per Meal: 0-16 (approx. 11ml per portion)
- Special Features: Customizable feeding program, security lock, sealed body (ant-resistant), paw-proof button panel.
- Care Instructions: Hand wash detachable parts only. Wipe base with dry cloth.
- Recommended for: Cats, small dogs, small animals.
Safety Information
- Use only dry pet food. Do not use wet, canned, or moist food.
- Keep out of reach of children and pets when not in use or during maintenance.
- Do not immerse the main feeder base in water or any other liquid.
- Ensure the feeder is placed on a stable, level surface.
- Regularly check the food level and battery status.
- Do not attempt to repair or modify the device yourself. Contact customer support for assistance.
- This product is intended for indoor use only.
Warranty and Support
For warranty information, technical support, or any questions regarding your PETLIBRO Automatic Pet Feeder PLAF008, please refer to the contact details provided in the packaging or visit the official PETLIBRO website. Please retain your proof of purchase for warranty claims.


