1. Introduction
This manual provides essential information for the setup, operation, and maintenance of your Klipsch Reference Premiere RP-8060FA II 5.1.2 Home Theater System, paired with the Onkyo TX-NR6100 7.2 Channel THX Certified Network AV Receiver. The system is designed to deliver cinematic sound through advanced audio technologies, including a larger Tractrix horn, updated Cerametallic woofers, a vented tweeter design, and Tractrix ports. The Onkyo receiver ensures precise sound and image delivery, enhancing your home theater experience.
2. What's in the Box
Your Klipsch Reference Premiere RP-8060FA II 5.1.2 Home Theater System package includes the following components:
- Two (2) RP-8060FA II Dolby Atmos Floorstanding Speakers: These speakers feature built-in up-firing speakers for immersive Dolby Atmos sound.
- One (1) RP-504C II Center Channel Speaker: Designed for clear dialogue and front soundstage presence.
- One (1) Pair of RP-600M II Bookshelf Speakers: Ideal for surround sound channels.
- One (1) RP-1200SW 12" Subwoofer: Delivers deep, powerful bass.
- One (1) Onkyo TX-NR6100 7.2 Channel AV Receiver: The central hub for processing and amplifying audio and video signals.
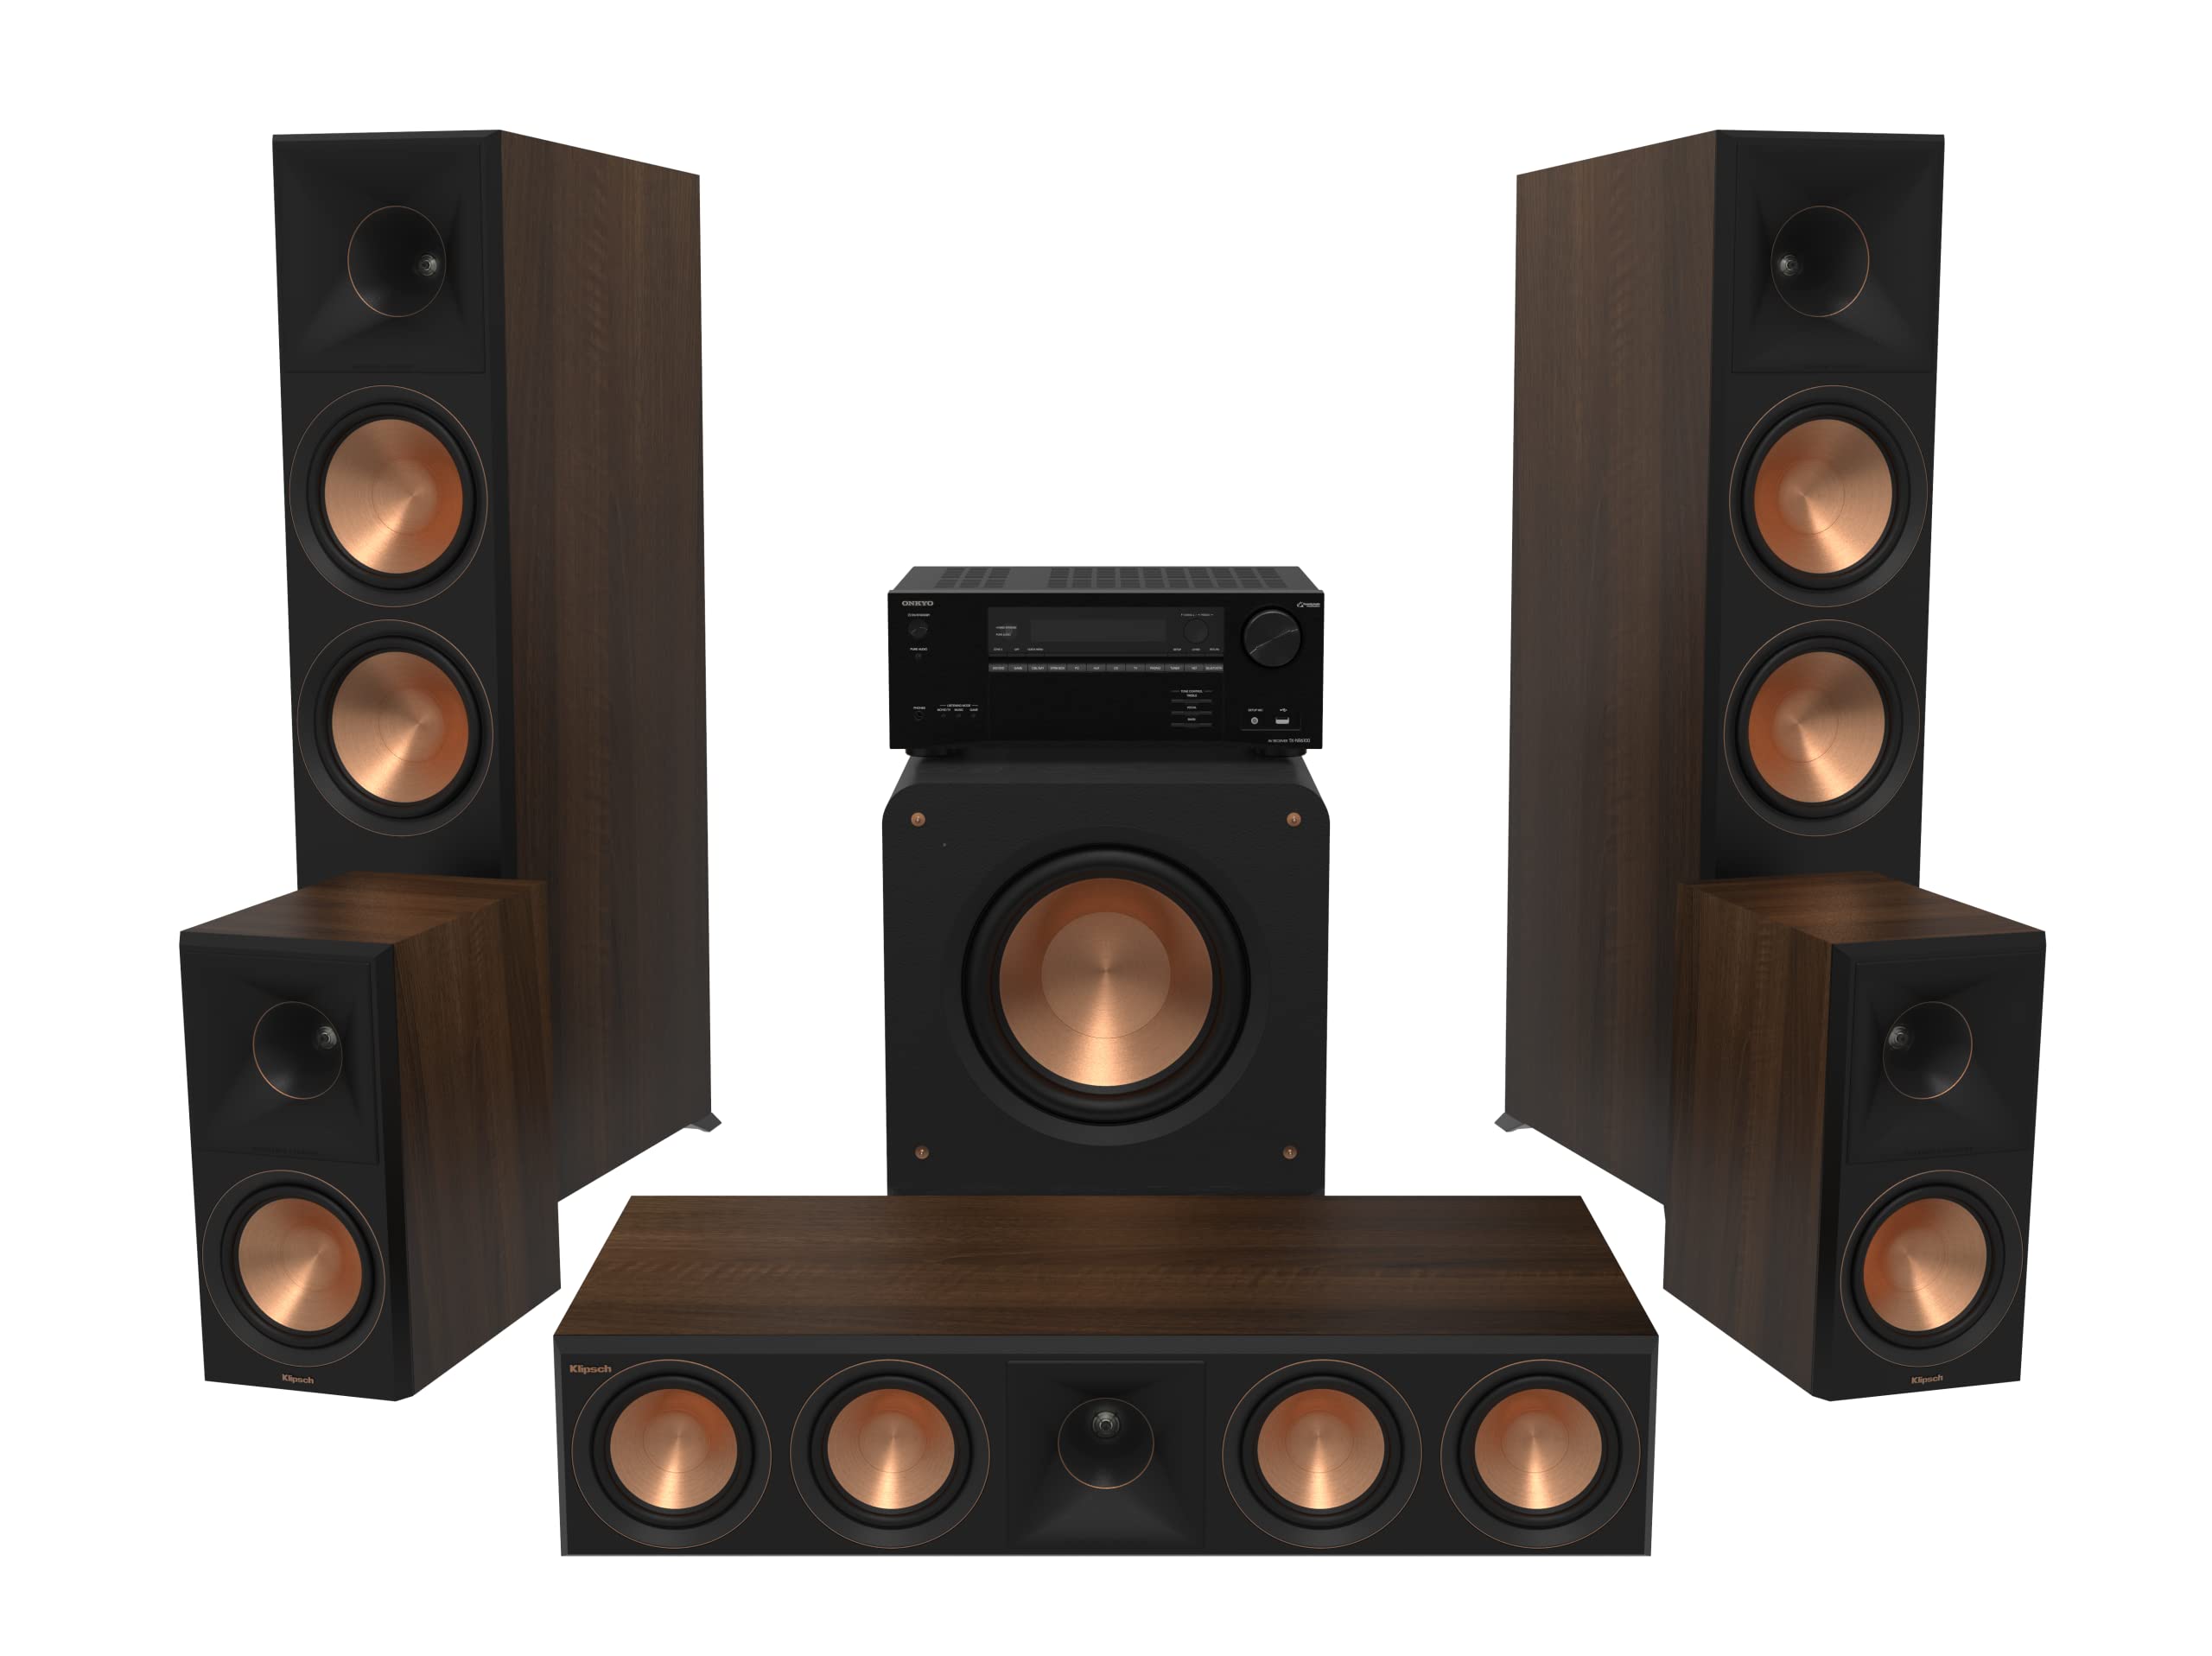
Image: Overview of the Klipsch Reference Premiere Home Theater System components.
3. Key Features
The Klipsch Reference Premiere RP-8060FA II system and Onkyo TX-NR6100 receiver incorporate advanced technologies for superior audio performance:
- THX Select Certified Onkyo TX-NR6100 Receiver: Ensures precision sound and images, meeting rigorous performance standards.
- Larger 90° x 90° Silicone Composite Hybrid Tractrix Horn: Provides efficient transfer of high-frequency waves for crisp, clear sound.
- 1” Linear Travel Suspension (LTS) Titanium Diaphragm Tweeter: Minimizes distortion for enhanced, detailed high-frequency performance.
- All-New Cerametallic Woofers: Deliver flawless sound reproduction with minimum distortion and maximum efficiency.
- Vented Tweeter Design: Reduces standing waves that create unwanted harmonics, improving detail and clarity.
- Tractrix Ports: Utilize Tractrix geometry for efficient, fast air transfer, reducing port noise and enhancing low frequencies.
- Enhanced Cabinet Bracing and Divided Cabinet Volumes: Improves structural integrity and acoustic performance.
- Refined Dolby Atmos Connections: Simplifies integration of Dolby Atmos up-firing speakers.
Video: An overview of the Klipsch Reference Premiere speaker series features and benefits.
4. Setup
Proper setup is crucial for optimal performance. Follow these general guidelines:
4.1 Speaker Placement
- Front Left/Right (RP-8060FA II): Place these floorstanding speakers equidistant from your primary listening position and your display. Ensure they are at least 6-12 inches from the wall for optimal bass response.
- Center Channel (RP-504C II): Position directly above or below your display, centered with the screen, to ensure clear dialogue.
- Surround Left/Right (RP-600M II): Place these bookshelf speakers to the sides or slightly behind your main listening position, ideally at ear level when seated.
- Subwoofer (RP-1200SW): Experiment with placement. A corner position often provides the most bass output, but other locations may offer a more balanced sound.

Image: Klipsch RP-8060FA II Floorstanding Speaker, showing its design and drivers.
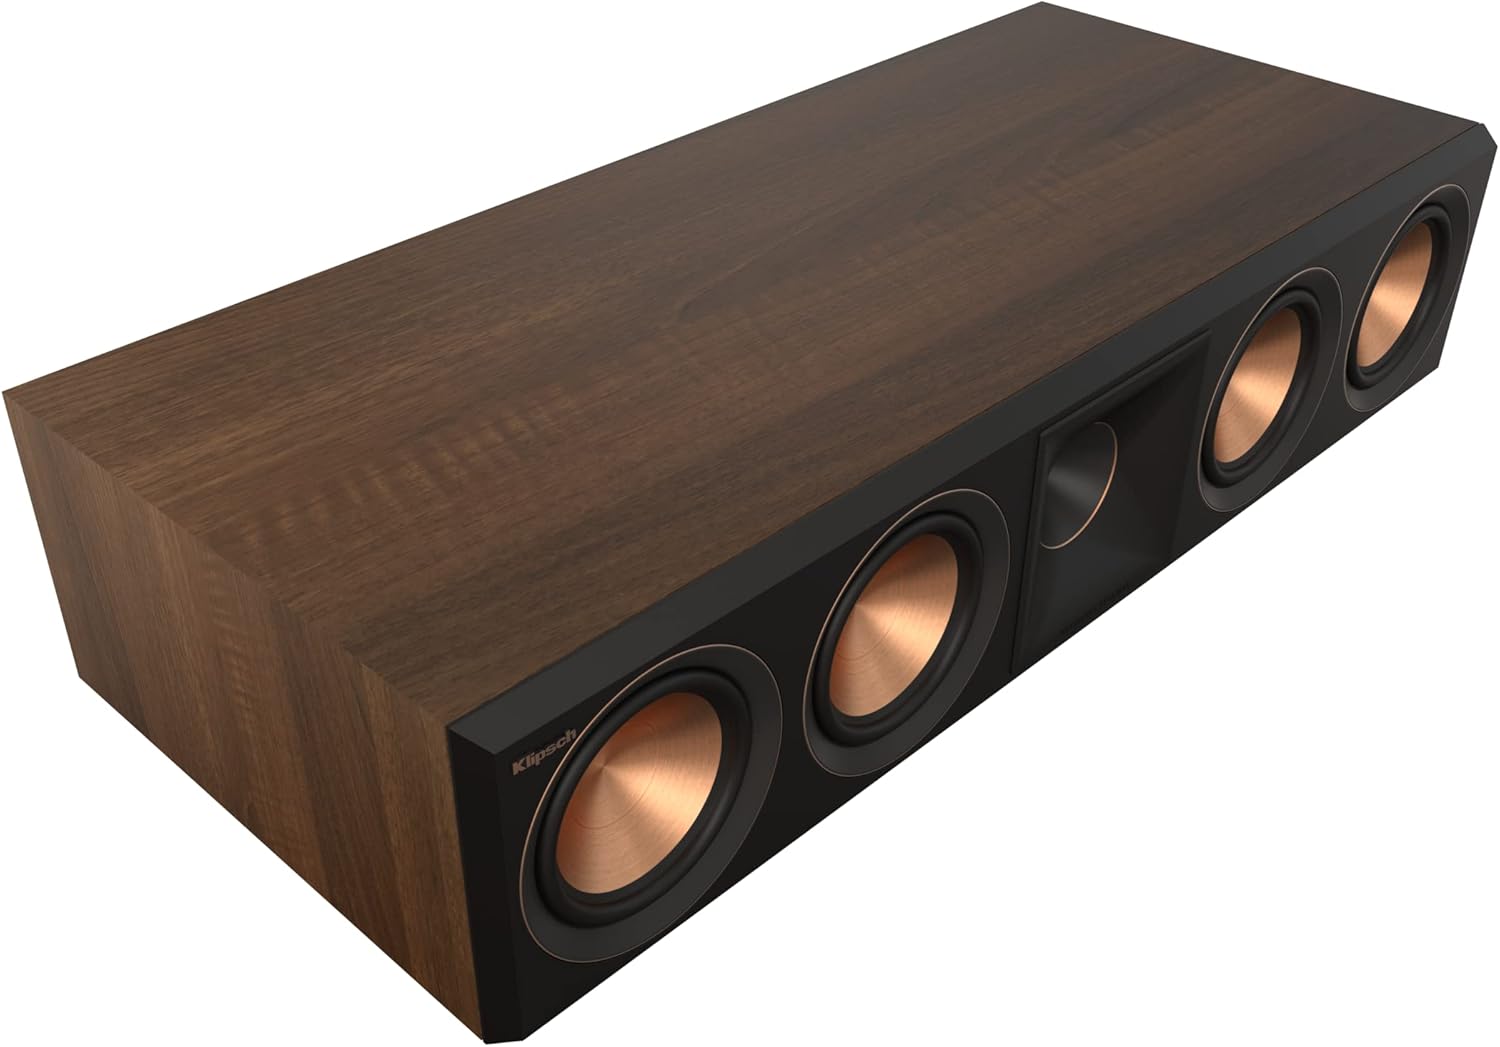
Image: Klipsch RP-504C II Center Channel Speaker, designed for clear dialogue.

Image: Klipsch RP-600M II Bookshelf Speakers, suitable for surround sound.

Image: Klipsch RP-1200SW Subwoofer, providing deep bass.
4.2 Wiring Connections
- Speaker Wire: Use high-quality speaker wire to connect each speaker to the corresponding speaker terminals on the Onkyo TX-NR6100 receiver. Ensure correct polarity (+ to + and - to -).
- Dolby Atmos Connections: For the RP-8060FA II floorstanding speakers, connect the main speaker terminals to the Front Left/Right outputs on the receiver, and the up-firing speaker terminals to the Height/Dolby Atmos outputs.
- Subwoofer Connection: Connect the RP-1200SW subwoofer to the receiver's SUBWOOFER PRE-OUT using an RCA cable.
- Source Devices: Connect your audio/video sources (Blu-ray player, streaming device, game console) to the appropriate HDMI or other input ports on the Onkyo TX-NR6100 receiver.
- Power: Connect the Onkyo receiver and the powered subwoofer to a suitable power outlet.

Image: Front view of the Onkyo TX-NR6100 AV Receiver.
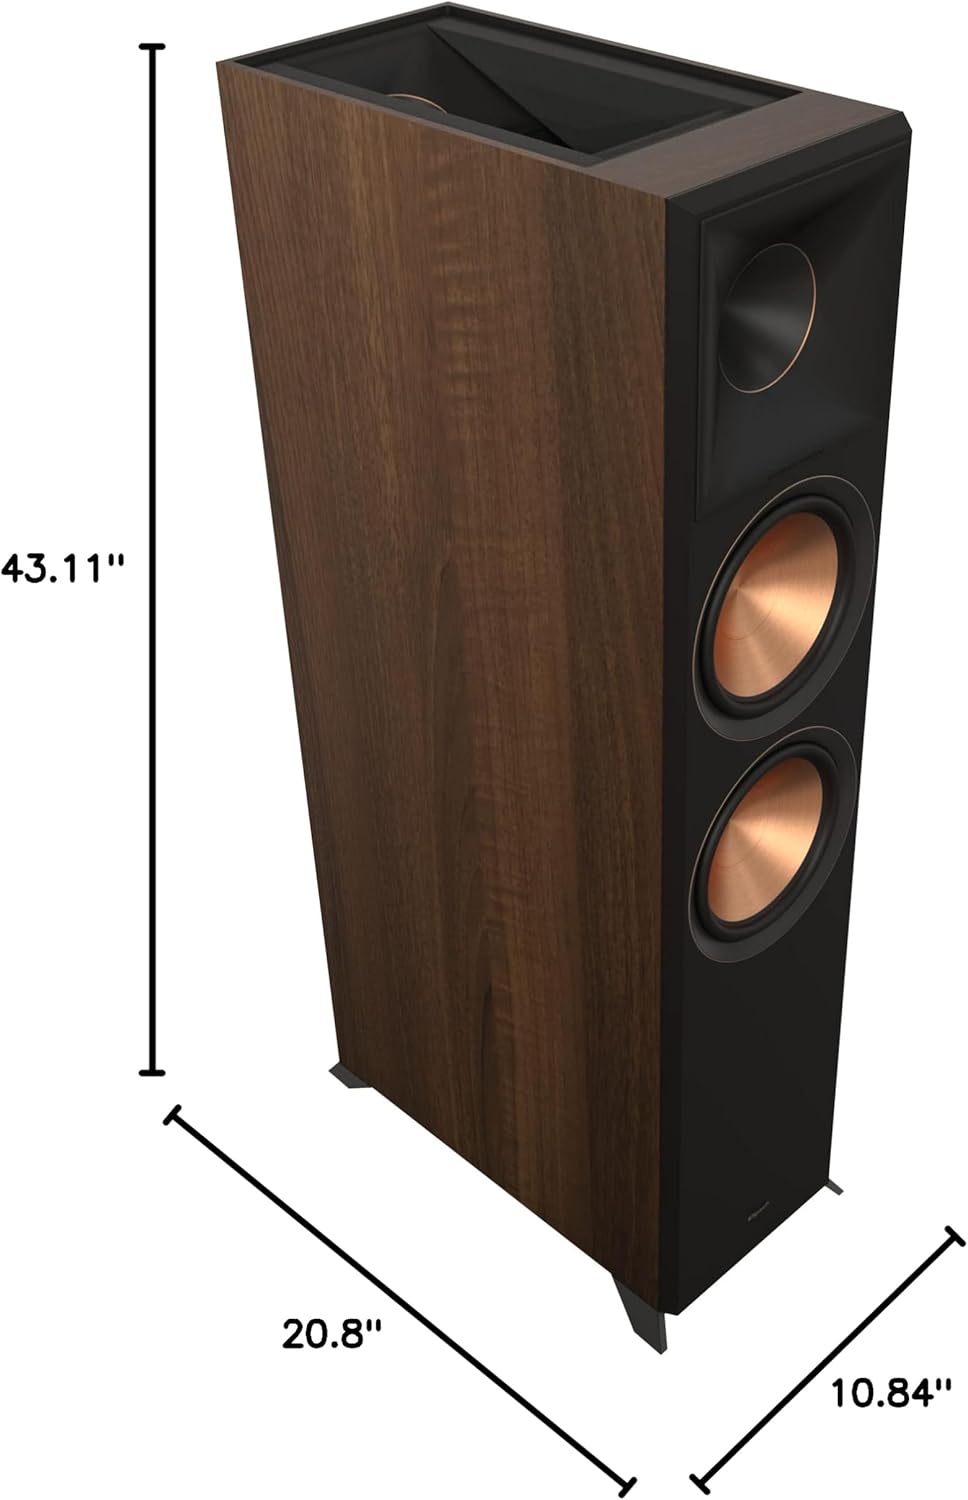
Image: Rear panel of the Onkyo TX-NR6100 AV Receiver, showing various input and output connections.
4.3 Initial Configuration (Onkyo TX-NR6100)
Refer to the Onkyo TX-NR6100 owner's manual for detailed instructions on initial setup, including:
- Speaker Calibration: Use the included setup microphone and the receiver's automatic calibration system (e.g., AccuEQ) to optimize speaker levels, distances, and crossover frequencies for your room.
- Input Assignment: Assign your connected source devices to the appropriate input selections on the receiver.
- Network Setup: Connect the receiver to your home network for streaming services and firmware updates.
5. Operating the System
Once set up, operating your home theater system is straightforward:
- Power On/Off: Use the power button on the Onkyo receiver or its remote control to turn the system on or off.
- Input Selection: Select the desired input source (e.g., Blu-ray, Game, TV) using the receiver's front panel buttons or remote.
- Volume Control: Adjust the master volume using the large knob on the receiver or the remote control.
- Sound Modes: Explore the various sound modes offered by the Onkyo receiver (e.g., Dolby Atmos, DTS:X, THX, Stereo) to match your content and preferences.
- Subwoofer Control: Adjust the subwoofer's volume and crossover frequency as needed, typically through the receiver's menu or the subwoofer's rear panel controls.
6. Maintenance
To ensure the longevity and performance of your system:
- Cleaning: Gently wipe speaker cabinets and receiver surfaces with a soft, dry cloth. Avoid abrasive cleaners or solvents.
- Ventilation: Ensure the Onkyo receiver has adequate ventilation to prevent overheating. Do not block ventilation openings.
- Placement: Avoid placing speakers in direct sunlight or near heat sources. Keep them away from moisture.
- Connections: Periodically check all cable connections to ensure they are secure.
7. Troubleshooting
If you encounter issues, refer to these common troubleshooting steps:
- No Sound:
- Check all power connections for the receiver and subwoofer.
- Verify speaker wire connections at both the receiver and speakers.
- Ensure the correct input source is selected on the receiver.
- Check the volume level on the receiver and ensure it is not muted.
- Distorted Sound:
- Reduce the volume to see if distortion decreases.
- Check speaker wire connections for any loose strands or short circuits.
- Ensure speakers are not overdriven.
- No Bass from Subwoofer:
- Verify the subwoofer's power is on and its volume is adjusted.
- Check the RCA cable connection from the receiver to the subwoofer.
- Ensure the subwoofer output is enabled in the receiver's settings.
- Remote Control Not Working:
- Replace batteries in the remote control.
- Ensure there are no obstructions between the remote and the receiver.
For more detailed troubleshooting, consult the specific owner's manuals for the Onkyo TX-NR6100 receiver and Klipsch speakers.
8. Specifications
Key specifications for the Klipsch Reference Premiere RP-8060FA II 5.1.2 Home Theater System and Onkyo TX-NR6100 AV Receiver:
| Feature | Specification |
|---|---|
| Surround Sound Channel Configuration | 5.1.2 |
| Subwoofer Diameter | 12 Inches (RP-1200SW) |
| Speaker Type | Component (Floorstanding, Center, Bookshelf, Subwoofer) |
| Control Method | Remote |
| Power Source | Corded Electric |
| Input Voltage (Receiver) | 120 Volts |
| Item Weight (System) | Approximately 85 pounds (total) |
| Model Number | RPW-1150000020D0 |
| UPC | 743878053135 |

Image: Klipsch RP-8060FA II Floorstanding Speaker with indicated dimensions (43.11"H x 10.84"W x 20.8"D).
9. Warranty and Support
This Klipsch Home Theater System comes with a limited warranty. Please refer to the warranty documentation included with your product for specific terms and conditions. For technical support, service, or warranty claims, please contact Klipsch customer service or visit the official Klipsch website.


