
1. Introduction
The Hyuduo Buck Boost Converter is a versatile power module designed for various applications including solar charging, lithium battery charging, and as a regulated power supply. It features a wide input voltage range of DC 7-80V and an adjustable output voltage range of DC 1.4-79V, with a maximum output current of 20A and power up to 300W. This module incorporates MPPT (Maximum Power Point Tracking) functionality for solar applications and includes essential protections for stable and reliable operation.
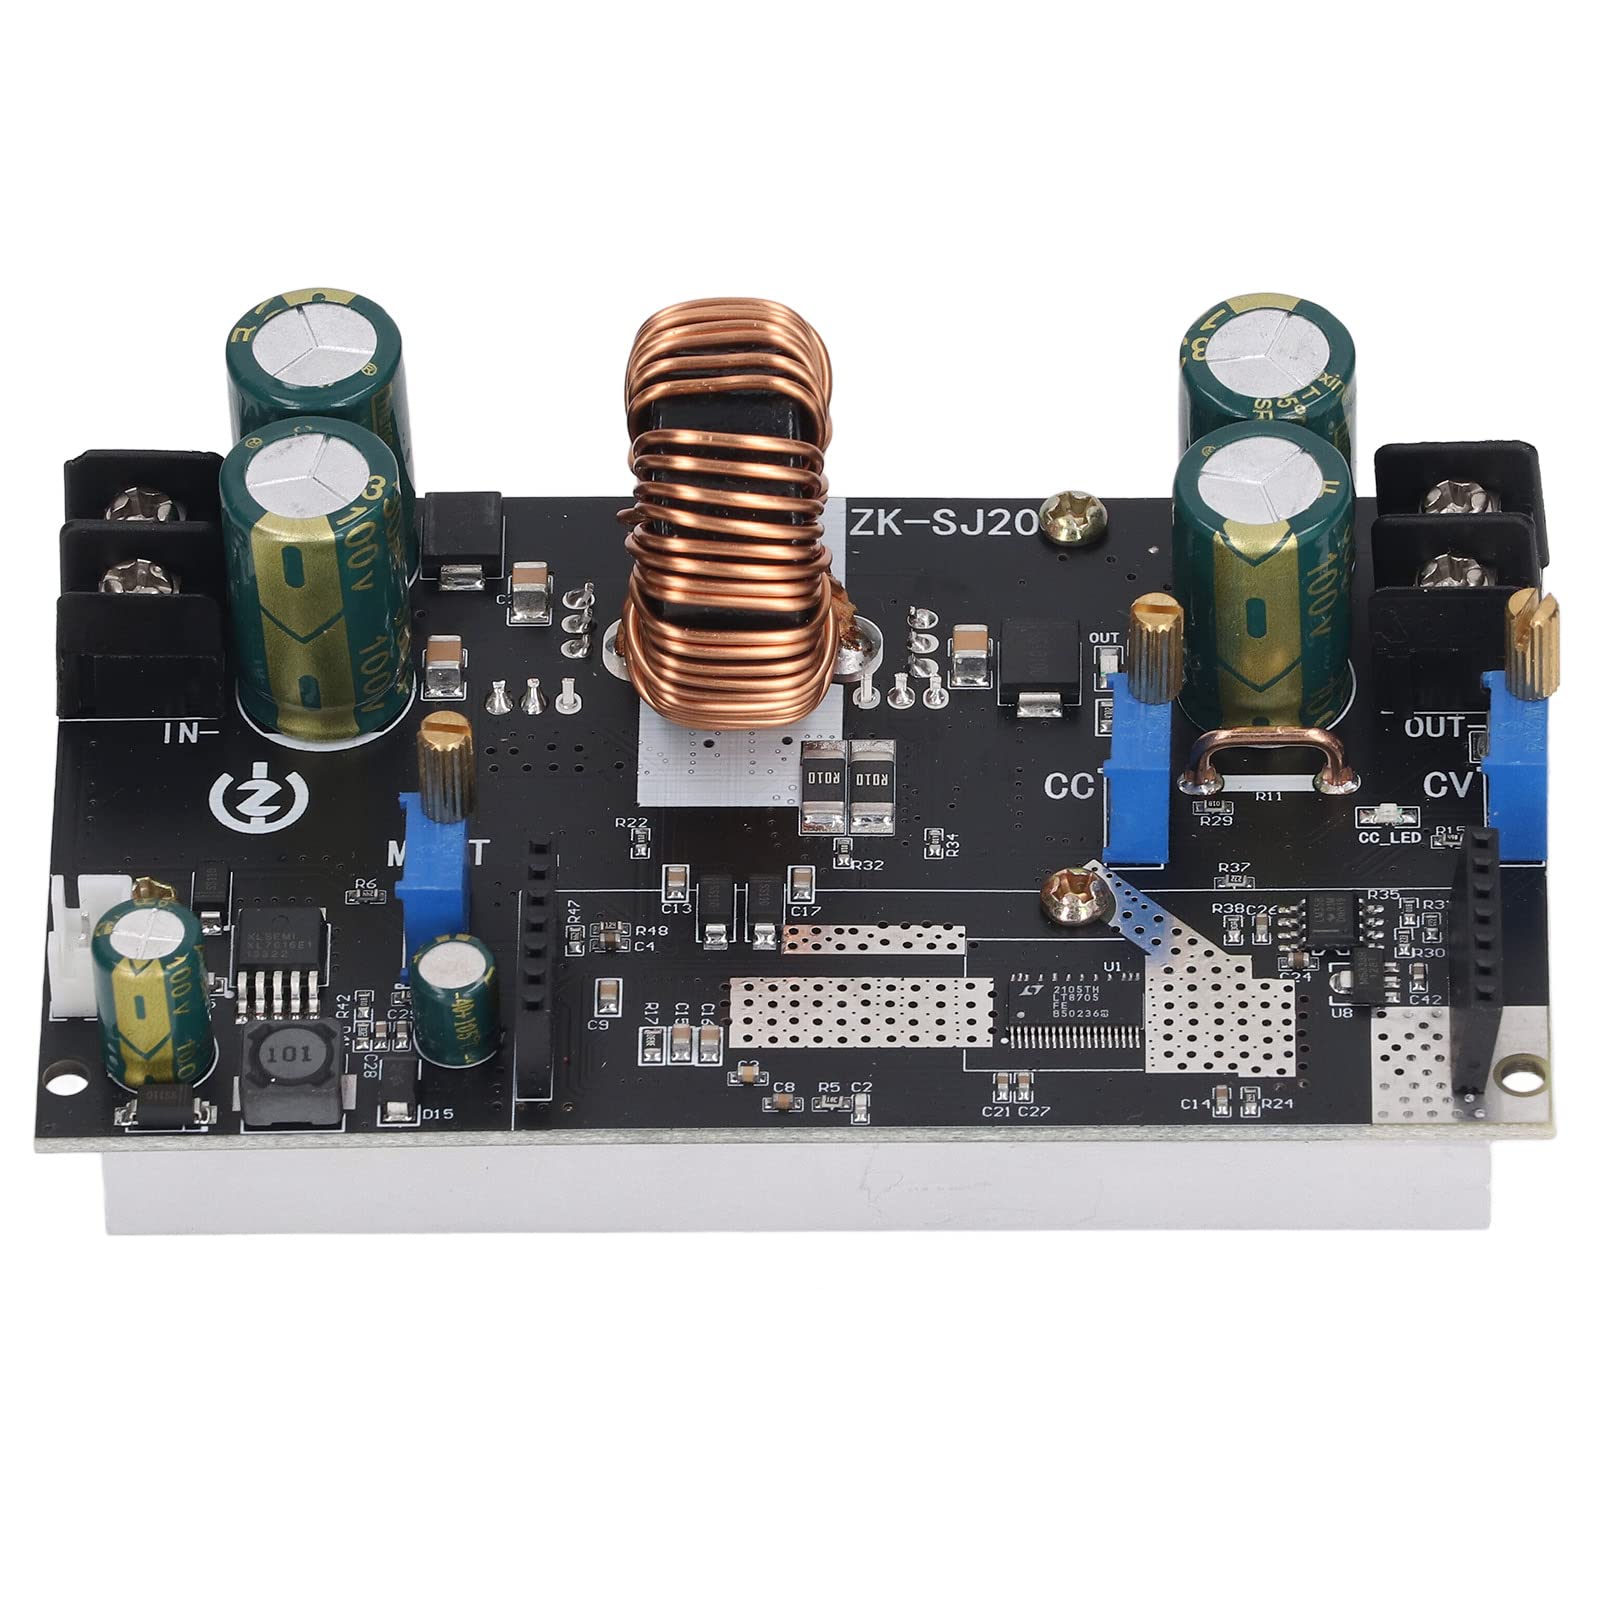
Figure 1: General overview of the Hyuduo Buck Boost Converter module, showcasing its compact design and main components.
2. Safety Information
- Always ensure correct input and output polarity. Incorrect connections can damage the module and connected devices.
- Do not exceed the maximum input voltage of 80V DC or the maximum output current of 20A.
- Ensure adequate ventilation around the module, especially during high-power operation, to prevent overheating. The integrated heat sink aids in dissipation, but ambient conditions are important.
- Avoid touching the module components during operation, as some parts may become hot.
- Disconnect power before making any adjustments or connections.
- This module is designed for DC applications. Do not connect to AC power sources.
- The module features anti-backflow protection, eliminating the need for external diodes when connecting to batteries.
3. Product Features
- Wide Input Voltage Range: DC 7-80V.
- Adjustable Output Voltage: DC 1.4-79V.
- High Output Current: Up to 20A.
- High Power Output: Up to 300W (with overpower protection).
- MPPT Function: Integrated Maximum Power Point Tracking for solar charging applications.
- Constant Current (CC) and Constant Voltage (CV) Modes: For precise control.
- Anti-Backflow Protection: Prevents current flow back into the input source, useful for battery charging.
- Overpower Protection (OPP): Automatically shuts off output if power exceeds 300W, displaying 'OPP'.
- Enhanced Heat Dissipation: Designed for stable performance under high power loads.
- Real-Time Control: Allows for monitoring and adjustment of MPPT, output voltage, and current.
4. Specifications
| Parameter | Value |
|---|---|
| Input Voltage Range | DC 7-80V |
| Output Voltage Range | DC 1.4-79V |
| Voltage Display Range | 1.40-80.00V (accuracy ± 0.1V) |
| Output Current Regulation Range | 0-20A |
| Current Display Range | 0.00A-20.00A (accuracy ± 0.03A) |
| Maximum Output Power | 300W (with Overpower Protection) |
| MPPT Function | Yes |
| Anti-Backflow Function | Yes |
| Constant Current & Current Limiting | Yes |
| Product Size | Approx. 108 x 64 x 48mm / 4.25 x 2.52 x 1.89in |
| Item Weight | 0.1 Kilograms |
5. Setup and Installation
Follow these steps for proper setup and installation of your Buck Boost Converter:
- Identify Terminals: Locate the input terminals (IN+ and IN-) and output terminals (OUT+ and OUT-) on the module.
- Connect Input Power: Connect your DC power source (e.g., solar panel, DC power supply) to the IN+ and IN- terminals. Ensure correct polarity.
- Connect Output Load: Connect your load (e.g., battery, LED driver, device requiring regulated power) to the OUT+ and OUT- terminals. Ensure correct polarity.
- Initial Adjustment (Optional but Recommended): Before connecting a sensitive load, it is recommended to adjust the output voltage and current limit to your desired values. See Section 6 for adjustment details.
- Mounting: Secure the module in a well-ventilated area using appropriate mounting hardware. Ensure no conductive materials can short circuit the board.

Figure 2: Clear top view showing the labeled input (IN+) and output (OUT+) terminals, along with indicators for MPPT, CC (Constant Current), and CV (Constant Voltage) adjustments.

Figure 3: Angled view of the converter, highlighting the input and output screw terminals and the large inductor.
6. Operating Instructions
The module features three adjustment potentiometers (knobs) for precise control:
- MPPT Voltage Regulation: Adjusts the Maximum Power Point Tracking voltage for solar panel optimization.
- Output Voltage Regulation (CV): Sets the desired output voltage.
- Output Current Limiting Regulation (CC): Sets the maximum output current.

Figure 4: Close-up of the adjustment potentiometers (blue components) for MPPT, output voltage, and current limiting.
6.1. Adjusting Output Voltage (CV)
- Connect the input power source.
- Do not connect the load yet, or connect a dummy load that can handle the maximum expected voltage.
- Use a multimeter to measure the voltage across the OUT+ and OUT- terminals.
- Carefully turn the Output Voltage Regulation (CV) potentiometer until the desired output voltage is achieved. Turn clockwise to increase voltage, counter-clockwise to decrease.
6.2. Adjusting Output Current Limit (CC)
- First, set the output voltage as described above.
- Connect a suitable load that will draw current, or short-circuit the output terminals briefly (only if your power source can handle it and you are careful, or use an ammeter in series).
- Use an ammeter in series with the load to measure the output current.
- Carefully turn the Output Current Limiting Regulation (CC) potentiometer until the desired maximum current limit is achieved. Turn clockwise to increase current, counter-clockwise to decrease.
6.3. MPPT Adjustment (for Solar Charging)
When using the module for solar charging, the MPPT function helps extract maximum power from the solar panel.
- Connect the solar panel to the input (IN+ and IN-).
- Connect the battery to be charged to the output (OUT+ and OUT-).
- Adjust the MPPT Voltage Regulation potentiometer. This potentiometer sets the voltage at which the solar panel operates to deliver maximum power. Refer to your solar panel's specifications for its optimal operating voltage (Vmp).
- Adjust the output voltage (CV) and current limit (CC) according to your battery's charging requirements (e.g., constant voltage for lithium batteries, constant current for initial charging phase).
7. Maintenance
- Cleaning: Keep the module clean and free from dust and debris. Use a soft, dry brush or compressed air to clean the components and heat sink.
- Ventilation: Ensure the module is always operated in a well-ventilated environment to prevent thermal stress.
- Connections: Periodically check all wiring connections to ensure they are secure and free from corrosion.
- Inspection: Visually inspect the module for any signs of damage, such as burnt components or cracked solder joints.

Figure 5: Side view emphasizing the integrated heat sink for efficient thermal management during operation.
8. Troubleshooting
- No Output Voltage:
- Check input power supply.
- Verify input and output wiring polarity.
- Ensure the output voltage potentiometer is not set to its minimum or faulty.
- Output Voltage Fluctuates:
- Check for loose connections.
- Ensure the input power source is stable and within the specified range.
- Verify the load is not exceeding the module's capabilities.
- Output Current is Lower Than Expected:
- Check the current limit (CC) potentiometer setting.
- Ensure the load is capable of drawing the desired current at the set voltage.
- Check for overpower protection (OPP) activation if the total power exceeds 300W.
- Module Overheating:
- Reduce the load or ensure adequate ventilation.
- Verify the input voltage is not excessively high, causing higher internal dissipation.
- 'OPP' Displayed:
- The module has entered overpower protection. Reduce the output load to below 300W.
9. Warranty and Support
For warranty information and technical support, please refer to the documentation provided at the point of purchase or contact your vendor. Keep your purchase receipt as proof of purchase.