
AKO S1500 372951
Kerbl AKO SunPower S1500 372951 Pasture Fence Energizer User Manual
Model: S1500 372951
Introduction
The Kerbl AKO SunPower S1500 372951 is a powerful, compact solar-powered energizer designed for electric pasture fences. It is optimized for continuous, maintenance-free operation during the main grazing season, making it ideal for various livestock including horses, cattle, goats, chickens, and pigs.
This manual provides essential information for the proper setup, operation, and maintenance of your SunPower S1500 energizer to ensure optimal performance and longevity.
Product Features
- Microcontroller controlled for precise operation.
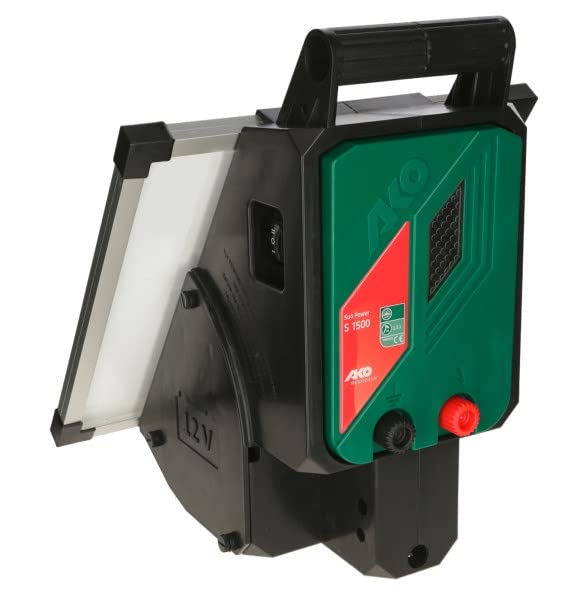
- Equipped with a High/Low/Off switch for flexible power management.
- Integrated lightning protection for enhanced safety.
- Intelligent and modern battery management system with deep discharge protection, ensuring operation even during extended periods of bad weather.
- Excellent efficiency for extended battery life.
- Robust, weather-resistant, and waterproof housing with a convenient carrying handle.
- Features a fence control LED and an optical battery indicator for easy monitoring.
Package Contents
Please verify that all the following items are included in your package:
- 1 x Solar Pasture Fence Energizer
- 1 x AGM Battery 12V 18Ah (Part No. 441125)
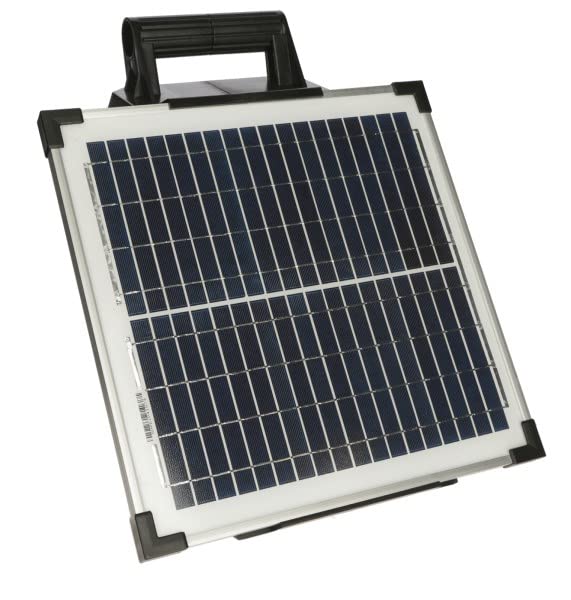
- 1 x Crystalline Solar Panel 12V, 15W (Part No. E262115) (not pre-mounted)
- 1 x 230V Battery Charger (Part No. 371032)
- 1 x Fence Connection Cable
- 1 x Ground Connection Cable
- 1 x 2-part Mounting Stake (Part No. 442385)
- 1 x Warning Sign
Setup Instructions
The SunPower S1500 is designed for quick and easy installation. Follow these steps for proper setup:
- Assemble the Mounting Stake: Connect the two parts of the mounting stake (442385) securely.
- Mount the Solar Panel: Attach the 12V, 15W crystalline solar panel (E262115) to the energizer unit. Ensure it is securely fastened and positioned to receive maximum sunlight throughout the day.
- Install the Energizer: Drive the assembled mounting stake into the ground in a suitable location near your fence line. Ensure the energizer is stable and the solar panel is unobstructed.
- Connect the Battery: Connect the 12V 18Ah AGM battery (441125) to the energizer according to the polarity markings.
- Connect to Fence: Use the provided fence connection cable to connect the energizer's positive (+) terminal (typically red) to your electric fence line.
- Connect to Ground: Use the provided ground connection cable to connect the energizer's negative (-) terminal (typically black or green) to a suitable ground stake. Ensure the ground stake is driven deep into moist soil for effective grounding.
- Initial Charge (Optional but Recommended): Before first use, you may use the 230V battery charger (371032) to fully charge the AGM battery. This ensures optimal performance from the start.
- Attach Warning Sign: Place the warning sign prominently on your fence to alert people and animals to the electric fence.

Operating Instructions
Once the energizer is set up and connected, operating it is straightforward:
- Power On: Locate the High/Low/Off switch on the unit.
- Set to "High" for maximum output, suitable for longer fences or areas with more vegetation.
- Set to "Low" for reduced output, suitable for shorter fences or when less power is required.
- Set to "Off" to completely power down the unit.
- Monitor Indicators: Observe the fence control LED and the optical battery indicator.
- The fence control LED should flash regularly, indicating that the energizer is sending pulses to the fence.
- The optical battery indicator will show the current charge level of the battery. Ensure it remains in the optimal range for continuous operation.
- Solar Charging: The integrated solar panel will continuously charge the 12V battery during daylight hours. Ensure the panel remains clean and unobstructed for efficient charging. The intelligent battery management system will prevent overcharging and deep discharge.
Maintenance
Regular maintenance ensures the longevity and optimal performance of your SunPower S1500 energizer:
- Solar Panel Cleaning: Periodically clean the surface of the solar panel with a soft, damp cloth to remove dust, dirt, and debris. A clean panel ensures maximum solar energy absorption.
- Battery Health: While the unit has deep discharge protection, it is good practice to occasionally check the battery indicator. If the unit is stored for extended periods, ensure the battery is fully charged before storage and recharged every few months to maintain its health.
- Connections: Regularly inspect all electrical connections (fence, ground, battery) to ensure they are secure and free from corrosion. Loose or corroded connections can reduce energizer performance.
- Grounding: Verify that the ground stake remains firmly in moist soil. Poor grounding can significantly reduce the effectiveness of your electric fence.
- Fence Line Inspection: Periodically check your fence line for vegetation growth, broken wires, or insulators. Excessive vegetation can short out the fence, reducing voltage.
Troubleshooting
If your SunPower S1500 energizer is not performing as expected, consider the following common issues and solutions:
- No Pulse/Weak Pulse:
- Check the battery charge level using the optical indicator. Recharge if necessary.
- Ensure all connections (battery, fence, ground) are secure and free of corrosion.
- Inspect the fence line for shorts caused by vegetation, broken insulators, or damaged wires. Clear vegetation and repair any damage.
- Verify the ground stake is properly installed and in moist soil. Add water if the soil is dry.
- Battery Not Charging:
- Ensure the solar panel is clean and free from obstructions (e.g., leaves, dirt).
- Verify the solar panel is positioned to receive maximum direct sunlight throughout the day.
- Check the connection between the solar panel and the energizer.
- Unit Not Turning On:
- Confirm the High/Low/Off switch is not in the "Off" position.
- Check the battery voltage. The battery might be completely discharged or faulty.
If problems persist after following these steps, please contact customer support.
Technical Specifications
| Parameter | Value |
|---|---|
| Charge Energy | 2.3 J |
| Max. Discharge Energy | 1.5 J |
| Max. Voltage | 10,000 V |
| No-load Voltage | 10,000 V |
| Voltage at 500 ohms | 4,800 V |
| Theoretical Fence Length (according to VDE) | 45 km |
| Max. Fence Length (no growth) | 15 km |
| Max. Fence Length (medium growth) | 3 km |
| Max. Fence Length (heavy growth) | 1.5 km |
| Number of Nets | 6 |
| Number of Ground Stakes | 2 |
| Current Consumption | 25 mA - 130 mA |
Warranty and Support
This product is manufactured by Kerbl. For specific warranty information, please refer to the documentation provided with your purchase or contact your retailer. Information regarding the availability of spare parts for this model is currently unavailable.
For technical support or inquiries, please contact the manufacturer or your authorized dealer. Always provide your product model number (S1500 372951) when seeking assistance.
Ask a question about this manual
Ask about setup, troubleshooting, compatibility, parts, safety, or missing instructions. Manuals+ will review the question and use this page’s manual context to help answer it.