
1. Product Overview
The MSI PRO B860-P WIFI is an ATX motherboard designed to support the latest Intel Core Ultra Processors (Series 2) with an LGA 1851 socket. It features a robust 12 Duet Rail Power System (P-PACK) VRM for stable power delivery and Core Boost architecture. This motherboard is equipped with DDR5 memory support, PCIe 5.0 x16 and 4.0 x16 slots, and multiple M.2 Gen5 and Gen4 connectors for high-speed storage. Advanced connectivity includes Wi-Fi 7 and 5Gbps LAN.

Image 1.1: MSI PRO B860-P WIFI Motherboard, packaging, and included Wi-Fi antenna.
2. Setup and Installation
Follow these steps for proper installation of your MSI PRO B860-P WIFI motherboard into your system.
2.1. Preparing the Motherboard
Before installation, ensure your workspace is static-free. Place the motherboard on a non-conductive surface.

Image 2.1: Top-down view of the MSI PRO B860-P WIFI Motherboard, highlighting the CPU socket, DIMM slots, and various headers.
2.2. CPU Installation
- Locate the LGA 1851 socket on the motherboard.
- Open the CPU socket lever.
- Carefully align the Intel Core Ultra Processor (Series 2) with the socket, ensuring the notches match.
- Gently place the CPU into the socket without forcing it.
- Close the socket lever to secure the CPU.
2.3. Memory (RAM) Installation
The motherboard supports DDR5 memory. It features 4x DDR5 DIMM SMT slots, allowing for extreme overclocking speeds up to 8600+ MT/s (OC).
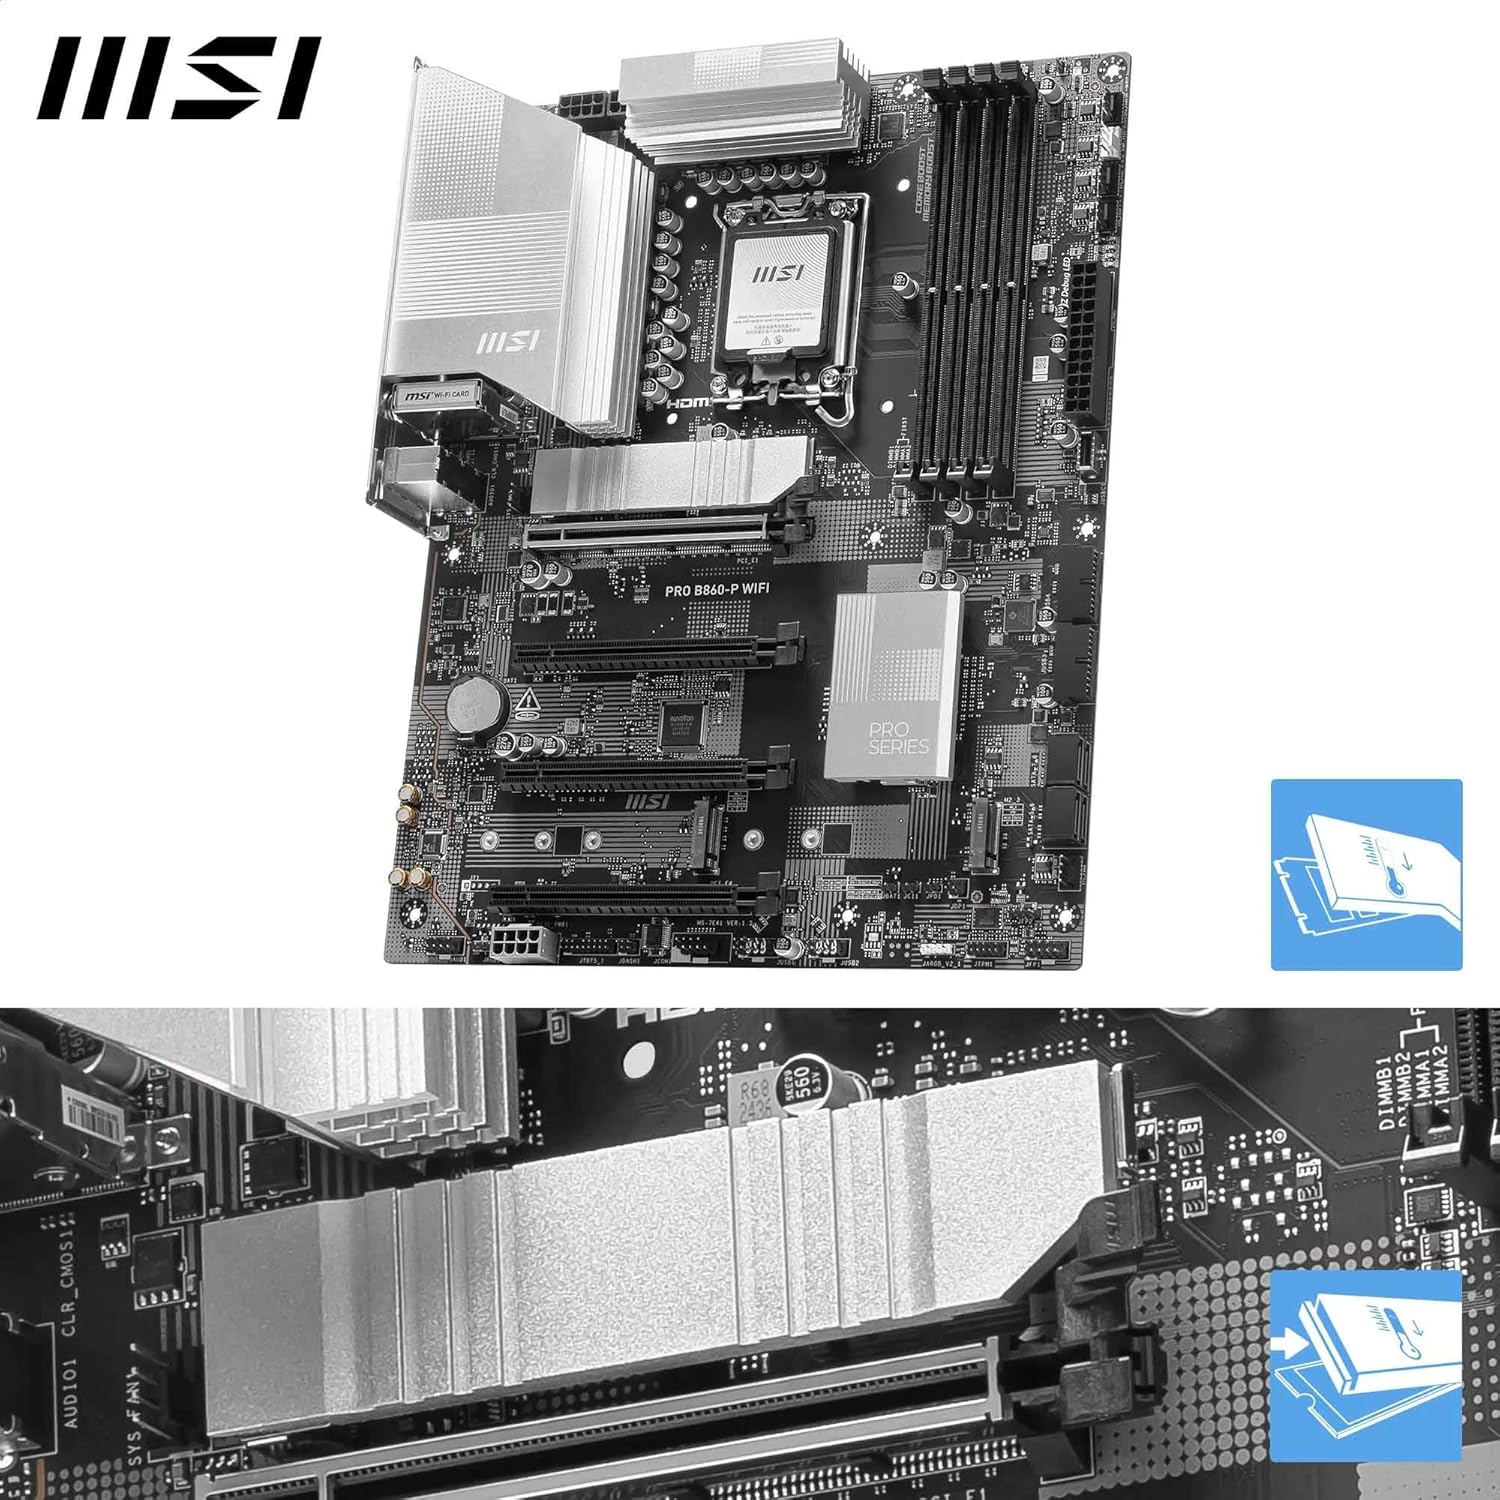
Image 2.2: Close-up view of the DDR5 DIMM slots and the EZ M.2 Shield Frozr II heatsink on the MSI PRO B860-P WIFI Motherboard.
- Open the clips on both ends of the DIMM slot.
- Align the memory module with the slot, ensuring the notch on the module matches the key in the slot.
- Press down firmly on both ends of the memory module until the clips snap into place.
2.4. Storage Device Installation (M.2 SSDs)
The motherboard offers triple M.2 connectors for high-speed storage:
- 1 x M.2 Gen5 x4 128 Gbps slot with EZ M.2 Shield Frozr II.
- 1 x M.2 Gen4 x4 64 Gbps slot.
- 1 x M.2 Gen4 x2 32 Gbps slot.
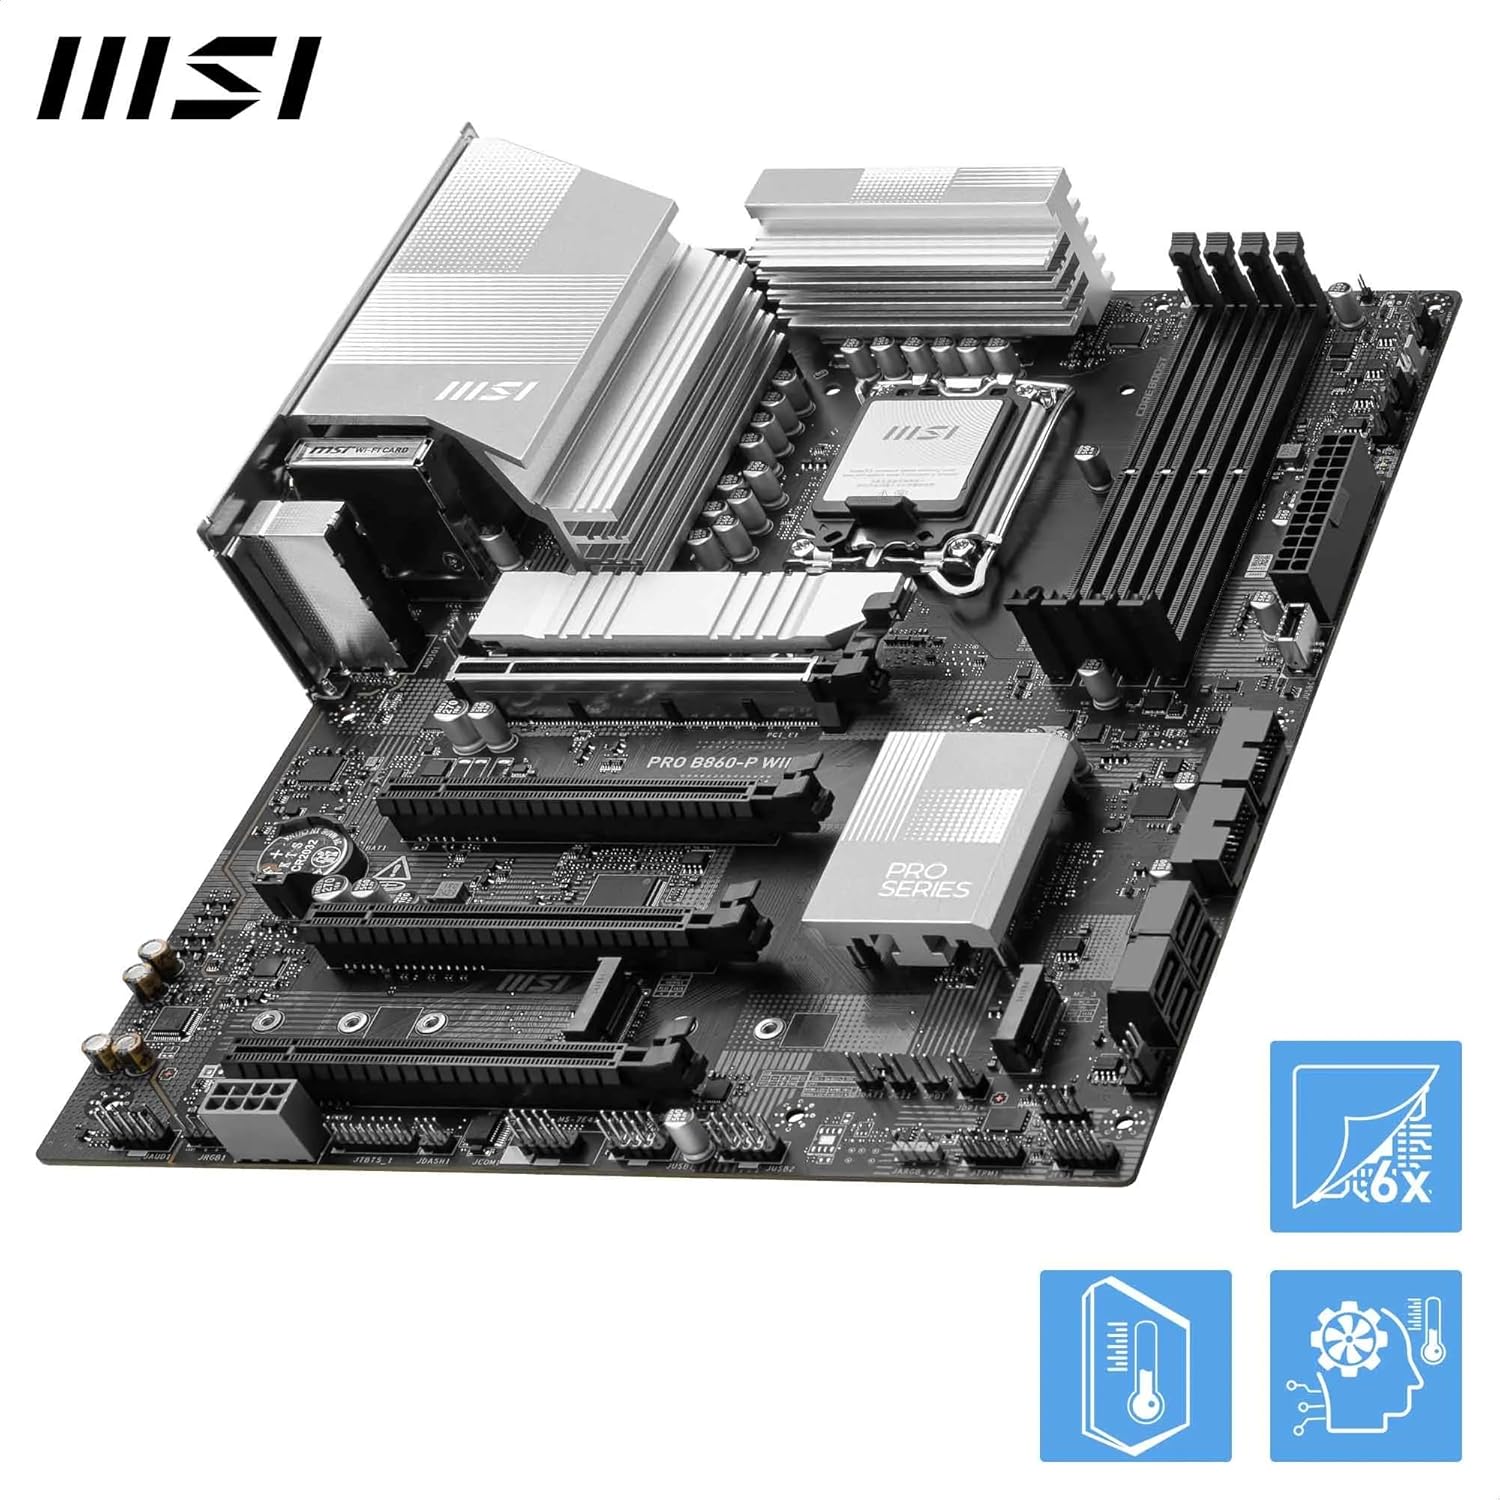
Image 2.3: Angled view of the MSI PRO B860-P WIFI Motherboard, highlighting the various heatsinks and M.2 slots for storage devices.
- Unscrew and remove the EZ M.2 Shield Frozr II heatsink if installing in the Gen5 slot.
- Insert the M.2 SSD into the corresponding slot at an angle.
- Gently push down the M.2 SSD and secure it with the provided screw or M.2 clip.
- Reattach the EZ M.2 Shield Frozr II heatsink if applicable.
2.5. Expansion Card Installation (PCIe)
The motherboard includes a PCIe 5.0 x16 slot with Steel Armor for graphics cards and additional PCIe 4.0 x16 slots for other expansion cards.

Image 2.4: Angled view of the MSI PRO B860-P WIFI Motherboard, illustrating the PCIe expansion slots and M.2 connectors.
- Align your expansion card with the desired PCIe slot.
- Press down firmly until the card is fully seated in the slot and the retention clip engages.
- Secure the card to your chassis with a screw.
2.6. Connecting Peripherals and Power
Connect all necessary power cables from your power supply unit (PSU) to the motherboard (24-pin ATX and 8-pin CPU power connectors). Connect SATA devices, front panel headers (USB, audio, power/reset buttons, LEDs), and case fans. The rear I/O panel provides various ports for external devices.

Image 2.5: Detailed view of the rear I/O panel on the MSI PRO B860-P WIFI Motherboard, showing DisplayPort, HDMI, Thunderbolt 4 Type-C, USB ports, 5G LAN, Wi-Fi 7 antenna connectors, and audio jacks.
The rear I/O panel includes:
- DisplayPort and HDMI for video output.
- Thunderbolt 4 Type-C with display output.
- Multiple USB 2.0, USB 5Gbps Type-A, and USB 10Gbps Type-A ports.
- 5Gbps LAN port.
- Wi-Fi 7 module with Bluetooth 5.4 antenna connectors.
- 7.1 HD audio jacks with Audio Boost.
- Clear CMOS Button.
3. Operating Instructions
Once all components are installed and connected, you can power on your system.
3.1. Initial Boot-up and BIOS Configuration
- Power on your computer.
- Press the designated key (usually DEL or F2) repeatedly during startup to enter the BIOS/UEFI setup.
- Configure boot order, enable XMP for DDR5 Memory Boost, and adjust other settings as needed.
- Save changes and exit the BIOS.
3.2. Operating System Installation
The motherboard is compatible with Windows 11. Install your preferred operating system from a bootable USB drive or optical media.
3.3. Network and Wireless Connectivity
The integrated Wi-Fi 7 module with Bluetooth 5.4 and 5Gbps LAN provide high-speed network access. Ensure the Wi-Fi antennas are connected for optimal wireless performance.
4. Maintenance
Regular maintenance helps ensure the longevity and optimal performance of your motherboard.
4.1. Dust Management
Periodically clean dust from inside your computer case, especially around heatsinks and fans, using compressed air. Excessive dust can impede cooling and lead to overheating.
4.2. Driver and BIOS Updates
Keep your motherboard drivers and BIOS firmware updated to the latest versions available on the MSI official website. Updates often include performance improvements, bug fixes, and compatibility enhancements.
4.3. Thermal Management
The motherboard features Frozr Guard with 7W/mK MOSFET thermal pads, extra choke thermal pads, an extended heatsink, and EZ M.2 Shield Frozr II. Ensure proper airflow within your case to maintain effective cooling for all components.
5. Troubleshooting
If you encounter issues, consider the following troubleshooting steps:
- No Power/No Display: Double-check all power connections (24-pin ATX, 8-pin CPU, GPU power). Ensure the monitor is connected to the correct video output.
- System Instability/Crashes: Verify that all components (CPU, RAM, GPU) are properly seated. Check for overheating using monitoring software. Update drivers and BIOS.
- Clear CMOS: If the system fails to boot after making BIOS changes, use the Clear CMOS button on the rear I/O panel (refer to Image 2.5) or locate the CMOS jumper on the motherboard to reset BIOS settings to default.
- Peripheral Issues: Ensure USB devices are connected to functional ports. Reinstall drivers for problematic peripherals.
- Network Connectivity Problems: Check LAN cable connection or Wi-Fi antenna installation. Verify network adapter drivers are installed and updated.
6. Specifications
| Feature | Specification |
|---|---|
| Brand | MSI |
| Model Name | 7E41-001R (PRO B860-P WIFI) |
| CPU Socket | LGA 1851 |
| Compatible Processors | Intel Core Ultra (Series 2) |
| Chipset Type | Intel B860 |
| RAM Memory Technology | DDR5 |
| Memory Clock Speed | 8800 MHz (OC) |
| Memory Storage Capacity | Up to 256 GB |
| PCIe Slots | 1x PCIe 5.0 x16, 1x PCIe 4.0 x16 |
| M.2 Connectors | 1x M.2 Gen5 x4, 1x M.2 Gen4 x4, 1x M.2 Gen4 x2 |
| Network Hardware | Wi-Fi 7, Bluetooth 5.4, 5Gbps LAN |
| Rear I/O Ports | DisplayPort, HDMI, Thunderbolt 4 Type-C, USB 2.0, USB 5Gbps Type-A, USB 10Gbps Type-A, 5Gbps LAN, Wi-Fi antenna connectors, Audio jacks, Clear CMOS Button |
| Compatible Devices | Personal Computer |
| Platform | Windows 11 |
| Item Weight | 1.76 ounces (Motherboard only, approximate) |
| Manufacturer | MSI Computer |
7. Warranty Information
For detailed warranty terms and conditions, please refer to the official MSI website or the warranty card included with your product. Warranty coverage typically includes manufacturing defects for a specified period from the date of purchase.
8. Support
For technical assistance, driver downloads, BIOS updates, and further product information, please visit the official MSI support website. You can find contact information for customer service and technical support there.
Official MSI Website: www.msi.com


