1. Introduction
This manual provides detailed instructions for the proper use and maintenance of your Daikin BRC52B61 Remote Control with Wall Holder. Please read this manual thoroughly before using the product to ensure safe and efficient operation. Keep this manual for future reference.
2. Safety Information
- Do not expose the remote control to direct sunlight, high temperatures, or high humidity.
- Avoid dropping the remote control or subjecting it to strong impacts.
- Do not attempt to disassemble or modify the remote control.
- Keep batteries out of reach of children. If swallowed, seek medical attention immediately.
- Dispose of used batteries according to local regulations.
3. Product Overview
The Daikin BRC52B61 remote control is designed for convenient operation of your Daikin minisplit air conditioner. It features an intuitive button layout and a clear display for easy temperature and mode adjustments. The included wall holder provides a secure and accessible storage solution.

Figure 1: Daikin BRC52B61 Remote Control and Wall Holder. The image shows the white remote control on the left with its display and various buttons, and the matching white wall holder on the right.
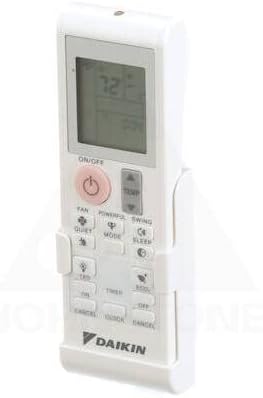
Figure 2: Daikin BRC52B61 Remote Control securely placed within its wall holder, viewed from an angled perspective.
4. Setup
4.1 Battery Installation
To power your remote control, you will need to install two AAA batteries (not included). Follow these steps:
- Slide the battery cover off the back of the remote control.
- Insert two AAA batteries, ensuring the positive (+) and negative (-) terminals align correctly with the markings inside the battery compartment.
- Slide the battery cover back into place until it clicks securely.
Video 1: This video demonstrates the process of installing batteries into the remote control and subsequently changing the temperature display unit from Celsius to Fahrenheit. The remote is shown on a white surface, and hands are seen manipulating the battery cover and pressing buttons.
4.2 Wall Holder Installation
The included wall holder allows for convenient storage of your remote control. To install:
- Choose a suitable location on a wall, ensuring it is easily accessible and away from direct heat or moisture.
- Use screws (not included) to securely fasten the wall holder to the wall through the designated mounting holes.
- Once installed, simply slide the remote control into the holder for storage.
5. Operating Instructions
Familiarize yourself with the buttons on your remote control:
- ON/OFF: Press to turn the air conditioner unit on or off.
- TEMP ▲/▼: Adjusts the desired temperature setting.
- MODE: Cycles through operating modes (e.g., Cool, Heat, Fan, Dry, Auto).
- FAN: Adjusts the fan speed.
- POWERFUL: Activates powerful operation for rapid cooling or heating.
- SWING: Controls the louver swing direction.
- QUIET: Activates quiet operation mode.
- SLEEP: Activates sleep mode for comfortable night operation.
- LED: Turns the indoor unit's display LED on or off.
- TIMER ON/OFF: Sets the timer for automatic on/off operation.
- ECONO: Activates economy mode for energy-saving operation.
- COMFORT: Activates comfort airflow mode.
- CANCEL: Cancels timer settings.
5.1 Changing Temperature Units (Celsius/Fahrenheit)
To switch the temperature display between Celsius (°C) and Fahrenheit (°F):
- Ensure the remote control is powered on.
- Press and hold the OFF button and the TEMP ▲ (up arrow) button simultaneously for approximately 3 seconds.
- The display will switch between Celsius and Fahrenheit. Repeat the process to switch back.
Refer to Video 1 in the Battery Installation section for a visual demonstration of this process.
6. Maintenance
6.1 Battery Replacement
When the display on the remote control becomes dim or the remote control does not respond, replace both batteries with new AAA batteries. Always replace both batteries at the same time with the same type.
6.2 Cleaning the Remote Control
Wipe the remote control with a soft, dry cloth. Do not use liquid cleaners or chemical sprays, as these may damage the remote control's surface or internal components.
7. Troubleshooting
- Remote control not responding: Check if the batteries are installed correctly and have sufficient charge. Replace batteries if necessary. Ensure there are no obstructions between the remote control and the air conditioner unit.
- Incorrect temperature display: Refer to Section 5.1 to change the temperature unit between Celsius and Fahrenheit.
- Limited range: Ensure the remote control is pointed directly at the air conditioner unit's receiver. Obstacles can reduce the effective range.
8. Specifications
| Model Number | BRC52B61 |
| Brand | DAIKIN |
| Compatible Devices | Air Conditioner (Minisplit) |
| Power Source | 2 x AAA Batteries (not included) |
| Color | White |
| Item Weight | 7.8 ounces |
| Package Dimensions | 10.24 x 6.06 x 2.56 inches |
9. Warranty and Support
For warranty information and technical support, please refer to the documentation provided with your Daikin air conditioner unit or visit the official Daikin website. Keep your purchase receipt as proof of purchase.


