
ELECOM DE-NEST15000A
ELECOM NESTOUT Portable Charger User Manual
Model: DE-NEST15000A
1. Introduction
Thank you for purchasing the ELECOM NESTOUT Portable Charger. This rugged 15000 mAh power bank is designed for outdoor enthusiasts, offering IP67 waterproof and dustproof ratings, shock resistance, and fast charging capabilities. Please read this manual carefully before use to ensure proper operation and maintenance.
2. Safety Information
To ensure safe operation and prevent damage, please observe the following precautions:
- Do not disassemble, open, or attempt to repair the device.
- Keep away from extreme temperatures, direct sunlight, and open flames.
- Do not immerse the device in water beyond its IP67 rating (1 meter for 30 minutes). Ensure port covers are securely closed before exposure to water or dust.
- Avoid dropping or subjecting the device to severe impacts, despite its shock-resistant design.
- Use only approved charging cables and adapters. A USB power adapter of 18W or more is recommended for charging the power bank.
- Keep out of reach of children.
- Dispose of the battery responsibly according to local regulations.
3. Package Contents
Verify that all items are present in your package:
- ELECOM NESTOUT Portable Charger (15000 mAh)
- USB Charging Cable
- Product Manual (this document)
Note: Tripod and lights are not included and must be purchased separately.
4. Product Overview
Familiarize yourself with the components and features of your NESTOUT Portable Charger.
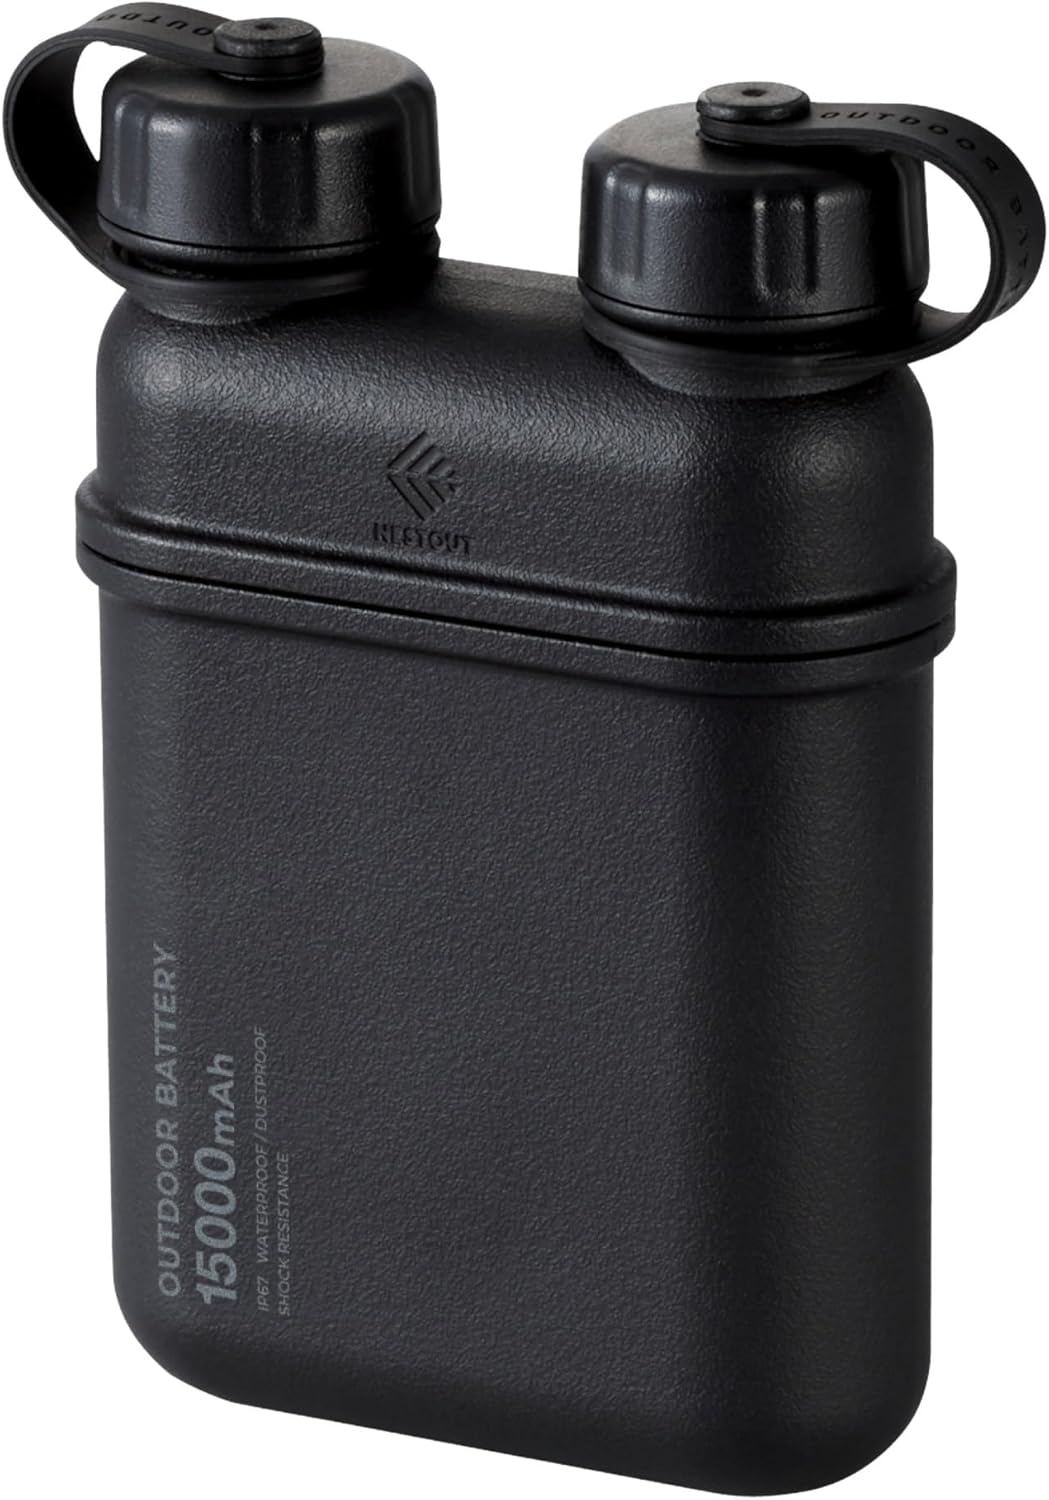
Figure 4.1: Front view of the ELECOM NESTOUT Portable Charger.
Key Features:
- USB-C PD Fast Charging: Equipped with USB-C ports for rapid charging of electronic devices.
- Smart Power Delivery: Automatically detects and allocates optimal power to connected devices.
- IP67 Waterproof and Dustproof: Designed for outdoor activities, resistant to water immersion (up to 1m for 30 mins) and dust.
- Shock-Resistant Hard Shell: Lithium-ion batteries are protected by a silicone cushion and robust casing, tested to MIL-STD 810G 516.7.
- Built-in Tripod Thread: Standard ¼-inch thread on the bottom for attaching tripods or other accessories.
- Modular Accessories: Compatible with NESTOUT accessories like LAMP-1 lantern and FLASH-1 LED panel (sold separately).

Figure 4.2: Multiple device charging capability.

Figure 4.3: Smart USB Power Delivery functionality.

Figure 4.4: IP67 waterproof design.

Figure 4.5: Dustproof design with sealed ports.

Figure 4.6: Internal shock absorbent cushion for durability.

Figure 4.7: Built-in tripod thread for versatile attachments.

Figure 4.8: Example of versatile threading attachments.

Figure 4.9: Wide device compatibility and portability.
5. Setup
Initial Charging of the Power Bank:
- Open the protective cap covering the USB-C input port on the power bank.
- Connect the provided USB charging cable to the USB-C input port of the NESTOUT power bank.
- Connect the other end of the USB cable to a compatible USB power adapter (18W or higher recommended for optimal charging speed).
- The LED indicators on the power bank will illuminate to show the charging status. Charge the power bank fully before first use.
- Once fully charged, disconnect the cable and securely close the protective cap to maintain IP67 rating.
6. Operating Instructions
Charging Your Devices:
- Open the protective cap covering the desired USB output port (USB-A or USB-C) on the power bank.
- Connect your device's charging cable to the appropriate output port on the NESTOUT power bank.
- Connect the other end of the cable to your device (e.g., smartphone, tablet, earbuds).
- The power bank will automatically begin charging your device. The LED indicators will show the remaining battery level.
- Once your device is charged, disconnect the cable and securely close the protective cap.

Figure 6.1: Charging multiple devices simultaneously.
Using Modular Accessories:
The NESTOUT power bank is designed to integrate with optional modular accessories like the LAMP-1 lantern and FLASH-1 LED panel. These accessories typically snap directly onto the top of the power bank, utilizing its power output for operation.

Figure 6.2: NESTOUT power bank with optional lantern accessory.
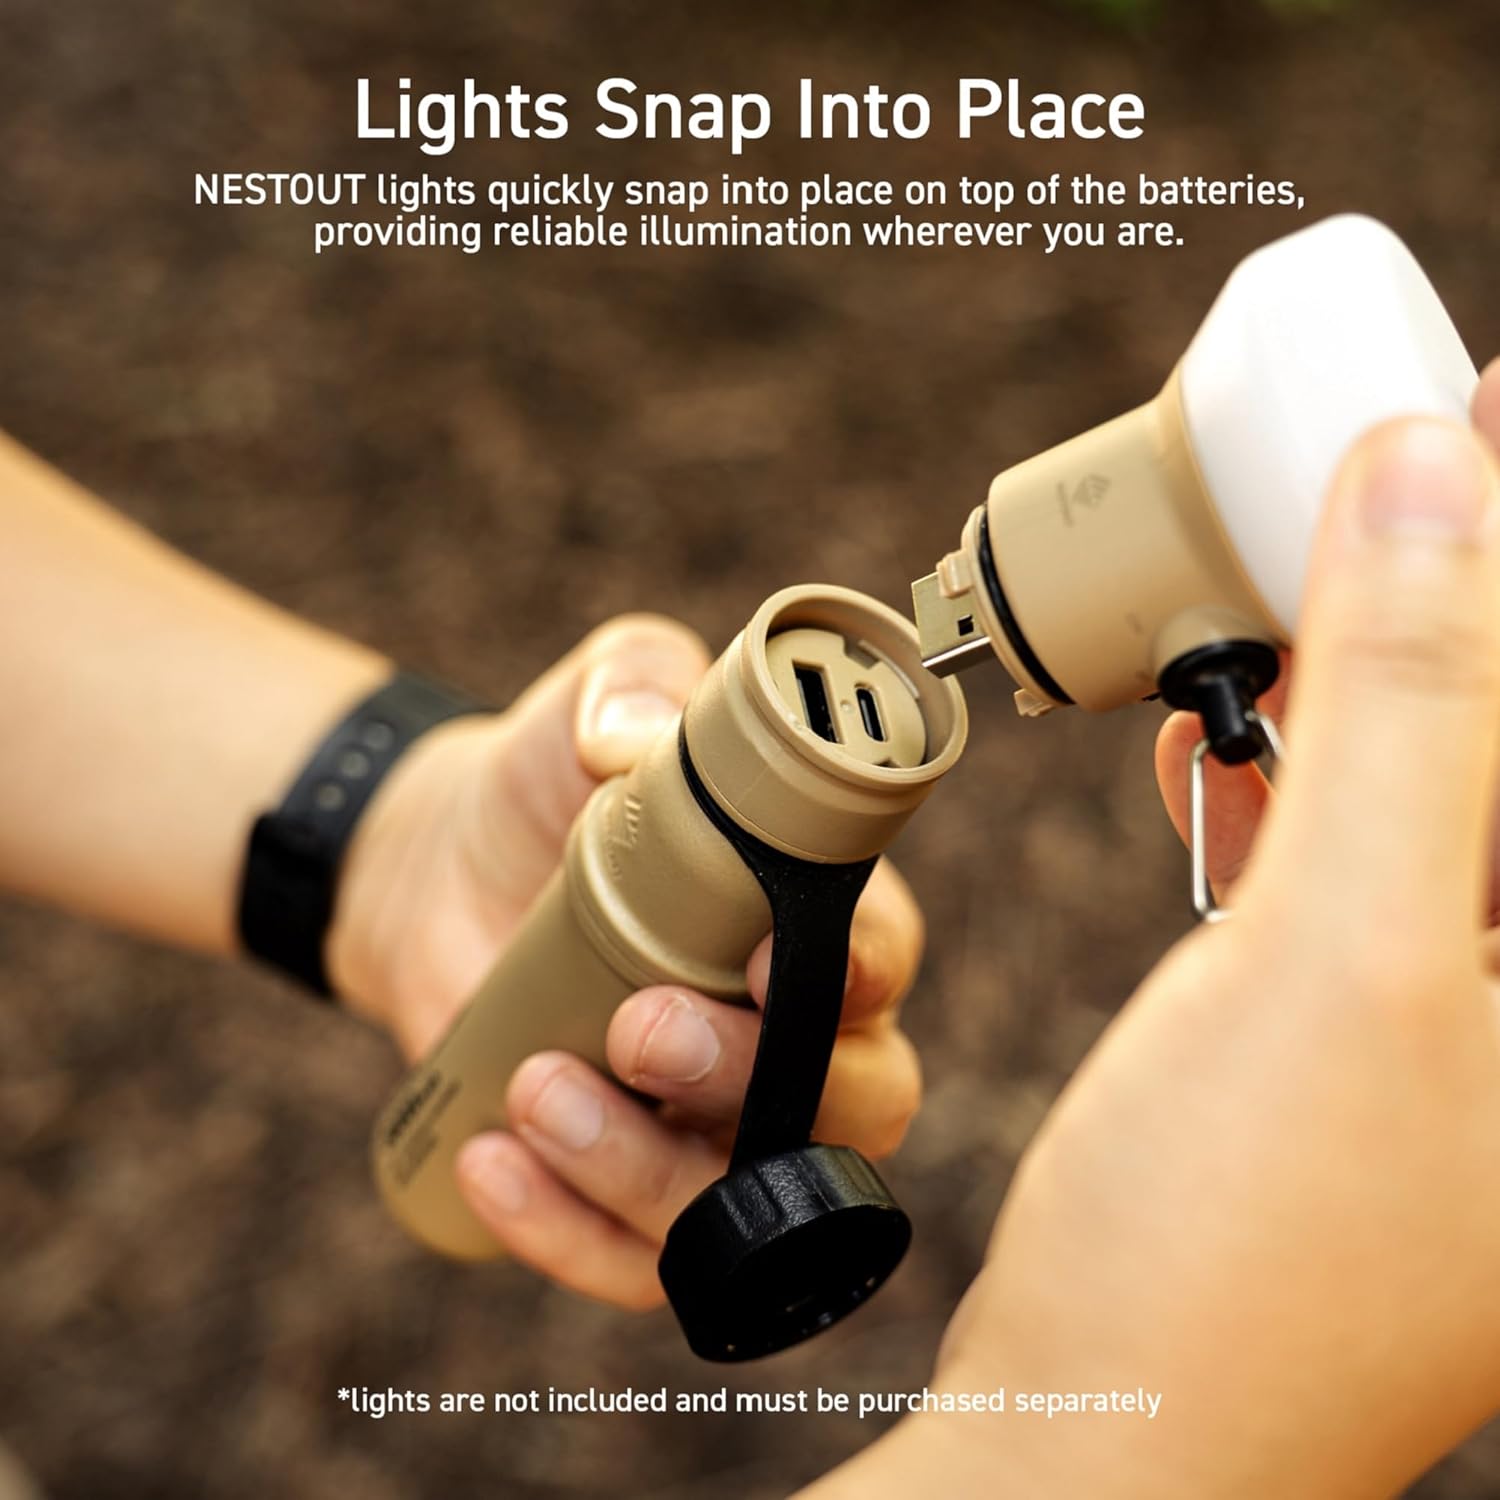
Figure 6.3: Attaching a modular light accessory.
7. Maintenance
- Cleaning: Wipe the exterior with a soft, damp cloth. Do not use harsh chemicals or abrasive cleaners. Ensure port covers are closed during cleaning.
- Storage: Store the power bank in a cool, dry place away from direct sunlight and extreme temperatures. For long-term storage, charge the power bank to about 50-70% capacity every 3-6 months to preserve battery health.
- Port Protection: Always ensure the protective caps for the USB ports are securely closed when not in use, especially in dusty or wet environments, to maintain the IP67 rating.
8. Troubleshooting
| Problem | Possible Cause | Solution |
|---|---|---|
| Power bank not charging. | Charging cable or adapter faulty; power bank fully charged; connection issue. | Try a different USB cable and/or power adapter. Ensure connections are secure. Verify power adapter is 18W or higher. |
| Device not charging from power bank. | Power bank battery low; device cable faulty; incompatible device. | Charge the power bank. Try a different charging cable for your device. Ensure your device is compatible with USB charging. |
| Slow charging. | Low power input for power bank; high power demand from device; cable quality. | Use an 18W or higher USB power adapter to charge the power bank. Ensure the cable used for charging your device supports fast charging. |
| Water or dust inside ports. | Protective caps not securely closed. | Immediately power off the device. Do not use until completely dry. Ensure caps are always securely closed before exposure to elements. |
9. Specifications
| Feature | Detail |
|---|---|
| Model Name | DE-NEST15000A |
| Brand | ELECOM |
| Battery Capacity | 15000 mAh |
| Connector Type | USB Type A, USB Type C |
| Special Features | Automatic Stop, Fast Charge, LED Indicators |
| Voltage | 3.6 Volts |
| Battery Composition | Lithium-ion |
| Recommended Uses | iPhone, Tablet, Tablets |
| Power Source | Battery Powered, Corded Electric |
| Color | Black |
10. Warranty and Support
This ELECOM NESTOUT Portable Charger comes with a 1-year product warranty from the date of purchase. In the unlikely event of a product defect or quality issue, ELECOM offers a product warranty for your convenience.
For warranty claims, returns, or exchanges, please visit the ELECOM USA website and use the return/exchange request form. For more detailed information regarding the warranty policy, please refer to the official ELECOM website.
Website: elecomusa.com
Related documentsDE-NEST15000A


Ask a question about this manual
Ask about setup, troubleshooting, compatibility, parts, safety, or missing instructions. Manuals+ will review the question and use this page’s manual context to help answer it.