
GGM Gastro WKAF5ND
GGM Gastro WKAF5ND Wall-Mounted Refrigeration Unit
Instruction Manual
1. Introduction
Thank you for choosing the GGM Gastro WKAF5ND Wall-Mounted Refrigeration Unit. This manual provides essential information for the safe and efficient installation, operation, and maintenance of your new appliance. Please read this manual thoroughly before using the unit and keep it for future reference.
2. Safety Instructions
Your safety and the safety of others are paramount. Please observe all safety warnings and precautions outlined in this manual.
- Electrical Safety: Ensure the unit is connected to a properly grounded power supply. Do not operate with damaged cords or plugs.
- Installation: Installation must be performed by qualified personnel in accordance with local regulations and this manual.
- Ventilation: Ensure adequate ventilation around the unit to prevent overheating.
- Flammable Materials: Do not store explosive substances or flammable materials near the unit.
- Maintenance: Disconnect power before performing any maintenance or cleaning.
- Children: Keep children away from the appliance.
3. Product Overview
The GGM Gastro WKAF5ND is a compact, wall-mounted refrigeration unit designed for cooling spaces up to 5 cubic meters. It features a robust stainless steel construction and an intuitive digital control panel.

Figure 3.1: Front view of the GGM Gastro WKAF5ND wall-mounted refrigeration unit, showcasing its sleek design and integrated control panel.
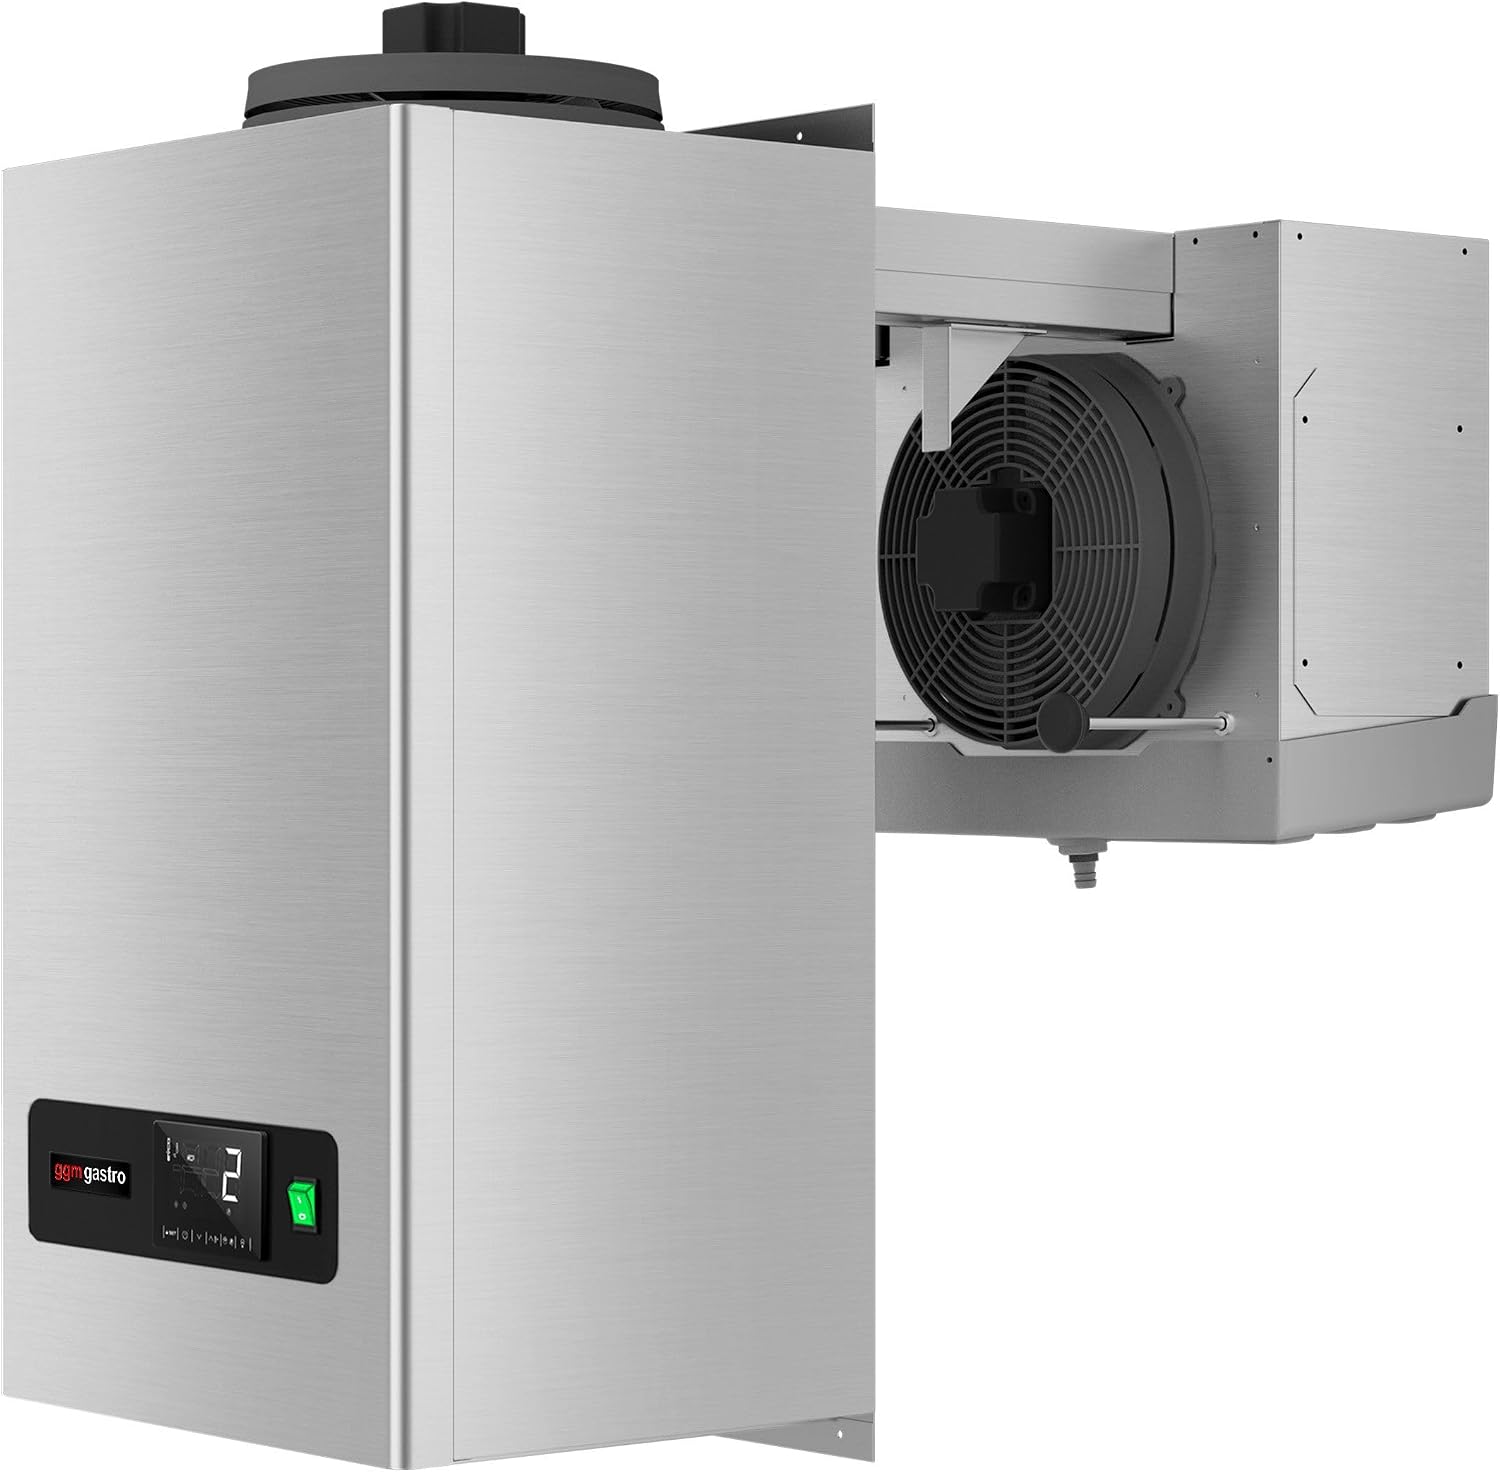
Figure 3.2: Side view of the unit, highlighting the internal fan mechanism responsible for air circulation within the cooled space.

Figure 3.3: Detailed view of the digital control panel, displaying temperature readings and operational status indicators.

Figure 3.4: Components for interior lighting and the contact switch, which can be integrated into the cold room setup.
4. Setup and Installation
The WKAF5ND unit is designed for wall-mounted installation within a cold room or similar insulated space. Professional installation is highly recommended.
4.1 Site Requirements
- The unit is suitable for cooling volumes up to 5 cubic meters.
- Ensure the wall chosen for mounting is structurally sound and can support the weight of the unit.
- Maintain a minimum ceiling distance of 300 mm above the unit for proper ventilation and access.
- The installation area must allow for adequate air circulation around the unit's exterior components.

Figure 4.1: Illustrates the refrigeration unit installed in a cold room, emphasizing the required minimum ceiling distance of 300 mm for optimal performance and maintenance access.
4.2 Mounting the Unit
- Carefully unpack the unit and inspect for any shipping damage.
- Mark the drilling points on the wall according to the unit's mounting template (not included, refer to packaging for details).
- Securely fasten the mounting brackets to the wall using appropriate hardware.
- Lift the unit onto the brackets, ensuring it is level and securely seated.
4.3 Electrical Connection
Connect the unit to a dedicated 230 Volt, 50 Hz power supply. All electrical work must comply with local electrical codes and be performed by a certified electrician.
5. Operating Instructions
5.1 Initial Startup
- After installation, wait at least 2 hours before plugging in the unit to allow refrigerants to settle.
- Plug the unit into the power outlet. The digital display will illuminate.
- The unit will begin cooling automatically to the factory-set temperature.
5.2 Setting Temperature
Refer to the digital control panel (Figure 3.3) for temperature adjustment. Typically, there are UP/DOWN arrows or dedicated buttons to set the desired temperature. Consult the specific control panel instructions provided with the unit for detailed programming.
5.3 Automatic Defrost System
The GGM Gastro WKAF5ND features an automatic defrost system. This system periodically melts frost buildup on the evaporator coil, ensuring efficient operation without manual intervention. Defrost cycles are typically programmed to occur at regular intervals.
6. Maintenance
Regular maintenance ensures the longevity and efficient operation of your refrigeration unit.
6.1 Cleaning the Unit
- Exterior: Wipe the exterior surfaces with a soft cloth dampened with mild detergent. Do not use abrasive cleaners or solvents.
- Condenser Coil: Periodically clean the condenser coil (located on the exterior part of the unit) to remove dust and debris. A soft brush or vacuum cleaner can be used. Ensure the unit is unplugged before cleaning.
- Interior: For the interior of the cold room, follow standard hygiene practices for food storage areas.
6.2 General Care
- Inspect door seals of the cold room regularly for damage to ensure proper insulation.
- Check for any unusual noises or vibrations, which may indicate a problem.
- Ensure the area around the unit remains clear of obstructions to allow for proper airflow.
7. Troubleshooting
Before contacting service, please check the following common issues:
| Problem | Possible Cause | Solution |
|---|---|---|
| Unit not cooling | No power; thermostat set too high; condenser coil dirty; cold room door not sealed properly. | Check power supply; adjust thermostat; clean condenser coil; inspect and repair door seals. |
| Excessive noise | Loose components; fan obstruction; unit not level. | Check for loose parts; clear fan area; ensure unit is level. |
| Water leakage | Clogged drain line; improper installation. | Clear drain line; verify proper installation and drainage. |
If problems persist after attempting these solutions, please contact GGM Gastro customer support.
8. Technical Specifications
| Feature | Specification |
|---|---|
| Brand | GGM Gastro |
| Model Number | WKAF5ND |
| Manufacturer | GGM Gastro |
| Product Dimensions (D x W x H) | 15 x 45 x 188 cm |
| Capacity (Freezer Compartment) | 5 Cubic Meters |
| Installation Type | Built-in, Wall-mounted |
| Color | Silver |
| Voltage | 230 Volt |
| Defrost System | Automatic |
| Power Source | Corded Electric |
| Energy Efficiency Scale (10 Classes) | A++ to G |
9. Warranty and Support
For warranty information and customer support, please refer to the documentation provided with your purchase or visit the official GGM Gastro website. Keep your proof of purchase for warranty claims.
GGM Gastro Contact:
- Official GGM Gastro Website
- Refer to your purchase invoice for specific contact details.
Related documentsWKAF5ND

Ask a question about this manual
Ask about setup, troubleshooting, compatibility, parts, safety, or missing instructions. Manuals+ will review the question and use this page’s manual context to help answer it.