
VanSmaGo GP-01
VanSmaGo Galaxy Projector User Manual
Model: GP-01
Brand: VanSmaGo
1. Introduction
Thank you for purchasing the VanSmaGo Galaxy Projector. This 13-in-1 planetarium star projector is designed to transform any room into a realistic starry sky, offering a unique visual experience with various celestial scenarios. This manual provides essential information for safe operation, setup, and maintenance of your projector.
2. Safety Information
- Do not look directly into the projector lens when the device is operating, as the bright light may cause eye strain.
- Keep the device away from water or any liquids to prevent electric shock.
- Do not disassemble or attempt to repair the device yourself. Contact customer support for assistance.
- Ensure the projector is placed on a stable, flat surface to prevent it from falling.
- Use only the provided Type-C cable for power.
- Keep out of reach of small children to prevent accidental ingestion of small parts (e.g., film discs).
3. Package Contents
Verify that all items are present in your package:
- 1 x VanSmaGo Galaxy Projector
- 13 x Film Discs (one pre-inserted in the projector)
- 1 x Type-C Power Cable
- 1 x User Manual
- 1 x Lens Cleaning Cloth

Image: The VanSmaGo Galaxy Projector, along with its included accessories such as film discs, Type-C cable, and lens cleaning cloth.
4. Product Overview
Familiarize yourself with the main components and controls of your projector:

Image: A detailed diagram of the projector highlighting its key components: 1. Power On/Off & Meteor On/Off Button, 2. Rotation Speed Button, 3. Timer Button, 4. Focus Adjustment Knob, 5. Film Disc Tray, 6. Type-C Power Input (5V/2A).
5. Setup
- Power Connection: Connect the provided Type-C cable to the projector's power input (6) and plug the other end into a compatible 5V/2A USB power adapter (not included).
- Film Disc Installation:
- Gently pull out the film disc tray (5) from the side of the projector.
- Remove the pre-inserted film disc or insert your desired film disc into the tray. Ensure the flat side of the film is facing up.
- Slide the film disc tray back into the projector until it clicks into place.
- Positioning: Place the projector on a stable surface. The 360° rotatable angle allows projection onto ceilings, walls, or floors. For optimal clarity, ensure the projection surface is flat and dark.
Video: A demonstration of the 13-in-1 Planetarium Projector, showcasing its features and how to change film discs.
6. Operating Instructions
- Power On/Off: Press the Power On/Off button (1) to turn the projector on or off.
- Adjusting Focus: Rotate the Focus Adjustment Knob (4) on the top of the projector to achieve a clear and sharp image, regardless of the projection distance.
- Changing Film Discs: Follow the steps in the "Film Disc Installation" section (5.2) to swap between the 13 included scenarios.
- Rotation Speed: Press the Rotation Speed Button (2) to adjust the rotation speed of the projected image. The rotation is designed to be slow to simulate the real movement of celestial bodies.
- Timer Function: Press the Timer Button (3) to set an automatic shutdown timer. Options typically include 1 hour, 2 hours, or 4 hours (default).
7. Features
- 13 Realistic Scenarios: Explore the Solar System, Earth, Moon, The Milky Way, Galaxy, Andromeda Galaxy, NGC4302-NGC4298, Hubble Deep Field, M60--UCD1, North America Nebula, Mystic Mountain, and Small Magellanic Cloud.
- HD Projection: High-definition imaging technology with adjustable clarity and high-transmission optical glass lenses.
- Wide Projection Area: Supports a projection distance of up to 16.4 ft and an area of 754 sq ft.
- 360° Rotatable Angle: Project images onto ceilings, walls, or floors with flexible positioning.
- Super Quiet Operation: Designed to operate without noise, creating a peaceful environment.
- Auto-Off Timer: Convenient timing shutdown function for energy saving and undisturbed sleep.
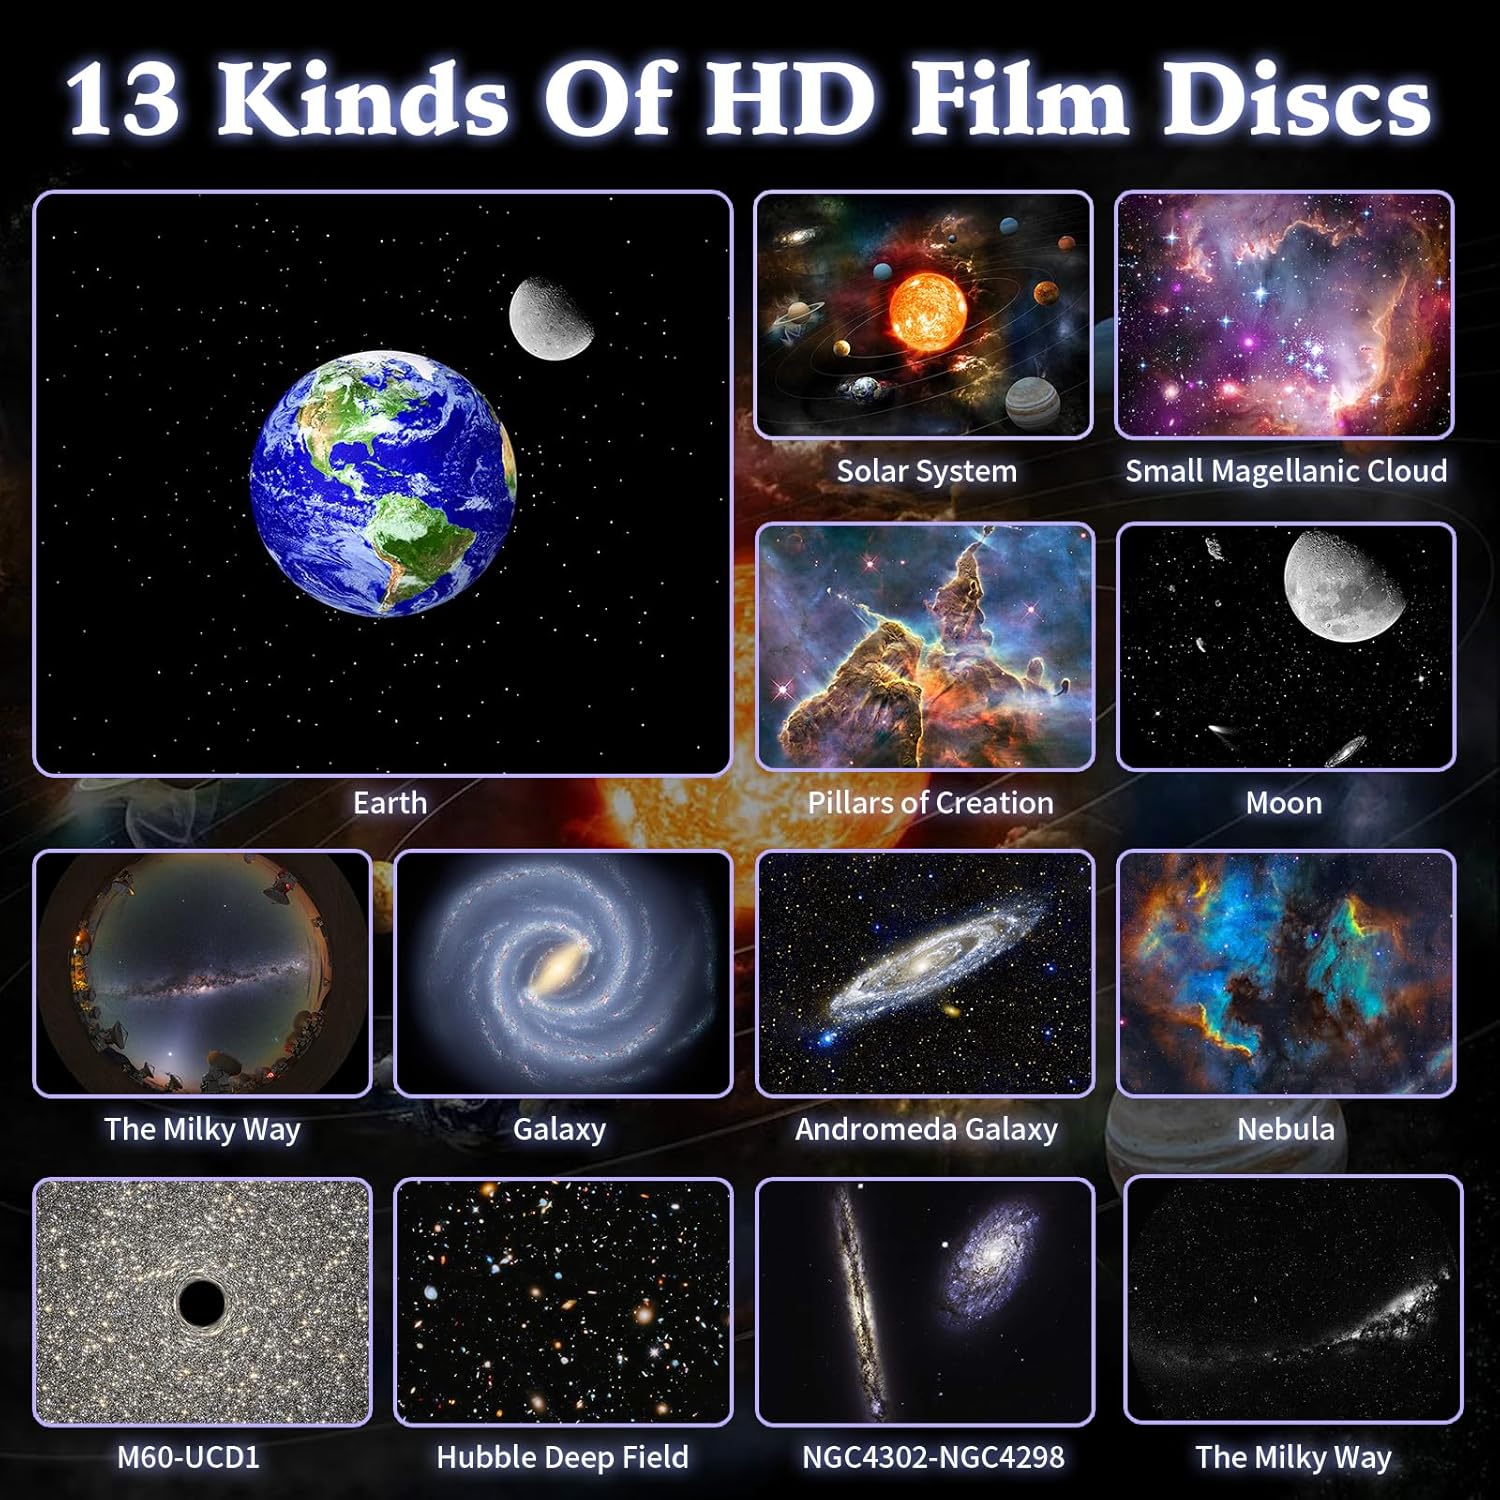
Image: A visual representation of the 13 distinct film discs included with the projector, each depicting a unique celestial body or phenomenon such as Earth, Moon, Solar System, and various galaxies and nebulae.

Image: The VanSmaGo Galaxy Projector illuminating a bedroom ceiling with a vibrant galaxy projection, creating an immersive atmosphere.
8. Maintenance
- Cleaning the Lens: Use the provided lens cleaning cloth to gently wipe the projector lens and film discs. Do not use abrasive cleaners or solvents.
- Cleaning the Device: Wipe the exterior of the projector with a soft, dry cloth.
- Storage: When not in use, store the projector and film discs in a cool, dry place away from direct sunlight and extreme temperatures.
9. Troubleshooting
| Problem | Possible Cause | Solution |
|---|---|---|
| No projection/Power not turning on | Power cable not connected properly or power adapter faulty. | Check power connections. Ensure the power adapter is 5V/2A. |
| Image is blurry | Focus is not adjusted correctly. | Rotate the Focus Adjustment Knob (4) until the image is clear. |
| Image is dim | Room is too bright or projection distance is too far. | Ensure the room is dark. Reduce the projection distance if necessary. |
| Film disc not rotating | Rotation function is off or stuck. | Press the Rotation Speed Button (2) to activate rotation. Check if the film disc is properly seated. |
| Projector makes noise | Unusual noise during operation. | The projector is designed to be super quiet. If unusual noise occurs, contact customer support. |
10. Specifications
| Feature | Detail |
|---|---|
| Model Number | GP-01 |
| Color | White |
| Material | Plastic |
| Power Source | Corded Electric |
| Voltage | 5 Volts |
| Max Wattage | 10 Watts |
| Item Dimensions (L x W x H) | 4.5"L x 4.5"W x 5.7"H |
| Item Weight | 1.15 Pounds |
| Projection Distance | Up to 16.4 ft |
| Projection Area | Up to 754 sq ft |
11. Warranty and Support
The VanSmaGo Galaxy Projector comes with a 1-year manufacturer's warranty. If you encounter any issues or have questions regarding your product, please do not hesitate to contact VanSmaGo customer support through your Amazon purchase history or visit the VanSmaGo Store on Amazon.
Ask a question about this manual
Ask about setup, troubleshooting, compatibility, parts, safety, or missing instructions. Manuals+ will review the question and use this page’s manual context to help answer it.