1. Introduction
This user manual provides detailed instructions for the operation and maintenance of your Roadstar IR-540D+BT/BK Micro Hi-Fi System. This versatile audio system combines Internet Radio, DAB+/FM digital radio, a CD-MP3 player, Bluetooth connectivity, and a USB port for both playback and fast charging. Please read this manual thoroughly before using the device to ensure proper and safe operation.
2. Safety Information
To reduce the risk of electric shock, fire, or damage to the unit, please observe the following safety precautions:
- Power Source: Use only the specified power adapter. Ensure the voltage matches your local power supply.
- Ventilation: Do not block any ventilation openings. Maintain adequate space around the unit for proper airflow.
- Water and Moisture: Do not expose the unit to rain, moisture, dripping, or splashing. Do not place objects filled with liquids, such as vases, on the apparatus.
- Heat Sources: Keep the unit away from heat sources such as radiators, heat registers, stoves, or other apparatus (including amplifiers) that produce heat.
- Cleaning: Unplug the unit from the power outlet before cleaning. Use a soft, dry cloth. Do not use liquid cleaners or aerosol cleaners.
- Servicing: Do not attempt to service this product yourself. Refer all servicing to qualified service personnel.
- Placement: Place the unit on a stable, flat surface. Avoid placing it in direct sunlight or near strong magnetic fields.
3. Product Overview
Familiarize yourself with the main components of your Roadstar Micro Hi-Fi System.
3.1 Front Panel

Figure 3.1: Front view of the Roadstar IR-540D+BT/BK, showing the central display, control knob, and various buttons for menu, preset, volume, and navigation.
The front panel features a clear LCD display, a central multi-function control knob, and an array of buttons for intuitive operation. These include controls for power, menu navigation, preset stations, volume adjustment, and equalizer settings.
3.2 Rear Panel

Figure 3.2: Rear panel of the unit, displaying the headphone output, AUX-IN port, and DC power input.
The rear panel houses essential connection ports, including the headphone jack, AUX-IN for external audio sources, and the DC power input. An extendable antenna for FM/DAB+ reception is also located here.
3.3 Remote Control
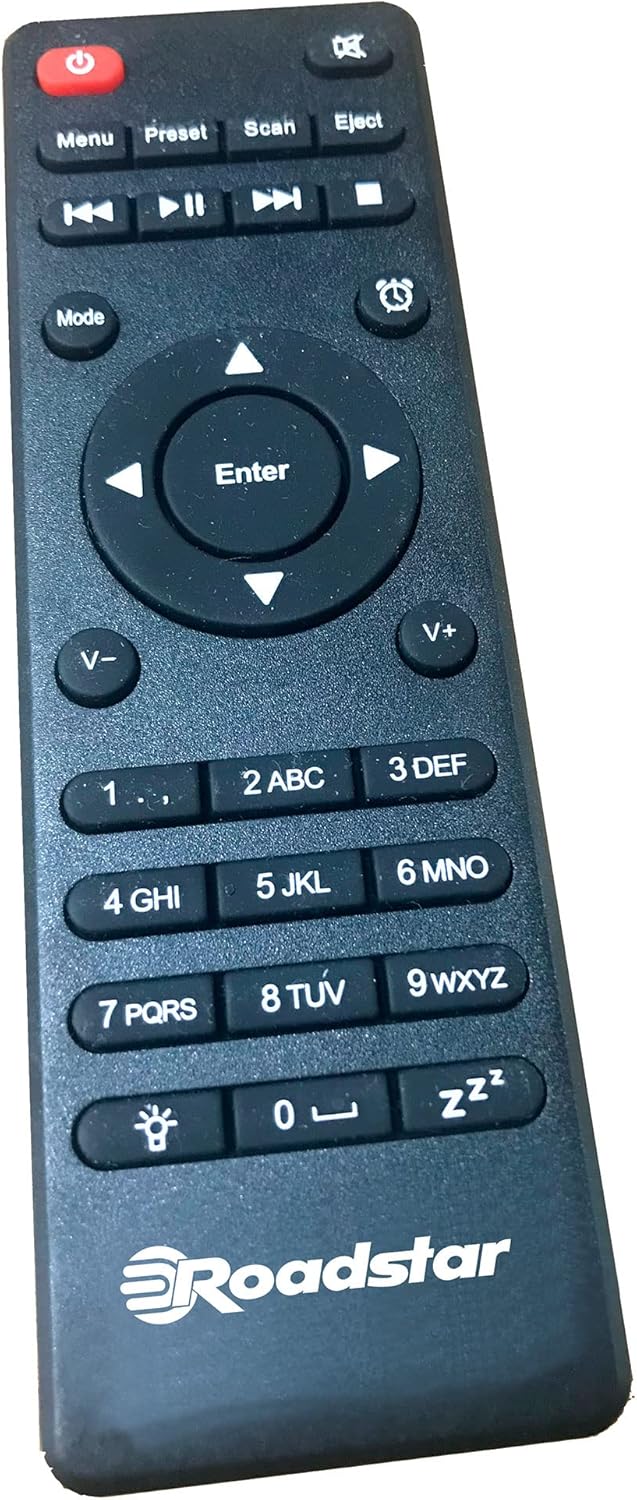
Figure 3.3: The multi-function remote control for the Roadstar IR-540D+BT/BK, featuring buttons for power, mode selection, playback, volume, and numeric input.
The included remote control allows for convenient operation of all functions from a distance, including power, mode selection, volume, track control, and alarm settings.
4. Setup
4.1 Unpacking
Carefully remove the unit and all accessories from the packaging. Ensure all components are present:
- Roadstar IR-540D+BT/BK Micro Hi-Fi System
- Remote Control
- Power Adapter
- User Manual (this document)
4.2 Connecting Power
Connect the provided power adapter to the DC IN port on the rear of the unit. Plug the other end of the adapter into a suitable wall outlet.
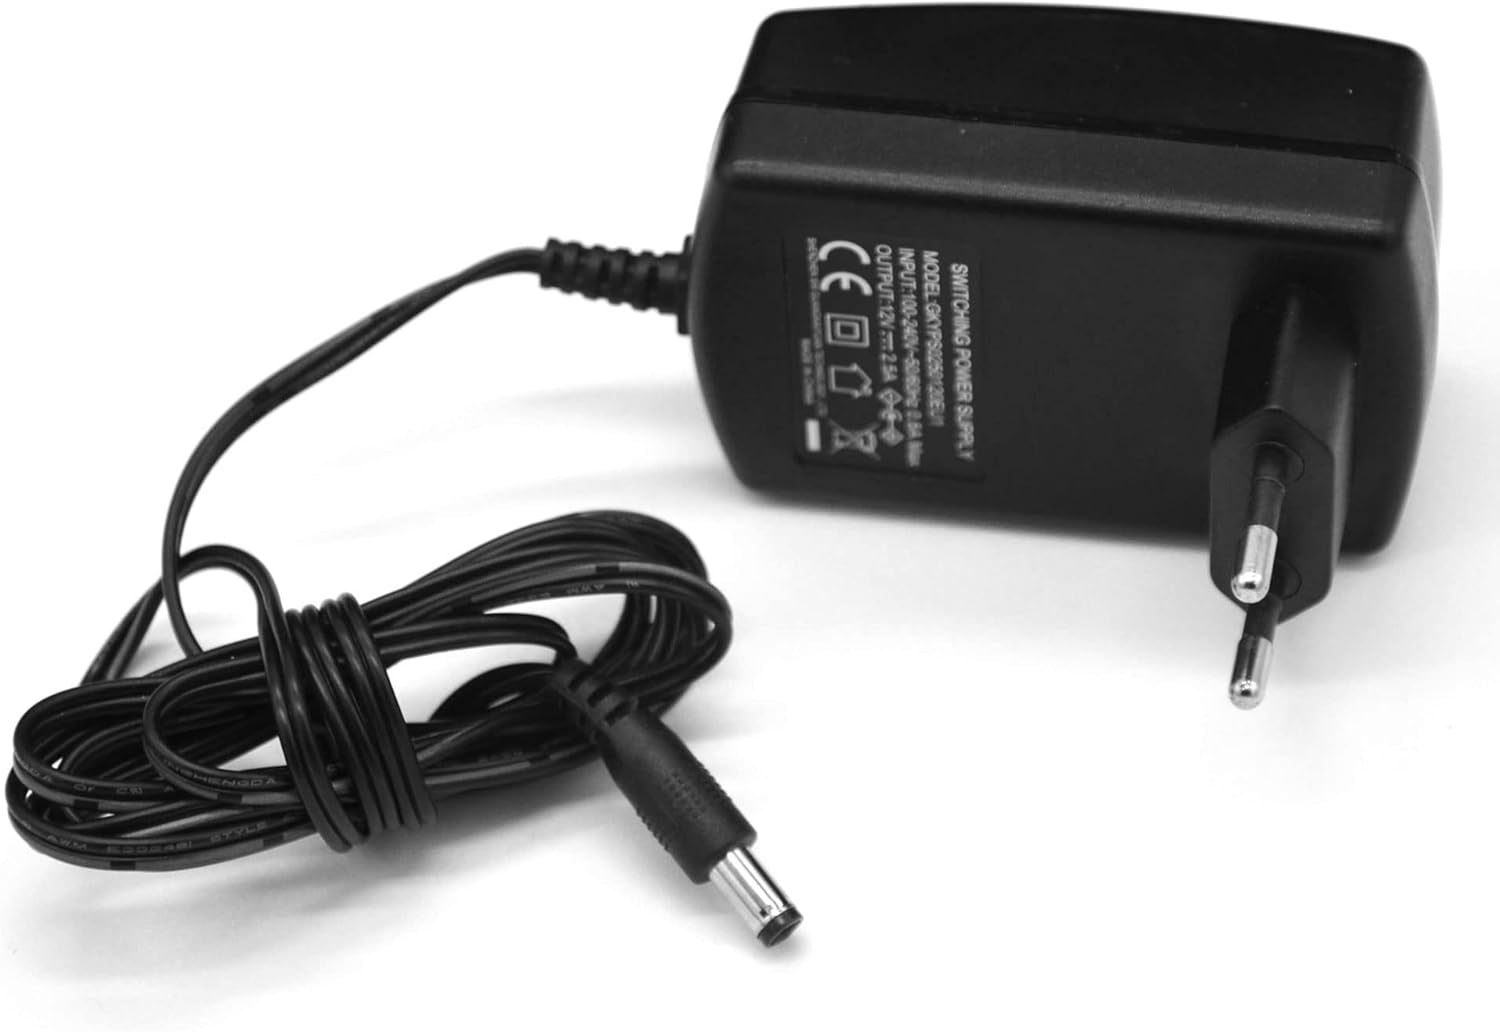
Figure 4.2: The power adapter, which connects to the DC IN port on the unit's rear panel.
4.3 Antenna Connection
For optimal DAB+ and FM radio reception, fully extend the telescopic antenna located on the rear of the unit.
4.4 Initial Setup (First-Time Use)
Upon first power-on, the unit may guide you through an initial setup wizard. Follow the on-screen prompts to:
- Select your preferred language.
- Configure network settings for Internet Radio (Wi-Fi connection).
- Perform an automatic scan for DAB+ and FM stations.
5. Operating Instructions
5.1 Power On/Off
Press the Power button on the front panel or remote control to turn the unit on or off.
5.2 Mode Selection
Press the Mode button on the remote control or the front panel to cycle through available modes: Internet Radio, DAB+, FM, CD, Bluetooth, and AUX-IN.
5.3 Internet Radio
To access Internet Radio, ensure the unit is connected to a Wi-Fi network (refer to Section 4.4 for initial setup).
- Browsing Stations: Use the navigation buttons or control knob to browse stations by genre, location, or search.
- Saving Presets: Once a station is playing, press and hold the Preset button to save it to a preset number. Press Preset briefly to recall saved stations.
5.4 DAB+/FM Radio
- Scanning Stations: In DAB+ or FM mode, press the Scan button to perform an automatic scan for available stations.
- Manual Tuning: Use the navigation buttons to fine-tune frequencies manually.
- RDS/Radiotext: When available, RDS (Radio Data System) or Radiotext information will be displayed on the screen in FM mode.
5.5 CD/MP3 Player
The unit supports CD, CD-R, CD-RW, and MP3 CD formats.
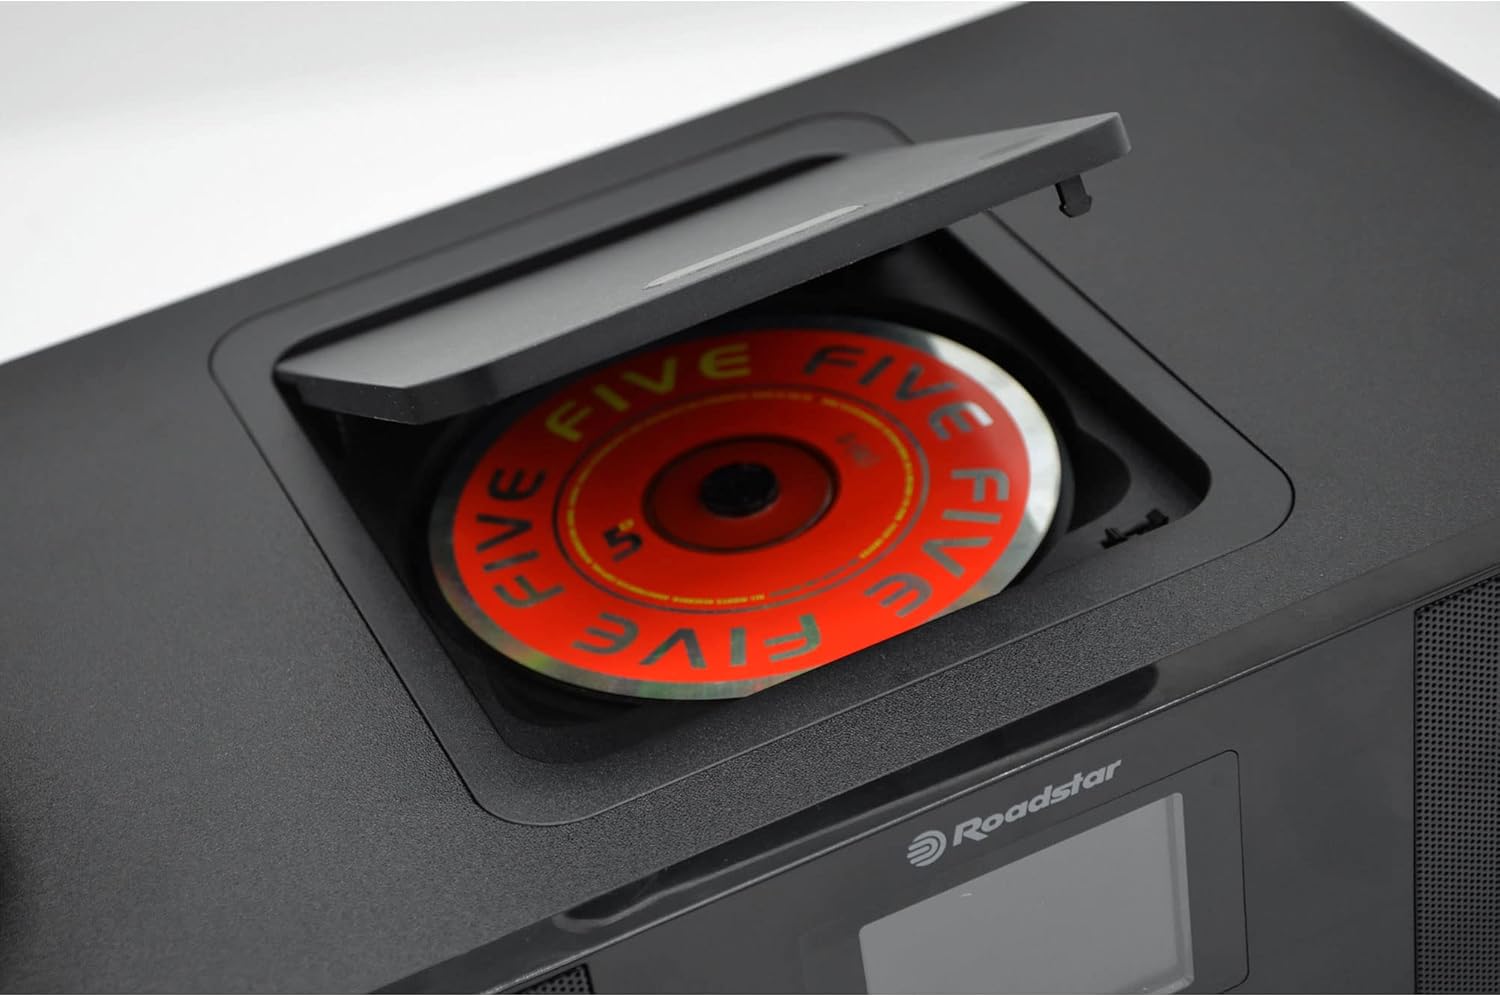
Figure 5.5: Top-loading CD compartment with a disc partially inserted.
- Loading a CD: Open the CD compartment cover on top of the unit and place a CD with the label side facing up. Close the cover.
- Playback Controls: Use the Play/Pause, Skip Forward/Backward, and Fast Forward/Rewind buttons for playback control.
- MP3 Track Search: For MP3 CDs, you can search for tracks using the navigation buttons.
5.6 Bluetooth Connectivity
Pair your smartphone, tablet, or other Bluetooth-enabled device with the Micro Hi-Fi System.
- Pairing: Select Bluetooth mode on the unit. The unit will enter pairing mode automatically. On your device, search for "Roadstar IR-540D+BT/BK" (or similar) in the Bluetooth settings and connect.
- Playing Audio: Once paired, audio played on your connected device will stream through the Micro Hi-Fi System's speakers.
5.7 USB Playback and Charging
The USB port supports MP3 playback and fast charging for compatible devices.
- USB Playback: Insert a USB flash drive containing MP3 files into the USB port. Select USB mode to begin playback.
- Fast Charging: Connect your mobile device to the USB port for rapid charging.
5.8 AUX-IN Connection
Connect external audio devices (e.g., MP3 players, older smartphones) using a 3.5mm audio cable to the AUX-IN port on the rear panel. Select AUX-IN mode to listen to audio from the connected device.
5.9 Headphone Connection
For private listening, plug 3.5mm headphones into the headphone jack on the rear panel. The main speakers will be muted automatically.
5.10 Alarm Clock Function
The unit features a dual alarm function.
- Setting Alarms: Access the alarm settings through the menu. You can set two independent alarms, choose the alarm source (buzzer or radio), and set the desired time.
5.11 Equalizer Settings
Adjust the audio output to suit your preference using the pre-set equalizer modes:
- Normal
- Flat
- Classic
- Rock
- Pop
- Jazz
- Soundtracks
Press the EQ button to cycle through these modes.
5.12 Volume Control
Rotate the central control knob or use the Vol+ / Vol- buttons on the remote control to adjust the volume level.
6. Maintenance
Proper care will ensure the longevity of your Micro Hi-Fi System.
- Cleaning the Unit: Wipe the exterior of the unit with a soft, dry, lint-free cloth. Do not use abrasive cleaners, waxes, or solvents.
- CD Player Care: Handle CDs by their edges to avoid fingerprints. If a CD is dirty, wipe it gently from the center outwards with a soft, dry cloth.
- Storage: If storing the unit for an extended period, unplug it from the power outlet and store it in a cool, dry place.
7. Troubleshooting
If you encounter any issues, refer to the table below for common problems and their solutions.
| Problem | Possible Cause | Solution |
|---|---|---|
| No power | Power adapter not connected; power outlet not active. | Ensure the power adapter is securely connected to the unit and a working power outlet. |
| No sound | Volume too low; Mute function active; incorrect mode selected; headphones connected. | Increase volume; check if mute is active; select the correct input mode; disconnect headphones. |
| Poor radio reception | Antenna not extended; weak signal; interference. | Fully extend the antenna; reposition the unit for better signal; move away from other electronic devices. |
| Bluetooth pairing fails | Unit not in pairing mode; device too far; Bluetooth off on source device. | Ensure unit is in Bluetooth pairing mode; bring devices closer; enable Bluetooth on your source device. |
| CD not playing | CD inserted incorrectly; CD is dirty or scratched; unsupported disc format. | Reinsert CD correctly; clean or replace CD; ensure disc is CD, CD-R, CD-RW, or MP3 CD. |
8. Specifications
The following are the technical specifications for the Roadstar IR-540D+BT/BK Micro Hi-Fi System:
| Feature | Detail |
|---|---|
| Brand | Roadstar |
| Model Number | IR-540D+BTBK |
| Color | Black |
| Connectivity Technology | Bluetooth |
| Compatible Devices | Mobile devices, tablets, computers |
| Speaker Type | Stereo |
| Power Source | Corded Electric |
| Power Output (RMS) | 2 x 10W RMS (Total 20W RMS) |
| Power Output (PMPO) | 160W |
| Surround Sound Channel Configuration | 2.0 |
| Supported Standards | DAB, DAB+, FM, Bluetooth, MP3 |
| CD Player | CD, CD-R, CD-RW, MP3 CD compatible; Top loader; Track search; Fast forward/reverse |
| Radio Tuner | Internet Radio, DAB/DAB+/FM; RDS/Radiotext; Auto/Manual tuning; Presets |
| USB Port | Playback, Fast Charging (1A Rating) |
| AUX-IN | 3.5mm Jack |
| Headphone Socket | 3.5mm Jack |
| Display | Digital LCD |
| Remote Control | Multi-function |
| Alarm | Dual alarm function |
| Equalizer | Pre-set (Normal, Flat, Classic, Rock, Pop, Jazz, Soundtracks) |
| Weight | 3.18 kg |
9. Warranty and Support
Roadstar products are designed and manufactured to the highest quality standards. For information regarding warranty coverage and technical support, please refer to the warranty card included with your product or visit the official Roadstar website. Keep your purchase receipt as proof of purchase for warranty claims.
For further assistance, please contact Roadstar customer service.


