
1. Introduction and Product Overview
Thank you for choosing the Crivit Children's Bicycle Helmet. This helmet is designed to provide safety and comfort for young cyclists. It features an extremely lightweight design with high stability and heat resistance, achieved through modern Inmold construction. The outer shell is made of impact-resistant polycarbonate, and the inner shell uses high-absorption expanded polystyrene for optimal protection.
Key features include 13 ventilation channels for optimal air circulation and a removable rear light with a modern light strip offering three illumination levels for enhanced visibility.
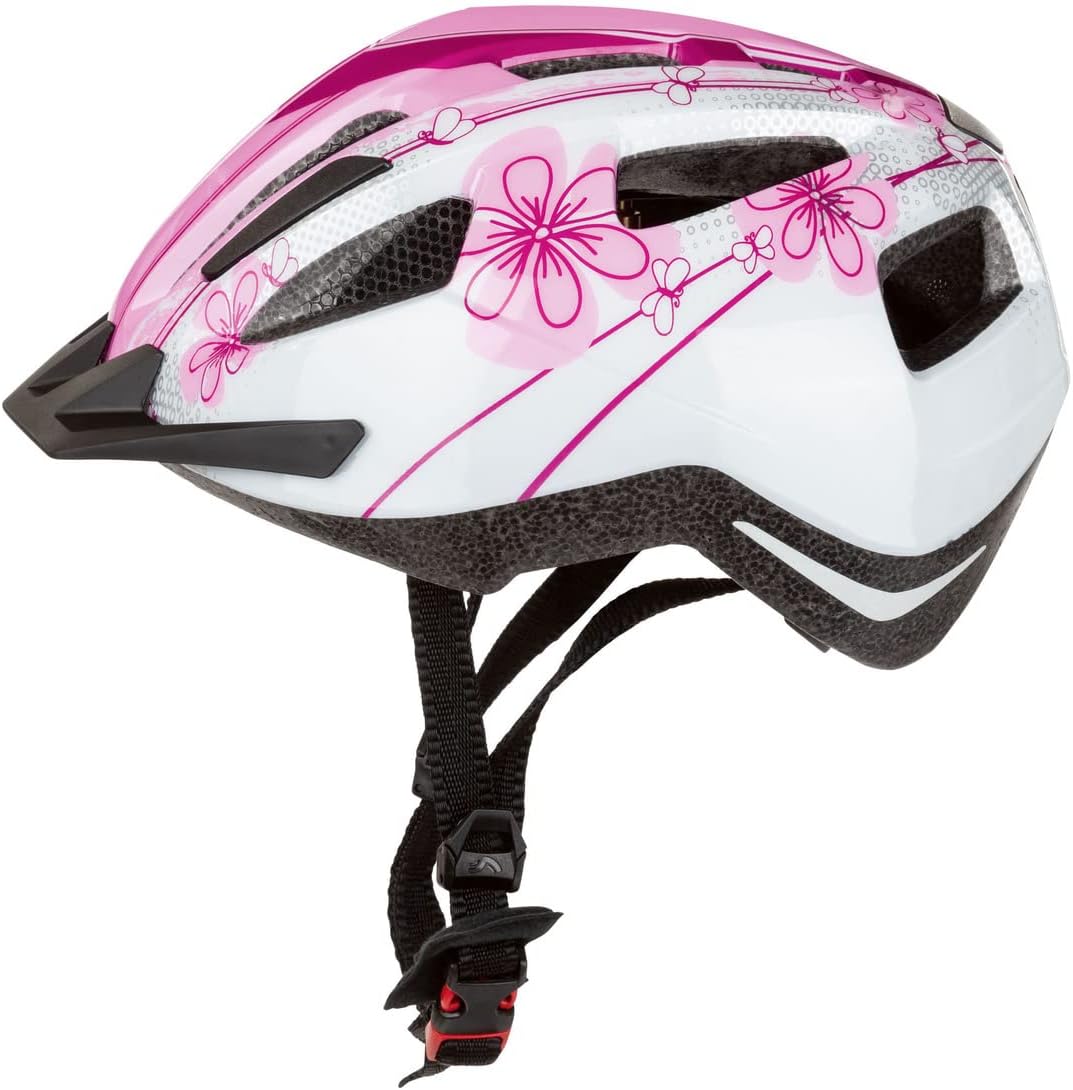
Figure 1.1: Side view of the Crivit Children's Bicycle Helmet, showcasing its design and ventilation channels.
2. Safety Information
Always prioritize safety when using this helmet. Please read and understand the following guidelines:
- This helmet is designed for cycling and similar activities. It is not intended for motor sports or other activities where a different type of helmet is required.
- Ensure the helmet fits snugly and comfortably. An improperly fitted helmet may not provide adequate protection.
- Always fasten the chin strap securely. The strap should be tight enough to prevent the helmet from moving freely, but not so tight as to cause discomfort.
- Inspect the helmet regularly for any signs of damage, such as cracks, dents, or frayed straps. If damage is found, replace the helmet immediately.
- Do not modify the helmet in any way. Modifications can compromise its protective capabilities.
- Clean the helmet only with mild soap and water. Harsh chemicals can damage the helmet's materials.
- Replace the helmet after any significant impact, even if visible damage is not apparent. The internal structure may be compromised.
3. Components
The Crivit Children's Bicycle Helmet consists of the following main components:
- Outer Shell: Impact-resistant polycarbonate.
- Inner Shell: High-absorption expanded polystyrene (EPS).
- Ventilation Channels: 13 channels for airflow.
- Adjustable Strap System: For secure and comfortable fit.
- Chin Strap with Buckle: For fastening the helmet.
- Removable Visor: Provides shade and protection.
- Removable Rear Light: With 3 illumination levels for visibility.
- Mosquito Net: Integrated into the front vents.
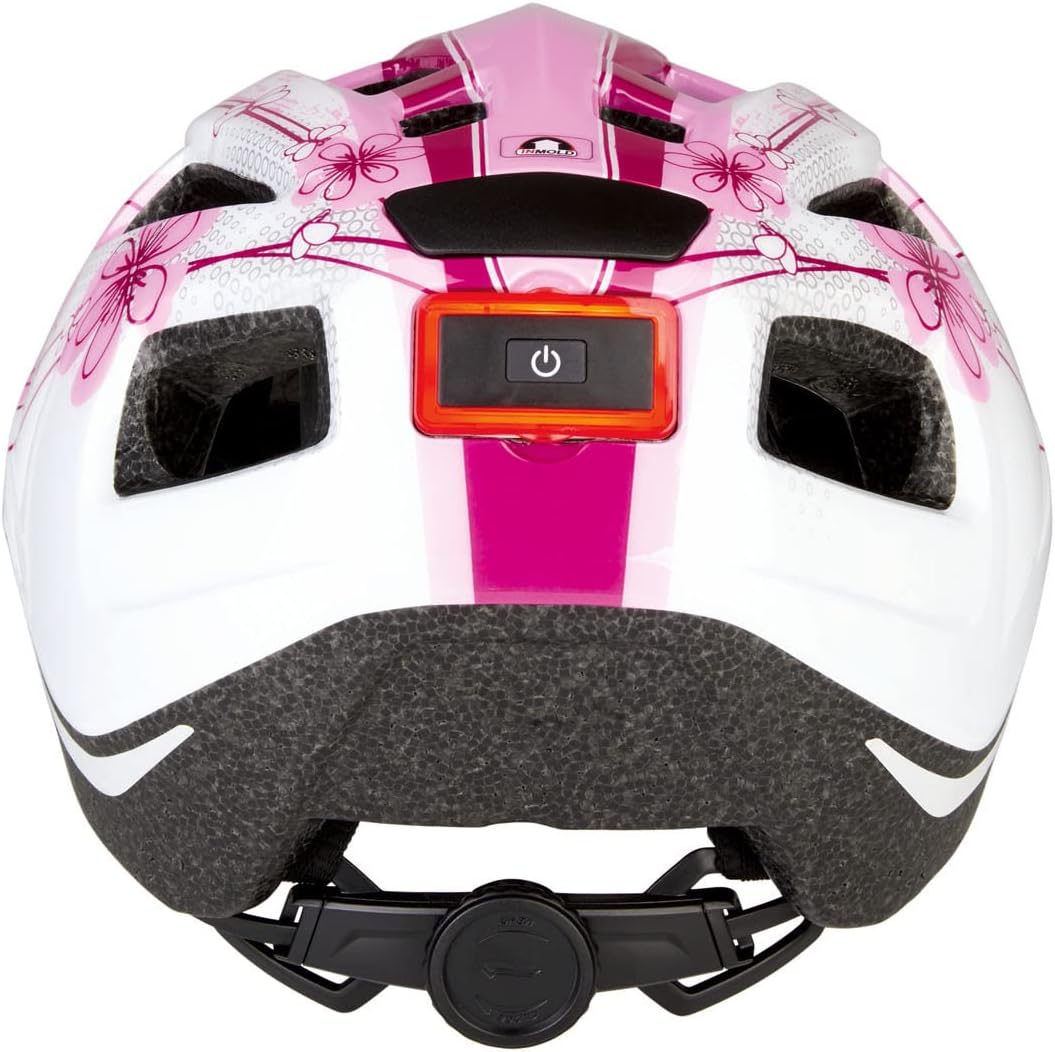
Figure 3.1: Rear view of the helmet, highlighting the integrated removable rear light.

Figure 3.2: Close-up of the removable rear light module, showing the power button.
4. Setup and Adjustment
Proper helmet fit is crucial for safety. Follow these steps to ensure a correct fit:
- Choose the Correct Size: This helmet is available in size XS (46-51 cm head circumference). Measure the user's head circumference to ensure it falls within this range.
- Position the Helmet: Place the helmet squarely on the head, covering the forehead. It should sit level, not tilted back or forward.
- Adjust the Retention System: Use the dial or slider at the back of the helmet to tighten or loosen the internal retention system. Adjust until the helmet feels snug but comfortable, without excessive pressure points. The helmet should not move significantly when the head is shaken.
- Adjust the Side Straps: The side straps should form a "V" shape just below the ears. Adjust the sliders on the straps to achieve this position.
- Fasten the Chin Strap: Buckle the chin strap. Tighten the strap until it is snug under the chin. You should be able to fit one or two fingers between the strap and the chin, but no more.
- Check for Movement: With the chin strap fastened, try to push the helmet from side to side and front to back. It should not move more than an inch in any direction. If it does, readjust the retention system and straps.
- Visor Attachment (if detached): Align the visor's attachment points with the corresponding slots on the helmet and firmly press until it clicks into place.
- Rear Light Installation: The rear light is designed to be easily removable and attachable. Ensure it is securely clicked into its designated slot at the back of the helmet.

Figure 4.1: Front view of the helmet, illustrating the visor and front ventilation channels with integrated mosquito net.
5. Operating Instructions
5.1 Using the Rear Light
The integrated rear light enhances visibility, especially in low-light conditions. It features three illumination levels:
- To Turn On/Cycle Modes: Press the power button located on the rear light module. Each press will cycle through the illumination modes (e.g., steady on, flashing, rapid flashing).
- To Turn Off: Continue pressing the power button until the light turns off, or press and hold the button for a few seconds.
- Battery Replacement: When the light dims or stops working, the battery needs replacement. Refer to the Maintenance section for instructions.
5.2 General Use
- Always wear the helmet when cycling.
- Ensure the helmet is properly adjusted and secured before each ride.
- The ventilation channels are designed to keep the head cool. Avoid obstructing them.
6. Maintenance
Regular maintenance will prolong the life of your helmet and ensure its continued effectiveness.
6.1 Cleaning the Helmet
- Use a soft cloth, mild soap, and cool water to clean the outer and inner surfaces of the helmet.
- Do not use abrasive cleaners, solvents, or harsh chemicals, as these can damage the helmet's materials and compromise its integrity.
- Allow the helmet to air dry completely before storage.
6.2 Rear Light Battery Replacement
The rear light uses a small button cell battery. To replace it:
- Carefully remove the rear light module from the helmet.
- Locate the battery compartment on the back of the module.
- Using a small screwdriver or coin, open the battery compartment cover.
- Remove the old battery and insert a new one, ensuring correct polarity (+/-).
- Close the battery compartment cover securely.
- Reattach the light module to the helmet.
6.3 Storage
- Store the helmet in a cool, dry place, away from direct sunlight and extreme temperatures.
- Avoid storing the helmet near chemicals or solvents that could damage its materials.
7. Troubleshooting
| Problem | Possible Cause | Solution |
|---|---|---|
| Helmet feels loose or wobbly. | Improper adjustment of retention system or straps. | Re-adjust the rear dial/slider and chin straps according to Section 4. |
| Chin strap is uncomfortable. | Strap too tight or improperly positioned. | Loosen the strap slightly. Ensure the side straps form a "V" below the ears. |
| Rear light not working. | Dead battery or loose connection. | Check battery connection. Replace battery if necessary (refer to Section 6.2). |
| Helmet makes squeaking noises. | Friction between components. | Ensure all components are securely fastened. A small amount of silicone spray (avoiding contact with EPS) might help if persistent. |
8. Specifications
| Feature | Detail |
|---|---|
| Model Name | Bicycle Helmet with Rear Light |
| Brand | Crivit |
| Size | X-Small (46-51 cm head circumference) |
| Weight | Approx. 260 grams (with battery) |
| Outer Material | EPS and Polycarbonate |
| Inner Material | Expanded Polystyrene |
| Ventilation Channels | 13 |
| Rear Light | Removable, 3 illumination levels |
| Special Features | Removable visor, integrated mosquito net, extremely lightweight |
| Recommended Use | Cycling |
| Color | Pink |
9. Warranty and Support
For warranty information and customer support, please refer to the documentation provided at the time of purchase or contact Crivit customer service directly. Keep your proof of purchase for any warranty claims.
Important: The warranty typically covers manufacturing defects. Damage resulting from improper use, accidents, or modifications is usually not covered. Always follow the instructions in this manual to ensure proper use and care of your helmet.