
1. Introduction
This manual provides essential information for the safe and efficient operation of your Fujitsu PRIMERGY TX1330 M5 Tower Server. It covers setup, operation, maintenance, and troubleshooting. Please read this manual thoroughly before using the server and retain it for future reference.
2. Safety Information
Always observe the following safety precautions to prevent injury and damage to the server:
- Ensure the server is placed on a stable, level surface.
- Do not block ventilation openings. Maintain adequate airflow around the server.
- Connect the server to a grounded power outlet.
- Do not open the server chassis unless you are a qualified technician. High voltage components are present.
- Disconnect all power cables before performing any internal maintenance or component installation.
- Avoid exposing the server to moisture or extreme temperatures.
3. Package Contents
Verify that all items are present in the package:
- Fujitsu PRIMERGY TX1330 M5 Tower Server unit
- Power cable(s)
- Documentation (Quick Start Guide, Safety Information)
- Accessory kit (may include screws, cables, etc.)
4. Physical Overview
4.1 Front View
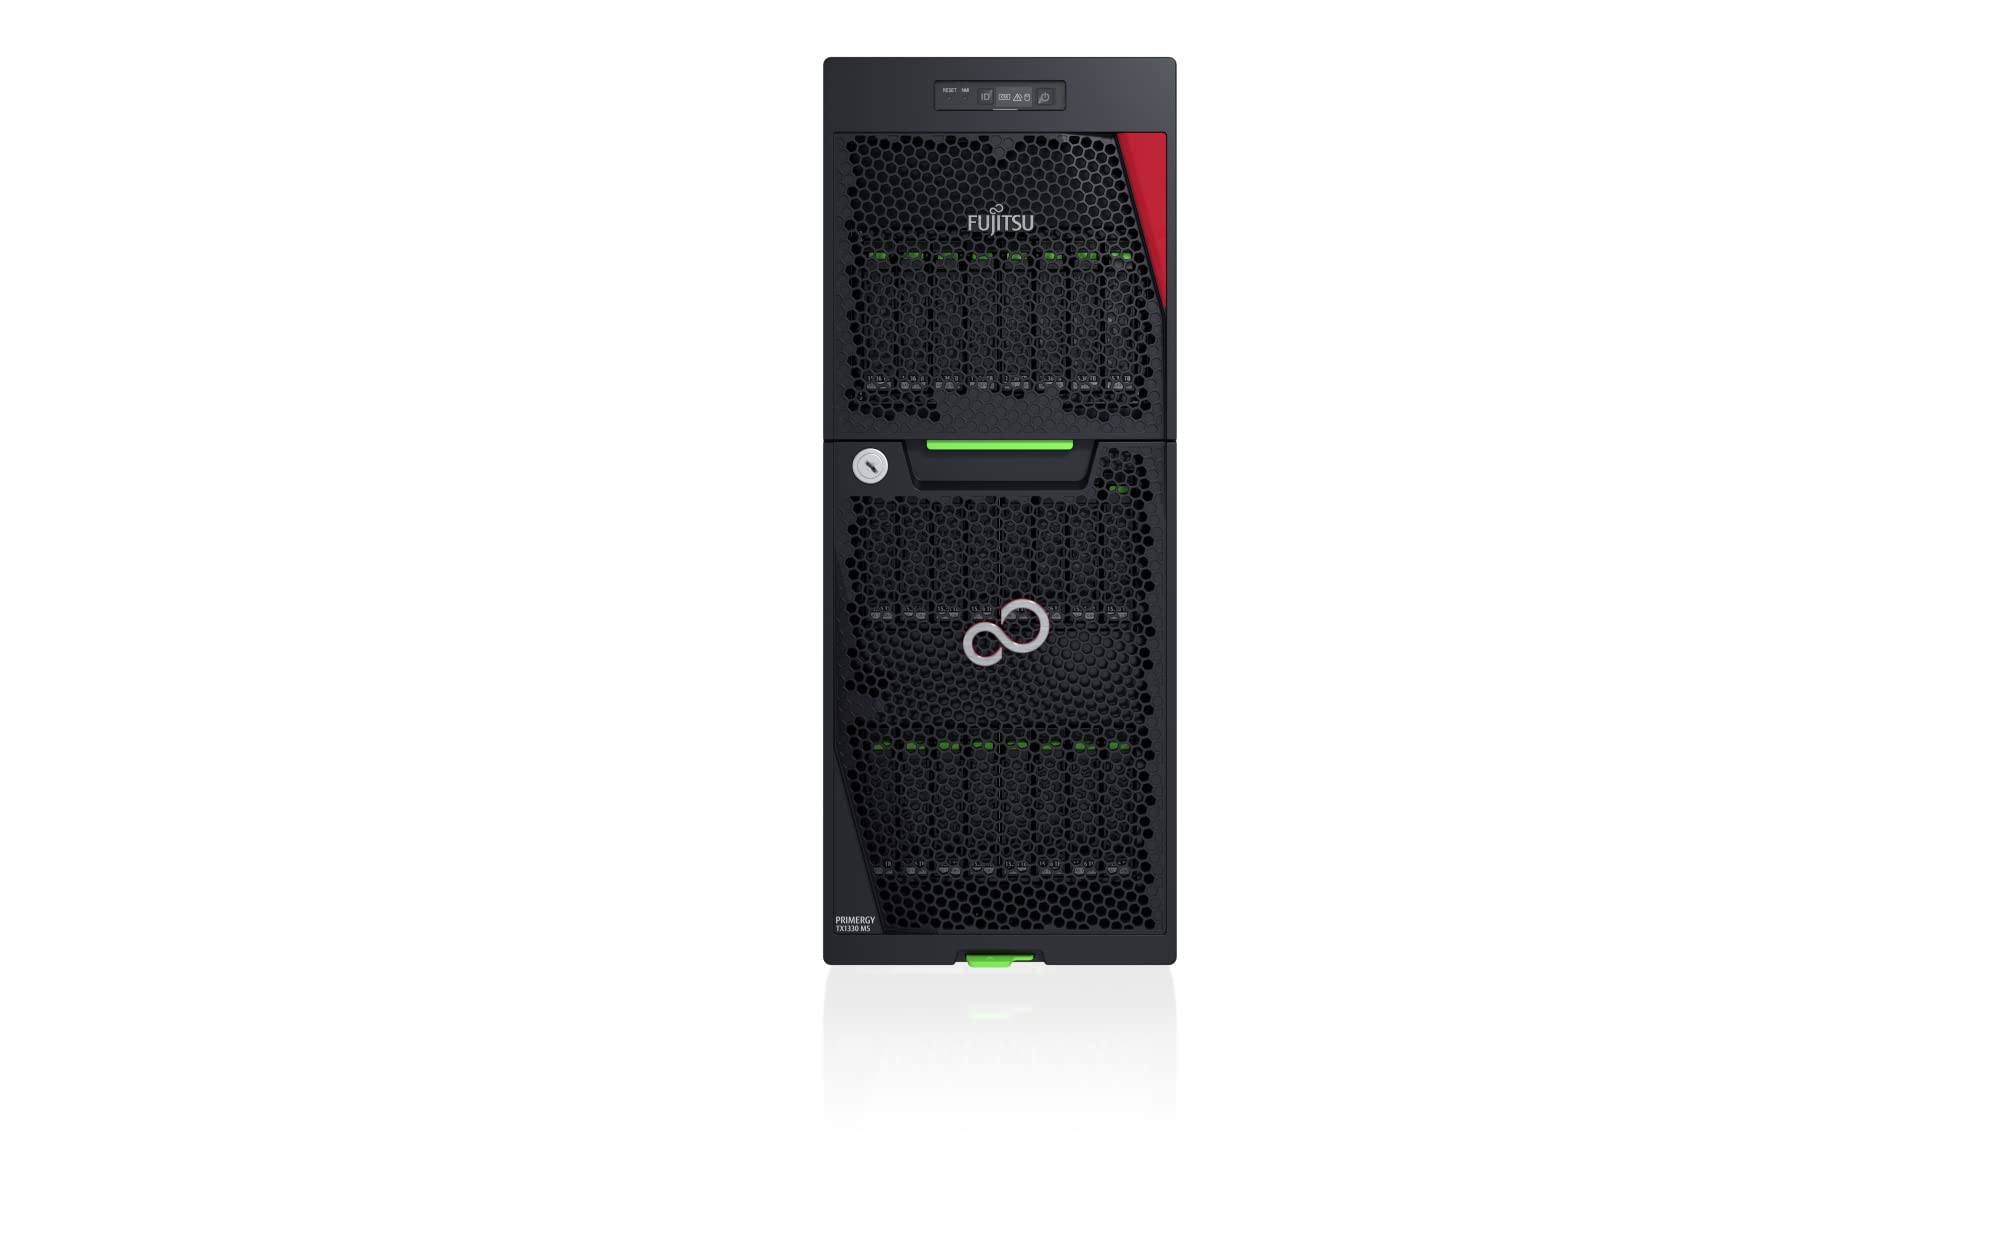
Figure 1: Front and side view of the Fujitsu PRIMERGY TX1330 M5 Tower Server. This image shows the front panel with drive bays, power button, and status indicators, along with the side panel.
The front panel of the PRIMERGY TX1330 M5 server typically includes:
- Power Button: To turn the server on or off.
- Status Indicators: LEDs for power, hard drive activity, network activity, and system health.
- Drive Bays: Bays for installing hard drives or solid-state drives.
- USB Ports: For connecting peripheral devices.
4.2 Rear View

Figure 2: Rear view of the Fujitsu PRIMERGY TX1330 M5 Tower Server. This image displays the various ports, expansion slots, and power supply units located at the back of the server.
The rear panel provides connectivity for power, networking, and other peripherals:
- Power Supply Units: Connect power cables here. The server supports redundant power supplies.
- Ethernet Ports: For network connectivity (10/100/1000Base-T(X)).
- USB Ports: Multiple USB 2.0 and USB 3.0 ports for connecting devices.
- VGA Port: For connecting a monitor.
- Expansion Slots: For installing additional cards (e.g., network cards, RAID controllers).
5. Setup
5.1 Unpacking and Placement
- Carefully remove the server from its packaging.
- Place the server on a flat, stable, and well-ventilated surface. Ensure there is sufficient space around the server for proper airflow.
- Avoid locations with direct sunlight, excessive dust, or high humidity.
5.2 Connecting Peripherals
- Connect a monitor to the VGA port on the rear panel.
- Connect a USB keyboard and mouse to the available USB ports.
- Connect one or more Ethernet cables from your network to the Ethernet ports on the rear panel.
5.3 Power Connection
- Connect the provided power cable(s) to the power supply unit(s) on the rear of the server.
- Plug the other end of the power cable(s) into a grounded electrical outlet or a suitable uninterruptible power supply (UPS).
6. Operating the Server
6.1 Powering On
Press the power button on the front panel of the server. The power indicator LED should illuminate. The server will begin its boot sequence.
6.2 Initial Boot and Operating System
Upon initial power-on, the server will perform a Power-On Self-Test (POST). If an operating system (e.g., Windows Tower) is pre-installed, it will load automatically. Follow any on-screen prompts for initial setup or configuration.
6.3 Powering Off
To power off the server, it is recommended to shut down the operating system gracefully. Once the operating system has shut down, press and hold the power button on the front panel until the server powers off completely. For emergency shutdown, press and hold the power button for several seconds.
7. Maintenance
7.1 Cleaning
Regularly clean the exterior of the server with a soft, dry cloth. Ensure ventilation openings are free from dust and debris to maintain optimal cooling. Do not use liquid cleaners directly on the server.
7.2 Firmware and Software Updates
Periodically check the Fujitsu support website for the latest firmware updates for your server and drivers for your operating system. Keeping your server's firmware and software up-to-date ensures optimal performance, security, and compatibility.
7.3 Component Replacement
For component replacement (e.g., hard drives, RAM modules), refer to the detailed service manual available on the Fujitsu support website. Always disconnect power before opening the server chassis and follow anti-static precautions.
8. Troubleshooting
This section provides solutions to common issues. For more complex problems, consult the Fujitsu support website or contact technical support.
| Problem | Possible Cause | Solution |
|---|---|---|
| Server does not power on. | No power, faulty power cable, power supply issue. | Check power cable connections. Ensure outlet is functional. Test with a different power cable. |
| No display on monitor. | Monitor not connected, faulty VGA cable, monitor off. | Verify monitor connection and power. Test with another monitor or cable. |
| Operating system fails to load. | Corrupt OS, boot device issue, hardware failure. | Check boot order in BIOS/UEFI. Consult OS documentation for repair options. |
| Network connectivity issues. | Loose Ethernet cable, incorrect network settings, faulty network adapter. | Verify Ethernet cable connection. Check network adapter status in OS. Restart network devices. |
9. Specifications
The following are the key technical specifications for the Fujitsu PRIMERGY TX1330 M5 Tower Server:
- Model Number: VFY:T1335SC041IN
- Processor: Intel Xeon E-2388G, 3.2 GHz
- RAM: 32 GB DDR4-SDRAM (3200 MHz), expandable up to 128 GB
- Chassis Type: Tower
- Power Supply: 500 W (redundant power supply supported)
- Operating System: Windows Tower (as specified)
- Graphics: Integrated Intel HD Graphics
- USB Ports: 4x USB 2.0, 5x USB 3.0
- Network Interface: Ethernet (10/100/1000Base-T(X))
- Processor Socket: LGA 1151
- Dimensions (Package): 88.4 x 57.7 x 39.7 cm
- Weight (Package): 21.22 kg
10. Warranty and Support
For detailed warranty information, please refer to the warranty card included with your product or visit the official Fujitsu website. Technical support and additional resources, including drivers and detailed service manuals, can be found on the Fujitsu support portal.
Fujitsu Support Website: www.fujitsu.com/global/support/


