
WORKPRO W125226AE
WORKPRO Compact Router Combo Kit
Model: W125226AE
Instruction Manual
Introduction
Thank you for choosing the WORKPRO Compact Router Combo Kit. This manual provides essential information for the safe and efficient operation, maintenance, and troubleshooting of your new tool. Please read this manual thoroughly before initial use and retain it for future reference.
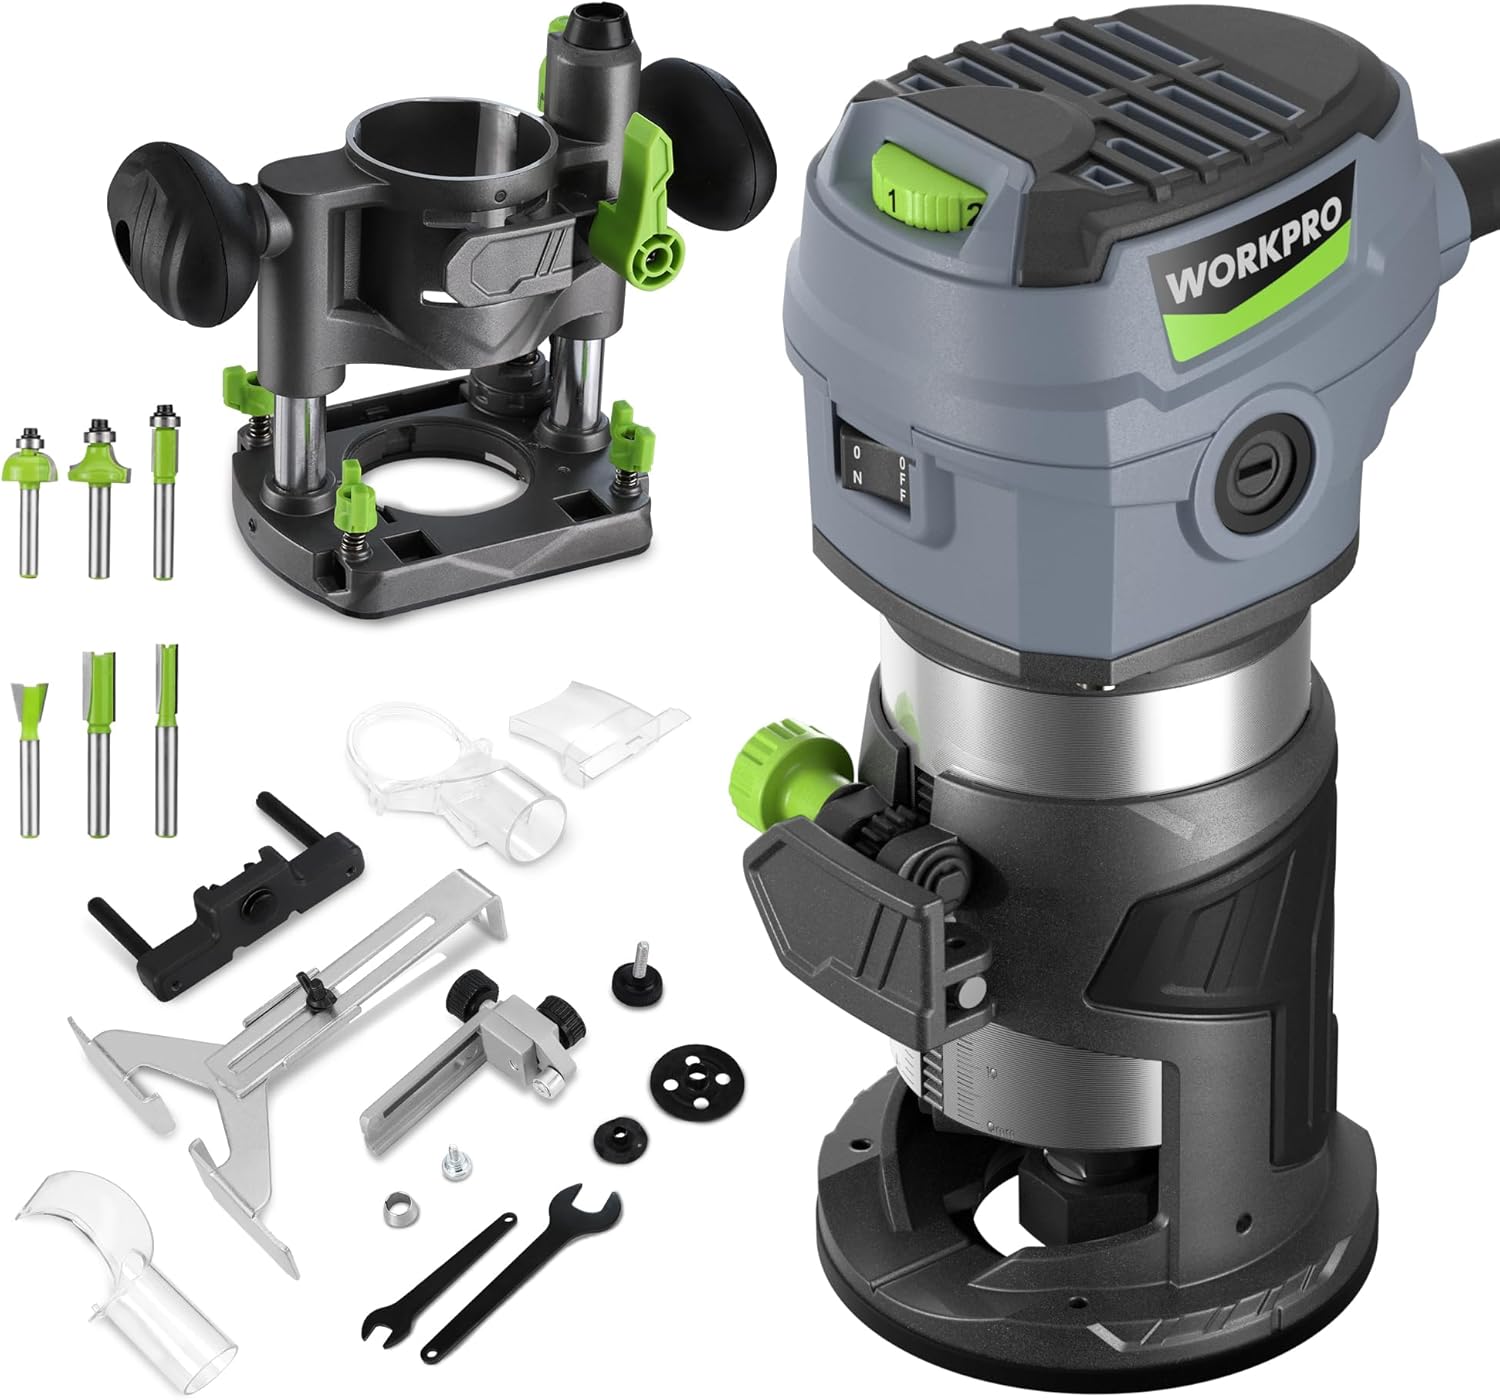
Figure 1: WORKPRO Compact Router Combo Kit, showing the main router unit, fixed base, plunge base, and included accessories.
Important Safety Information
WARNING: Always follow basic safety precautions to reduce the risk of fire, electric shock, and personal injury when using power tools.
- Work Area Safety: Keep your work area clean and well-lit. Cluttered or dark areas invite accidents. Do not operate power tools in explosive atmospheres, such as in the presence of flammable liquids, gases, or dust.
- Electrical Safety: Power tool plugs must match the outlet. Never modify the plug in any way. Do not expose power tools to rain or wet conditions.
- Personal Safety: Always wear appropriate eye protection (safety glasses or goggles) and hearing protection. Use a dust mask if operating in dusty conditions. Secure workpiece with clamps or a vise.
- Tool Use and Care: Do not force the power tool. Use the correct power tool for your application. Disconnect the plug from the power source before making any adjustments, changing accessories, or storing power tools.
- Dust Control: The transparent dust hood controls flying wood chips and provides an overview of the processing conditions. Always use dust collection systems when available to minimize airborne particles.
Product Components
The WORKPRO Compact Router Combo Kit includes the following main components and accessories:
- 1. Compact Router Unit: The core power tool with a 6.5 amp motor and variable speed control (12,000-30,000 RPM). Features a speed adjusting dial, depth adjustment knob, switch, brush holder cap, locking lever, depth scale, and spindle lock.
- 2. Fixed Base: Used for standard routing operations, allowing for precise depth adjustments.
- 3. Plunge Base: Provides controlled plunge routing for mortises, dados, and other applications requiring precise depth control.
- 4. Collet Cones: Includes 1/4” and 3/8” collet cones for compatibility with various router bits.
- 5. Router Bits: A set of 6 router bits for common woodworking tasks, including Cover Bit (R 1/4"), Rounding Over Bit (R 1/4"), Flush Trim Bit (D 3/8"), Dovetail Bit (D 1/2"), Straight Bit (D 3/8"), and Straight Bit (D 1/4").
- 6. Guides and Accessories:
- Straight Guide: Stabilizes the router for precise straight cuts.
- Trimming Guide: Ensures precise machining for edge trimming.
- Template Guides (x2): For following patterns and templates.
- Dust Hoods (x3): Transparent hoods for effective dust collection, providing visibility of the workpiece.
- Wrenches (x2): For tightening the spindle lock and changing bits.
- Guide Holder: Ensures the straight guide works properly on the plunge router.

Figure 4: The router with a dust hood attached for efficient dust collection.

Figure 2: Key components of the router unit and plunge base.

Figure 3: The 6-piece router bit set included with the kit.
Setup
Proper setup is crucial for safe and effective operation. Always ensure the router is unplugged before performing any setup procedures.
1. Installing Router Bits:
- Unscrew the chuck (collet nut) from the router spindle.
- Insert the desired router bit into the collet cone, ensuring it is fully seated.
- Screw the chuck back onto the spindle and tighten securely with the provided wrenches.

Figure 5: Step-by-step guide for installing router bits.
2. Attaching Bases:
The router unit can be attached to either the fixed base or the plunge base depending on your application. Align the router unit with the chosen base and secure it using the locking mechanism. Ensure it is firmly seated and locked before operation.
3. Depth Adjustment:
Adjust the routing depth using the depth adjustment knob and depth scale. For precise operation, make small adjustments and test on a scrap piece of material.
Operating Instructions
1. Power and Speed Control:
Connect the router to a 120-volt power source. The 6.5 amp motor provides ample power. Use the speed control dial to adjust the RPM from 12,000 to 30,000, matching the speed to the material and bit type for optimal results.

Figure 6: The router's powerful motor and variable speed control dial.
2. Routing Techniques:
This compact router is versatile for various woodworking applications:
- Slotting: Create grooves or slots in wood.
- Trimming: Perfect edges and flush trim laminates.
- Woodworking: Ideal for general woodworking, grooving, and edge planing.
- Handicraft Making: Suitable for detailed work and craft projects.
- Cabinet Making: Perform precise cuts for cabinetry.
- Surface Treatment: Smooth and shape wood surfaces.
- Curve Cutting & Pattern Processing: Use template guides for intricate designs.
- Chamfering & DIY: Create decorative edges and complete various DIY projects.

Figure 7: Examples of common applications for the WORKPRO Compact Router.
Maintenance
Regular maintenance ensures the longevity and optimal performance of your router.
- Cleaning: After each use, unplug the tool and clean off sawdust and debris from the motor housing and bases. Use a soft, dry cloth. Do not use harsh chemicals or abrasive cleaners.
- Brush Inspection: Periodically check the carbon brushes for wear. Replace them when they are worn down to approximately 1/4 inch or if the motor performance decreases. Refer to the "Brush Holder Cap" in Figure 2 for location.
- Lubrication: Apply a drop of machine oil to the plunge base shafts occasionally to ensure smooth action.
- Bit Care: Keep router bits clean and sharp for best results and to prevent motor strain.
Troubleshooting
If you encounter issues with your WORKPRO Compact Router, refer to the following common problems and solutions:
| Problem | Possible Cause | Solution |
|---|---|---|
| Motor cuts out during operation. | Overloading the motor by pushing too fast or taking too deep a cut. | Reduce feed rate and/or take shallower passes (e.g., 1/4" cuts at a time). Allow the router to work at its own pace. |
| Bit comes loose or out of adjustment. | Collet nut not tightened sufficiently. | Ensure the collet nut is securely tightened with the provided wrenches after bit installation. |
| Rough cut or burning of wood. | Dull bit, incorrect speed, or improper feed rate. | Replace dull bits. Adjust speed according to material (higher speed for smaller bits/softer wood, lower for larger bits/harder wood). Maintain a consistent, appropriate feed rate. |
Specifications
| Feature | Detail |
|---|---|
| Brand | WORKPRO |
| Model Number | W125226AE |
| Power Source | Corded Electric |
| Amperage | 6.5 Amps |
| Voltage | 120 Volts |
| Maximum Rotational Speed | 32,000 RPM |
| Variable Speeds | 6 (12,000-30,000 RPM) |
| Base Type | Fixed & Plunge |
| Item Weight | 4.31 Kilograms (9.48 pounds) |
| Material | Stainless Steel |
| Included Components | 6 x router bits, 1 x corded compact router, 1 x fixed base and plunge base, 1/4” and 3/8" collet cone, 1 x straight guide, 2 x template guides, 1 x trimming guide, 2 x wrenches, 3 x dust hoods, 1 x guide holder. |
Warranty and Support
For warranty information, technical support, or to purchase replacement parts, please visit the official WORKPRO website or contact their customer service. Keep your purchase receipt as proof of purchase for warranty claims.
Visit the WORKPRO Store on Amazon for more products and information.
Ask a question about this manual
Ask about setup, troubleshooting, compatibility, parts, safety, or missing instructions. Manuals+ will review the question and use this page’s manual context to help answer it.