
AIMIBO A8
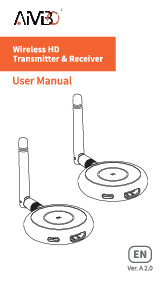
AIMIBO HDMI Wireless Transmitter & Receiver User Manual
Model: A8
1. Introduction
This user manual provides detailed instructions for setting up, operating, and maintaining your AIMIBO HDMI Wireless Transmitter & Receiver. This device allows for wireless transmission of HDMI signals, supporting various configurations including one-to-one, one-to-many, and many-to-one setups, along with KVM and IR remote control functionalities.
2. What's in the Box
Please verify that all items listed below are included in your package:
- Wireless HDMI Transmitter (TX)
- Wireless HDMI Receiver (RX)
- 2 x HDMI Cables
- 2 x IR Cables
- 1 x USB Cable
- 1 x Audio Cable
- 2 x DV Power Cables
- 1 x User Manual

Image: The complete package contents of the AIMIBO HDMI Wireless Extender, showing all included accessories.
3. Product Overview
The AIMIBO HDMI Wireless Extender system consists of two main units: the Transmitter (TX) and the Receiver (RX). Each unit is designed for specific functions to ensure seamless wireless signal transmission.
Transmitter (TX) Unit
The TX unit connects to your source device (e.g., laptop, PC, Blu-ray player) and sends the HDMI signal wirelessly. It features an HDMI input, an HDMI loop-out, a USB port for KVM functionality, and an IR output port.
Receiver (RX) Unit
The RX unit connects to your display device (e.g., TV, monitor, projector) and receives the wireless HDMI signal. It includes an HDMI output, two USB ports for KVM (keyboard and mouse) connections, and an IR input port.

Image: Detailed diagram showing the front and back panels of both the Transmitter and Receiver units, indicating all ports and LED indicators.
4. Setup Guide
Follow these steps for a successful initial setup of your AIMIBO Wireless HDMI Extender:
- Power Connection: Plug the provided DV 12V power cables into both the Transmitter (TX) and Receiver (RX) units. Ensure both units are powered on.
- Mode Selection: Set both the TX and RX units to SP mode using the switch on the side.
- Initial Pairing (SP Mode): To pair the units, connect an HDMI cable from the HDMI OUT port of the RX unit to the HDMI IN port of the TX unit. Wait for 3-5 seconds until the STA light (third LED from the left) on both units becomes solid, indicating successful pairing. Once paired, remove this HDMI cable.
- Connect TX to Source: Connect an HDMI cable from your source device (e.g., laptop, PC, game console) to the HDMI IN port on the TX unit.
- Connect RX to Display: Connect an HDMI cable from the HDMI OUT port on the RX unit to your display device (e.g., TV, monitor, projector).
- Auto Streaming: After connecting, wait approximately 3 seconds for the devices to auto-stream the content.
Video: This video demonstrates the two connection modes (SP and SW) for the AIMIBO Wireless HDMI Extender, showing how to set up and achieve auto-streaming between devices.
5. Operating Modes
The AIMIBO Wireless HDMI Extender supports two primary operating modes for flexible signal distribution:
5.1. SP Mode (Splitter Mode: 1 Transmitter to Multiple Receivers)
In SP mode, one Transmitter (TX) unit can send an HDMI signal to up to eight Receiver (RX) units simultaneously. This is ideal for displaying the same content on multiple screens in different locations.
- Ensure both TX and all RX units are set to SP mode.
- Pair the TX unit with each RX unit individually as described in the "Setup Guide" (Section 4).
- Connect your source device to the TX unit and each RX unit to its respective display.

Image: Visual representation of SP Mode, showing a single Transmitter connected to a laptop, broadcasting content to four separate Receiver units connected to individual screens.
Video: This video demonstrates the AIMIBO HDMI Extender operating in a 1 TX to multiple screens configuration, showcasing its ability to broadcast content to several displays simultaneously.
Video: This video illustrates the AIMIBO Wireless HDMI Extender's capability to connect one Transmitter to up to eight Receivers, enabling simultaneous display on multiple screens.
Video: This video demonstrates the AIMIBO HDMI Extender's functionality to connect one Transmitter to two TVs, allowing for dual display of content.
5.2. SW Mode (Switch Mode: 1 Receiver to Multiple Transmitters)
In SW mode, one Receiver (RX) unit can receive signals from up to eight Transmitter (TX) units. This is useful in environments like meeting rooms where multiple users need to share their screens on a single display.
- Ensure the RX unit and all TX units are set to SW mode.
- Connect each TX unit to its respective source device.
- Connect the RX unit to the main display.
- Use the ID button on the RX unit to switch between the different TX sources.

Image: Visual representation of SW Mode, showing multiple laptops (each with a Transmitter) wirelessly connecting to a single Receiver unit, which is then connected to a large projector screen.
6. KVM Functionality
The KVM (Keyboard, Video, Mouse) function allows you to control your source device remotely from the Receiver (RX) side. This is particularly useful for managing a computer located in another room.
- Connect your keyboard and mouse to the two USB ports on the Receiver (RX) unit.
- Connect a USB cable from the Transmitter (TX) unit's USB port to your source computer (e.g., laptop, PC).
- Once connected, you can use the keyboard and mouse connected to the RX unit to control the source computer.

Image: A setup illustrating the KVM function, where a user operates a computer connected to the TX unit using a keyboard and mouse plugged into the RX unit, with the display showing the computer's screen.
Video: This video highlights the professional features of the AIMIBO wireless HDMI extender, including its KVM functionality for remote control of source devices.
7. IR Remote Control
The IR (Infrared) remote control feature allows you to control your source device (e.g., cable box, Blu-ray player) from the location of your display, even if the source device is in another room.
- Connect the IR IN cable to the IR IN port on the Receiver (RX) unit. Position the IR receiver eye in a location where it can receive signals from your remote control.
- Connect the IR OUT cable to the IR OUT port on the Transmitter (TX) unit. Position the IR emitter eye near the IR sensor of your source device.
- You can now use your original remote control at the display location to control the source device.

Image: An illustration demonstrating the IR remote control setup, with the IR IN connected to the Receiver near the TV and the IR OUT connected to the Transmitter near the source device, enabling remote control.
8. Local Loop-out
The Transmitter (TX) unit features an HDMI loop-out port, allowing you to connect a local display directly to the TX unit while simultaneously transmitting the signal wirelessly to the Receiver (RX) unit. This is useful for monitoring the source content locally.
- Connect your source device to the HDMI IN port on the TX unit.
- Connect a local display (e.g., a monitor) to the HDMI OUT (Loop-out) port on the TX unit.
- The signal will be displayed on both the local monitor and transmitted wirelessly to the RX unit.

Image: A setup demonstrating the HDMI loop-out feature, where a laptop's display is simultaneously shown on a large TV via wireless transmission and on a smaller local monitor connected directly to the Transmitter.
9. Specifications
| Feature | Description |
|---|---|
| Brand | AIMIBO |
| Model Number | A8 |
| Wireless Type | Infrared (for IR remote) |
| Connectivity Technology | Wireless HDMI (5.8G) |
| Max Transmission Range | Up to 656 feet (200m) line-of-sight |
| Supported Resolutions | 480P, 576P, 720P, 1080P@60Hz |
| Latency | Approximately 0.1 seconds |
| Operating Modes | SP Mode (1 TX to 8 RXs Max), SW Mode (1 RX to 8 TXs Max) |
| KVM Function | Yes (Keyboard & Mouse control via RX USB ports) |
| IR Remote Control | Yes |
| Local Loop-out | Yes (on TX unit) |
| Audio Output Mode | Stereo |
| Surround Sound | 5.1 Channel Configuration |
| Video Encoding | H.264, H.265/HEVC |
| Item Weight | 1.96 pounds |
| Product Dimensions | 5.91 x 1.97 x 1.97 inches |
10. Troubleshooting
If you encounter issues with your AIMIBO HDMI Wireless Extender, please refer to the following common troubleshooting steps:
- No Signal/Black Screen:
- Ensure both TX and RX units are powered on and their power indicator lights are solid.
- Verify all HDMI cables are securely connected to the correct ports (HDMI IN on TX, HDMI OUT on RX).
- Confirm that the TX and RX units are set to the correct operating mode (SP or SW) and are properly paired (STA light solid). If not, re-pair them as per Section 4.
- Check the input source on your display device to ensure it's set to the correct HDMI input.
- Reduce the distance between the TX and RX units, or remove any major obstructions (thick walls, metal objects) that might interfere with the wireless signal.
- Try restarting both the TX and RX units by unplugging and re-plugging their power cables.
- KVM (Keyboard/Mouse) Not Responding:
- Ensure the USB cable is connected from the TX unit to your source computer.
- Verify that the keyboard and mouse are properly connected to the USB ports on the RX unit.
- Some peripherals may require a few moments to be recognized. Wait for a short period after connecting.
- Try connecting a different keyboard or mouse to rule out peripheral compatibility issues.
- IR Remote Control Not Working:
- Ensure the IR IN cable is connected to the RX unit and the IR OUT cable to the TX unit.
- Verify that the IR receiver eye on the RX unit is positioned to receive signals from your remote.
- Ensure the IR emitter eye on the TX unit is placed directly in front of or very close to the IR sensor of your source device.
- Check the batteries in your remote control.
- Intermittent Signal/Flickering:
- This can be caused by interference. Try changing the wireless channel if available (refer to product documentation for specific channel changing instructions, if applicable).
- Ensure there are no other 5.8Ghz wireless devices operating very close to the extender units.
- Check for strong electromagnetic interference from other electronics.
11. Maintenance
To ensure the longevity and optimal performance of your AIMIBO HDMI Wireless Extender, follow these maintenance guidelines:
- Cleaning: Use a soft, dry cloth to clean the exterior of the units. Do not use liquid cleaners or aerosol sprays.
- Ventilation: Ensure adequate airflow around both the TX and RX units to prevent overheating. Do not block ventilation openings.
- Storage: When not in use for extended periods, store the units in a cool, dry place away from direct sunlight and extreme temperatures.
- Handling: Handle the units and cables with care to avoid physical damage.
12. Warranty and Support
AIMIBO products are designed for reliability and performance. In the event of any issues, please contact customer support.
For technical assistance or warranty claims, please reach out to AIMIBO customer support via email at support@aimibo.tv. Please provide your product model number (A8) and a detailed description of the issue for prompt assistance.
Related documentsA8




Ask a question about this manual
Ask about setup, troubleshooting, compatibility, parts, safety, or missing instructions. Manuals+ will review the question and use this page’s manual context to help answer it.