
1. Introduction
This manual provides comprehensive instructions for the installation, operation, and maintenance of your Morecam J9 Wireless Video Doorbell Camera with Chime. Please read this manual thoroughly before using the product to ensure correct usage and optimal performance. Keep this manual for future reference.
The Morecam J9 Wireless Video Doorbell offers enhanced home security features including 1080P HD video, two-way audio, PIR human detection, night vision, and a wireless chime. It operates on 2.4GHz Wi-Fi and is battery-powered for convenient installation.
2. Package Contents
Verify that all items listed below are present in your package. If any items are missing or damaged, please contact customer support.
- Morecam J9 Wireless Video Doorbell Camera
- Wireless Chime
- Mounting Bracket
- Mounting Screws and Wall Anchors
- USB Charging Cable
- User Manual

Image: The Morecam J9 Wireless Video Doorbell, its accompanying wireless chime, and a smartphone displaying the doorbell's live view interface.
3. Product Overview
Familiarize yourself with the components of your doorbell camera and chime.
Doorbell Camera
- Camera Lens: Captures video.
- PIR Motion Sensor: Detects human movement.
- Microphone: Captures audio for two-way communication.
- Speaker: Outputs audio for two-way communication.
- Doorbell Button: Activates the doorbell and sends notifications.
- Status Indicator Light: Shows device status (e.g., charging, connected).
- USB Charging Port: For recharging the internal battery.
- Reset Button: Used for factory reset or pairing.
- Micro SD Card Slot: For local video storage (supports up to 128GB, card not included).
Wireless Chime
- Speaker: Emits doorbell sound.
- Volume Button: Adjusts chime volume.
- Melody Button: Changes chime melody.
- Power Plug: For connecting to a standard wall outlet.

Image: The Morecam J9 Doorbell Camera mounted outdoors, demonstrating its IP66 weather resistance against rain, snow, heat, and dust.
4. Setup
4.1 Charge the Doorbell Camera
- Locate the USB charging port on the doorbell camera.
- Connect the provided USB charging cable to the doorbell and a compatible USB power adapter (not included).
- Charge the doorbell for approximately 8-10 hours before first use. The status indicator light will show charging status and turn off when fully charged.
4.2 Download the App
- Search for the "CloudEdge" app in your smartphone's app store (App Store for iOS or Google Play Store for Android).
- Download and install the app.
- Register for an account and log in.
4.3 Pair the Doorbell with the App
- Ensure your smartphone is connected to a 2.4GHz Wi-Fi network. Note: 5GHz Wi-Fi is not supported.
- Open the CloudEdge app and tap the "+" icon to add a new device.
- Select "Video Doorbell" from the device list.
- Follow the on-screen instructions to power on the doorbell and enter pairing mode (usually indicated by a flashing blue light).
- Scan the QR code displayed on your phone with the doorbell camera. Hold the phone approximately 15-30 cm (6-12 inches) from the camera lens.
- Once connected, the doorbell will confirm successful pairing, and you can name your device.
4.4 Pair the Wireless Chime
- Plug the wireless chime into a standard wall outlet within range of your doorbell camera.
- Press the "Pairing" button on the chime (refer to chime's specific instructions if available).
- Press the doorbell button on the camera. The chime should ring, indicating successful pairing.
- You can adjust the volume and melody using the respective buttons on the chime.
4.5 Installation
Choose a suitable location for your doorbell camera, typically near your front door, ensuring a clear view and good Wi-Fi signal strength.
- Mark Drill Holes: Place the mounting bracket against the wall at your desired height and mark the positions for drilling.
- Drill Holes: Use a drill bit appropriate for your wall type to drill holes at the marked positions.
- Insert Wall Anchors: If installing on masonry or stucco, insert the provided wall anchors into the drilled holes.
- Secure Bracket: Attach the mounting bracket to the wall using the provided screws.
- Mount Doorbell: Slide the doorbell camera onto the mounting bracket until it clicks securely into place.
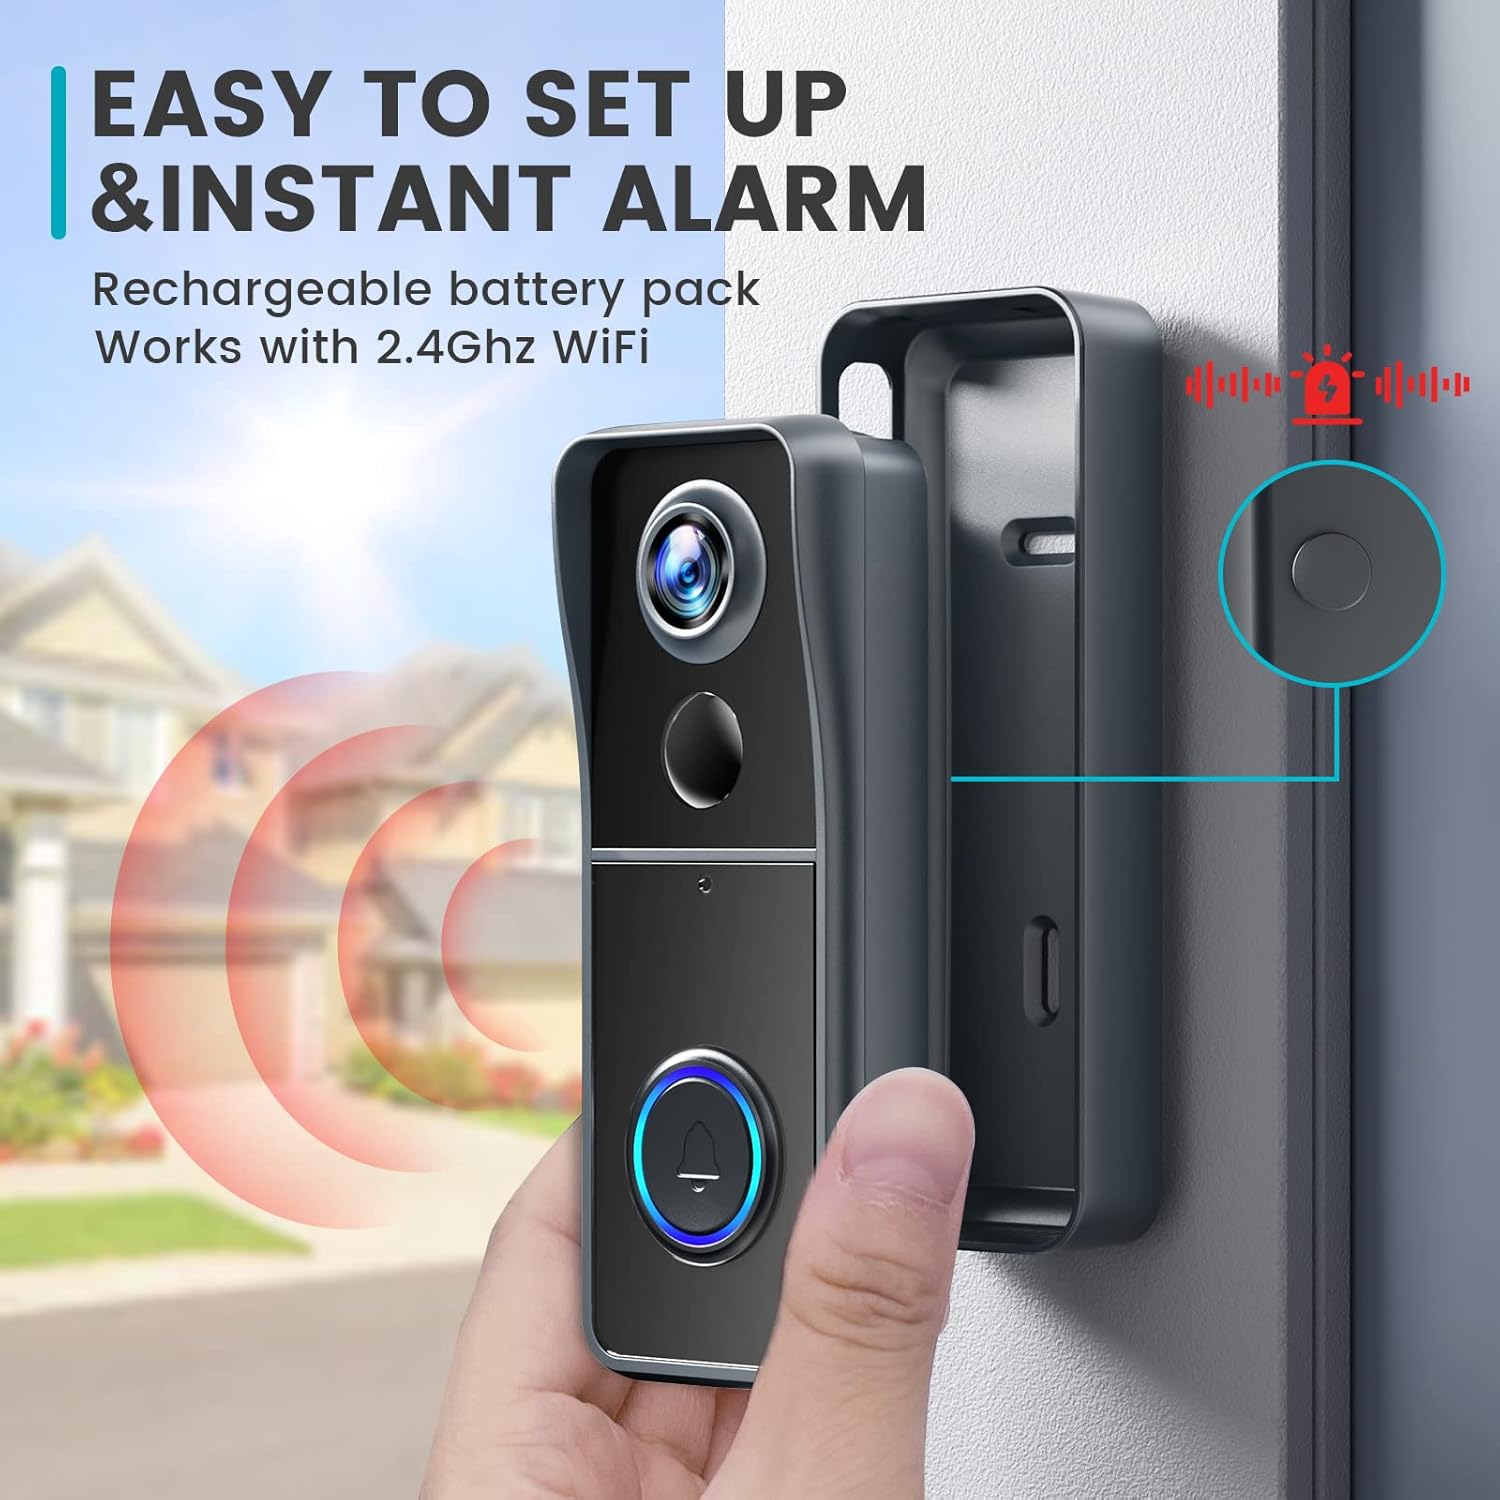
Image: A hand installing the Morecam J9 Doorbell Camera onto its mounting bracket on a wall, illustrating the ease of setup.
5. Operating Instructions
5.1 Live View
Open the CloudEdge app and select your doorbell camera to access the live video feed. This allows you to view your doorstep in real-time.
5.2 Two-Way Communication
When a visitor presses the doorbell or motion is detected, you will receive a notification on your smartphone. Tap the notification to enter live view and use the microphone icon in the app to speak to the visitor. The doorbell's speaker will transmit your voice.
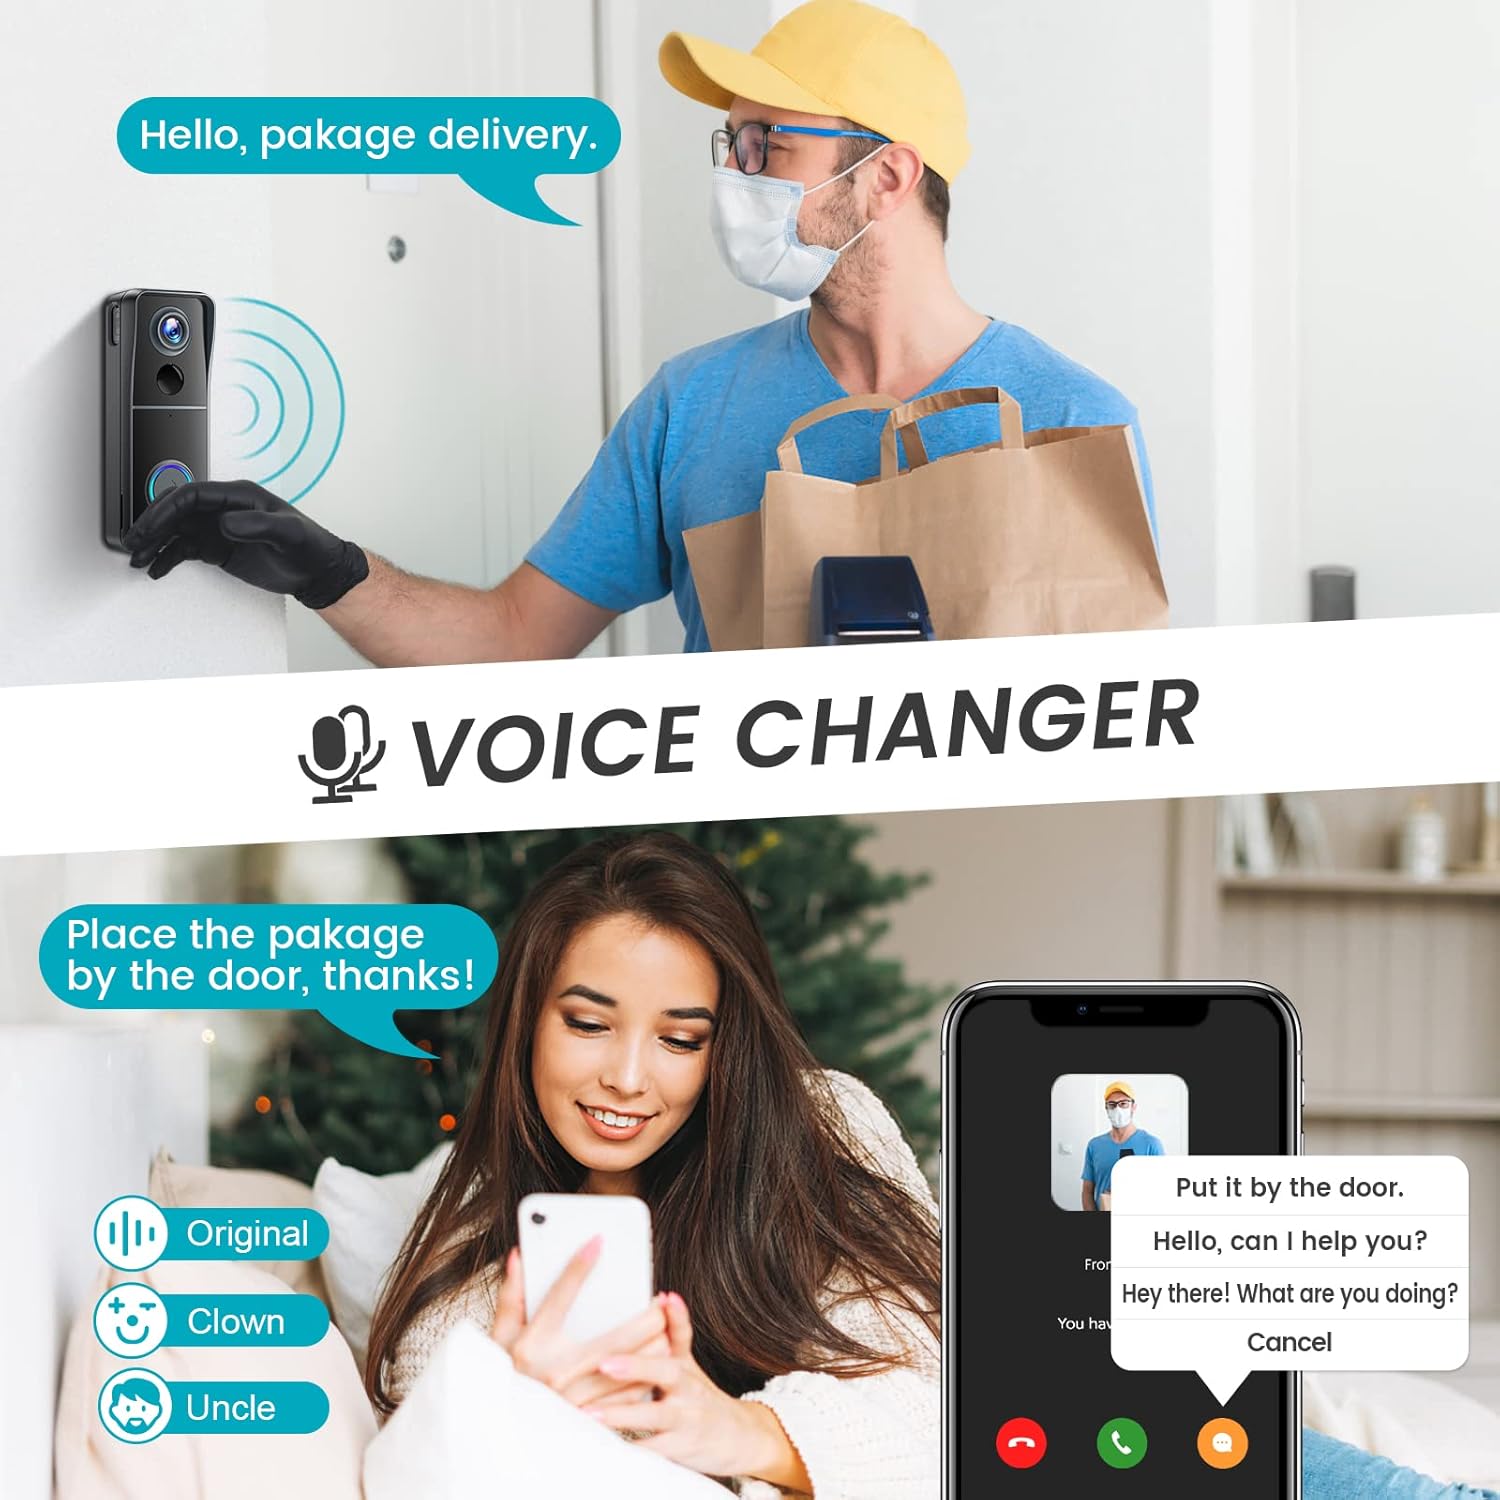
Image: A delivery person at the door and a user interacting via the Morecam J9 Doorbell Camera's two-way communication feature, which includes a voice changer option.
5.3 PIR Human Detection and Motion Zones
The doorbell features PIR (Passive Infrared) human detection to minimize false alarms. You can enable and customize this function within the app settings. Additionally, you can define specific motion zones to focus detection on critical areas and ignore irrelevant movements.

Image: A smartphone displaying a notification from the Morecam J9 Doorbell Camera indicating PIR human detection, with a child on rollerblades in the background.

Image: A smartphone screen showing the customizable motion zones feature of the Morecam J9 Doorbell Camera, allowing users to define specific areas for motion detection.
5.4 Voice Changer
The Morecam J9 doorbell includes a voice changer feature. During two-way communication, you can select different voice options within the app to modify your voice for privacy or other preferences.
5.5 Night Vision
The doorbell camera is equipped with infrared (IR) night vision. When ambient light levels are low, the IR lights will automatically activate, providing clear video footage even in complete darkness.
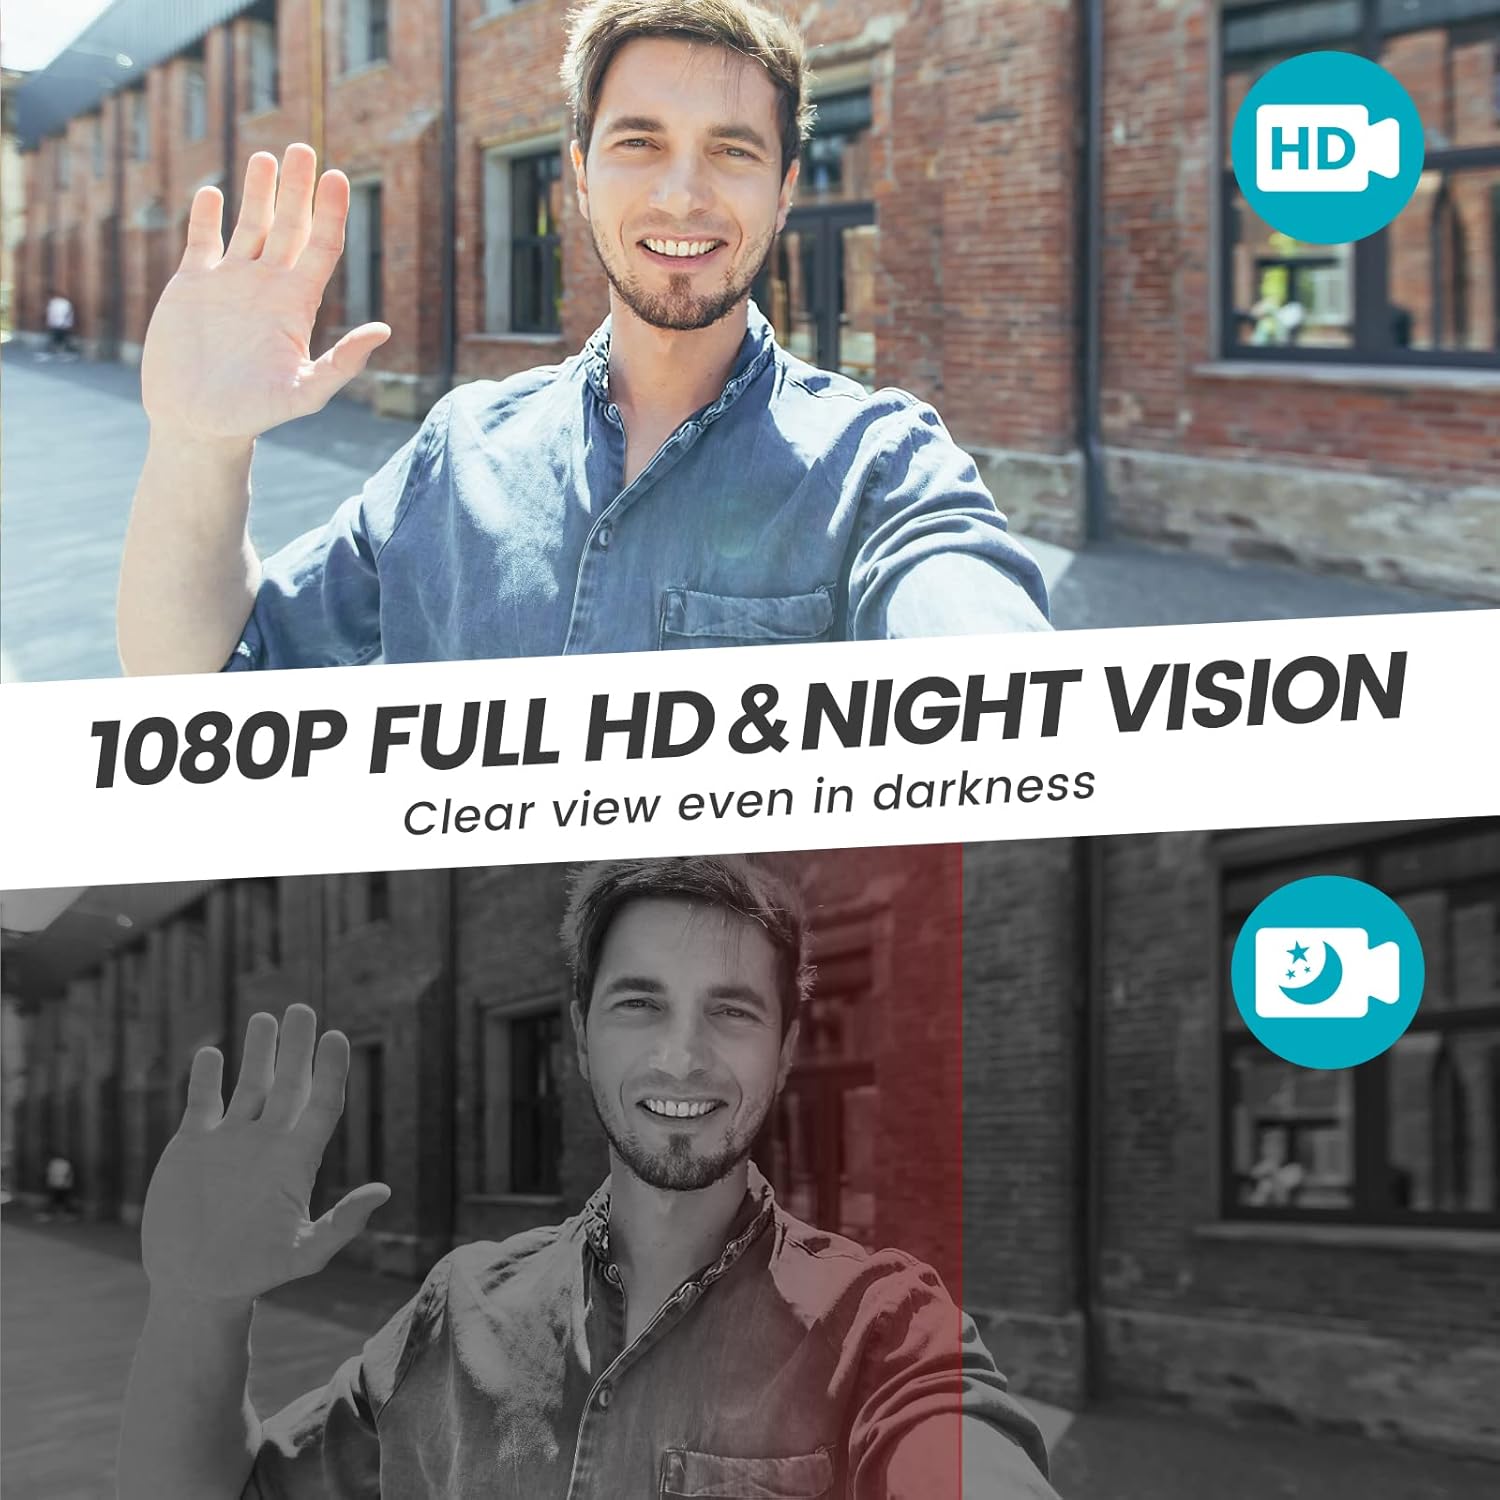
Image: A split image demonstrating the 1080P Full HD video quality of the Morecam J9 Doorbell Camera in daylight and its clear night vision capabilities in darkness.
5.6 Video Storage
The Morecam J9 supports two storage options for recorded video:
- Micro SD Card: Insert a Micro SD card (up to 128GB, not included) into the designated slot for local storage.
- Cloud Storage: A 7-day trial of cloud storage is typically included. You can subscribe to a cloud plan through the app for continuous cloud recording and access.

Image: A hand holding a smartphone displaying the Morecam J9 Doorbell Camera's app interface, highlighting options for live view, history, and cloud storage, with text indicating "No Monthly Fees" for SD card storage and "7-day free cloud storage".
6. Maintenance
6.1 Battery Charging
When the battery level is low, you will receive a notification via the app. Remove the doorbell camera from its mounting bracket and recharge it using the provided USB cable. A full charge can take 8-10 hours.
6.2 Cleaning
Periodically clean the camera lens and the doorbell's exterior with a soft, damp cloth to ensure clear video quality and proper sensor function. Avoid using harsh chemicals or abrasive materials.
7. Troubleshooting
- Doorbell not connecting to Wi-Fi:
- Ensure your Wi-Fi network is 2.4GHz. 5GHz networks are not supported.
- Check Wi-Fi signal strength at the doorbell's location. Move the doorbell closer to the router if necessary.
- Restart your Wi-Fi router and the doorbell camera.
- Ensure the Wi-Fi password entered in the app is correct. - No notifications received:
- Check your smartphone's app notification settings to ensure notifications for the CloudEdge app are enabled.
- Verify that motion detection and doorbell press notifications are enabled within the app settings.
- Ensure your phone has an active internet connection. - Poor video quality:
- Clean the camera lens.
- Ensure adequate Wi-Fi signal strength. Poor signal can affect streaming quality.
- Check for obstructions in front of the camera. - Chime not ringing:
- Ensure the chime is plugged into a working power outlet.
- Re-pair the chime with the doorbell camera as described in Section 4.4. - Battery drains quickly:
- Frequent motion detection events or live view access can consume more battery. Adjust motion sensitivity and recording duration in the app.
- Ensure the doorbell is fully charged after each charging cycle.
8. Specifications
| Feature | Specification |
|---|---|
| Model Name | J9 |
| Video Resolution | 1080 Pixels (Effective), 720p (Capture) |
| Viewing Angle | 145 Degrees |
| Frame Rate | 30 fps |
| Connectivity | Wireless (2.4GHz Wi-Fi only) |
| Power Source | Battery Powered |
| Special Features | Motion Sensor, Night Vision, Two-Way Audio, Voice Changer |
| Storage Options | Micro SD Card (up to 128GB), Cloud Storage |
| Weather Resistance | IP66 (implied by feature image) |
| Dimensions (L x W x H) | 17.9 x 9.8 x 7.5 cm |
| Weight | 431 g |
9. Warranty and Support
For warranty information, technical support, or further assistance, please refer to the product packaging, the official Morecam website, or contact Morecam customer service directly. Keep your purchase receipt as proof of purchase for warranty claims.


