
1. Introduction
The Nextion 10.1" Intelligent Series HMI Display (Model: NX1060P101-011C-I) is a capacitive LCD-TFT touch screen with a resolution of 1024x600 pixels. Designed for a wide range of human-machine interface (HMI) applications, this display offers powerful hardware and unique functions such as audio, video, and animation playback. It is an ideal solution for projects requiring intuitive graphical user interfaces, simplifying development with its free programming software.

2. Key Features
- Powerful Hardware: Equipped with a 200MHz MCU, 128MB Flash storage, and 512KB SRAM for robust performance.
- Unique Functions: Supports audio, video, and animation playback, transparent components, page loading effects, and component move/drag functionalities for enhanced HMI interaction.
- Free Programming Software: Utilizes the free Nextion Editor, featuring display-side encoding for ASCII text-based instructions, a built-in debugger for HMI project simulation, and drag-and-drop components for intuitive GUI design.
- Wide Range of Applications: Versatile for use in vehicle HMI systems, 3D printers, medical devices, beauty devices, and production line controls.
- Quality and Safety Assurance: Guaranteed availability for a minimum of 5 years, CE and RoHS compliant, with responsive technical support.

Video 1: An overview of the Nextion Intelligent Series HMI Display, showcasing its features and various applications in different industries.
3. Setup Guide
This section outlines the basic steps to set up your Nextion HMI Display. For detailed instructions, refer to the official Nextion documentation and software guides.
- Unpack the Contents: Carefully remove all items from the packaging. Verify that all components listed in the "What's in the Box" section are present.
- Power Connection: Connect the display to a stable 5V power source using the provided XH2.54 4P wire or the Power Supply Test Board. Ensure correct polarity to prevent damage.
- Serial Communication: Connect the TTL serial interface (+5V, TX, RX, GND) to your microcontroller or development board.
- Software Installation: Download and install the latest version of the Nextion Editor software from the official Nextion website.
- Project Upload: Use the Nextion Editor to create or load your HMI project. Upload the compiled project file to the display via the serial connection or an SD card.
4. Operating Instructions
The Nextion HMI Display operates based on the project loaded onto it using the Nextion Editor. Interaction is primarily through the capacitive touch screen.
4.1. Using the Nextion Editor
The Nextion Editor is a powerful visual development environment for designing your HMI. It allows you to:
- Design graphical interfaces using drag-and-drop components (buttons, text boxes, progress bars, images, etc.).
- Define interactions and events for each component.
- Implement display-side logic using ASCII text-based instructions.
- Simulate your HMI project before uploading to the physical display.

4.2. Touch Screen Interaction
The capacitive touch screen allows for intuitive interaction with the HMI. Depending on the loaded project, you can tap buttons, slide controls, input text, and navigate through different screens. Ensure your fingers are clean and dry for optimal touch responsiveness.
5. Applications
The Nextion Intelligent Series HMI Display is highly adaptable and can be integrated into various systems and environments:
- Vehicle HMI: Ideal for custom car dashboards, infotainment systems, and vehicle control panels.
- 3D Printers: Provides an interactive control interface for managing print jobs, settings, and monitoring progress.
- Medical Devices: Can be used in diagnostic equipment, patient monitoring systems, and other medical instruments requiring a user-friendly interface.
- Beauty Devices: Suitable for control panels on cosmetic and aesthetic equipment.
- Production Lines: Enhances control and monitoring systems in industrial automation and manufacturing processes.
- IoT Smart Devices: Integrates seamlessly into smart home appliances and other Internet of Things applications.


6. Maintenance
To ensure the longevity and optimal performance of your Nextion HMI Display, follow these maintenance guidelines:
- Cleaning: Use a soft, lint-free cloth slightly dampened with water or a screen-safe cleaner to wipe the display surface. Avoid abrasive materials, harsh chemicals, or excessive moisture.
- Handling: Handle the display by its edges. Avoid applying excessive pressure to the screen or dropping the device.
- Environment: Operate and store the display within its specified temperature and humidity ranges. Protect it from direct sunlight, extreme temperatures, and dusty environments.
- Power Supply: Always use a stable 5V power supply. Fluctuations or incorrect voltage can damage the display.
7. Troubleshooting
This section addresses common issues you might encounter with your Nextion HMI Display. For more complex problems, refer to the official Nextion support resources.
| Problem | Possible Cause | Solution |
|---|---|---|
| Display does not power on. | Incorrect power connection, insufficient power supply. | Verify 5V power supply and correct wiring. Check power adapter. |
| Touch screen unresponsive. | Project not loaded, touch controller issue, dirty screen. | Ensure a valid HMI project is loaded. Clean the screen. Re-upload project. |
| Communication errors with MCU. | Incorrect serial wiring, baud rate mismatch, software issues. | Check TX/RX connections. Verify baud rates in Nextion Editor and MCU code. Consult Nextion documentation. |
| Display shows blank screen after power cycle. | Project not set to auto-run, or issue with project file. | In Nextion Editor, ensure `runmod = 0` is set for auto-start. Re-upload the project. |
8. Specifications
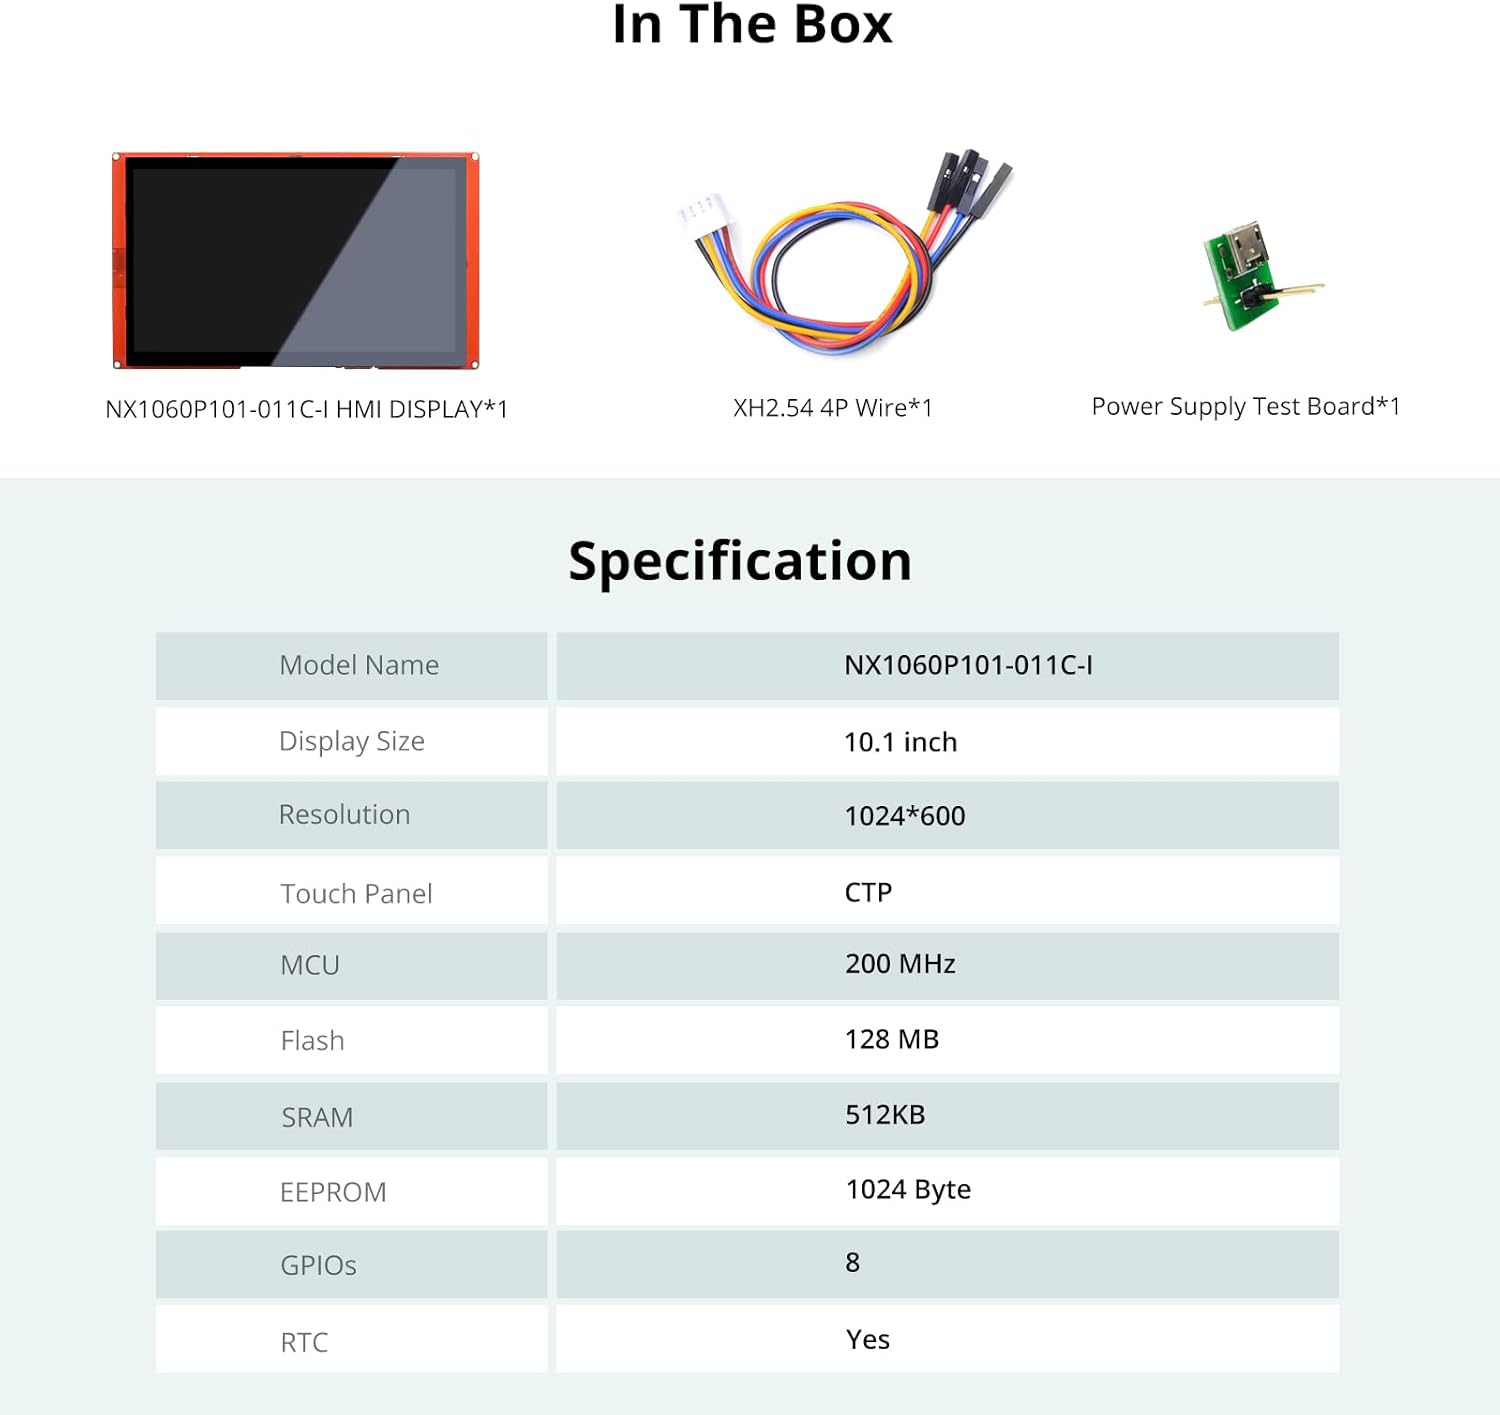
| Model Name | NX1060P101-011C-I |
| Display Size | 10.1 Inches |
| Resolution | 1024 x 600 |
| Touch Panel Type | Capacitive (CTP) |
| MCU Speed | 200 MHz |
| Flash Memory | 128 MB |
| SRAM | 512 KB |
| EEPROM | 1024 Byte |
| GPIOs | 8 |
| Real-Time Clock (RTC) | Yes |
| Operating System | Linux (internal) |
| Product Dimensions (LxWxH) | 10.16 x 5.98 x 0.71 inches |
| Item Weight | 1.28 pounds |
9. What's in the Box
- Nextion HMI Display (1 unit)
- Power Supply Test Board (1 unit)
- XH2.54 4P Wire (1 unit)

10. Warranty and Support
NEXTION guarantees the availability of all Intelligent Series products for a minimum of 5 years. The product is CE and RoHS compliant, ensuring adherence to international safety and environmental standards.
For technical assistance, documentation, and software downloads, please visit the official NEXTION website or contact their technical support team. Responsive basic hardware technical service is available across all time zones.
You can also find more information and products at the Official NEXTION Store on Amazon.


