
1. Introduction and Overview
The RYOBI USB Lithium 3-Port Charger is designed to efficiently charge and maintain up to three RYOBI USB Lithium batteries. This charger offers significantly faster charging compared to a standard USB cable, reducing downtime and enhancing productivity. It features intuitive LED indicators for battery status and an Energy Save Mode for power conservation. Its compact design and wall-mount capability ensure convenient storage and organization.
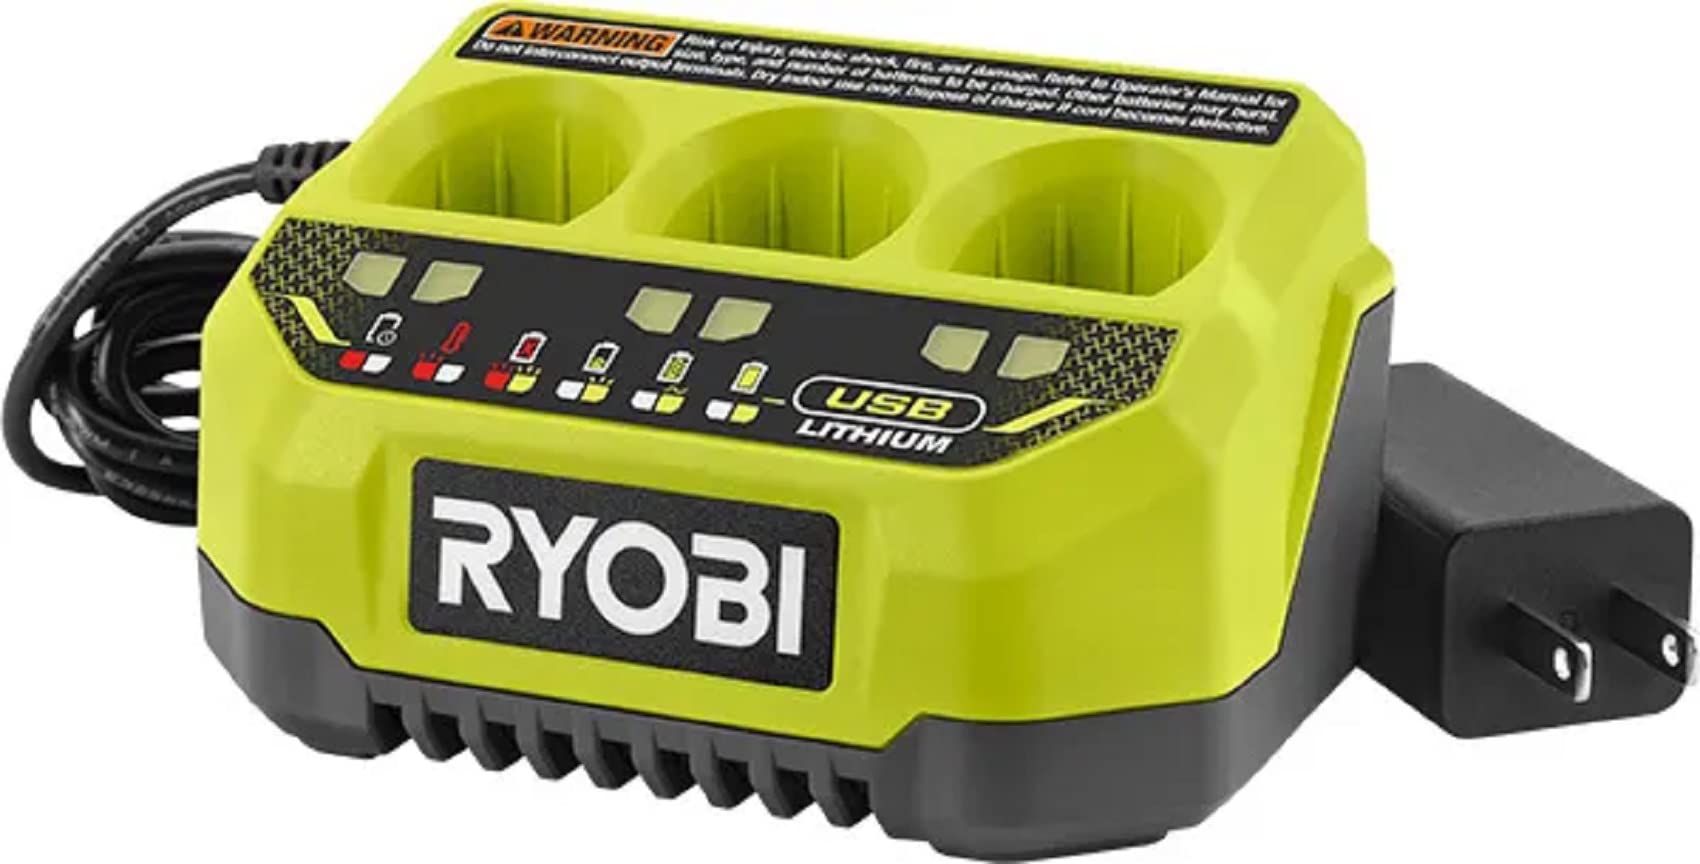
Image: The RYOBI USB Lithium 3-Port Charger with three USB Lithium batteries inserted, showing its compact design.
2. Safety Information
WARNING: Risk of injury, electric shock, fire, and damage. Refer to the Operator's Manual for the correct use, type, and number of batteries to be charged. Other batteries may burst. Do not interconnect output terminals. Use indoors only. Dispose of the charger if the cord becomes defective.
- Always ensure the charger is connected to a compatible power source.
- Do not attempt to charge non-RYOBI USB Lithium batteries.
- Avoid exposing the charger or batteries to moisture, extreme temperatures, or direct sunlight.
- Inspect the charger and its cord for any damage before each use. Do not use if damaged.
- Keep out of reach of children.
3. Package Contents
Your RYOBI USB Lithium 3-Port Charger package includes:
- 1 x FVCH01 USB Lithium 3-Port Charger
- 1 x Operator's Manual
Note: Batteries are sold separately.
4. Setup
- Unpack the charger and all its components.
- Place the charger on a stable, dry, and flat surface, away from direct sunlight or heat sources.
- Plug the charger's power cord into a standard 120V AC electrical outlet. The red LED indicator light will illuminate, signifying that the charger is powered on and ready for use.
5. Operating Instructions
- Inserting Batteries: Align a RYOBI USB Lithium battery with one of the three charging ports on the charger. Gently push the battery down into the port until it clicks securely into place.
- Automatic Charging: Once a battery is correctly inserted, the charger will automatically begin the charging process. The corresponding LED indicator light for that port will change to reflect the charging status.
- Consecutive Charging: The 3-Port Charger is designed to charge batteries consecutively. If multiple batteries are inserted, it will charge them one after another until all are fully charged.
- Removing Batteries: To remove a fully charged battery, simply pull it upwards from the charging port.
Video: This video demonstrates the insertion of a RYOBI USB Lithium battery into the 3-Port Charger and how the LED indicators respond during the charging process.
6. LED Indicator Guide
The charger features LED indicator lights for each port to communicate the battery's status:
- Solid Red Light: Charger is powered on, but no battery is inserted or ready for charging.
- Flashing Green Light: The battery is currently charging.
- Solid Green Light: The battery is fully charged.
- Flashing Red Light: The battery is overheating. Remove the battery and allow it to cool down before attempting to charge again.
- Flashing Red and Green Light: Indicates a battery failure or an issue with the charging process. The battery may be defective.
7. Energy Save Mode
The charger is equipped with an Energy Save Mode. This feature automatically conserves energy when no batteries are actively charging or being maintained in the ports. This helps reduce power consumption when the charger is not in full use.
8. Wall Mounting
For optimal workspace organization, the RYOBI USB Lithium 3-Port Charger includes wall-mount capabilities. Utilize the designated mounting holes on the back of the unit to securely attach it to a wall, keeping your workspace tidy and the charger easily accessible.
9. Maintenance
- Cleaning: Regularly wipe the charger's exterior with a soft, dry cloth. Do not use harsh chemicals or abrasive cleaners. Ensure no debris accumulates in the charging ports.
- Cord Inspection: Periodically check the power cord for any cuts, fraying, or damage. If the cord is damaged, discontinue use and dispose of the charger properly.
- Storage: When not in use, store the charger in a dry, indoor location. If storing for extended periods, ensure batteries are removed.
- Maintenance Mode: The charger features a maintenance mode that prevents overcharging when batteries are left in the charger after reaching full capacity. This helps prolong battery life.
10. Troubleshooting
If you encounter issues with your charger, refer to the LED indicator guide (Section 6) for specific error codes. Common troubleshooting steps include:
- Charger Not Powering On: Ensure the power cord is securely plugged into a working electrical outlet. Check for tripped circuit breakers.
- Battery Not Charging (Flashing Red): The battery may be too hot or too cold. Remove the battery and allow it to reach room temperature before reinserting.
- Battery Not Charging (Flashing Red and Green): This indicates a potential battery fault. Try a different battery if available. If the issue persists with multiple batteries, the charger may be faulty.
- Slow Charging: Ensure the charger is connected directly to a power outlet and not through an extension cord or power strip that may limit power delivery.
11. Specifications
| Feature | Specification |
|---|---|
| Model Number | FVCH01 |
| Product Dimensions | 5.75 x 4.29 x 2.83 inches |
| Item Weight | 10.2 ounces |
| Output Voltage | 4 Volts (DC) |
| Input Voltage | 12 Volts |
| Charging Time | Approximately 2 Hours (for a full charge) |
| Battery Compatibility | RYOBI USB Lithium System |
12. Warranty and Support
The RYOBI USB Lithium 3-Port Charger (Model FVCH01) is backed by a 2-Year Manufacturer's Warranty. For warranty claims, technical support, or any questions regarding your product, please contact RYOBI customer service through their official website or the contact information provided in your product packaging.


