
Discovery Spark 506 AZ
Discovery Spark 506 AZ Telescope User Manual
Model: Spark 506 AZ | Brand: Discovery
1. Introduction
The Discovery Spark 506 AZ Telescope is an entry-level achromatic refractor designed for beginners and young astronomers. This telescope is suitable for observing the Moon, bright planets, and distant terrestrial objects. Its user-friendly design and comprehensive accessory kit make it an excellent choice for your first steps into astronomy.
This manual provides detailed instructions for the assembly, operation, and maintenance of your Discovery Spark 506 AZ Telescope to ensure optimal performance and longevity.
2. Safety Information
- Never look directly at the Sun through the telescope or its finderscope without a professionally manufactured solar filter. Doing so can cause immediate and irreversible eye damage, including blindness.
- Do not leave the telescope unattended, especially when children are present.
- Handle optical components with care to avoid scratches or damage.
- Ensure the tripod is stable on a level surface before use to prevent tipping.
- Keep the telescope and accessories away from moisture and extreme temperatures.
3. Package Contents
Please verify that all the following items are included in your Discovery Spark 506 AZ Telescope kit:
- Telescope Optical Tube
- H 6mm Eyepiece
- H 20mm Eyepiece
- Optical Finderscope 5x24
- 90° Diagonal Mirror
- 3x Barlow Lens
- Alt-azimuth Mount
- Aluminum Tripod
- "Space. Non-empty emptiness" Knowledge Book (Italian Edition)
- User Manual and Warranty Card

Image 3.1: Included accessories and the knowledge book.
4. Component Identification
Familiarize yourself with the main components of your telescope:
- Optical Tube: The main body of the telescope containing the objective lens.
- Focuser: Used to adjust the clarity of the image. Eyepieces are inserted here.
- Finderscope: A small, low-magnification telescope mounted parallel to the main optical tube, used for locating objects.
- Eyepieces: Provide different magnifications. The H20mm eyepiece offers lower magnification and a wider field of view, while the H6mm eyepiece provides higher magnification.
- Diagonal Mirror: Redirects the light path at a 90-degree angle, providing a more comfortable viewing position.
- Barlow Lens: Increases the magnification of any eyepiece by a factor of 3x.
- Alt-azimuth Mount: Allows the telescope to move horizontally (azimuth) and vertically (altitude).
- Tripod: Provides a stable base for the telescope.

Image 4.1: Overview of the Discovery Spark 506 AZ Telescope.
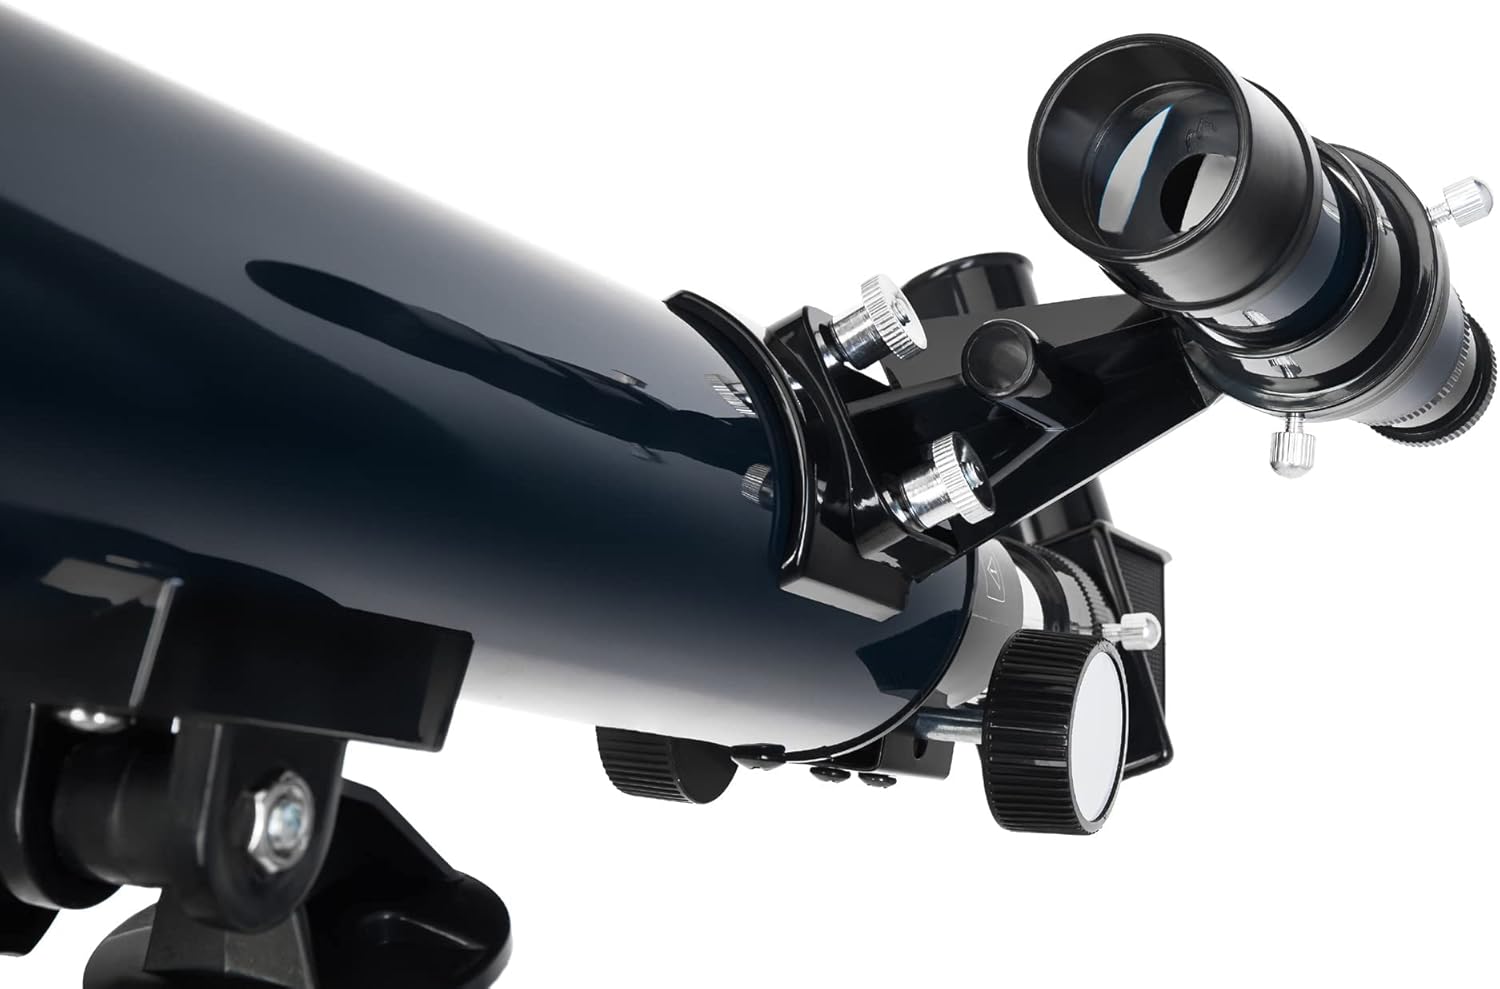
Image 4.2: Detail of the focuser and eyepiece area.
5. Setup Instructions
Follow these steps to assemble your Discovery Spark 506 AZ Telescope:
- Assemble the Tripod:
Unfold the aluminum tripod legs and extend them to your desired height. Secure the legs using the locking clamps. Ensure the accessory tray is properly attached to the center brace for added stability.
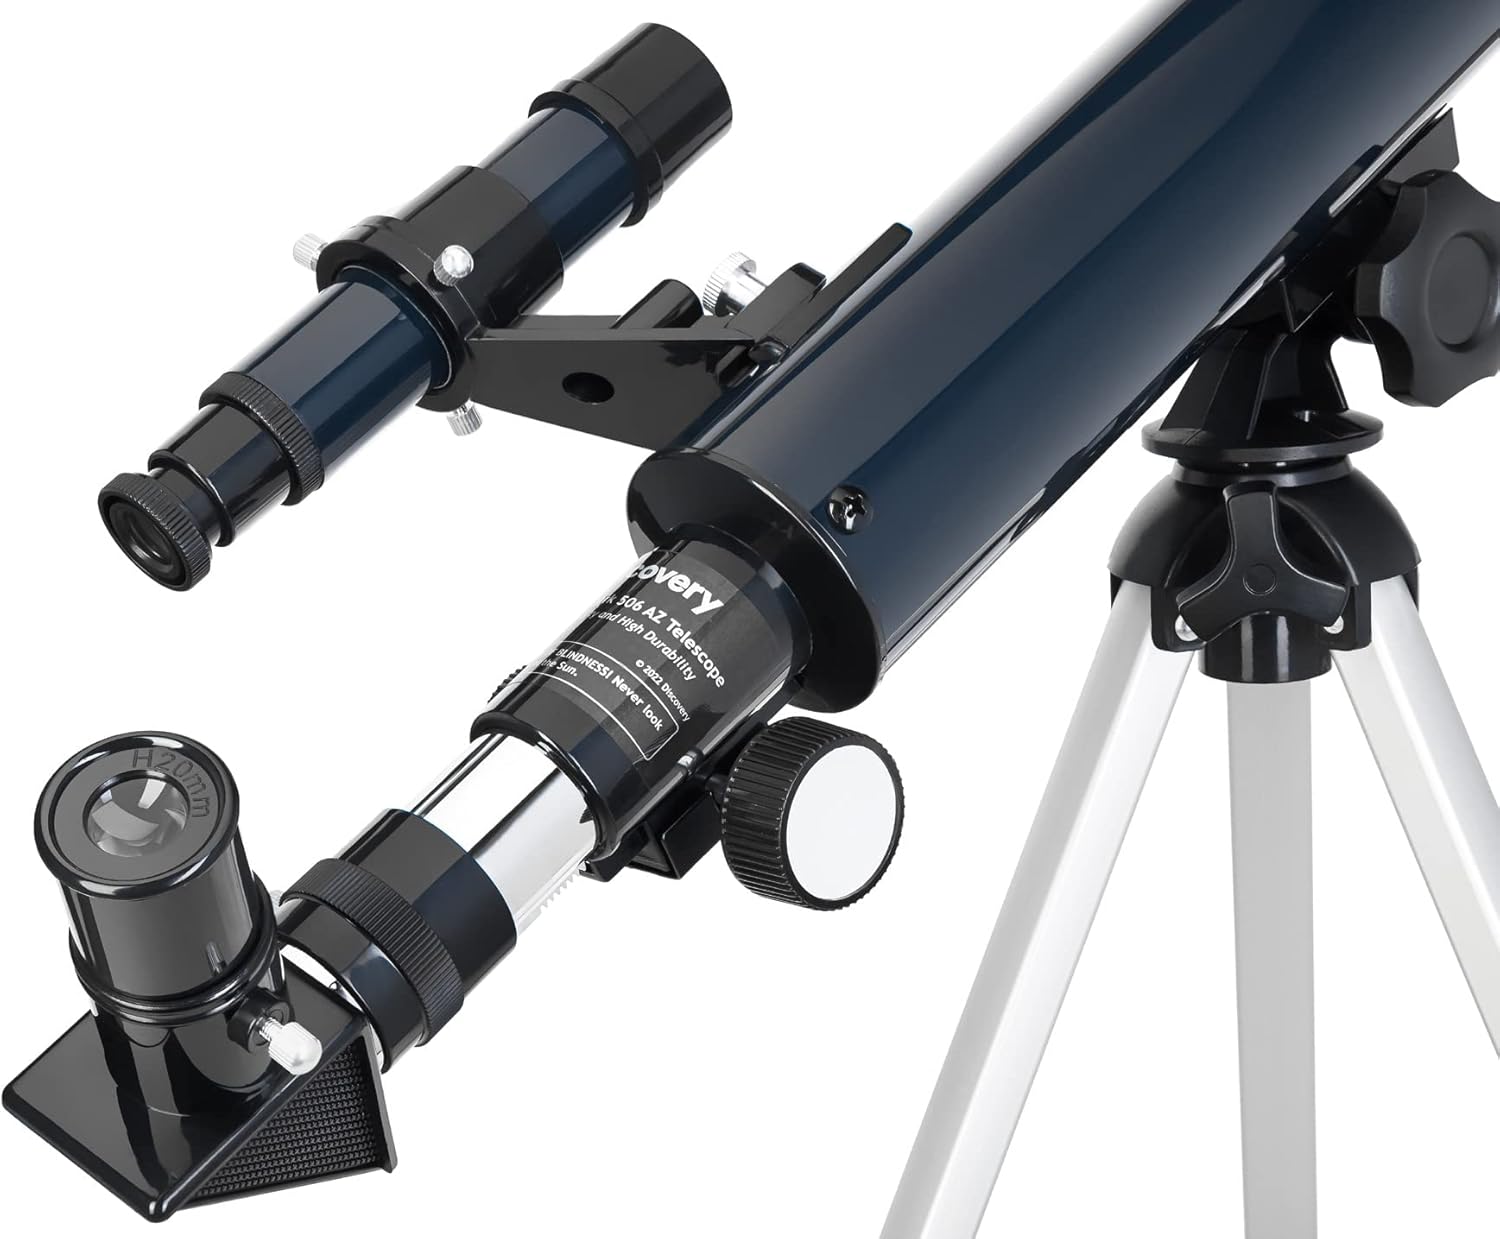
Image 5.1: Assembled telescope on tripod.
- Attach the Alt-azimuth Mount:
Place the alt-azimuth mount onto the tripod head. Secure it firmly with the provided screw or knob from underneath the tripod head.
- Mount the Optical Tube:
Carefully place the telescope optical tube into the cradle on the alt-azimuth mount. Tighten the mounting rings or screws to hold the tube securely in place. Ensure the focuser is easily accessible.
- Install the Finderscope:
Slide the 5x24 finderscope into its bracket on the optical tube. Tighten the small screws on the bracket to hold it firmly. Ensure the finderscope is oriented correctly for comfortable viewing.
- Insert the Diagonal Mirror and Eyepiece:
Loosen the thumbscrew on the focuser. Insert the 90° diagonal mirror into the focuser and tighten the thumbscrew to secure it. Then, insert the desired eyepiece (e.g., H20mm for initial setup) into the diagonal mirror and secure it with its thumbscrew.
6. Operating the Telescope
6.1. Finderscope Alignment
Before observing, align the finderscope with the main telescope:
- Point the main telescope at a distant, stationary object (e.g., a tree or building) during daylight hours.
- Look through the H20mm eyepiece and center the object in the main telescope's field of view.
- Now, look through the finderscope. Use the adjustment screws on the finderscope bracket to move its crosshairs until they are centered on the same object.
- Once aligned, objects centered in the finderscope will also be visible in the main telescope's eyepiece.
6.2. Observing Celestial Objects
- Start with the H20mm eyepiece for the widest field of view and easiest object location.
- Use the finderscope to locate your desired celestial object.
- Look through the main telescope's eyepiece. Use the focuser knob to achieve a sharp image.
- Once the object is centered and focused, you can switch to the H6mm eyepiece for higher magnification, if desired.
6.3. Observing Terrestrial Objects
The Discovery Spark 506 AZ can also be used as a spotting scope for daytime terrestrial viewing. Follow the same steps as for celestial observation, ensuring the object is distant enough for the telescope to focus properly.
6.4. Using the Barlow Lens
The 3x Barlow lens increases the magnification of any eyepiece. To use it:
- Insert the Barlow lens into the diagonal mirror (or directly into the focuser if not using a diagonal).
- Insert your chosen eyepiece into the Barlow lens.
- This combination will multiply the eyepiece's magnification by three. For example, the H20mm eyepiece with the 3x Barlow lens will provide 90x magnification (600mm focal length / 20mm eyepiece * 3x Barlow = 90x).
7. Maintenance and Care
- Cleaning Optics: Use a soft, lint-free cloth specifically designed for optical lenses. For stubborn smudges, use a small amount of optical cleaning fluid on the cloth, not directly on the lens. Avoid touching optical surfaces with your fingers.
- Cleaning Non-Optical Surfaces: Use a soft, damp cloth to wipe down the telescope tube, mount, and tripod. Avoid abrasive cleaners.
- Storage: Store the telescope in a dry, dust-free environment. Use the dust caps for the objective lens and focuser opening when not in use.
- Handling: Always carry the telescope by the optical tube or mount, not by the focuser or finderscope.
8. Troubleshooting
| Problem | Possible Cause | Solution |
|---|---|---|
| Image is blurry or out of focus. | Focuser not adjusted correctly. | Adjust the focuser knob slowly until the image is sharp. |
| Cannot find objects in the main telescope. | Finderscope is not aligned. | Align the finderscope with the main telescope as described in Section 6.1. |
| Image is dim or dark. | Too high magnification for current conditions; light pollution. | Use a lower magnification eyepiece (e.g., H20mm). Observe from a darker location if possible. |
| Image appears upside down or reversed. | This is normal for astronomical telescopes. | For terrestrial viewing, an erecting eyepiece (not included) would correct the image orientation. For astronomy, this is not an issue. |
9. Technical Specifications
| Feature | Specification |
|---|---|
| Optical Design | Achromatic Refractor |
| Aperture | 50 mm |
| Focal Length | 600 mm |
| Focal Ratio | f/12 |
| Eyepieces | H 6mm, H 20mm |
| Barlow Lens | 3x |
| Finderscope | 5x24 Optical |
| Diagonal Mirror | 90° |
| Mount Type | Alt-azimuth |
| Tripod | Aluminum, Adjustable Height |
| Weight | 2.46 kg |
10. Warranty and Support
Your Discovery Spark 506 AZ Telescope comes with a 10-year manufacturer's warranty. This warranty covers defects in materials and workmanship under normal use.
For technical assistance, warranty claims, or to inquire about replacement parts, please refer to the contact information provided with your purchase documentation or visit the official Discovery Optics website. Please have your model number (Spark 506 AZ) and proof of purchase ready when contacting support.
Related documentsSpark 506 AZ


Ask a question about this manual
Ask about setup, troubleshooting, compatibility, parts, safety, or missing instructions. Manuals+ will review the question and use this page’s manual context to help answer it.