
Introduction
Thank you for choosing the PARTPHONER 76" Classic Black Solar Lamp Post Lights. This manual provides essential information for the safe and efficient installation, operation, and maintenance of your new solar lamp post. Please read it thoroughly before use and retain it for future reference.

Image: The 76-inch Classic Black Solar Lamp Post Light featuring a three-head design, ideal for outdoor illumination.
Safety Information
- Ensure all components are securely connected before installation.
- Do not attempt to modify or disassemble the solar lamp post. This may void the warranty and pose safety risks.
- Keep the solar panel clean to ensure optimal charging efficiency.
- Avoid placing the lamp post in shaded areas, as this will reduce solar charging effectiveness.
- This product is designed for outdoor use and is IP44 waterproof. However, avoid submerging it in water.
Package Contents
Before beginning installation, please verify that all parts are present and undamaged:
- 3 x Lamp Heads with Solar Panels
- 3 x Gooseneck Arms
- 4 x Pole Sections
- 1 x Base
- 1 x Top Cover Connector
- 3 x LED Bulbs (included and pre-installed in some models)
- 3 x AAA Rechargeable Batteries (included)
- Mounting Hardware (screws, anchors)
- Small Wrench/Tool (for assembly)
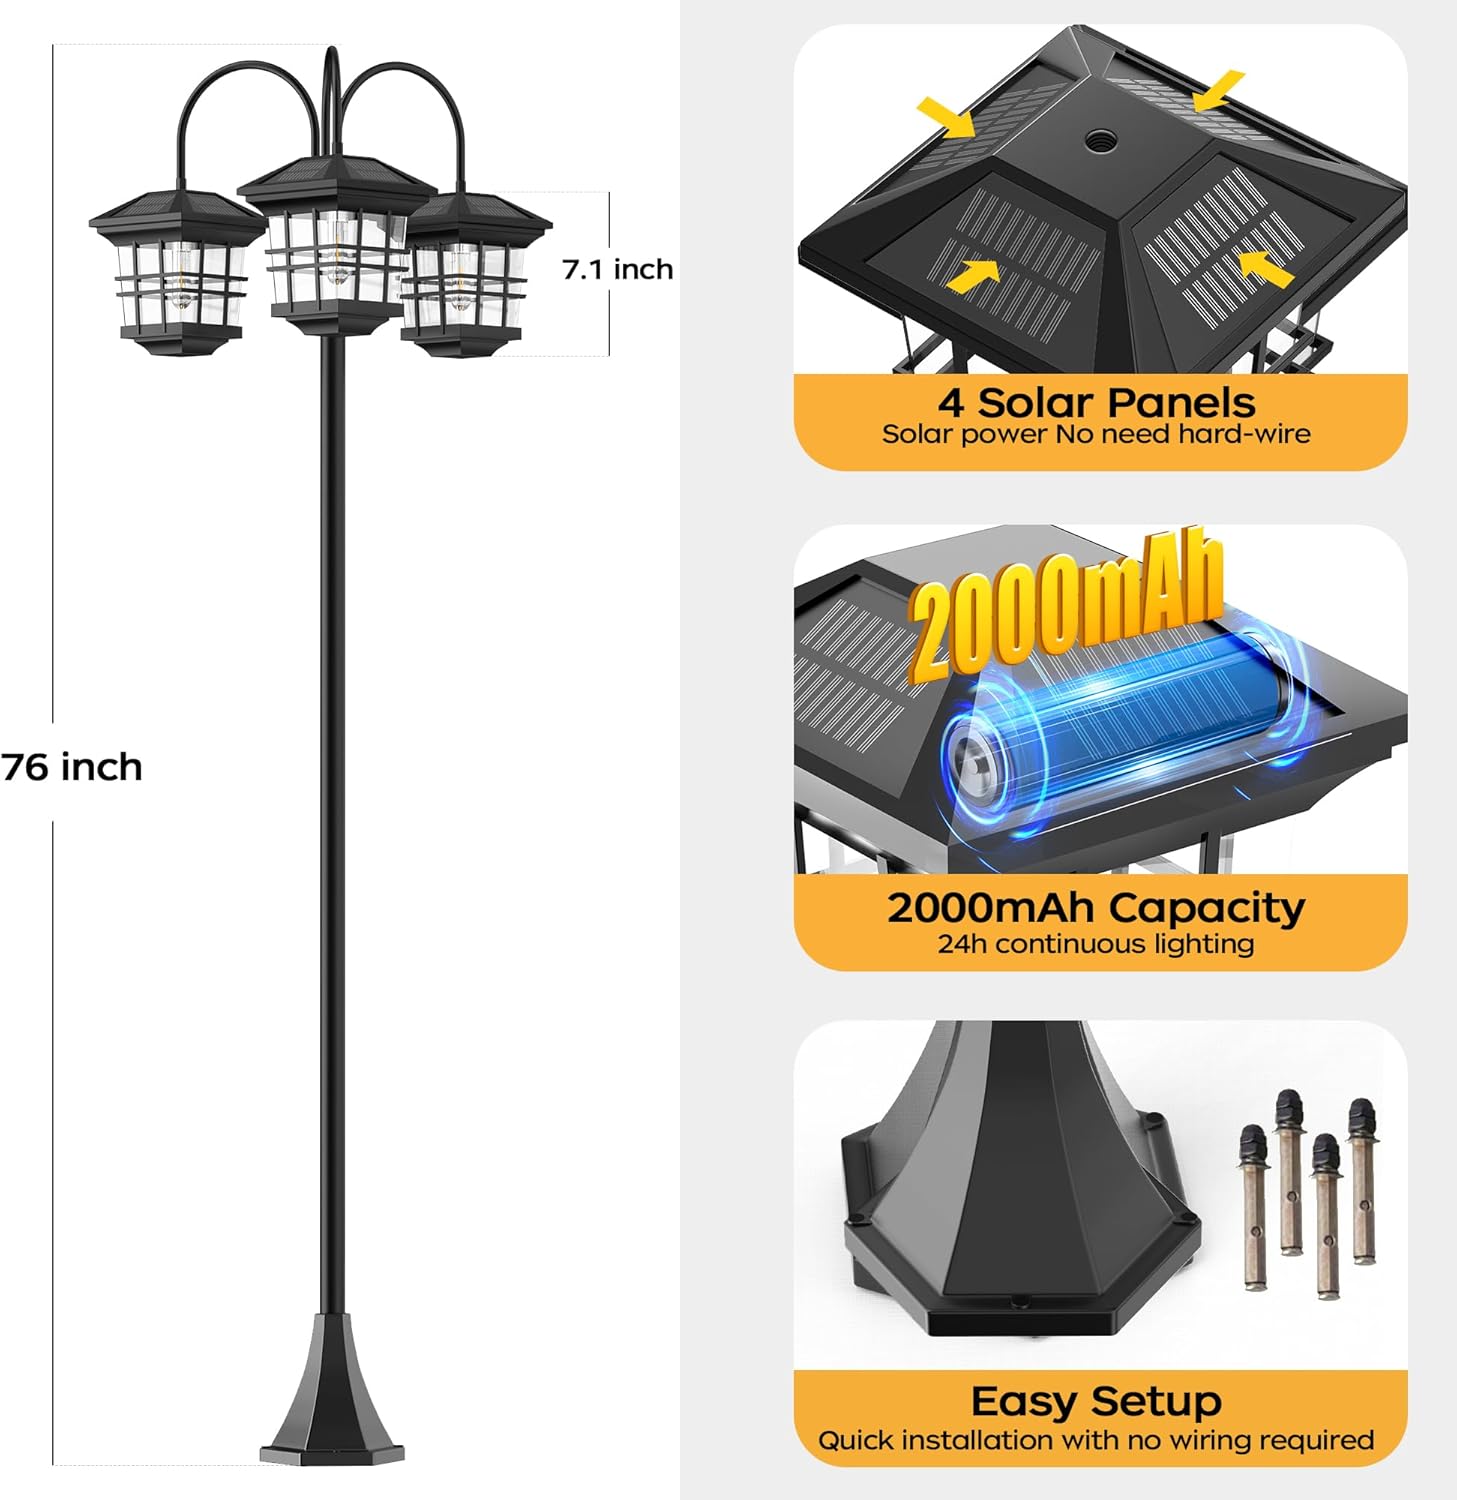
Image: A visual representation of the solar lamp post's dimensions and individual components, including the solar panels and battery capacity.
Setup and Installation
The PARTPHONER Solar Lamp Post is designed for easy self-installation with no wiring required. Follow these steps for assembly:
Installation Steps:
- Turn on the switch and install the bulb: Locate the ON/OFF switch on the underside of each lamp head. Turn the switch to the "ON" position. If not pre-installed, carefully screw the LED bulb into its socket.

Image: Detail showing the ON/OFF switch and the process of installing the LED bulb into the lamp head.
- Turn clockwise to fix light cap: Securely attach the light cap to the lamp head by turning it clockwise until it is firmly in place.
- Connect gooseneck and lantern: Attach each gooseneck arm to its respective lamp head. Ensure a secure connection.
- Connect the gooseneck to the top cover: Connect the free end of the gooseneck arms to the top cover connector. This piece will eventually sit atop the main pole.
- Connect 4 pipes then connect pipes with base: Assemble the four pole sections by screwing them together. Then, attach the assembled pole to the base.
- Connect lanterns on the pipe: Finally, attach the assembled lamp heads with gooseneck arms to the top of the main pole.
Installation Video Guide:
For a visual guide on the assembly process, please watch the official installation video:
Video: A step-by-step guide demonstrating the assembly and installation of the PARTPHONER Solar Lamp Post Lights.
Once assembled, place the lamp post in a location that receives direct sunlight for at least 6-8 hours daily to ensure optimal charging.
Operating Instructions
Your PARTPHONER Solar Lamp Post Lights are designed for automatic operation:
- Automatic Charging: During the day, the high-efficiency solar panels on each lamp head will automatically collect solar energy and charge the internal 2000mAh rechargeable batteries. A full charge typically takes 6-8 hours of direct sunlight.
- Dusk-to-Dawn Operation: The solar pole lights are equipped with a light sensor. They will automatically turn on at dusk when ambient light levels drop and turn off at dawn when light levels increase.
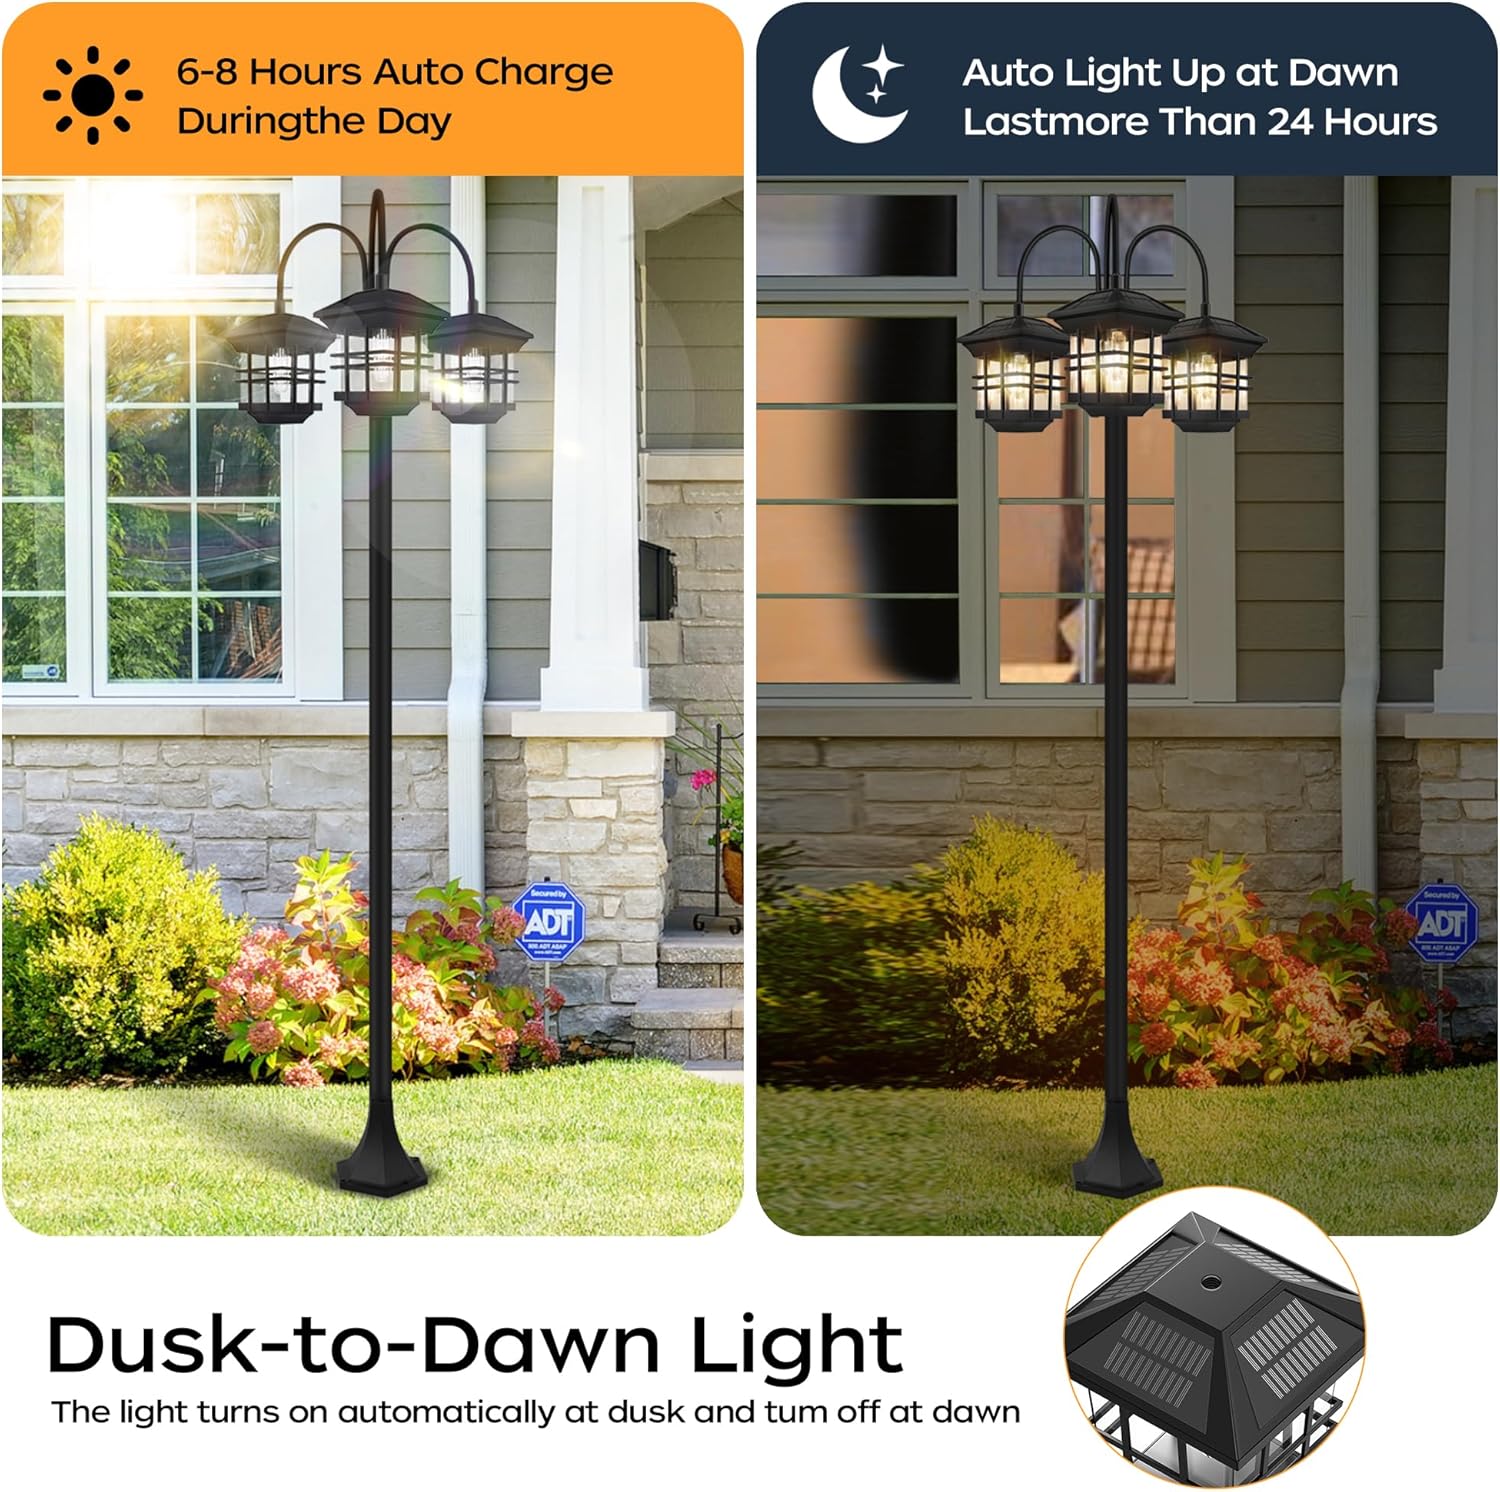
Image: Illustrates the automatic charging during the day and the automatic illumination at night, showcasing the dusk-to-dawn functionality.
- Lighting Duration: With a full charge, the lights can provide lasting illumination for up to 24 hours, depending on the amount of sunlight received and the ambient temperature.
Maintenance
To ensure the longevity and optimal performance of your solar lamp post, follow these maintenance guidelines:
- Cleaning: Regularly wipe the solar panels and lamp covers with a soft, damp cloth to remove dust, dirt, and debris. A clean solar panel ensures maximum sunlight absorption.
- Weather Resistance: The lamp post is crafted from anti-rust die-cast aluminum and is IP44 waterproof, designed to withstand various weather conditions including rain, snow, wind, and frost. No special weather-related maintenance is typically required beyond regular cleaning.

Image: Demonstrates the lamp post's weather resistance, including waterproof, snowproof, heat resistance, and anti-rust properties.
- Battery Replacement: The included AAA rechargeable batteries have a long lifespan. If you notice a significant decrease in lighting duration after prolonged use, the batteries may need replacement. Use only rechargeable AAA batteries of the same type and capacity.
Troubleshooting
If your solar lamp post is not functioning as expected, consider the following common issues and solutions:
| Problem | Possible Cause | Solution |
|---|---|---|
| Light does not turn on at night. |
|
|
| Light is dim or only lasts a short time. |
|
|
| Water inside the lamp head. |
|
|
Specifications
| Feature | Detail |
|---|---|
| Brand | PARTPHONER |
| Model Name | Classic Garden Style (PAPO033AB1) |
| Product Dimensions | 16.5"L x 16.5"W x 76"H |
| Item Weight | 7.94 pounds |
| Material | Aluminum |
| Power Source | Solar Powered |
| Light Source Type | LED |
| Number of Light Sources | 3 |
| Battery Type | 3 x AAA rechargeable batteries (included) |
| Charging Time | 6-8 hours (direct sunlight) |
| Lighting Duration | Up to 24 hours (on full charge) |
| Water Resistance Level | IP44 Waterproof |
| Installation Type | Self-installation |
| Special Features | Dusk-to-dawn auto on/off, Anti-rust |
Warranty and Support
For warranty information and customer support, please refer to the documentation provided with your purchase or contact PARTPHONER directly through their official website or the retailer where the product was purchased. Keep your purchase receipt as proof of purchase for any warranty claims.

