
1. Introduction
This manual provides comprehensive instructions for the installation, operation, and maintenance of the LiGuVCY Carburetor Kit. This kit is designed as a replacement part for specific Honda small engines, ensuring optimal fuel delivery and engine performance. Please read this manual thoroughly before attempting any installation or maintenance procedures.
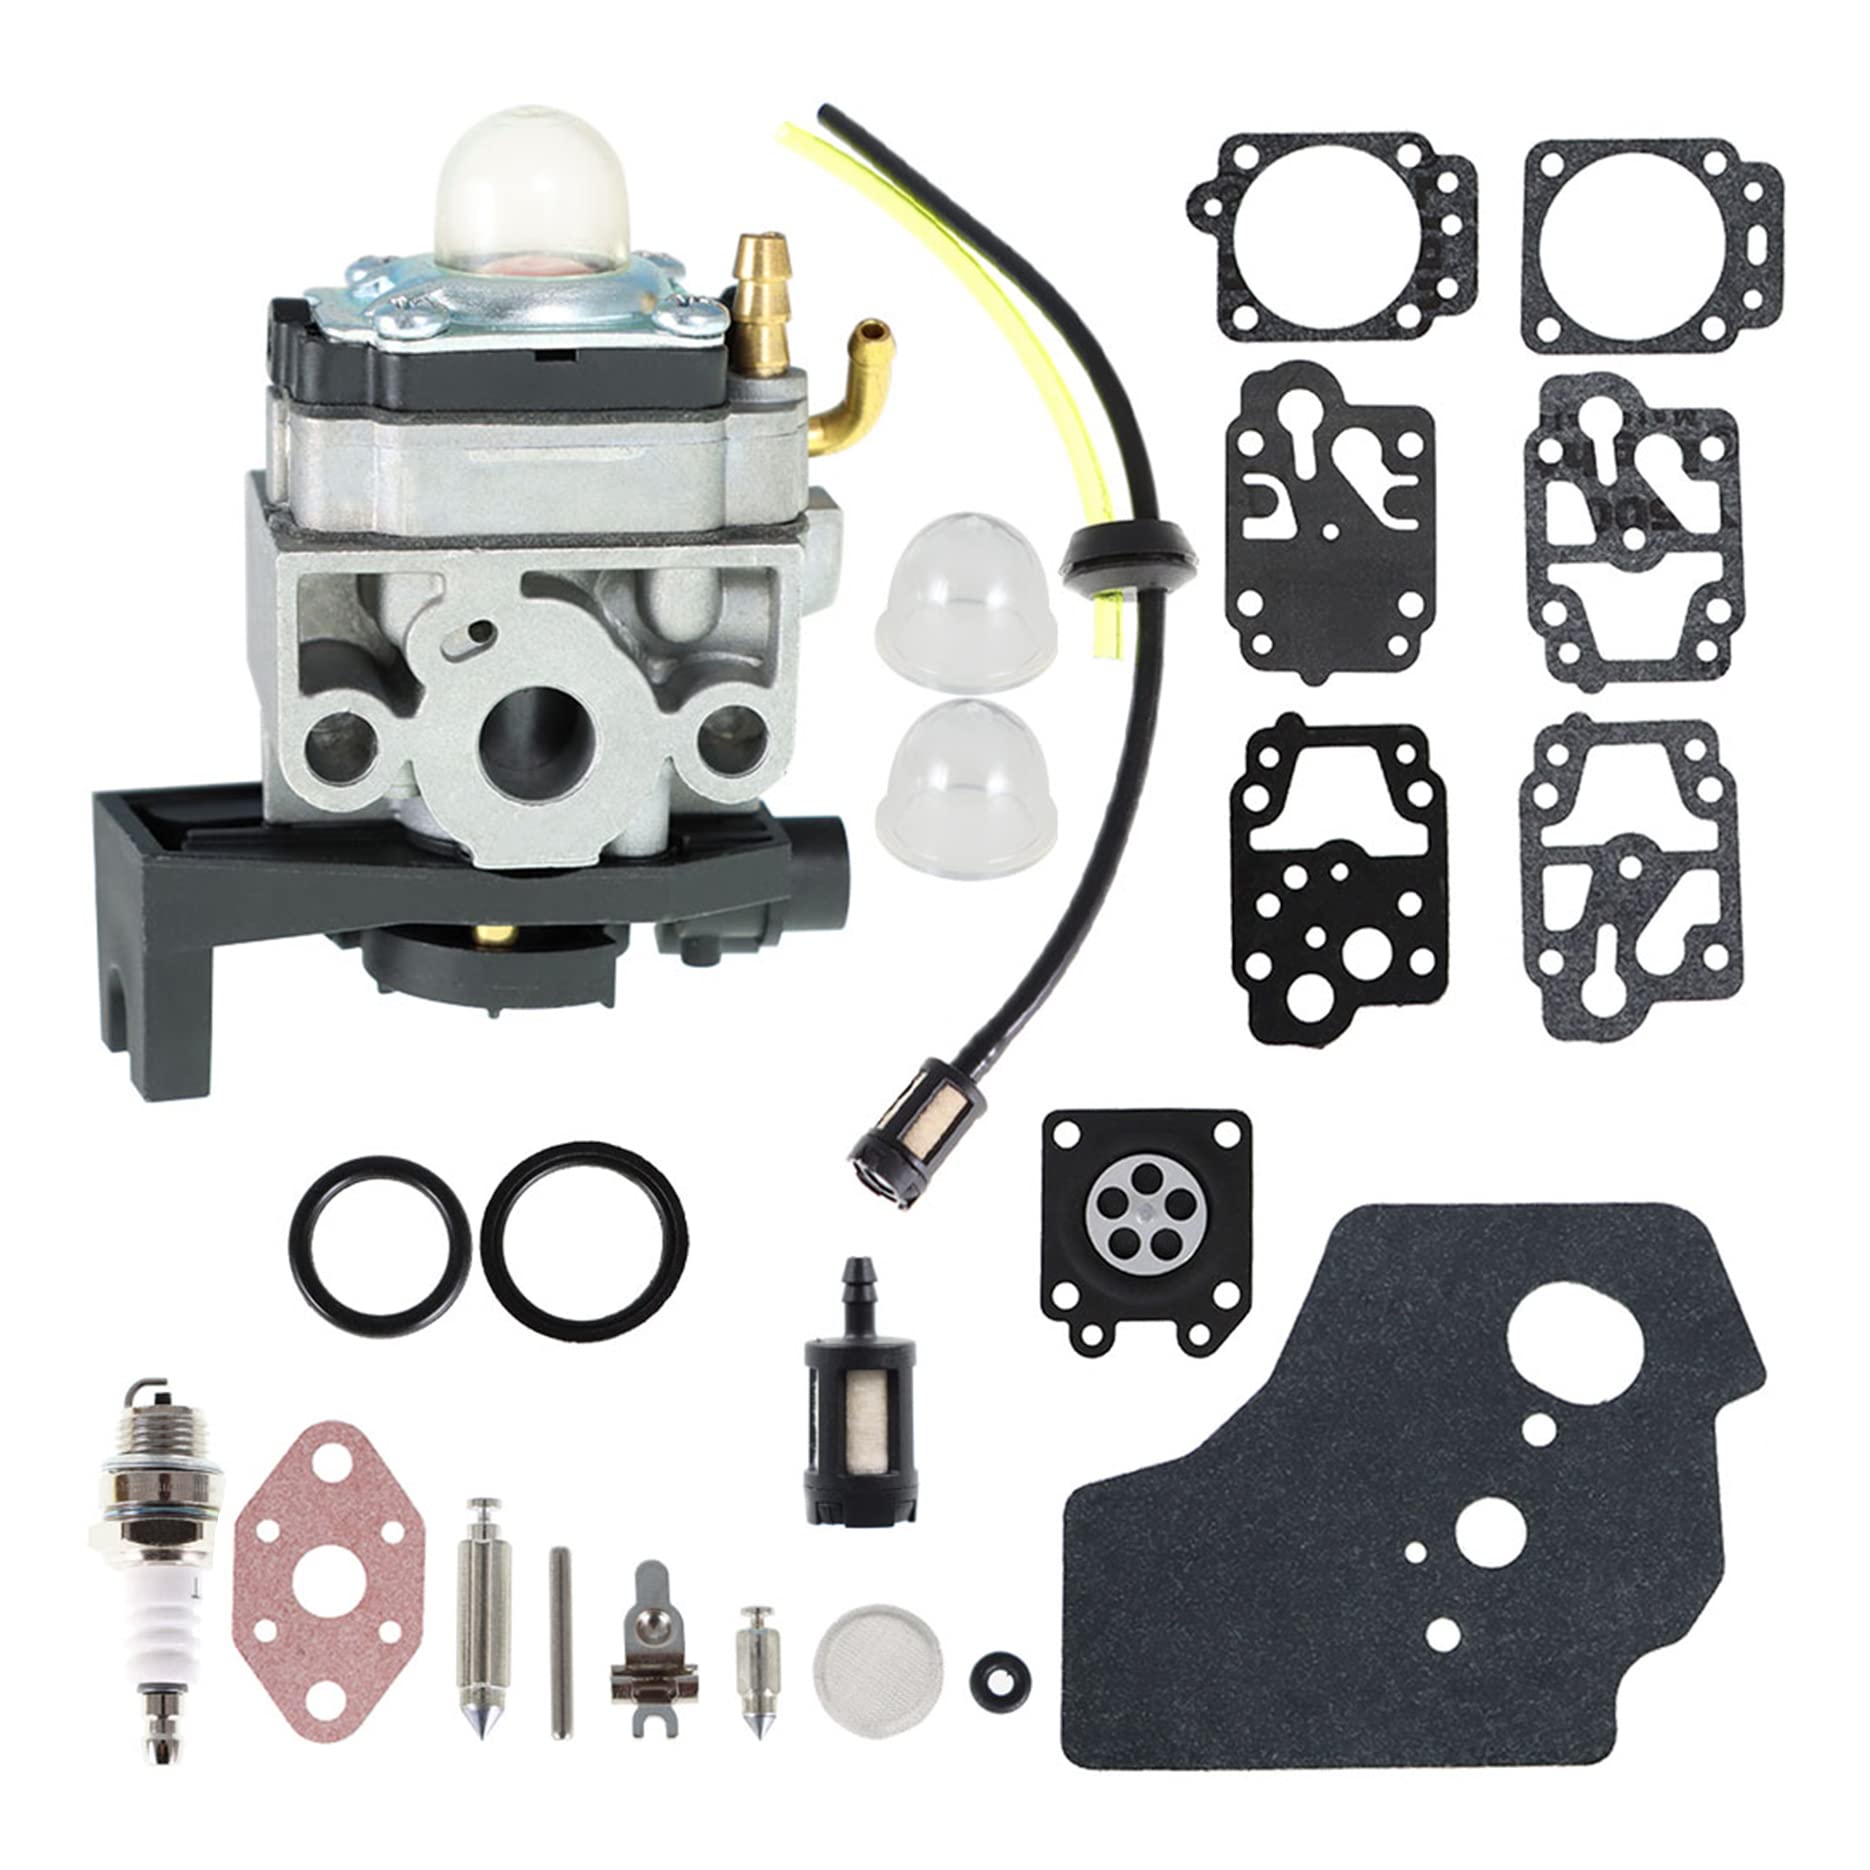
Image 1.1: Complete LiGuVCY Carburetor Kit. This image displays all components included in the kit, such as the carburetor assembly, various gaskets, fuel line, fuel filter, primer bulbs, and a spark plug.
2. Package Contents
The LiGuVCY Carburetor Kit includes the following components:
- 1x Carburetor Assembly (Part Numbers: 16100-Z0H-825, 16100-Z0H-053)
- Gasket Set (various shapes and sizes for proper sealing)
- Fuel Line
- Fuel Filter
- 2x Primer Bulbs
- 2x O-rings
- 1x Spark Plug
- Additional small components for installation
Please inspect all items upon receipt to ensure no components are missing or damaged.
3. Compatibility
This carburetor kit is a direct replacement for the following Honda engine models:
- Honda GX25
- Honda GX25N
- Honda GX25NT
- Honda HHT25S (Trimmer)
- Honda FG110 (Tiller)
- Honda FG110K1 (Tiller)
Before installation, verify that your engine's existing carburetor part number matches 16100-Z0H-825 or 16100-Z0H-053 to ensure proper fitment and function.
4. Setup and Installation
Safety First: Always ensure the engine is turned off, cooled down, and the spark plug wire is disconnected before beginning any work. Wear appropriate safety gear, including gloves and eye protection.
- Prepare the Engine:
Drain any fuel from the fuel tank. Place absorbent material under the engine to catch any spilled fuel.
- Remove Air Filter Assembly:
Locate and remove the air filter housing and air filter element. This will expose the carburetor.
- Disconnect Fuel Lines and Linkages:
Carefully disconnect the fuel lines from the old carburetor. Note their positions for reinstallation. Disconnect any throttle linkages or choke cables attached to the carburetor.
- Remove Old Carburetor:
Unbolt the old carburetor from the engine manifold. Remove any old gaskets. Inspect the manifold for debris or damage.
- Install New Gaskets:
Place the new gaskets from the kit in their correct positions between the engine manifold and the new carburetor, and between the carburetor and the air filter housing. Ensure they are seated properly to prevent air leaks.
- Mount New Carburetor:
Attach the new LiGuVCY carburetor to the engine manifold using the original bolts. Tighten securely but do not overtighten.
- Reconnect Fuel Lines and Linkages:
Reconnect the fuel lines to the new carburetor, ensuring a snug fit. Install the new fuel filter in the fuel line if replacing. Reattach all throttle linkages and choke cables. Verify smooth operation of the throttle and choke.
- Install New Spark Plug and Primer Bulbs:
Replace the old spark plug with the new one provided in the kit. If applicable, replace the old primer bulbs with the new ones.
- Reassemble Air Filter Assembly:
Reinstall the air filter element and housing.
- Refuel and Test:
Refill the fuel tank with the appropriate fuel type. Reconnect the spark plug wire. Prime the carburetor if necessary and attempt to start the engine. Adjust idle speed if required.

Image 4.1: Detailed view of the carburetor assembly. This image highlights the main body of the carburetor, showing the fuel inlet, adjustment screws, and linkage points, which are crucial for proper installation.
5. Operating Principles
The carburetor is a vital component responsible for mixing air and fuel in the correct ratio for combustion within the engine. It atomizes fuel and mixes it with air, delivering this mixture to the engine's combustion chamber. Proper carburetor function ensures efficient engine starting, smooth idling, and consistent power output across various RPMs.
After installation, the engine should start and run smoothly. If the engine runs rough or stalls, minor adjustments to the idle screw may be necessary. Refer to your engine's specific service manual for detailed adjustment procedures.
6. Maintenance
Regular maintenance of your carburetor and fuel system is crucial for prolonging engine life and ensuring reliable performance.
- Fuel Quality: Always use fresh, clean fuel. Stale or contaminated fuel is a primary cause of carburetor issues. Consider using a fuel stabilizer if the engine will be stored for extended periods.
- Fuel Filter: Inspect and replace the fuel filter periodically, or if it appears clogged. A clogged fuel filter restricts fuel flow to the carburetor.
- Air Filter: Ensure the air filter is clean and free of debris. A dirty air filter can restrict airflow, leading to a rich fuel mixture and poor engine performance.
- Carburetor Cleaning: If the engine experiences performance issues, the carburetor may require cleaning. This typically involves disassembling the carburetor, cleaning jets and passages with carburetor cleaner, and replacing gaskets. This procedure should only be performed by individuals with appropriate mechanical knowledge.
- Spark Plug: Inspect the spark plug regularly. Replace it if the electrode is worn or fouled. The kit includes a new spark plug for initial replacement.
7. Troubleshooting
If you encounter issues after installing the new carburetor, consider the following common troubleshooting steps:
| Symptom | Possible Cause | Solution |
|---|---|---|
| Engine will not start | No fuel, clogged fuel filter, incorrect choke setting, fouled spark plug, air leak. | Check fuel level, replace fuel filter, adjust choke, replace spark plug, check gasket seating. |
| Engine runs rough or stalls | Improper idle adjustment, air leak, dirty carburetor jets, old fuel. | Adjust idle screw, check gaskets, clean carburetor, use fresh fuel. |
| Engine lacks power | Clogged air filter, restricted fuel flow, incorrect fuel/air mixture. | Clean/replace air filter, check fuel lines/filter, inspect carburetor for blockages. |
| Fuel leaks | Loose fuel lines, damaged gaskets, float bowl issue. | Tighten connections, replace gaskets, inspect float and needle valve. |
If problems persist after attempting these solutions, it is recommended to consult a qualified small engine mechanic.
8. Specifications
| Feature | Detail |
|---|---|
| Brand | LiGuVCY |
| Model Number | Alla-USF8-024039 |
| Replacement Part Numbers | 16100-Z0H-825, 16100-Z0H-053 |
| Item Weight | 7.4 ounces (approx. 210 grams) |
| Product Dimensions | 6.5 x 4.21 x 1.5 inches (approx. 16.5 x 10.7 x 3.8 cm) |
| Recommended Use | Lawn Mower and Small Engine Carburetor Replacement |
9. Warranty Information
LiGuVCY products are manufactured to high-quality standards. While specific warranty details are not provided in this manual, most replacement parts typically come with a limited manufacturer's warranty covering defects in materials and workmanship. Please retain your proof of purchase. For detailed warranty information, contact your retailer or the manufacturer directly.
10. Support and Contact
For technical assistance, troubleshooting advice beyond this manual, or inquiries regarding parts and warranty, please contact your point of purchase. You may also visit the LiGuVCY Store on Amazon for more information.