
1. Introduction
This manual provides instructions for the installation, operation, maintenance, and troubleshooting of the inruwo W11220230 Washing Machine Water Inlet Valve Assembly. This component is designed to regulate the flow of hot and cold water into your washing machine. Proper installation and maintenance are crucial for the correct functioning of your appliance.
2. Safety Information
Before beginning any repair or installation, please read and understand all safety precautions. Failure to follow these instructions could result in personal injury or property damage.
- Disconnect Power: Always unplug the washing machine from the electrical outlet before performing any service.
- Turn Off Water Supply: Close both the hot and cold water supply valves to the washing machine.
- Wear Protective Gear: Use appropriate personal protective equipment, such as gloves and safety glasses.
- Professional Assistance: If you are unsure about any step, consult a qualified appliance technician.
- Water Drainage: Be prepared for residual water in the hoses when disconnecting them.
3. Package Contents
Verify that all components are present upon opening the package:
- 1 x inruwo Washing Machine Water Inlet Valve Assembly (Model W11220230)
4. Compatibility
This water inlet valve assembly is compatible with a wide range of washing machine models from Whirlpool, Kenmore, and Maytag. Please verify your specific model number against the lists below to ensure compatibility.
Compatible Whirlpool Models:
7MWTW8500EC2, 7MWTW8500EC0, 7MWTW8500EC1, WTW7500GC0, WTW7500GW0, WTW8500DC0, WTW8500DC1, WTW8500DC2, WTW8500DC3, WTW8500DR0, WTW8500DR1, WTW8500DR2, WTW8500DR3, WTW8500DW0, WTW8500DW1, WTW8500DW2, WTW8500DW3, WTW8700EC0, WTW8700EC1, WTW5100HC0, WTW5100HW0, WTW5105HC0, WTW5105HC1, WTW5105HW0, WTW5105HW1, WTW7500GC2, WTW7500GC3, WTW7500GW2, WTW7500GW3, WTW8500DC4, WTW8500DC5, WTW8500DC6, WTW8500DR4, WTW8500DR5, WTW8500DW4, WTW8500DW5, WTW8500DW6, WTW7000DW0, WTW7300DW1, WTW8040DW0, WTW7040DW1, WTW8040DW4, WTW7300DW0, WTW7040DW0, WTW8040DW2, WTW6120HW0.
Compatible Kenmore Models:
11021112020, 11021112022, 11021652020, 11028132411, 11028132412, 11028132413, 11028132414, 11028133410, 11028133411, 11028133412, 11028133413, 11028133414, 11029132411, 11029132412, 11029132413, 11029132414, 11029133410, 11029133411, 11029133412, 11029133413, 11029133414, 11031312020, 11031312021, 11031652020.
Compatible Maytag Models:
MVWB755DW0, MVWB755DW1, MVWB765FC1, MVWB765FC2, MVWB765FC3, MVWB765FW0, MVWB765FW1, MVWB765FW2, MVWB765FW3, MVWB766FW0, MVWB766FW1, MVWB835DC0, MVWB835DC2, MVWB835DC3, MVWB835DC4, MVWB835DW0, MVWB835DW1, MVWB835DW2, MVWB835DW3, MVWB835DW4, MVWB855DC0, MVWB855DC1, MVWB855DC2, MVWB855DC3, MVWB855DW0, MVWB855DW1, MVWB855DW2, MVWB855DW3, MVWB865GC0, MVWB865GW0, MVW7230HC0, MVW7230HW0, MVW7232HC0, MVW7232HW0, MVW8230HC0, MVWB757JW0, MVWB765FC4, MVWB765FW4, MVWB835DC5, MVWB835DW5, MVWB855DC4, MVWB865GC1, MVWB865GW1, 7MMVWB855EC2, 7MMVWB855EC3, 7MMVWB835EW0, 7MMVWB835EW1, 7MMVWB855EC0, 7MMVWB855EC1, MVWB766FW0, MVWB765FW0, MVWB755DW0.
Replaces Part Numbers:
W11096268, W11220230, W10632527, W10758829, W10853296, 4591408, AP6329544, PS12349461, EAP12349461.
5. Setup and Installation
This section outlines the general steps for replacing the water inlet valve. Specific procedures may vary slightly depending on your washing machine model. Refer to your appliance's service manual or online resources for detailed model-specific instructions.
Tools You May Need:
- Screwdriver (Phillips and/or Flathead)
- Pliers
- Adjustable Wrench
- Plastic Putty Knife (recommended for control panel removal)
- Towels or a bucket for water drainage
Installation Steps:
- Prepare the Washer:
- Disconnect the washing machine from the power supply.
- Turn off the hot and cold water supply valves to the washer.
- Move the washer away from the wall to access the rear.
- Disconnect Water Hoses:
- Place towels or a bucket behind the washer to catch any residual water.
- Carefully unscrew the hot and cold water inlet hoses from the existing valve.
- Access the Valve:
- Depending on your model, you may need to remove the top panel or the rear access panel of the washing machine. For some models, the control panel needs to be lifted or removed. A plastic putty knife can be useful for this.
- Locate the water inlet valve assembly.
- Disconnect Electrical Connections:
- Carefully disconnect the electrical wiring harnesses from the solenoids on the old valve. Note their positions (e.g., hot and cold).
- Remove Old Valve:
- Unscrew any mounting screws or release clips holding the old valve in place.
- Disconnect the internal water dispenser hoses from the old valve.
- Remove the old water inlet valve assembly.
- Install New Valve:
- Attach the internal water dispenser hoses to the new valve, ensuring a secure fit.
- Mount the new valve assembly in the washer, securing it with screws or clips.
- Reconnect the electrical wiring harnesses to the corresponding solenoids on the new valve.
- Reconnect Water Hoses:
- Screw the hot and cold water inlet hoses onto the new valve. Ensure they are hand-tight, then use a wrench for an additional quarter turn. Do not overtighten.
- Final Checks:
- Replace any removed panels or the control panel.
- Turn on the hot and cold water supply valves. Check for any leaks at the hose connections.
- Plug the washing machine back into the electrical outlet.
- Test Operation:
- Run a short wash cycle to confirm proper water filling and check for leaks.

Figure 1: Exploded view illustrating the water inlet valve assembly (item 13, indicated by red arrow) within a washing machine.

Figure 2: Front view of the water inlet valve assembly, highlighting the hot and cold water connections and solenoid components.
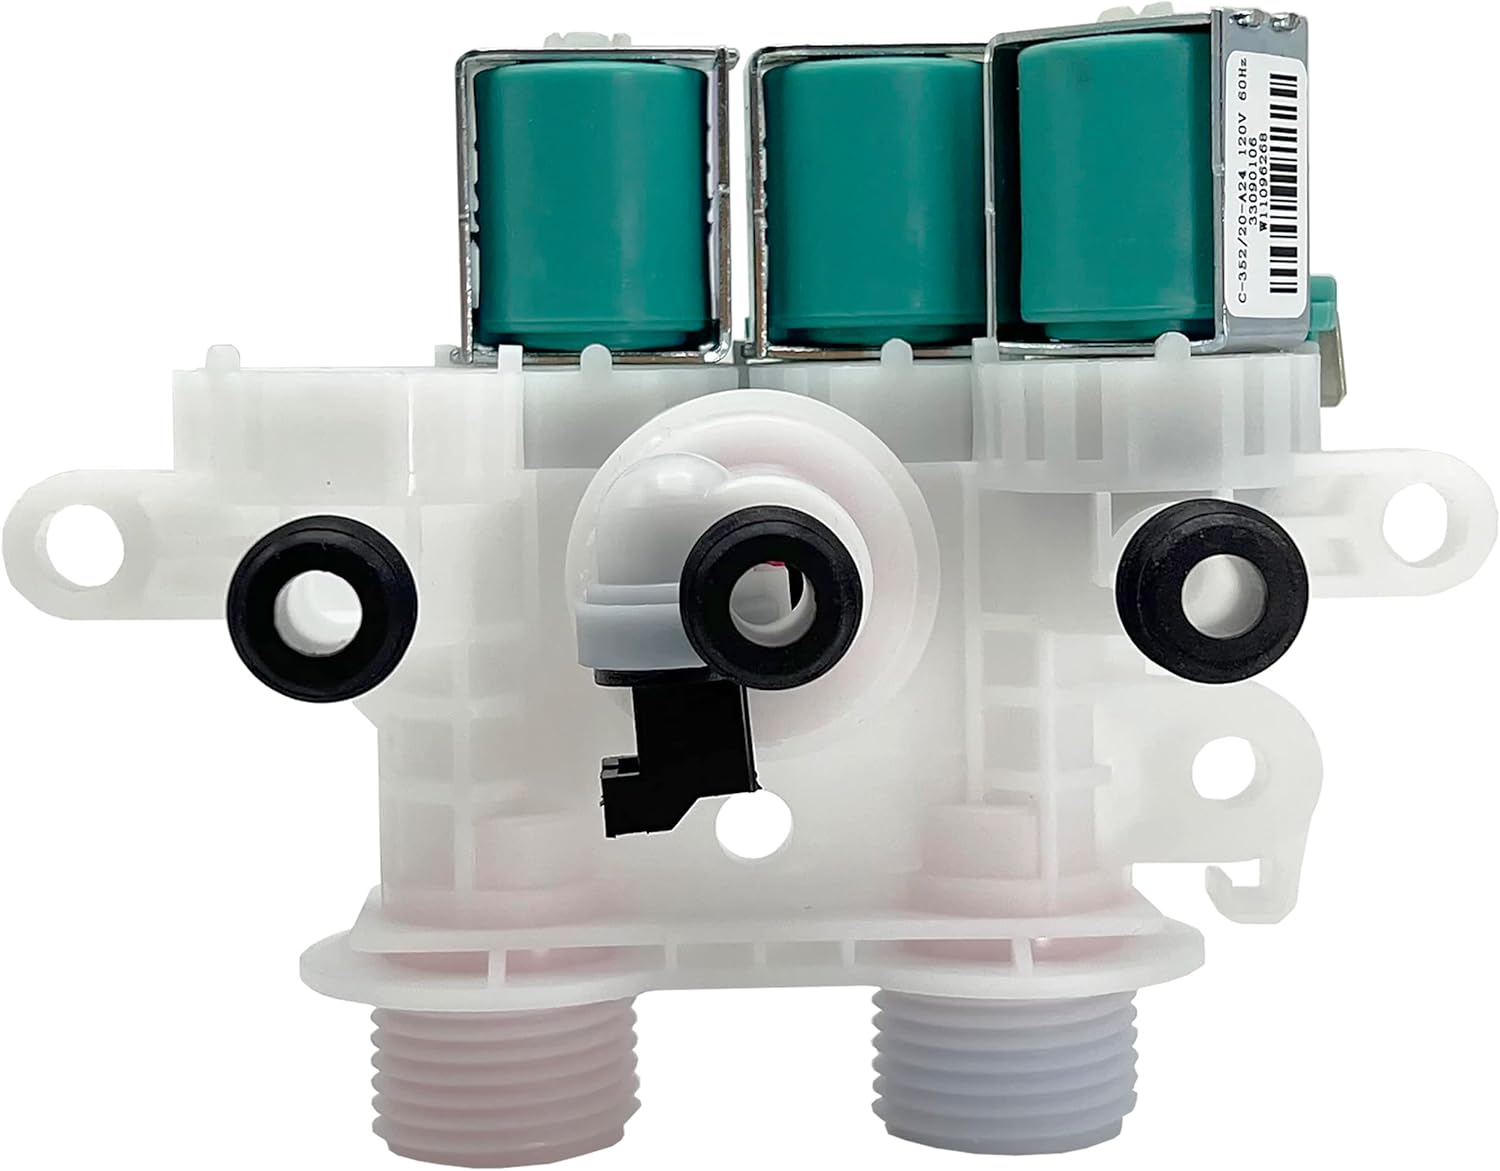
Figure 3: Rear view of the water inlet valve assembly, showing the solenoid arrangement and mounting features.

Figure 4: Side profile of the water inlet valve assembly.
6. Operating Principles
The water inlet valve assembly is an electro-mechanical component that controls the flow of water into the washing machine tub. When the washer's control board signals for water, the solenoids within the valve are energized, opening internal gates to allow hot, cold, or a mix of water to enter the machine. The valve remains open until the desired water level is reached or the cycle progresses.
7. Maintenance
Regular maintenance can extend the life of your water inlet valve and prevent common issues.
- Check Inlet Screens: Periodically inspect the small filter screens located at the water inlet connections on the valve (where the hoses attach). These screens prevent sediment from entering the valve and can become clogged, restricting water flow. Clean them gently with a brush under running water if necessary.
- Inspect Hoses: Check the hot and cold water inlet hoses for cracks, bulges, or leaks. Replace any damaged hoses immediately.
- Prevent Freezing: If the washing machine is in an unheated area, ensure water lines are drained or protected from freezing temperatures, which can damage the valve.

Figure 5: The water inlet valve assembly with highlighted blue and red filter screens, which should be regularly checked for clogs.
8. Troubleshooting
This section addresses common problems associated with the water inlet valve assembly.
Common Issues and Solutions:
| Problem | Possible Cause | Solution |
|---|---|---|
| Washer not filling with water or filling slowly | Clogged inlet screens, kinked water hoses, faulty water inlet valve, low water pressure. | Check and clean inlet screens (Figure 5). Ensure water supply valves are fully open and hoses are not kinked. If problem persists, the valve may need replacement. |
| Washer leaking water from the back | Loose hose connections, cracked water inlet valve housing, damaged hoses. | Tighten hose connections. Inspect the valve for cracks and hoses for damage. Replace the valve or hoses if damaged. |
| No hot water or no cold water | Faulty solenoid for specific water temperature, clogged screen for specific inlet. | Check the corresponding inlet screen. If clean, the solenoid for that water line on the valve may be faulty, requiring valve replacement. |
| Washer displays error codes F8, E1, LF, LO, FL | These codes often indicate a water fill issue, which can be related to the water inlet valve. | Perform checks for 'Washer not filling with water' above. If the valve is confirmed faulty, replacement is necessary. |
| Humming noise from valve area | Solenoid attempting to open but obstructed, or a partially failed solenoid. | Check inlet screens for clogs. If the noise persists and water flow is affected, the valve may need replacement. |
9. Specifications
| Feature | Detail |
|---|---|
| Model Number | W11220230 |
| Part Number | W11096268 |
| Voltage | 120V |
| Frequency | 60Hz |
| Material | Plastic |
| Item Dimensions (L x W x H) | 5.43 x 3.14 x 4.26 inches |
| Number of Ports | 2 |
| Inlet Connection Type | Compression |
| Outlet Connection Type | Threaded |
| UPC | 735280715008 |

Figure 6: Dimensional overview of the water inlet valve assembly.
10. Warranty and Support
The inruwo W11220230 Washing Machine Water Inlet Valve Assembly comes with a one-year warranty from the order date. If the product fails to work within this period, a full refund or new replacement is guaranteed.
For technical support or warranty claims, please contact your retailer or the manufacturer directly. Keep your purchase receipt as proof of purchase.