
SENIX LSPG-M7
SENIX LSPG-M7 21-Inch Gas Push Lawn Mower User Manual
Model: LSPG-M7
Brand: SENIX
1. Introduction
This manual provides essential information for the safe and efficient operation, maintenance, and troubleshooting of your SENIX LSPG-M7 21-Inch Gas Push Lawn Mower. Please read this manual thoroughly before operating the mower and keep it for future reference.
The SENIX LSPG-M7 is a versatile 3-in-1 push mower designed for small to medium yards, offering bagging, mulching, and side discharge options. It features a reliable 140 cc 4-Cycle Briggs & Stratton Engine and a 6-position dual lever height adjustment for precise cutting.
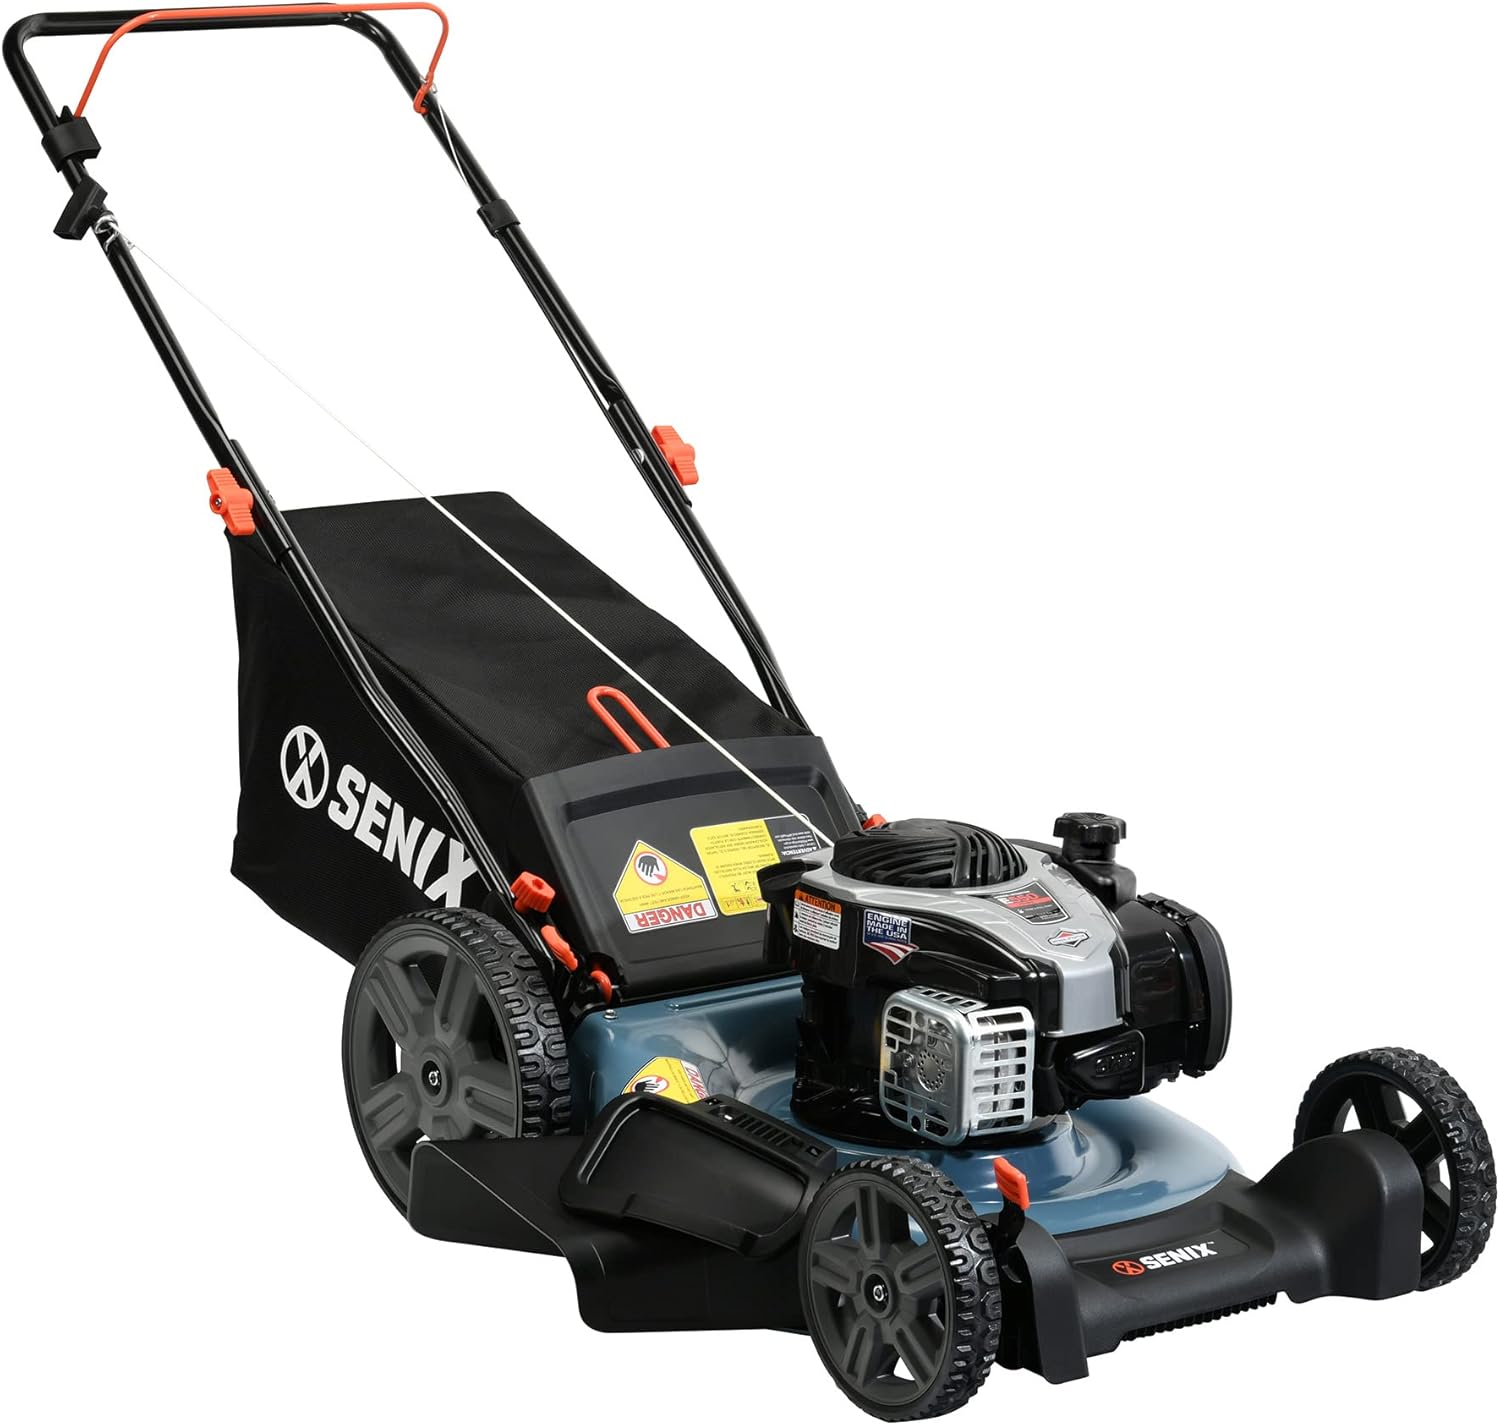
Figure 1: Overall view of the SENIX LSPG-M7 Gas Push Lawn Mower.
2. Setup and Assembly
Your SENIX LSPG-M7 lawn mower is designed for straightforward assembly. Follow these steps to prepare your mower for first use:
- Unpacking: Carefully remove all components from the packaging. Ensure all parts listed in the packing list are present.
- Handle Assembly: Attach the handle to the mower body using the provided hardware. Ensure all screws are tightened securely.
- Add Engine Oil: Locate the oil fill cap on the Briggs & Stratton engine. Add the included engine oil to the appropriate level. Refer to the engine manual for specific oil type and capacity.
- Add Fuel: Fill the fuel tank with fresh, unleaded gasoline. Do not overfill.
- Attach Bagger (Optional): If using the bagging function, attach the 16-gallon bagger to the rear discharge opening.
- Install Side Discharge Chute (Optional): For side discharge, attach the chute to the side of the mower deck.
- Install Mulch Plug (Optional): For mulching, ensure the mulch plug is securely inserted into the rear discharge opening.

Figure 2: Components included with the lawn mower, such as engine oil, mulch plug, side discharge chute, and bagger.
3. Operating Instructions
Familiarize yourself with the mower's controls and features before beginning operation.
3.1 Starting the Engine
The mower features a Prime N' Pull start system for easy ignition:
- Ensure the fuel tank is filled and oil level is correct.
- Press the primer bulb (if equipped) a few times as per engine instructions.
- Firmly pull the starter cord until the engine starts.

Figure 3: The Prime N' Pull start system ensures easy engine ignition.
3.2 Adjusting Cutting Height
The 6-position dual-lever height adjustment allows you to set the cutting height from 1.25 inches to 3.75 inches. Adjust both front and rear levers to the desired position for an even cut.

Figure 4: Adjust the cutting height using the dual levers on the wheels.
3.3 3-in-1 Mowing Options
The 21-inch steel deck provides three versatile mowing options:
- Bagging: Collects grass clippings in the included 16-gallon bagger for easy disposal.
- Mulching: Finely cuts and redistributes clippings back onto the lawn as natural fertilizer. Ensure the mulch plug is installed.
- Side Discharge: Disperses clippings out of the side chute, ideal for taller grass or when bagging is not desired.

Figure 5: The 3-in-1 steel deck offers versatile mowing options.
3.4 Self-Propelled Feature (if applicable)
For models with self-propelled functionality, engage the self-propel handle to allow the mower to move forward with minimal effort. Release the handle to disengage the drive.
4. Maintenance
Regular maintenance ensures optimal performance and extends the life of your lawn mower.
- Engine Oil: The Briggs & Stratton engine is designed for no oil changes; simply check the oil level before each use and add as needed.
- Air Filter: Inspect and clean the air filter regularly, especially in dusty conditions. Replace if damaged.
- Spark Plug: Check the spark plug annually and replace if necessary.
- Blade Care: Regularly inspect the cutting blade for sharpness and damage. Sharpen or replace the blade as needed to ensure a clean cut.
- Cleaning: After each use, clean grass clippings from the underside of the mower deck to prevent buildup and maintain cutting efficiency.

Figure 6: The powerful 140 CC Briggs & Stratton engine requires minimal oil maintenance.
5. Troubleshooting
Refer to this section for common issues and their solutions.
| Problem | Possible Cause | Solution |
|---|---|---|
| Engine will not start | No fuel, stale fuel, fouled spark plug, clogged air filter | Add fresh fuel, clean/replace spark plug, clean/replace air filter |
| Mower cuts unevenly | Dull or bent blade, uneven wheel height adjustment | Sharpen/replace blade, ensure all wheels are set to the same height |
| Excessive smoke from engine | Too much oil, incorrect oil type, engine malfunction | Check oil level and drain excess if necessary. If smoke persists, consult customer support. |
| Mower leaves clumps of grass | Grass too tall, mowing too fast, clogged discharge chute | Mow more frequently, slow down, clear chute, use bagging or side discharge |
6. Specifications
- Brand: SENIX
- Model Number: LSPG-M7
- Power Source: Gasoline-Powered
- Engine: Briggs & Stratton 140 cc 4-Cycle Engine
- Cutting Width: 21 Inches
- Cutting Height Positions: 6 (1.25 Inches to 3.75 Inches)
- Mowing Functions: 3-in-1 (Bagging, Mulching, Side Discharge)
- Wheel Size: 8" Front, 11" Rear
- Item Weight: 54 Pounds
- Product Dimensions: 32.8"D x 22.72"W x 15.87"H
- Material: Alloy Steel
- UPC: 843212113225
7. Warranty and Support
All SENIX gas lawn mowers are backed by a 2-year limited warranty. This warranty covers defects due to faulty materials or workmanship within the specified period. For warranty claims or technical assistance, please contact SENIX customer support.

Figure 7: Your SENIX mower comes with a 2-year limited warranty for peace of mind.
For further assistance, visit the official SENIX website or contact their customer service department. Keep your purchase receipt for warranty validation.
Related documentsLSPG-M7


Ask a question about this manual
Ask about setup, troubleshooting, compatibility, parts, safety, or missing instructions. Manuals+ will review the question and use this page’s manual context to help answer it.