
SwitchBot W0202200-HBWT
SwitchBot Smart Switch Button Pusher & Hub Mini User Manual
Model: W0202200-HBWT
1. Setup Guide
This section provides step-by-step instructions for setting up your SwitchBot Bots and Hub Mini.
1.1 Unboxing and Components
Verify that all components are present in the package:
- 3 x SwitchBot Bot
- 1 x SwitchBot Hub Mini
- 3 x 3M Adhesive Stickers (pre-attached to Bots)
- User Manual (this document)

Image: Contents of the SwitchBot Smart Switch Button Pusher (3Pack) with Hub Mini package, showing three Bots and one Hub Mini.
1.2 Installing the SwitchBot App
- Download the "SwitchBot" app from your device's app store (iOS App Store or Google Play Store).
- Open the app and create a new account or log in if you already have one.
1.3 Adding SwitchBot Bots
- In the SwitchBot app, tap the "+" icon in the top right corner to add a new device.
- Select "Bot" from the list of available devices.
- Follow the on-screen instructions to pair your Bot via Bluetooth. Ensure your phone's Bluetooth is enabled and the Bot is nearby.
- Once paired, you can name your Bot and assign it to a room.
- Repeat for all three Bots.
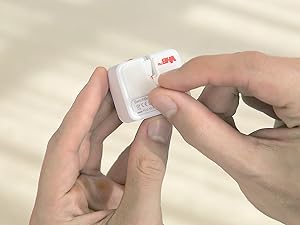
Image: Screenshot of the SwitchBot app showing the process of adding a new device.
1.4 Adding SwitchBot Hub Mini
- Plug in the Hub Mini to a power source using the provided USB cable and adapter.
- In the SwitchBot app, tap the "+" icon and select "Hub Mini".
- Follow the on-screen instructions to connect the Hub Mini to your Wi-Fi network.
- Once connected, the Hub Mini will automatically link with your paired Bots, enabling remote control and voice assistant integration.

Image: The SwitchBot Hub Mini plugged into a power outlet, ready for setup.
1.5 Attaching Bots to Switches/Buttons
The Bots can be attached to various types of switches and buttons. Ensure the surface is clean and dry before attachment.
- For Rocker Switches (ON/OFF): Use the included 3M adhesive to attach the Bot directly below the switch. The Bot's arm will push the switch up or down.
- For Push Buttons: Attach the Bot directly next to the button, ensuring the arm aligns with the button.
- For Toggle Switches (ON/OFF with string): For switches that require pulling, attach the Bot and use the included string accessory.

Image: A SwitchBot Bot attached to a standard rocker light switch, demonstrating its placement for operation.

Image: Close-up of a SwitchBot Bot on a light switch, highlighting its ability to support both on and off functions.

Image: Various applications of the SwitchBot Bot, including light switches, coffee machines, and computer power buttons, showcasing its versatility.
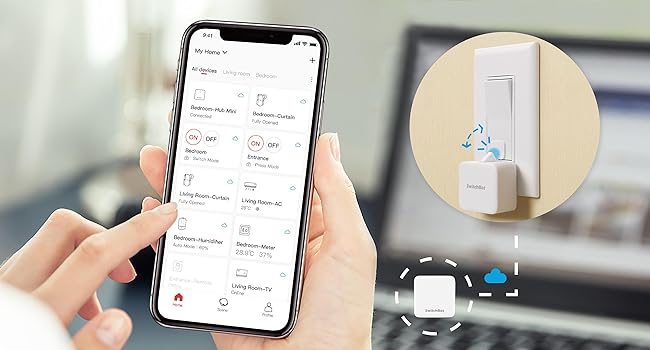
Image: Diagram illustrating compatible and incompatible light switch types for the SwitchBot Bot.
2. Operating Instructions
Learn how to control your SwitchBot devices using the app, voice commands, and automation features.
2.1 App Control
Open the SwitchBot app. On the main screen, you will see a list of your paired Bots and other devices. Tap on a device to control it:
- Press Mode: For simple on/off buttons, the Bot will press and release.
- Switch Mode: For rocker switches, the Bot can push up (ON) or pull down (OFF) using the included string accessory.
- Custom Mode: Configure specific press durations or multiple presses for advanced scenarios.

Image: Screenshot of the SwitchBot app showing different control modes (Press Mode, Switch Mode, Custom Mode) for the Bot.
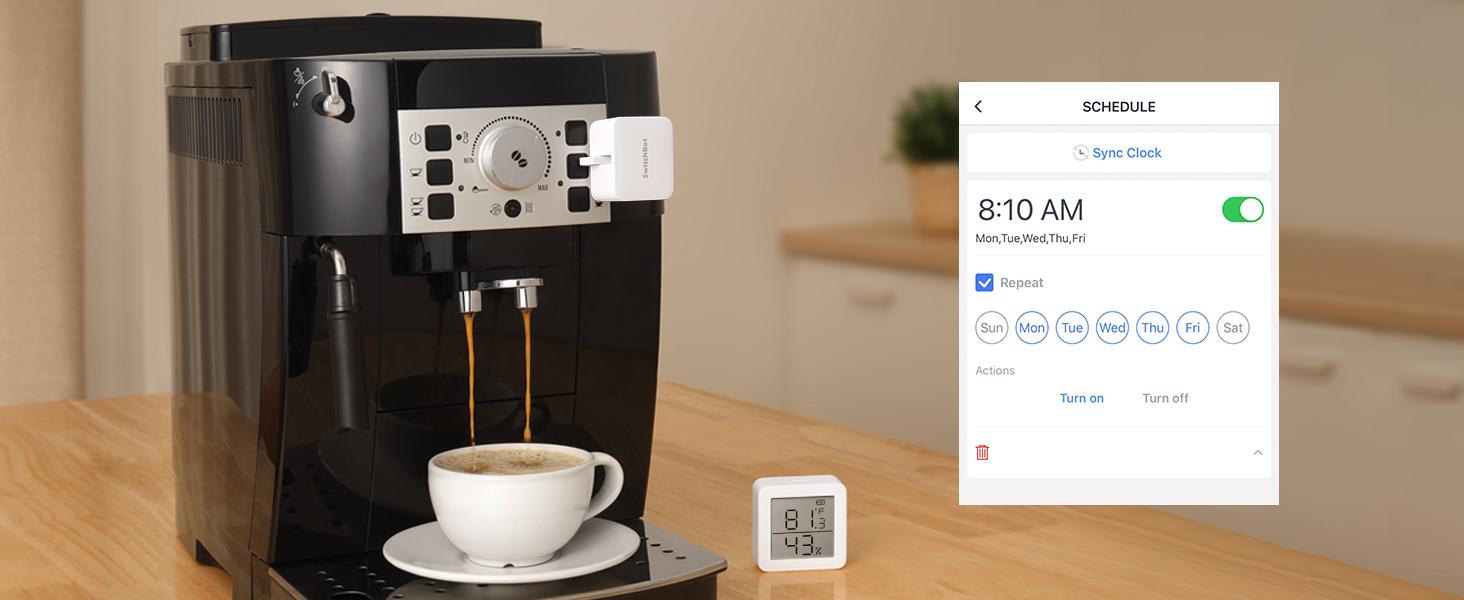
Image: A user remotely controlling SwitchBot devices via the app, enabled by the Hub Mini's cloud connectivity.
2.2 Voice Control (via Hub Mini)
With the Hub Mini, you can integrate your SwitchBot devices with popular voice assistants:
- Amazon Alexa: Link your SwitchBot account in the Alexa app. Use commands like "Alexa, turn on the light."
- Google Home: Link your SwitchBot account in the Google Home app. Use commands like "Hey Google, turn off the fan."
- IFTTT: Create custom applets to automate actions based on various triggers.
Image: A bedside setup showing an Amazon Echo device and a SwitchBot Hub Mini, illustrating voice control capabilities.
Video: Official SwitchBot video demonstrating the smart switch button pusher's functionality, including wireless app and timer control, and its compatibility with voice assistants. This video highlights the ease of use and no-wiring installation.
2.3 Scheduling and Automation
Set schedules for your Bots to activate at specific times:
- In the app, navigate to the device settings and select "Schedule".
- Create new schedules for daily, weekly, or one-time events.
- Combine with other SwitchBot products (e.g., Meter, Contact Sensor) for advanced automations (e.g., turn on fan when temperature exceeds 25°C).
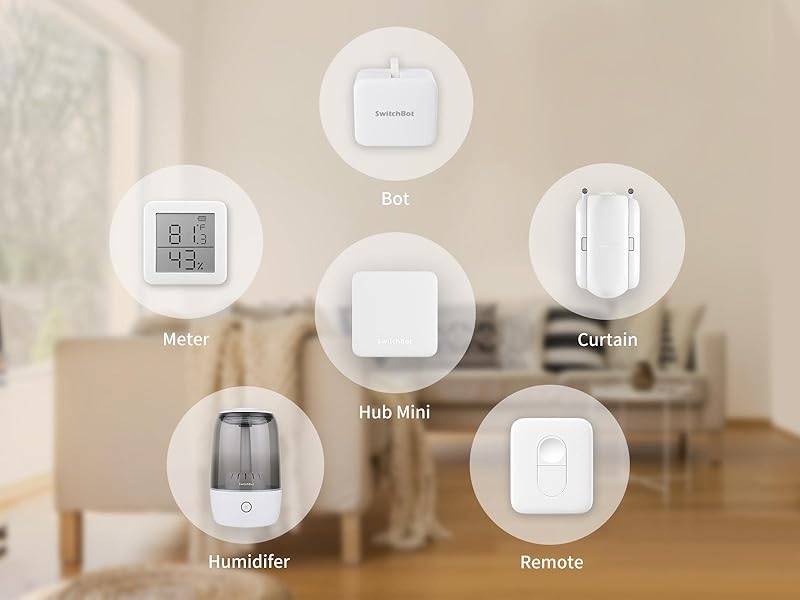
Image: A coffee machine with a SwitchBot Bot attached, demonstrating how to set a daily schedule for automatic operation via the app.
3. Maintenance
Proper maintenance ensures the longevity and optimal performance of your SwitchBot devices.
3.1 Battery Replacement (SwitchBot Bot)
The SwitchBot Bot uses a replaceable CR2 battery. When the battery is low, the app will notify you.
- Gently detach the Bot from its mounted surface.
- Open the battery compartment cover.
- Remove the old CR2 battery and insert a new one, ensuring correct polarity.
- Close the cover and reattach the Bot using a fresh 3M adhesive sticker if needed.
3.2 Cleaning
Wipe the exterior of the Bots and Hub Mini with a soft, dry cloth. Avoid using abrasive cleaners or liquids that could damage the electronics.
3.3 Adhesive Replacement
If the adhesive loses its stickiness, replace it with a new 3M VHB adhesive strip. Ensure the surface is clean and dry before applying new adhesive.
4. Troubleshooting
Common issues and their solutions for your SwitchBot devices.
4.1 Bot Not Responding
- Check Battery: Ensure the Bot has sufficient battery power. Replace if low.
- Bluetooth Range: Make sure your phone is within Bluetooth range of the Bot (if not using Hub Mini).
- Hub Mini Connection: If using Hub Mini, verify it is powered on and connected to Wi-Fi.
- Reset Bot: Press and hold the reset button on the Bot until the indicator light flashes. Then try re-pairing.
4.2 Hub Mini Offline
- Power Check: Ensure the Hub Mini is properly plugged into a working power outlet.
- Wi-Fi Signal: Check your Wi-Fi router and signal strength. Relocate the Hub Mini closer to the router if necessary.
- Router Settings: Verify that your Wi-Fi network is 2.4GHz. The Hub Mini does not support 5GHz networks.
- Restart Hub Mini: Unplug the Hub Mini, wait 10 seconds, and plug it back in.
4.3 Inaccurate Switch Operation
- Alignment: Ensure the Bot's arm is correctly aligned with the switch or button. Adjust its position if needed.
- Adhesive Strength: If the Bot moves during operation, the adhesive may be weak. Replace with a new 3M adhesive strip.
- Switch Type: Confirm your switch type is compatible with the Bot (refer to Section 1.5).
5. Specifications
| Feature | Specification |
|---|---|
| Brand | SwitchBot |
| Model Number | W0202200-HBWT |
| Included Components | 3 x SwitchBot Bot, 1 x SwitchBot Hub Mini |
| Connectivity Protocol | Bluetooth Low Energy (Bot), Wi-Fi (Hub Mini) |
| Control Method | App, Voice (via Hub Mini), Schedule |
| Compatibility | Alexa, Google Home, IFTTT, SmartThings |
| Power Source (Bot) | CR2 Battery |
| Power Source (Hub Mini) | USB Powered |
| Material | Plastic |
| International Protection Rating | IP54 |
6. Warranty Information
SwitchBot products typically come with a 1-year limited warranty from the date of purchase. This warranty covers defects in materials and workmanship under normal use.
For detailed warranty terms and conditions, please refer to the official SwitchBot website or the warranty card included with your product.
7. Support & Contact
For further assistance, technical support, or customer service inquiries, please contact SwitchBot support:
- Online Support: Visit the SwitchBot Support Center for FAQs, troubleshooting guides, and contact options.
- Email Support: support@switch-bot.com
You can also find additional resources and community forums on the official SwitchBot website.
Ask a question about this manual
Ask about setup, troubleshooting, compatibility, parts, safety, or missing instructions. Manuals+ will review the question and use this page’s manual context to help answer it.