
ELEPHAS BL1O8
ELEPHAS BL1O8 Mini Projector 1080p Full HD User Manual
Model: BL1O8 | Brand: ELEPHAS
1. Introduction
Thank you for purchasing the ELEPHAS BL1O8 Mini Projector. This manual provides essential information for setting up, operating, and maintaining your projector. Please read it thoroughly before use to ensure proper function and to maximize your viewing experience. Keep this manual for future reference.
Safety Precautions
- Do not look directly into the projector lens when the lamp is on.
- Ensure proper ventilation around the projector to prevent overheating.
- Avoid placing the projector in dusty, humid, or extremely hot environments.
- Use only the power adapter supplied with the projector.
- Do not attempt to repair the projector yourself. Contact qualified service personnel.
2. Package Contents
Please check that all items are present in your package:
- ELEPHAS BL1O8 Mini Projector
- Power Cord
- HDMI Cable
- Remote Control
- User Manual
3. Product Overview
Familiarize yourself with the projector's components and interfaces.
Projector Front and Top View
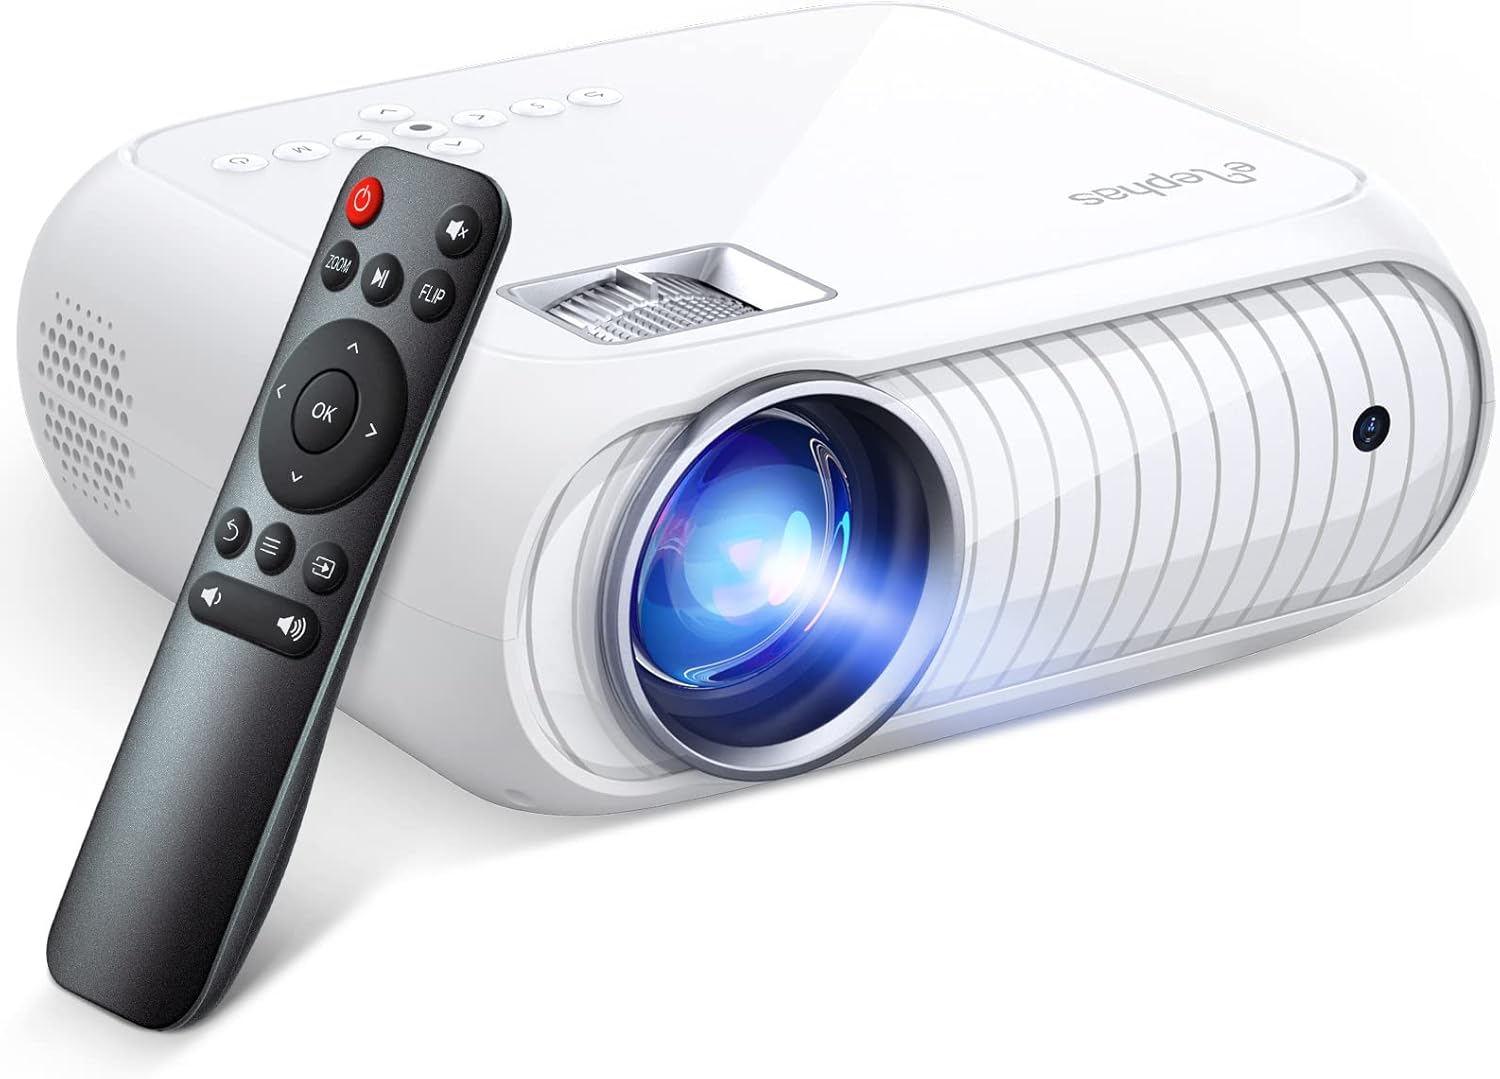
The front of the projector features the projection lens. The top panel includes control buttons for power, navigation, and input selection. The remote control provides convenient operation from a distance.
Projector Rear and Side View (Ports)

The rear and side panels house various connectivity options, including HDMI, USB, AV, and audio output ports, allowing connection to a wide range of devices.
4. Setup
4.1 Placement
Place the projector on a stable, flat surface. For optimal viewing, ensure the projector is positioned directly in front of the projection screen or wall. The projector supports projection sizes from 33 to 200 inches, with optimal projection distances between 1.1m and 6m.

4.2 Power Connection
- Connect the power cord to the projector's power input port.
- Plug the other end of the power cord into a power outlet.
- The power indicator light on the projector will illuminate.
4.3 Focus and Keystone Adjustment
- Focus: Rotate the focus ring near the lens until the projected image is clear and sharp.
- Keystone: If the image appears trapezoidal, adjust the keystone correction dial (if available) or use the remote control to correct the image shape. The screen can be reduced to 75% by adjusting the display without moving the projector.
5. Operating Instructions
5.1 Power On/Off
- Power On: Press the power button on the projector or the remote control.
- Power Off: Press the power button again. Confirm shutdown if prompted.
5.2 Input Source Selection
After powering on, select the desired input source using the "Source" button on the projector or remote control. Options typically include HDMI, USB, and AV.
5.3 Connecting External Devices
HDMI Connection (PC, Laptop, Game Console, TV Stick)
- Connect one end of the HDMI cable to the HDMI port on your device.
- Connect the other end to the HDMI port on the projector.
- Select "HDMI" as the input source on the projector.

USB Connection (USB Drive)
- Insert your USB drive into the USB port on the projector.
- Select "USB" as the input source.
- Navigate through the files on your USB drive using the remote control or projector buttons to play media.
Smartphone/Tablet Connection
To connect a smartphone or tablet, an additional HD adapter cable is required (not included).
- For iOS devices (iPhone/iPad): You will need a Lightning to HD Adapter cable.
- For Android devices: You will need a Micro USB/Type-C to HD Adapter cable.

5.4 Audio Output
The projector has built-in speakers. For enhanced audio, you can connect external speakers via the audio output port. Note that Dolby sound is not supported by this mini projector.
6. Maintenance
6.1 Cleaning the Lens
Use a professional lens cleaning cloth or lens paper to gently wipe the lens. Avoid using abrasive cleaners or cloths that could scratch the lens surface.
6.2 Cleaning the Projector Body
Wipe the projector's exterior with a soft, dry cloth. Do not use liquid cleaners directly on the projector.
6.3 Ventilation
Ensure the ventilation vents are clear of obstructions to prevent overheating. The projector features a high-efficiency cooling technology designed to minimize fan noise and extend lamp life to over 65,000 hours.
7. Troubleshooting
| Problem | Possible Cause | Solution |
|---|---|---|
| No image displayed |
|
|
| Blurry image |
|
|
| No sound |
|
|
| Remote control not working |
|
|
8. Specifications
| Feature | Detail |
|---|---|
| Brand | ELEPHAS |
| Model Number | BL1O8 |
| Color | White |
| Display Resolution | 1920 x 1080 (Full HD Supported) |
| Brightness | 8500 Lux |
| Contrast Ratio | 9500:1 |
| Lamp Life | 65,000 hours |
| Aspect Ratio | 4:3 / 16:9 |
| Projection Size | 33 - 200 inches |
| Projection Distance | 1.1m - 6m (optimal) |
| Connectivity Technology | HDMI, USB, AV, Audio |
| Compatible Devices | PC, Laptop, Smartphone, Tablet, TV Stick, Game Consoles |
| Special Features | Lightweight, Integrated Cooling System, Built-in Speakers |
| Dolby Sound Support | Not supported |
9. Warranty and Support
ELEPHAS provides lifetime technical support for all its projectors. If you encounter any issues or have questions regarding your BL1O8 Mini Projector, please contact ELEPHAS customer service for assistance.
Contact information can typically be found on the official ELEPHAS website or through your purchase platform.
Related documentsBL1O8


Ask a question about this manual
Ask about setup, troubleshooting, compatibility, parts, safety, or missing instructions. Manuals+ will review the question and use this page’s manual context to help answer it.