
POMIACAM DCH122
POMIACAM DCH122 DVR Board User Manual
AHD 1CH 1080P Video Recording Motherboard
1. Introduction
This manual provides detailed instructions for the installation, operation, and maintenance of the POMIACAM DCH122 DVR Board. This board is designed for industrial endoscope applications, offering versatile video input and output options. Please read this manual thoroughly before using the product to ensure proper functionality and safety.
2. Product Overview
2.1 Key Features
- Supports CVBS, AHD, and TVI video formats (D1, 720P, 1080P).
- Multiple output interfaces: HDMI, VGA, CVBS.
- Audio input and output capabilities.
- Remote control and UART/ADC key operation support.
- PC keyboard access for OSD text editing.
- Multi-language menu support.
- Encoder support for cable distance measurement.
- Photo and video recording functionality.
- Adjustable media file names.
- Image scaling (ZOOM) support.
- U disk storage (SD card storage requires conversion circuit).
- MP4 video file format support.
- Adjustable image brightness, chromaticity, and contrast.
2.2 Board Components and Ports
The POMIACAM DCH122 motherboard features various ports and connectors for video, audio, power, and control. Refer to the diagram below for a visual representation of these components.

The following table describes the function of each numbered port shown in Figure 1-1.

| NO | Function |
|---|---|
| 1 | Audio input RCA terminal |
| 2 | Video input RCA terminal |
| 3 | J16 audio and video input, audio output, CVBS output |
| 4 | J15 key, encoder interface |
| 5 | J11 Power input terminal |
| 6 | Power input interface |
| 7 | MCU burning interface (used by the manufacturer) |
| 8 | J4 UART interface and LED indicator interface |
| 9 | USB port (for storage devices like USB flash drives) |
| 10 | USB port (for PC keyboard or wireless keyboard receiver) |
| 11 | Infrared remote control receiver |
| 12 | Disk working indicator |
| 13 | Record indicator light |
| 14 | Audio output and CVBS output port |
| 15 | Debugging interface (used by the manufacturer) |
| 16 | HDMI output interface |
| 17 | J17 VGA output terminal (R,G,B,HS,VS,GND) |
| 18 | 15PIN VGA output port |
2.3 Package Contents
Verify that all items are present in the package:
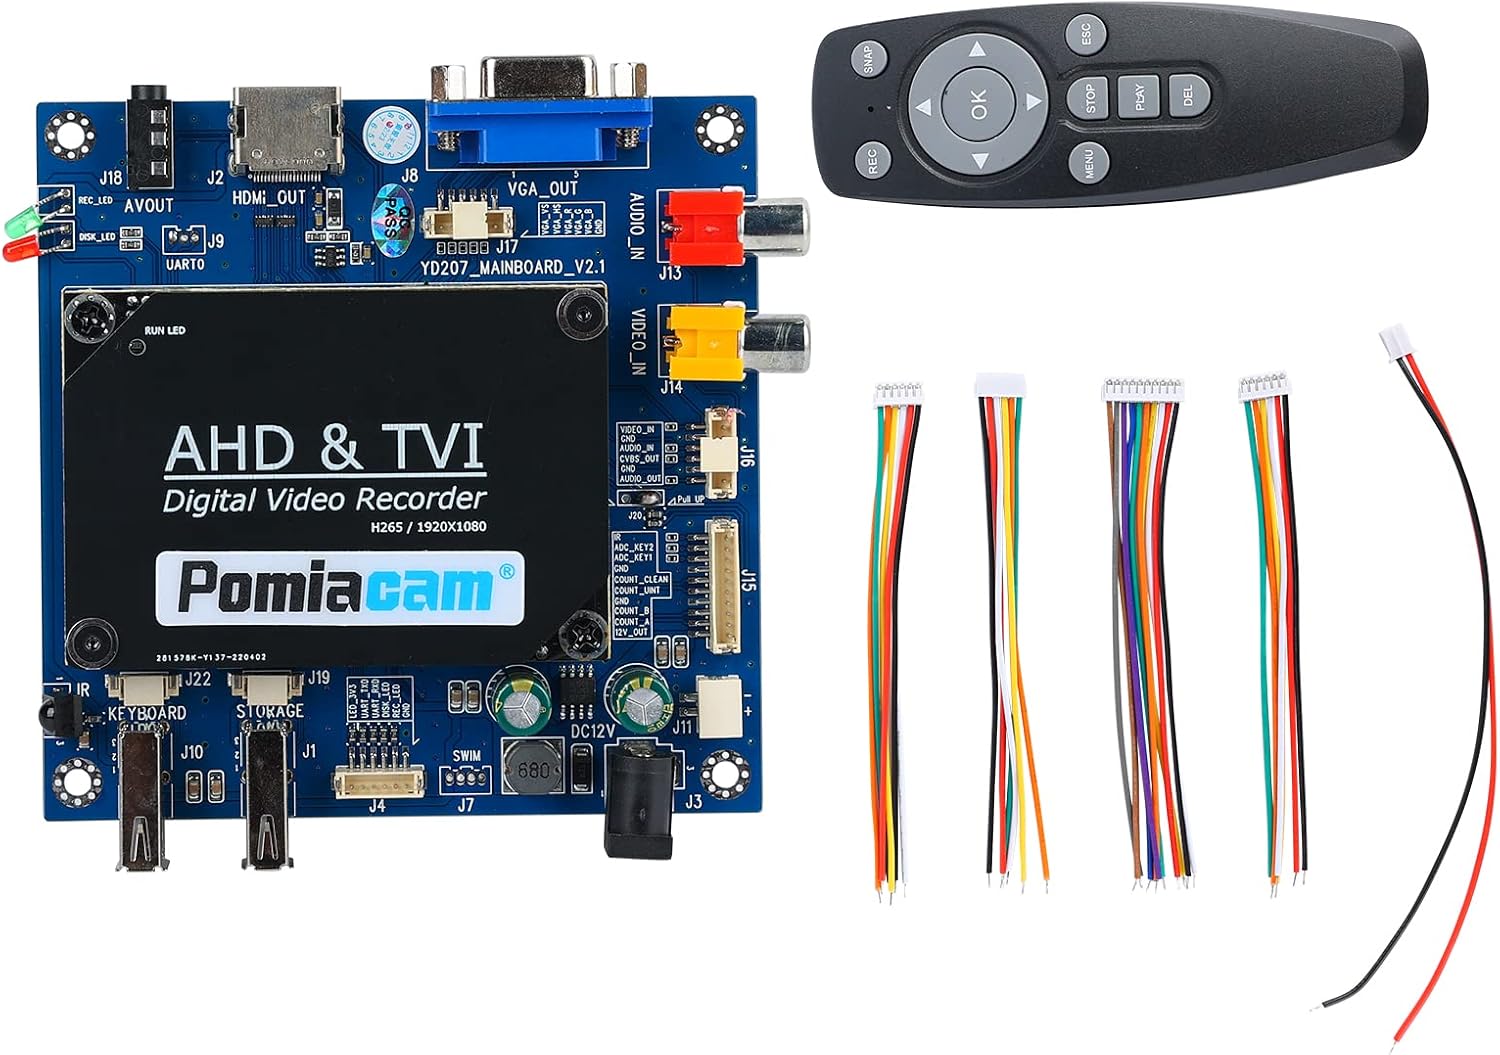
- POMIACAM DCH122 DVR Board
- Remote Control
- Connection Cables (various types as shown)
3. Setup Instructions
Follow these steps to set up your DCH122 DVR Board:
- Power Connection: Connect a compatible DC 12V power supply to the Power Input Interface (Port 6).
- Video Input: Connect your AHD, TVI, or CVBS camera to the Video Input RCA Terminal (Port 2) or J16 (Port 3) as appropriate. Ensure the video format matches the board's capabilities (D1, 720P, or 1080P).
- Video Output: Choose your preferred display output:
- HDMI: Connect an HDMI cable from the HDMI Output Interface (Port 16) to your monitor.
- VGA: Connect a VGA cable from the 15PIN VGA Output Port (Port 18) to your monitor.
- CVBS: Connect a CVBS cable from the Audio Output and CVBS Output Port (Port 14) to your display.
- Audio Connection: If using external audio, connect your audio source to the Audio Input RCA Terminal (Port 1) or J16 (Port 3). Connect speakers or an audio receiver to the Audio Output and CVBS Output Port (Port 14) for audio playback.
- USB Devices: For storage, insert a USB flash drive into one of the USB ports (Port 9). For OSD text editing, connect a PC keyboard or a USB wireless keyboard receiver to the other USB port (Port 10).
- Remote Control: Ensure the Infrared Remote Control Receiver (Port 11) is unobstructed for proper remote operation.
4. Operating Instructions
4.1 Main Menu Navigation
Upon powering on the device, the main menu will be displayed on your connected monitor. Use the remote control or a connected PC keyboard to navigate through the options.

4.2 Video Recording and Playback
To record video, select the 'Record' option from the main menu. Ensure a USB storage device is connected. To view recorded videos, select the 'Video' option. The playback interface allows you to review your recordings.

4.3 OSD Text Editing
Connect a PC keyboard to the USB port (Port 10) to access and edit On-Screen Display (OSD) text. This feature allows for real-time editing of information displayed on the screen.
4.4 System Settings
Access the 'System' menu to configure various settings such as language, time, date, and other system parameters. The 'Image' menu allows adjustment of brightness, chromaticity, and contrast.
5. Maintenance
- Keep the DVR board in a clean, dry environment, away from dust and moisture.
- Avoid exposing the board to extreme temperatures or direct sunlight.
- Periodically check all cable connections to ensure they are secure.
- Do not attempt to repair the board yourself. Refer to qualified personnel for service.
- Ensure proper ventilation around the board to prevent overheating.
6. Troubleshooting
If you encounter issues with your DCH122 DVR Board, refer to the table below for common problems and solutions.
| Problem | Possible Cause | Solution |
|---|---|---|
| No video output | Incorrect video cable connection; Monitor input not selected; Power issue. | Check all video cable connections (HDMI, VGA, CVBS). Ensure the monitor is set to the correct input source. Verify power supply is connected and functional. |
| No recording | No USB storage device connected; USB device full or corrupted; Recording not initiated. | Connect a compatible USB flash drive. Check available storage space. Format the USB drive if necessary (this will erase all data). Ensure recording is manually started or scheduled. |
| Remote control not working | Batteries low or dead; Obstruction to IR receiver; Remote out of range. | Replace remote control batteries. Ensure no objects block the Infrared Remote Control Receiver (Port 11). Operate the remote within effective range. |
| Poor image quality | Incorrect video format setting; Cable quality; Camera issue. | Verify the camera's video format (AHD, TVI, CVBS) and resolution (D1, 720P, 1080P) are compatible and correctly configured. Use high-quality video cables. Check the camera for proper function. |
7. Specifications
| Feature | Detail |
|---|---|
| Model Name | DCH122 |
| Product Dimensions | 6.1 x 5.91 x 1.97 inches |
| Item Weight | 8.8 ounces |
| Video Input Formats | CVBS, AHD, TVI (D1, 720P, 1080P) |
| Video Output Interfaces | HDMI, VGA, CVBS |
| Audio | Input and Output |
| Storage Support | U disk (USB flash drive) |
| Video File Format | MP4 |
| Control Methods | Remote Control, UART, ADC Key, PC Keyboard |
| Compatible Devices | Personal Computer (for keyboard input) |
| Manufacturer | POMIACAM |
8. Warranty and Support
8.1 Warranty Period
The POMIACAM DCH122 DVR Board comes with a 12-month warranty period from the date of purchase. This warranty covers manufacturing defects and malfunctions under normal use.
8.2 Technical Support
For any questions, technical assistance, or warranty claims, please contact POMIACAM customer support. You can also request customization of the startup screen by contacting us via email.
Email: sales09@autopvision.com
Ask a question about this manual
Ask about setup, troubleshooting, compatibility, parts, safety, or missing instructions. Manuals+ will review the question and use this page’s manual context to help answer it.