
Nitecore P23i-RSW2i-GM06
Nitecore P23i Long Range Tactical Flashlight User Manual
Model: P23i-RSW2i-GM06
Product Overview
The Nitecore P23i is a high-performance long-range tactical flashlight designed for various applications including law enforcement, search operations, and self-defense. It features a powerful Luminus SFT-70 LED, delivering up to 3,000 lumens of output and a maximum beam distance of 470 meters. The P23i is equipped with dual tail switches for intuitive operation, including instant access to STROBE Mode, and is rechargeable via USB-C.

Image: The Nitecore P23i flashlight shown with its complete package of accessories, including the RSW2i Remote Switch, GM06 Offset Mount, NL2150HPi 5000mAh battery, and a USB-C charging cable.
What's in the Box
- Nitecore P23i Flashlight
- NL2150HPi 5000mAh Rechargeable Li-ion Battery
- RSW2i Remote Switch
- GM06 Offset Mount
- USB-C Charging Cable
- Holster
- Clip
- Lanyard
- Spare O-ring

Image: A visual representation of the standard accessories included with the Nitecore P23i flashlight package.
Setup
1. Battery Installation
Unscrew the tail cap of the flashlight. Insert the included NL2150HPi 5000mAh rechargeable Li-ion battery with the positive (+) end facing towards the head of the flashlight. Screw the tail cap back on securely.
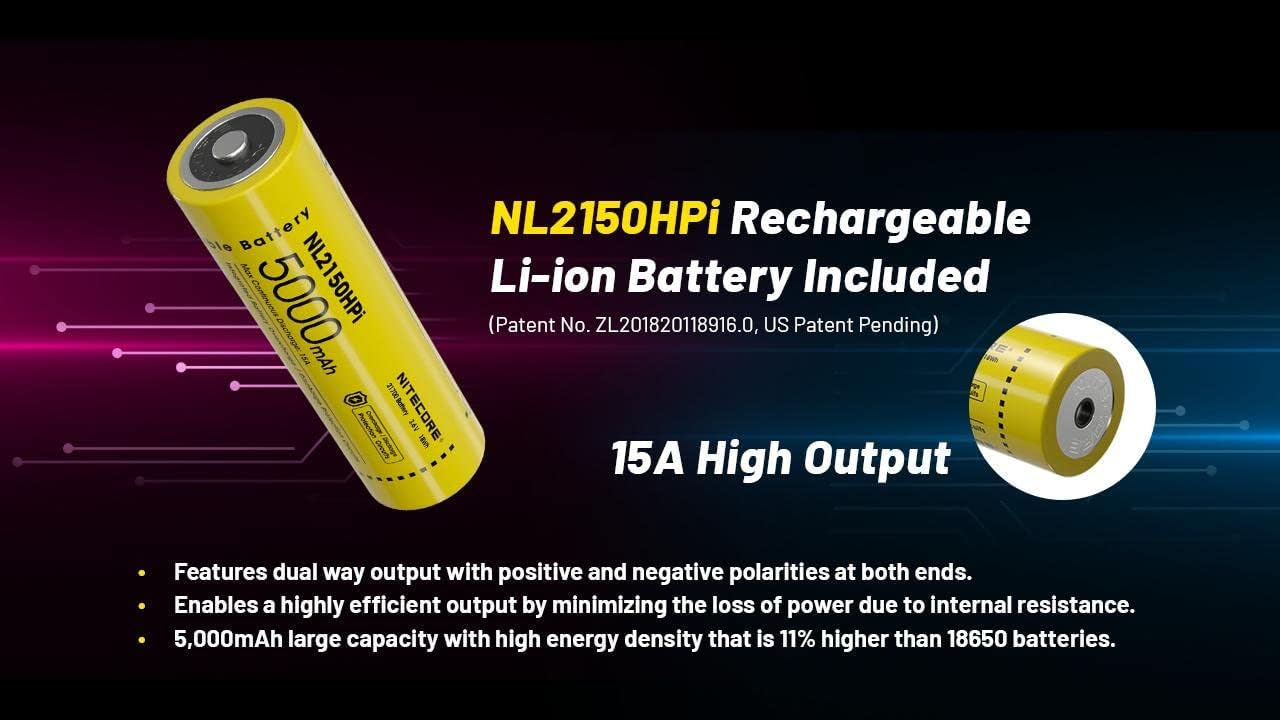
Image: The NL2150HPi 5000mAh battery, which features dual way output with positive and negative polarities at both ends for efficient power delivery.
2. Charging the Battery
Connect the USB-C charging cable to the flashlight's charging port and to a USB power source. The charging indicator will show the charging status. A full charge typically takes several hours.
3. Attaching Accessories (Optional)
- Remote Switch (RSW2i): Attach the remote switch to the tail cap for remote control of the flashlight's functions.
- Offset Mount (GM06): Use the GM06 mount to attach the flashlight to compatible rails or systems.
- Holster/Clip/Lanyard: Attach these for convenient carrying and retention.
Operating Instructions
Basic Operation
- Power On/Off: Press the main tail switch to turn the flashlight on or off.
- Momentary On: Half-press the main tail switch for momentary illumination. Release to turn off.
- Brightness Levels: With the flashlight on, press the mode switch (smaller tail switch) to cycle through brightness levels (e.g., Ultralow, Low, Mid, High, Turbo).
Special Modes
- STROBE Mode: From any state (on or off), press and hold the mode switch for instant access to STROBE mode. Release to exit.

Image: The second generation STROBE READY™ Technology, designed for tactical applications, enables instant STROBE access and features an inset pedal design to prevent accidental activation.
Dual User Modes
The P23i features two user modes: Daily Mode and Tactical Mode. Refer to the full manual for detailed instructions on switching between and utilizing these modes for quick response in different scenarios.

Image: An overview of the Nitecore P23i's unparalleled tactical performance features, including its advanced LED, instant strobe access, high-efficiency battery, robust tail cap, and versatile dual user modes.
Maintenance
- Cleaning: Periodically clean the flashlight body with a soft, damp cloth. Do not use abrasive cleaners.
- Threads and O-rings: Apply silicone grease to the threads and O-rings regularly to maintain water resistance and smooth operation. Replace O-rings if they appear damaged.
- Battery Care: Store the battery in a cool, dry place when not in use. Recharge the battery every 3-6 months if stored for extended periods to prevent over-discharge.
- Lens Cleaning: Gently wipe the lens with a lens cleaning cloth to remove dust or smudges.
Troubleshooting
- Flashlight not turning on:
- Ensure the battery is inserted correctly with the positive end towards the head.
- Check if the battery is charged.
- Tighten the tail cap fully.
- Dim output or flickering:
- Recharge the battery.
- Clean the battery contacts and flashlight contacts.
- Charging issues:
- Ensure the USB-C cable is properly connected to both the flashlight and the power source.
- Try a different USB power source or cable.
Specifications
| Feature | Detail |
|---|---|
| Max Output | 3,000 Lumens |
| Max Beam Distance | 470 meters |
| Max Beam Intensity | 55,300 cd |
| Max Runtime | 45 hours (Ultralow mode) |
| LED | Luminus SFT-70 LED |
| Battery | 1 x 21700i (NL2150HPi 5000mAh included) |
| Special Modes | STROBE |
| Beam Color | White Light |
| Length | 143.5 mm / 5.65 in |
| Head Size | 31.8 mm / 1.25 in |
| Weight | 114.5 g / 4.04 oz (without battery) |
| Impact Resistance | 2 meters |
| Water Resistance | IP68 (2 meters submersible) |
| Charging Port | USB-C |

Image: A detailed technical data table outlining the performance specifications of the Nitecore P23i across various output modes, measured according to FL1 standard.
Warranty and Support
For warranty information and customer support, please refer to the official Nitecore website or contact your authorized Nitecore dealer. Keep your purchase receipt as proof of purchase for warranty claims.
Nitecore Official Website: www.nitecore.com
Related documentsP23i-RSW2i-GM06


Ask a question about this manual
Ask about setup, troubleshooting, compatibility, parts, safety, or missing instructions. Manuals+ will review the question and use this page’s manual context to help answer it.