
1. Introduction
Thank you for choosing the DEKO 126-Piece Tool Kit with 8V Cordless Drill. This comprehensive kit is designed for a wide range of DIY projects, home maintenance, and professional tasks. This manual provides essential information for safe operation, proper use, and maintenance of your tools. Please read it thoroughly before first use and keep it for future reference.
2. General Safety Information
Always follow basic safety precautions to reduce the risk of fire, electric shock, and personal injury.
2.1. Work Area Safety
- Keep your work area clean and well-lit. Cluttered or dark areas invite accidents.
- Do not operate power tools in explosive atmospheres, such as in the presence of flammable liquids, gases, or dust. Power tools create sparks which may ignite the dust or fumes.
- Keep children and bystanders away while operating a power tool. Distractions can cause you to lose control.
2.2. Electrical Safety (for Cordless Drill)
- Avoid body contact with earthed or grounded surfaces such as pipes, radiators, ranges, and refrigerators. There is an increased risk of electric shock if your body is earthed or grounded.
- Do not expose power tools to rain or wet conditions. Water entering a power tool will increase the risk of electric shock.
- Use the specified charging cable (USB-C) and a compatible 5V DC USB power source for charging the drill battery.
2.3. Personal Safety
- Always wear eye protection. Use safety glasses or goggles.
- Wear appropriate personal protective equipment (PPE) such as gloves, dust mask, and hearing protection when necessary.
- Stay alert, watch what you are doing, and use common sense when operating a power tool. Do not use a power tool while you are tired or under the influence of drugs, alcohol, or medication.
- Dress properly. Do not wear loose clothing or jewelry. Keep your hair and clothing away from moving parts.
2.4. Tool Use and Care
- Do not force the tool. Use the correct tool for your application.
- Disconnect the battery pack from the power tool before making any adjustments, changing accessories, or storing power tools.
- Store idle tools out of the reach of children and do not allow persons unfamiliar with the power tool or these instructions to operate the power tool.
- Maintain tools. Check for misalignment or binding of moving parts, breakage of parts, and any other condition that may affect the tool’s operation. If damaged, have the tool repaired before use.
3. Product Overview
The DEKO 126-Piece Tool Kit is a versatile set designed for various tasks around the home, workshop, or office. It includes a powerful 8V cordless electric drill/screwdriver and a comprehensive selection of hand tools and accessories, all housed in a durable, organized case.
3.1. Key Features
- Professional 8V LED Drill: Capable of drilling into wood and plastic, and tightening/loosening screws. Features variable speed control (up to 800 RPM no-load speed) and integrated LED work lights. Its lightweight design (0.75 kg) allows for comfortable one-handed operation.
- Rechargeable 1.5Ah Battery: The drill is powered by a 1.5Ah battery, rechargeable via an included USB-C cable. Connect to any universal charger or 5V DC USB output. A steady green light on the battery indicator signifies a full charge.
- High-Quality CR-V Steel Tools: The hand tools are crafted from high-quality CR-V chrome steel, ensuring durability and resistance to corrosion and rust.
- Robust Tool Case: All tools are securely organized within a sturdy DEKO tool case, featuring robust rubber handles for easy transport and improved control.
- Versatile Application: Ideal for DIY projects, home maintenance, decoration, furniture assembly, drilling, cutting, gardening, office tasks, and general repairs.
3.2. Package Contents
The DEKO 126-Piece Tool Kit includes the following items:

Figure 1: Overview of the DEKO 126-piece tool kit, displaying the cordless drill, various screwdrivers, pliers, hammer, tape measure, utility knife, Allen keys, and an assortment of bits and fasteners neatly arranged in the open case.
- 1x 8V Cordless Drill/Screwdriver
- 1x Claw Hammer (8oz)
- 1x Long Nose Pliers (6")
- 1x Adjustable Wrench (6")
- 1x Slotted Screwdriver (SL5x100mm)
- 1x Phillips Screwdriver (PH1x100mm)
- 4x Precision Screwdrivers (PH00, 0, SL2.4, 3.0)
- 1x Magnetic Bit Holder (60mm)
- 10x 50L Driver Bits (SL4,5,6, T15, T20, PH0,1,2,3, A.D.)
- 18x 25L Driver Bits (SL1/8,5/32,3/16,1/4,9/32, PH1,2,3, S1,2,3, H2,3,4,5,6, A.D.)
- 9x 1/4" Sockets (5,6,7,8,9,10,11,12,13mm)
- 6x Twisted Drills (5/64,3/32,1/8,5/32,3/16,1/4")
- 8x Hex Keys (1.5-6mm)
- 1x Tape Measure (3m)
- 1x Utility Knife (18mm)
- 10x Utility Knife Blades (18mm)
- 50x Fasteners (screws and anchors)
- 1x Durable Storage Case

Figure 2: A visual representation of the comprehensive list of tools and accessories included in the DEKO 126-piece tool kit, highlighting the variety of items for different tasks.
4. Cordless Drill Components
Familiarize yourself with the parts of your 8V cordless drill for safe and effective operation.

Figure 3: Labeled diagram of the 8V cordless drill, showing the Keyless Chuck, LED Worklight, Control Trigger, Soft Grip Handle, Battery Indicator Light, Forward/Reverse Switch, and Charging Input Port.
- Keyless Chuck: For quick and easy bit changes.
- LED Worklight: Illuminates the work area for better visibility.
- Control Trigger: Activates the drill and controls speed.
- Soft Grip Handle: Provides comfortable and secure handling.
- Battery Indicator Light: Shows the current battery charge level.
- Forward/Reverse Switch: Changes the rotation direction for drilling or driving/removing screws.
- Charging Input Port: USB-C port for charging the internal battery.
5. Setup and Charging
5.1. Initial Charging
Before first use, fully charge the drill's internal battery.
- Locate the USB-C charging input port on the drill (refer to Figure 3).
- Connect the provided USB-C charging cable to the drill's charging port.
- Connect the other end of the USB-C cable to a compatible 5V DC USB power source (e.g., a phone charger, computer USB port, or power bank).
- The battery indicator light on the rear of the drill will show charging status. A steady green light indicates a full charge.
- Once fully charged, disconnect the charging cable.
5.2. Inserting/Changing Bits
The keyless chuck allows for quick and easy bit changes.
- Ensure the drill is off and the forward/reverse switch is in the center (locked) position to prevent accidental starting.
- Rotate the keyless chuck counter-clockwise to open the jaws.
- Insert the desired drill bit or screwdriver bit into the chuck, ensuring it is seated as deeply as possible.
- Rotate the keyless chuck clockwise to tighten the jaws securely around the bit. Hand-tighten firmly.
- To remove a bit, rotate the chuck counter-clockwise until the jaws open, then pull the bit out.
6. Operating Instructions
6.1. Using the Cordless Drill
- Select Rotation Direction: Use the forward/reverse switch (refer to Figure 3) to select the desired rotation.
- Push left for forward rotation (for drilling and tightening screws).
- Push right for reverse rotation (for removing screws).
- Center position locks the trigger for safety.
- Start and Control Speed:
- Hold the drill firmly with both hands if possible, or one hand if lightweight tasks.
- Press the control trigger to start the drill. The LED worklight will illuminate.
- The drill features variable speed control: press the trigger lightly for slower speeds and harder for faster speeds (up to 800 RPM).
- Release the trigger to stop the drill.
- Drilling and Screwdriving Applications:

Figure 4: The 8V cordless drill shown performing various tasks such as drilling into wood, plastic, and soft metal, and tightening/loosening screws. Maximum torque is 12 N·m.
- Drilling: Apply steady, even pressure. For harder materials, start with a slower speed and gradually increase. Ensure the drill bit is appropriate for the material (wood, plastic).
- Screwdriving: Use the appropriate screwdriver bit. Start at a low speed to engage the screw, then increase speed as needed. For loosening, use reverse rotation. The maximum torque is 12 N·m.
6.2. Using Hand Tools
The kit includes a variety of hand tools for common tasks.
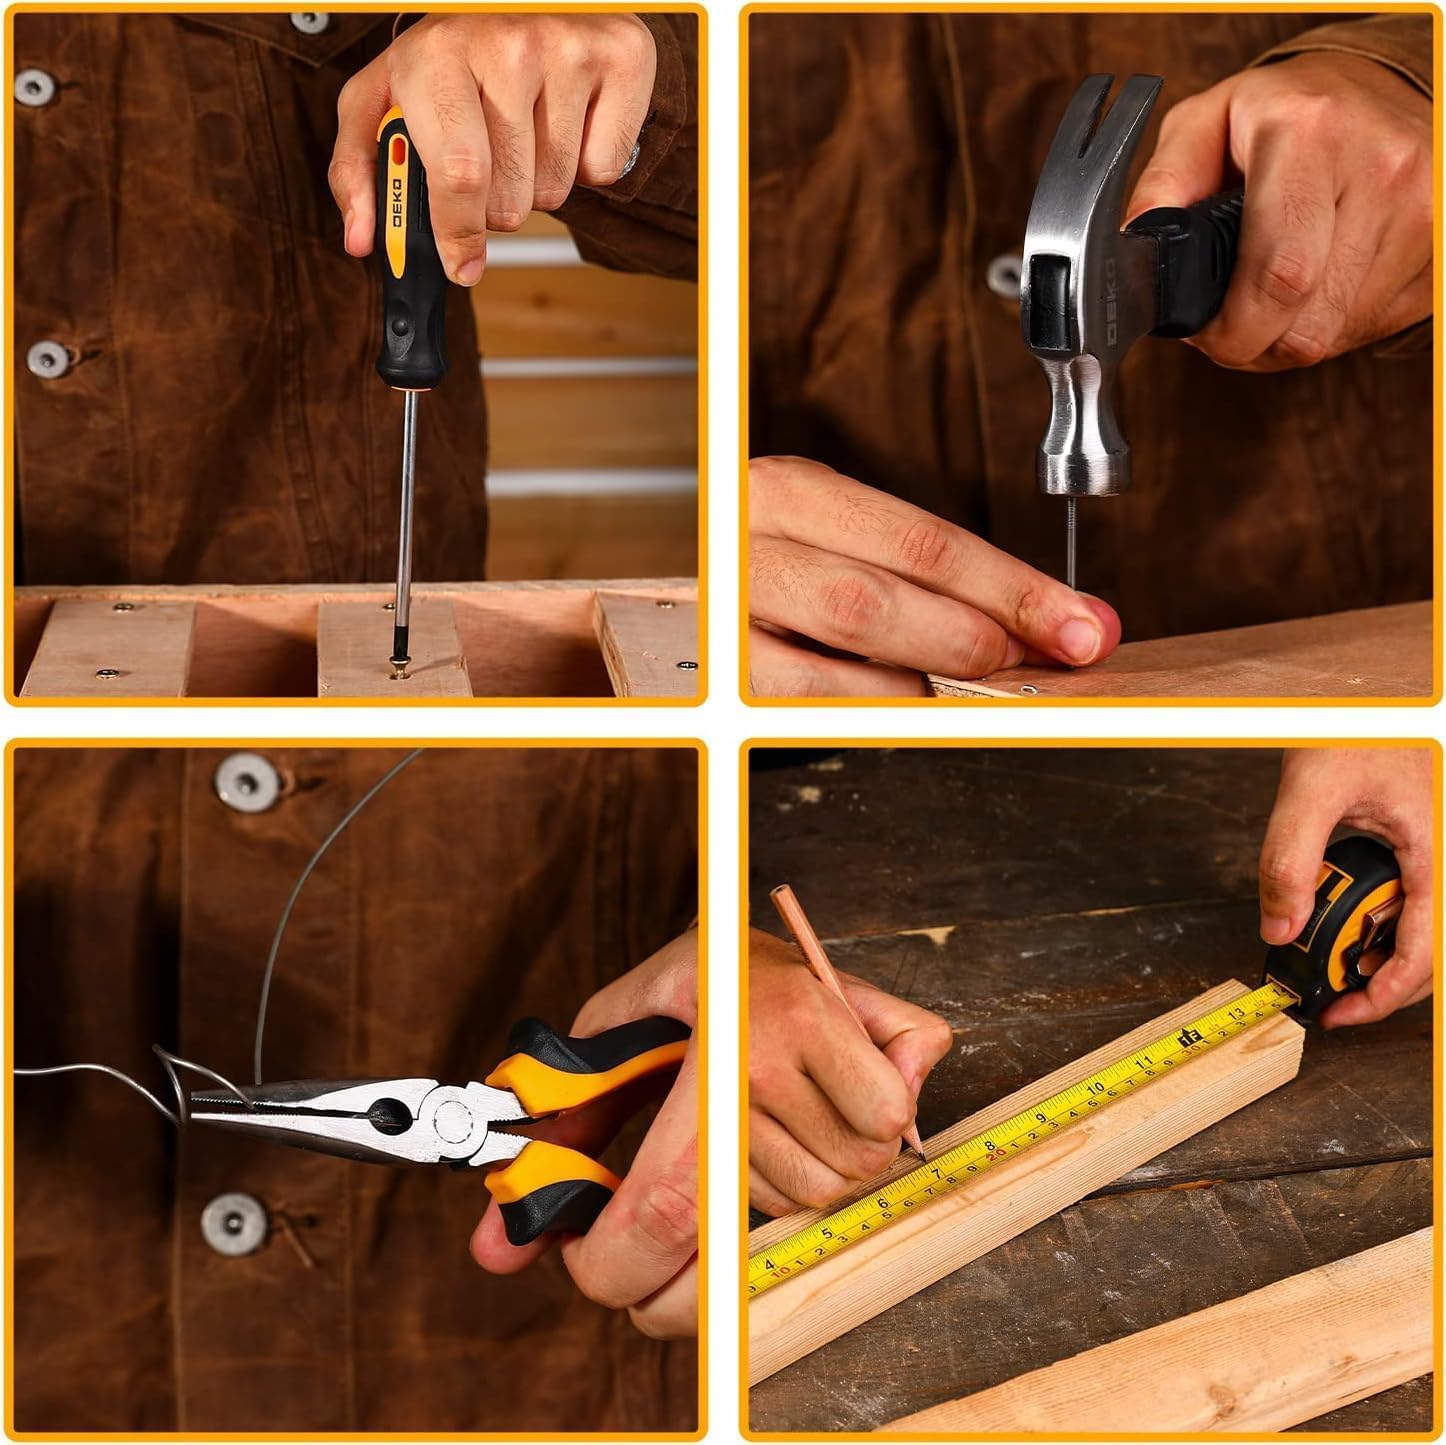
Figure 5: Demonstrations of using various hand tools from the kit, including a screwdriver for fastening, a hammer for driving nails, long nose pliers for bending wire, and a tape measure for accurate measurements.
- Screwdrivers: Select the correct type (slotted, Phillips, precision) and size for the screw head to prevent damage to the screw or tool.
- Hammer: Use for driving nails or light demolition. Always wear safety glasses.
- Pliers: Long nose pliers are ideal for gripping, bending, and cutting small wires or objects.
- Adjustable Wrench: Adjust the jaw opening to fit the nut or bolt head snugly before applying force.
- Tape Measure: Extend the tape to measure distances. Ensure it is straight and taut for accurate readings.
- Utility Knife: Use with caution for cutting materials. Always retract the blade when not in use. Change blades when dull for safety and efficiency.
- Hex Keys: Use for fasteners with hexagonal sockets. Ensure the correct size is used to avoid stripping.
7. Maintenance
Regular maintenance ensures the longevity and optimal performance of your tools.
- Cleaning: After each use, wipe down all tools with a clean, dry cloth. For stubborn dirt, a slightly damp cloth can be used, followed by immediate drying. Do not use harsh chemicals or abrasive cleaners.
- Cordless Drill Care: Keep the ventilation openings of the drill clean to prevent overheating. Do not immerse the drill in water.
- Lubrication: Moving parts of hand tools (e.g., pliers, adjustable wrench) may benefit from occasional light lubrication with a general-purpose oil to ensure smooth operation and prevent rust.
- Storage: Store all tools in the provided durable case in a dry, clean, and secure location, out of reach of children. Ensure the drill battery is partially charged (not fully depleted or fully charged for long-term storage) if storing for extended periods.
- Inspection: Periodically inspect all tools for signs of wear, damage, or loose parts. Replace worn-out bits or blades. Do not use damaged tools.
8. Troubleshooting
This section addresses common issues you might encounter with your DEKO tool kit.
| Problem | Possible Cause | Solution |
|---|---|---|
| Drill does not start. | Battery is depleted. Forward/reverse switch is in the center (locked) position. | Charge the battery fully. Move the forward/reverse switch to the left (forward) or right (reverse) position. |
| Drill lacks power or stops during use. | Low battery charge. Overloading the drill. | Recharge the battery. Reduce pressure on the drill or use a larger drill bit for pilot holes. |
| Battery indicator not lighting up during charging. | Charging cable or power source issue. Drill not properly connected. | Check the USB-C cable and power source. Ensure connections are secure. Try a different USB power source. |
| Bit slips in the chuck. | Chuck not tightened sufficiently. Bit shank is dirty or damaged. | Ensure the chuck is hand-tightened firmly. Clean or replace the bit. |
| Hand tool feels stiff or rusty. | Lack of lubrication or exposure to moisture. | Clean the tool and apply a light coat of general-purpose oil to moving parts. Store in a dry environment. |
9. Technical Specifications
| Feature | Specification |
|---|---|
| Brand | DEKO |
| Model | 8V Cordless Drill Tool Kit (ASIN: B0BQB4MKD5) |
| Drill Voltage | 8 Volts |
| No-Load Speed | 0-800 RPM |
| Max Torque | 12 N·m |
| Battery Capacity | 1.5 Ah |
| Charging Input | USB-C, 5V DC |
| Drill Net Weight | 0.75 kg (750 grams) |
| Tool Kit Dimensions (L x W x H) | 31.4 x 25.8 x 10.2 cm |
| Number of Pieces | 126 |
| Tool Material | CR-V Chrome Steel |
10. Warranty and Support
DEKO products are manufactured to high-quality standards. For specific warranty information, please refer to the warranty card included with your purchase or contact DEKO customer support.
If you encounter any issues or have questions regarding your DEKO 126-Piece Tool Kit, please contact our customer support team. Contact details can typically be found on the product packaging or on the official DEKO website.