
1. Introduction
The VPFET 1x4 HDMI Extender Splitter allows a single HDMI source to be distributed to four HDMI displays over Cat5e, Cat6, or Cat7 Ethernet cables. This system extends HDMI signals up to 165 feet (50 meters) while maintaining 1080p resolution and supporting 3D. It features Power over Cable (PoC) technology, meaning only the Transmitter (TX) unit requires a power adapter, simplifying installation at receiver locations. The device also includes EDID preset functions for enhanced compatibility with various display devices.

Image 1.1: VPFET 1x4 HDMI Extender Splitter system components.
2. Package Contents
Please verify that all items listed below are included in your package:
- 1x HDMI Extender Splitter Transmitter (TX)
- 4x HDMI Extender Receivers (RX)
- 1x 12V DC Power Adapter
- 1x User Manual (this document)
- 1x Pair of Fixed Hangers (for mounting)

Image 2.1: Package contents of the VPFET 1x4 HDMI Extender Splitter.
3. Product Overview
3.1 Transmitter (TX) Unit
The Transmitter unit connects to your HDMI source and distributes the signal to up to four Receiver units via Ethernet cables.

Image 3.1: Transmitter (TX) Front and Rear Panel Layout.
- ON/OFF Switch: Powers the unit on or off.
- Power Indicator: Illuminates when the unit is powered.
- HDMI Input Indicator: Illuminates when an HDMI signal is detected.
- CAT1-CAT4 Outputs: RJ45 ports for connecting to Receiver units via Ethernet cable.
- EDID Switch: Dip switch for selecting EDID modes.
- HDMI IN: Connects to your HDMI source device.
- DC12V: Power input port for the 12V DC adapter.
3.2 Receiver (RX) Unit
Each Receiver unit connects to an HDMI display and receives the signal from the Transmitter via an Ethernet cable. These units are powered by the Transmitter (PoC).
- RJ45 Input: Connects to the Transmitter via Ethernet cable.
- HDMI OUT: Connects to your HDMI display device.
4. Setup Instructions
Follow these steps to set up your VPFET HDMI Extender Splitter system:
- Connect HDMI Source to Transmitter: Connect an HDMI cable from your source device (e.g., PC, DVD player, PS4/PS5, TV box) to the HDMI IN port on the Transmitter (TX) unit.
- Connect Receivers to Displays: Connect an HDMI cable from each Receiver (RX) unit's HDMI OUT port to an HDMI input on your display devices (e.g., TV, projector).
- Connect Transmitter to Receivers via Ethernet: Use Cat5e, Cat6, or Cat7 Ethernet cables to connect the CAT OUT ports (CAT1-CAT4) on the Transmitter to the RJ45 input ports on each of the four Receiver units. Ensure cables are securely plugged in.
- Power the Transmitter: Connect the provided 12V DC power adapter to the DC12V port on the Transmitter unit, then plug the adapter into a power outlet. The Receiver units will receive power via the Ethernet cables (PoC).
- Power On Devices: Turn on your HDMI source device, the Transmitter unit, and all connected display devices.
- Verify Signal: Check each display for the HDMI signal. If no signal is present, refer to the Troubleshooting section.
Image 4.1: Typical wiring diagram for the HDMI Extender Splitter.
Video 4.1: This video demonstrates the connection process for the HDMI Extender Splitter, showing how to connect the transmitter to the source and receivers to displays using Ethernet cables, and applying power.
5. Operating Instructions
5.1 EDID Management
The Transmitter unit features an EDID (Extended Display Identification Data) dip switch to ensure optimal compatibility between your HDMI source and various display devices. EDID settings determine the video resolution and audio format that the source outputs. Adjust the dip switches according to the desired output resolution and audio channel configuration.

Image 5.1: EDID Dip Switch Settings and Specifications.
Refer to the table on the unit or in Image 5.1 for specific dip switch combinations for different resolutions and audio formats. After changing EDID settings, it is recommended to restart both the source device and the extender system for the changes to take effect.
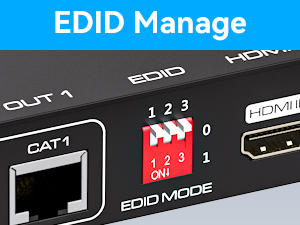
Image 5.2: Detail of the EDID Mode dip switch.
5.2 Power over Cable (PoC)
The VPFET HDMI Extender Splitter utilizes Power over Cable (PoC) technology. This means that the four Receiver (RX) units draw their power directly from the Transmitter (TX) unit through the connected Ethernet cables. This eliminates the need for separate power adapters at each display location, simplifying wiring and installation.
Important Note:
- The 12V power adapter must be connected to the Transmitter (TX) unit for the entire system to function.
- Failure to connect the 12V power to the TX unit will prevent the system from operating and may cause damage.
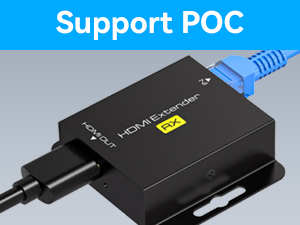
Image 5.3: Power over Cable (PoC) feature.
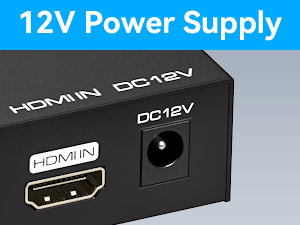
Image 5.4: 12V Power Supply connection on the Transmitter.
6. Maintenance
To ensure the longevity and optimal performance of your VPFET HDMI Extender Splitter, follow these maintenance guidelines:
- Cleaning: Use a soft, dry cloth to clean the units. Avoid using liquid or aerosol cleaners, as they may damage the devices.
- Ventilation: Ensure proper ventilation around the units to prevent overheating. Do not block any ventilation openings.
- Environment: Keep the devices away from excessive heat, humidity, dust, and direct sunlight.
- Cable Management: Ensure all cables are neatly organized and not under strain to prevent damage to ports or cables.
- Power Cycle: If experiencing minor issues, a simple power cycle (unplugging and replugging the power adapter) can often resolve them.
7. Troubleshooting
If you encounter issues with your HDMI Extender Splitter, please refer to the following common problems and solutions:
| Problem | Possible Cause | Solution |
|---|---|---|
| No video or audio on display(s). |
|
|
| Intermittent signal or flickering. |
|
|
| Audio issues (no sound, static). |
|
|
| Receivers not powering on (no indicator light). |
|
|
8. Specifications
| Feature | Detail |
|---|---|
| Model | 1 in 4 Out HDMI Extender Splitter |
| HDMI Compliance | HDMI 1.3 |
| HDCP Compliance | HDCP 1.2 |
| Video Resolution | Up to 1080p@60Hz, 1920x1200@60Hz |
| Supported 3D | Yes |
| Audio Format | PCM, DTS, DSD |
| Transmission Distance | Up to 165ft (50m) over Cat6/7; 130ft (40m) over Cat5e; 100ft (30m) over Cat5 |
| Ethernet Cable Requirement | Cat5e/6/7 (UTP/STP) |
| Power Supply | DC 12V (for Transmitter only) |
| Power Consumption | TX: <5W, RX: <2W |
| Operating Temperature | 0°C to 45°C (32°F to 113°F) |
| Storage Temperature | -20°C to 60°C (-4°F to 140°F) |
| Dimensions (L x W x H) | Transmitter: 8 x 6.4 x 2.4 inches (approx.) |
| Color | Black |
| Compatible Devices | Projector, Television |
9. Warranty & Support
9.1 Warranty Information
VPFET products are designed for reliability and performance. For specific warranty details, including duration and coverage, please refer to the warranty card included with your product or contact VPFET customer support. Keep your purchase receipt as proof of purchase for warranty claims.
9.2 Customer Support
If you require technical assistance or have questions regarding your VPFET HDMI Extender Splitter, please contact our customer support team. Contact information can typically be found on the product packaging, our official website, or through your retailer's support channels.
When contacting support, please have your product model number and a detailed description of the issue ready to facilitate a quicker resolution.