

1. Introduction
This manual provides essential information for the safe and efficient operation of your Sygonix Built-in Thermostat SY-5044424. This device is designed as a built-in solution for regulating and monitoring heat generators within heating, climate, and ventilation technology systems. Please read these instructions thoroughly before installation and use, and retain them for future reference.
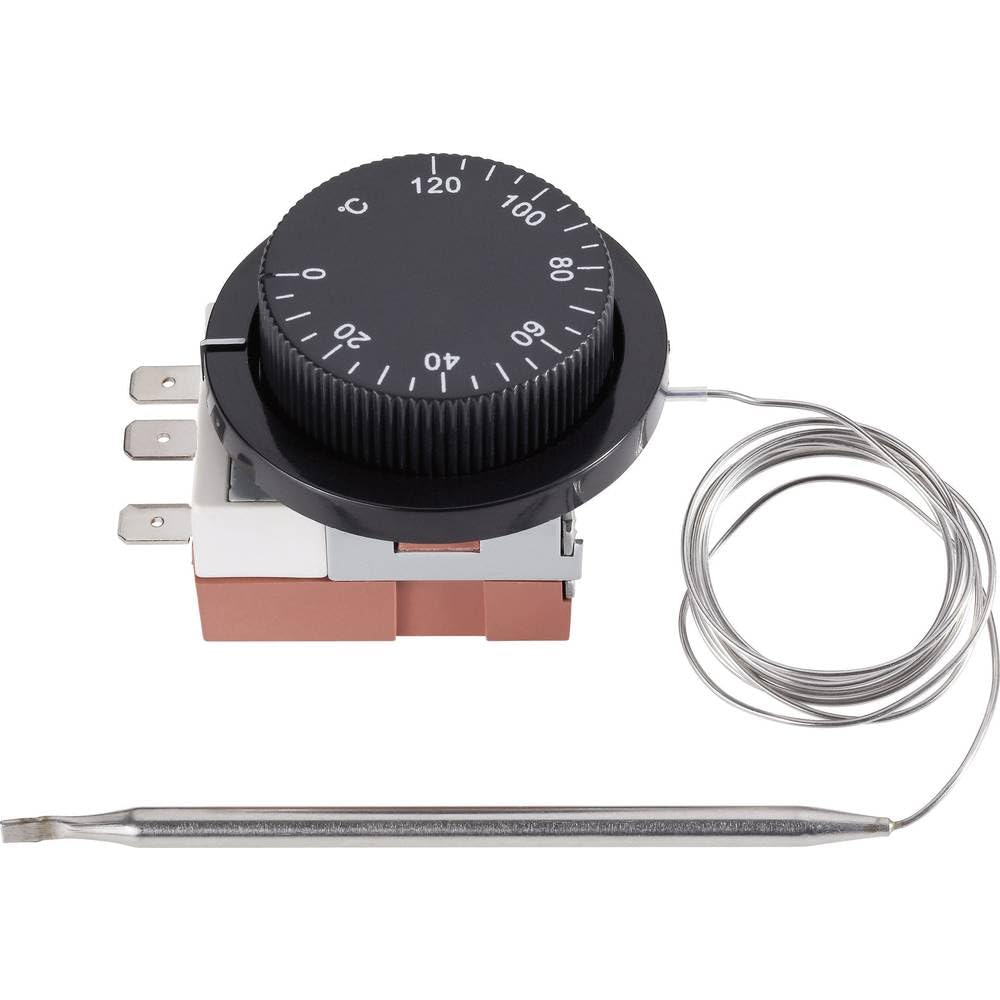
Image 1.1: The Sygonix Built-in Thermostat SY-5044424. This image shows the compact design of the thermostat, ready for integration into a control panel or wall unit.
2. Safety Instructions
Warning: Failure to follow these safety instructions may result in fire, electric shock, injury, or damage to the product or property.
- Installation must be performed by a qualified electrician in accordance with all local and national electrical codes.
- Ensure the power supply is disconnected before installation, maintenance, or troubleshooting.
- Do not expose the device to moisture, extreme temperatures, or direct sunlight.
- Do not attempt to modify or repair the device yourself. Contact qualified service personnel.
- Keep packaging materials away from children.
3. Product Features
- Setting range: 0 - 120 °C
- Switching differential: 3 ± 1.5 °C
- Built-in design for seamless integration
- Suitable for heating, climate, and ventilation systems
- Remote control capability (via RF connectivity)
4. Setup and Installation
The Sygonix Built-in Thermostat is designed for integration into existing control systems or panels. Professional installation is highly recommended.
4.1. Pre-installation Checks
- Verify that the power supply matches the thermostat's requirements (230V).
- Ensure the installation location is free from excessive vibration, moisture, and direct heat sources.
- Confirm that all necessary mounting hardware is available.
4.2. Wiring
- Disconnect Power: Turn off the main power supply to the circuit where the thermostat will be installed. Use a voltage tester to confirm that power is off.
- Mounting: Secure the thermostat in its designated built-in location using the provided mounting hardware.
- Connect Wires: Follow the wiring diagram provided with the product packaging. Connect the power input, load output, and sensor wires to the appropriate terminals. Ensure all connections are secure.
- Sensor Placement: Position the temperature sensor in an area that accurately reflects the ambient temperature to be controlled, away from drafts or direct heat sources.
- Restore Power: Once all connections are secure and verified, restore power to the circuit.
5. Operating Instructions
The Sygonix Built-in Thermostat is designed for straightforward temperature control. Specific operation details may vary based on the integrated system and any connected remote control unit.
5.1. Initial Power-On
- Upon first power-on, the thermostat may display a default temperature or enter a calibration mode. Refer to the specific display indicators in your product packaging.
5.2. Setting Temperature
- Use the integrated controls (if any) or a compatible remote control unit to adjust the desired temperature. The setting range is 0 to 120 °C.
- The thermostat will activate or deactivate the connected heating/cooling device to maintain the set temperature within the specified switching differential.
5.3. Remote Control Functionality
- The thermostat supports RF connectivity for remote control. Pair your compatible remote control or smart system according to its specific instructions.
- Ensure the remote control unit is within the effective range and has fresh batteries (if applicable).
6. Maintenance
The Sygonix Built-in Thermostat requires minimal maintenance.
- Cleaning: Gently wipe the surface of the thermostat with a soft, dry cloth. Do not use abrasive cleaners, solvents, or excessive moisture.
- Regular Checks: Periodically inspect the wiring connections for any signs of wear or damage. Ensure the temperature sensor is clean and unobstructed.
- Power Cycle: If the device behaves unexpectedly, try disconnecting and reconnecting the power supply for a few minutes.
7. Troubleshooting
If you encounter issues with your thermostat, refer to the following common problems and solutions:
| Problem | Possible Cause | Solution |
|---|---|---|
| Thermostat not powering on | No power supply; incorrect wiring | Check circuit breaker; verify wiring connections (ensure power is off first). |
| Incorrect temperature readings | Sensor obstructed or misplaced; faulty sensor | Ensure sensor is clean and in an appropriate location; contact support if suspected faulty. |
| Heating/cooling device not responding | Incorrect wiring; thermostat setting issue; device malfunction | Verify wiring; check thermostat settings; test the heating/cooling device independently. |
| Remote control not working | Remote not paired; batteries low; out of range | Pair remote as per its instructions; replace batteries; ensure remote is within RF range. |
If the problem persists after attempting these solutions, please contact customer support.
8. Specifications
| Feature | Detail |
|---|---|
| Brand | Sygonix |
| Model Number | SY-5044424 |
| Color | Black |
| Product Dimensions | 7 x 5 x 18 cm; 14 kg (or 17D x 6W x 5H cm) |
| Capacity | 10 Liters |
| Power/Voltage | 280 |
| Voltage | 230 V |
| Noise Level | 1 Decibel |
| Special Features | Remote Control |
| Manufacturer | Sygonix |
| Item Number | SY-5044424 |
| ASIN | B0BPX282HB |
| Controller Type | Handheld Controller |
| Specific Product Uses | Building heating and air conditioning |
| Temperature Control Type | Smart/Remote Control |
| Connectivity Technology | RF |
| Included Components | Mounting Hardware |
| Setting Range | 0 - 120 °C |
| Switching Differential | 3 ± 1.5 °C |
9. Warranty and Support
For warranty information and technical support, please refer to the documentation included with your purchase or visit the official Sygonix website. Keep your proof of purchase for warranty claims.