
OSTBA GGJ-801
OSTBA Food Dehydrator Machine User Manual
Model: GGJ-801 | Brand: OSTBA
1. Introduction
Thank you for choosing the OSTBA Food Dehydrator Machine. This appliance is designed to efficiently dry a variety of foods, including fruits, vegetables, herbs, jerky, and more, preserving their nutrients and extending their shelf life. This manual provides essential information for safe operation, maintenance, and optimal use of your new dehydrator. Please read it thoroughly before first use and retain it for future reference.

Image: The OSTBA Food Dehydrator Machine, showcasing its sleek design and multiple trays filled with various dehydrated foods.
2. Safety Instructions
To ensure safe operation and prevent damage to the appliance or injury to yourself, please adhere to the following safety precautions:
- Always place the dehydrator on a stable, heat-resistant surface.
- Do not immerse the main unit, cord, or plug in water or other liquids.
- Keep the appliance out of reach of children and pets.
- Unplug the dehydrator from the power outlet when not in use, before cleaning, or during assembly/disassembly.
- Do not operate the appliance with a damaged cord or plug. Contact customer service for repair.
- Ensure proper ventilation around the dehydrator during operation. Do not block air vents.
- The appliance will automatically shut off when the timer ends or if it overheats.
- Avoid touching hot surfaces. Use oven mitts or handles when handling trays or opening the door during or immediately after operation.
- This appliance is for household use only. Do not use outdoors.
3. Package Contents
Upon opening the package, verify that all components are present and in good condition:
- 1 x OSTBA Food Dehydrator Machine (Model: GGJ-801)
- 9 x Stainless Steel Trays (11.69" x 11.69" each)
- 2 x Mesh Screens
- 1 x Fruit Roll-Up Sheet
- 1 x User Manual
- 1 x Recipe Book

Image: A visual representation of all items included in the OSTBA Food Dehydrator package, including the main unit, trays, and accessories.
4. Setup
Before using your dehydrator for the first time, follow these steps:
- Unpack all components and remove any packaging materials.
- Wipe the exterior of the dehydrator with a damp cloth.
- Wash the stainless steel trays, mesh screens, and fruit roll-up sheet with warm, soapy water. Rinse thoroughly and dry completely.
- Place the dehydrator on a clean, dry, and level surface, ensuring adequate space around the unit for proper ventilation.
- Insert the clean trays into the dehydrator.
5. Operating Instructions
Operating the OSTBA Food Dehydrator is straightforward. Follow these steps for optimal results:
5.1 Preparing Food for Dehydration
- Clean: Thoroughly wash all fruits, vegetables, or other foods.
- Slice: Slice food into uniform thickness for even drying. Thinner slices will dry faster.
- Pre-treatment (Optional): Some foods benefit from pre-treatment (e.g., blanching, soaking in lemon juice) to prevent discoloration or improve texture. Refer to the included recipe book for specific recommendations.
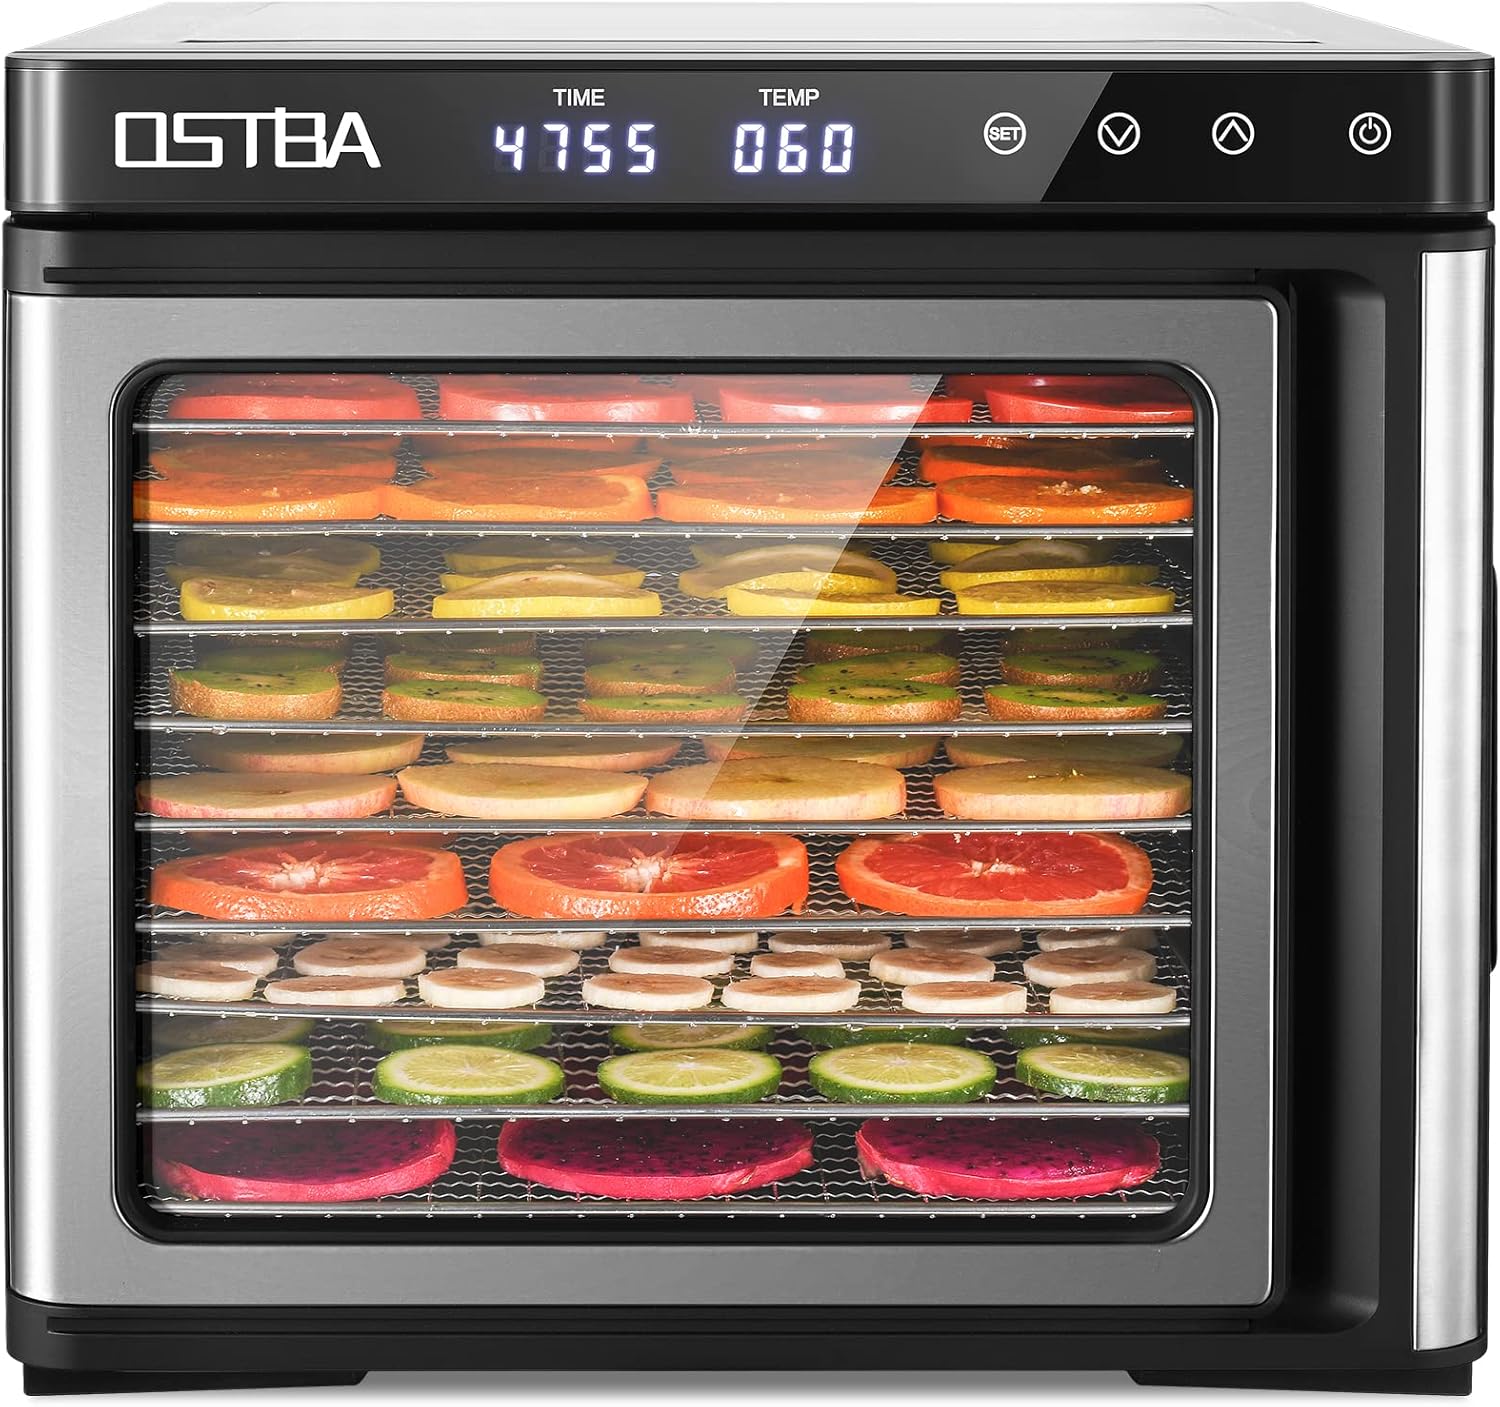
Image: A visual guide illustrating the simple steps of food dehydration: washing and slicing, placing food on trays, setting time and temperature, and removing dried food.
5.2 Loading Trays
- Arrange food in a single layer on the stainless steel trays. Do not overlap pieces.
- Ensure there is adequate space between food pieces for proper air circulation.
- For smaller items or sticky foods, use the mesh screens. For fruit leathers, use the fruit roll-up sheet.
- The dehydrator features 9 trays, allowing for large batches. The trays slide smoothly on metal guides.

Image: Examples of healthy homemade dehydrated foods, including fruits, jerky, herbs, pet treats, and fruit rolls, demonstrating the versatility of the dehydrator.
5.3 Setting Temperature and Timer
The dehydrator features an LED Smart Control Panel for precise adjustments.
- Plug the dehydrator into a 120V AC power outlet.
- Press the START/STOP button (power icon) to turn on the unit.
- Press the SET button to switch between Time and Temperature settings.
- Use the UP (arrow up) and DOWN (arrow down) buttons to adjust:
- Temperature: Adjustable from 95°F to 165°F in 5°F increments.
- Time: Adjustable from 30 minutes to 48 hours in 30-minute increments.
- Once settings are confirmed, the dehydrator will begin operation. The transparent door allows for easy monitoring of the drying process.

Image: Close-up of the LED Smart Control Panel, highlighting the Time and Temperature adjustment buttons and display.

Image: An interior view of the dehydrator, illustrating the dual rear fans and the 360° hot air circulation technology for even heating.
5.4 During Operation
- The 1000W power and dual rear fans ensure efficient and even drying. There is no need to rotate trays during the drying process.
- The dehydrator operates quietly, with a noise level below 48 decibels, allowing for overnight use without disturbance.
- The unit will automatically shut off once the set timer expires.
5.5 Official Product Video
Video: An official product video from OSTBA HOME demonstrating the features and operation of the 1000W Stainless Steel Dehydrator (Model GGJ-801).
6. Maintenance and Cleaning
Regular cleaning ensures the longevity and hygienic operation of your dehydrator.
- Always unplug the dehydrator before cleaning.
- The stainless steel trays are dishwasher safe, making cleanup convenient.
- The mesh screens and fruit roll-up sheet can be washed by hand with warm, soapy water.
- Wipe the interior and exterior of the dehydrator body with a damp cloth. Do not use abrasive cleaners or scourers.
- Ensure all parts are completely dry before reassembling or storing the dehydrator.

Image: Illustration of the two cleaning methods for the dehydrator trays: dishwasher safe for convenience and hand washing for food-grade and BPA-free components.
7. Troubleshooting
If you encounter issues with your dehydrator, refer to the following common problems and solutions:
| Problem | Possible Cause | Solution |
|---|---|---|
| Dehydrator does not turn on. | Not plugged in; power outlet issue; unit overheated. | Ensure the unit is securely plugged into a working outlet. Allow unit to cool down if overheat protection was activated. |
| Food not drying evenly. | Food slices too thick or uneven; trays overloaded. | Slice food uniformly. Do not overlap food on trays; ensure adequate space for air circulation. |
| Drying takes too long. | Temperature set too low; food too thick; high humidity. | Increase temperature setting. Ensure food is sliced thinly. Consider environmental humidity. |
| Unusual noise during operation. | Obstruction in fan; unit not level. | Unplug and check for any obstructions near the fan. Ensure the unit is on a flat, stable surface. |
If the problem persists after attempting these solutions, please contact OSTBA customer support for assistance.
8. Specifications
Detailed technical specifications for the OSTBA Food Dehydrator Machine:
| Feature | Detail |
|---|---|
| Brand | OSTBA |
| Model Number | GGJ-801 |
| Material | Stainless Steel |
| Color | Silver |
| Wattage | 1000 watts |
| Product Dimensions (D x W x H) | 15.9" x 13.6" x 12.3" |
| Voltage | 120 Volts |
| Number of Trays | 9 |
| Tray Dimensions | 11.69" x 11.69" |
| Temperature Range | 95-165 Degrees Fahrenheit (5°F increments) |
| Timer Range | 30 minutes - 48 hours (30-minute increments) |
| Noise Level | ≤48 dB |
| Dishwasher Safe Trays | Yes |
| Item Weight | 15.52 pounds |
9. Warranty and Support
OSTBA is committed to providing high-quality products. For information regarding warranty coverage, technical support, or replacement parts, please refer to the contact details provided in your product packaging or visit the official OSTBA website.
Online Resources:
- Visit the OSTBA Store on Amazon for product information and updates.
Related documentsGGJ-801


Ask a question about this manual
Ask about setup, troubleshooting, compatibility, parts, safety, or missing instructions. Manuals+ will review the question and use this page’s manual context to help answer it.