
Introduction
This manual provides detailed instructions for the setup, operation, and maintenance of your LUMIAX FJ3531 Digital Projection Alarm Clock. Please read this manual thoroughly before using the product to ensure proper function and to maximize your user experience.
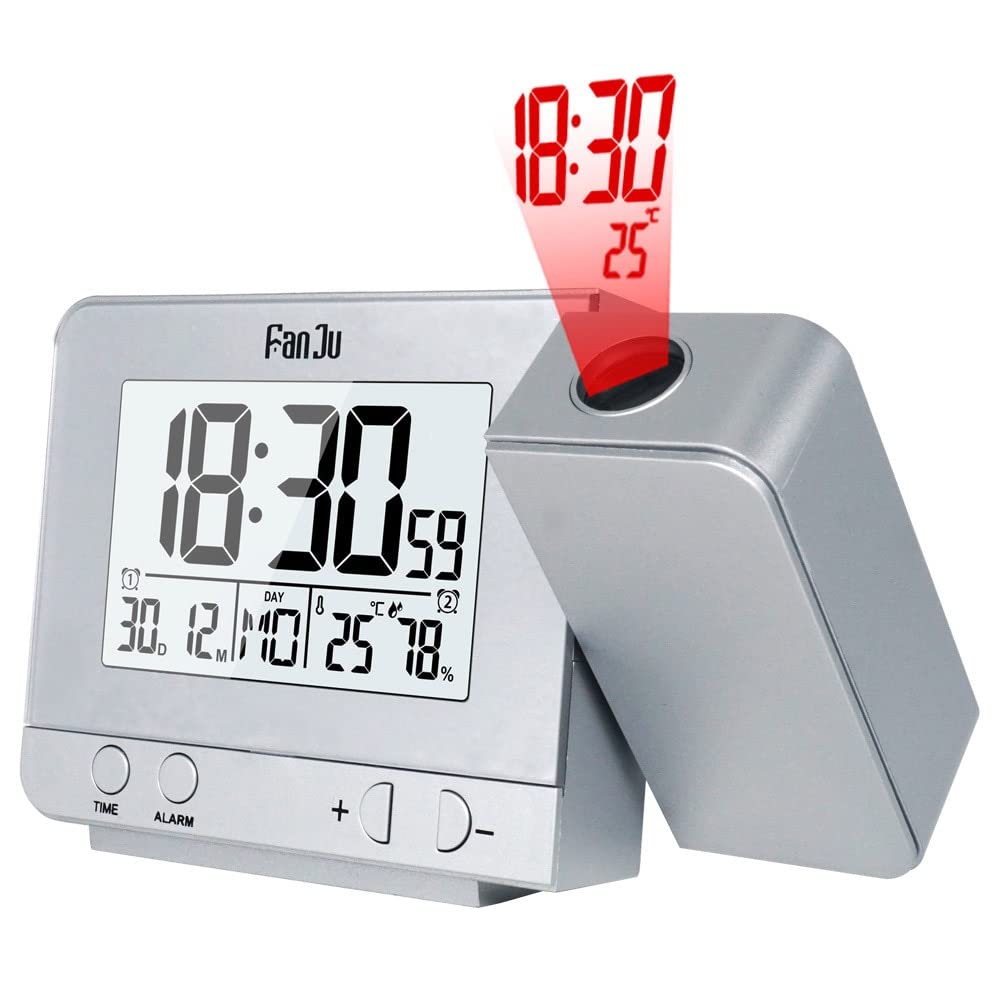
Image: The LUMIAX FJ3531 Digital Projection Alarm Clock in a bedroom setting, showcasing its display and projection feature.
Safety Information
- Do not expose the device to extreme temperatures, direct sunlight, or high humidity.
- Avoid dropping or subjecting the device to strong impacts.
- Do not attempt to disassemble or repair the device yourself. Contact qualified service personnel.
- Keep the device away from water and other liquids.
- Dispose of batteries properly according to local regulations.
Package Contents
Verify that all items are present in the package:
- 1 x Projection Alarm Clock
- 1 x USB Power Cable
- 1 x User Manual (this document)

Image: A collage of images displaying the product packaging, the alarm clock, and examples of its time and temperature projection.
Product Features
The LUMIAX FJ3531 Digital Projection Alarm Clock offers the following key features:
- Temperature & Time projection with ON/OFF button.
- Dual alarm with snooze function.
- Time display in 12/24 hour format.
- Calendar with 7 language options: English, German, Italian, French, Spanish, Dutch, and Danish.
- Indoor temperature and humidity display, switchable between Celsius (°C) or Fahrenheit (°F).
- Integrated USB charger for electronic devices.
- Adjustable projection angle.
- Compact design with a large digital display for easy readability.
- Backlight with 4 brightness modes when powered by USB.

Image: A visual guide pointing out the various display and projection features of the alarm clock.
Setup
Power Supply
The alarm clock can be powered by two methods:
- Batteries: Insert 2x AAA batteries (not included) into the battery compartment. Batteries provide backup power and allow basic clock functions, but the backlight and permanent projection features are limited.
- USB Power Cable: Connect the included USB power cable to the clock and a 5V USB power adapter (not included). Using the USB cable enables continuous backlight and permanent projection.

Image: The alarm clock demonstrating permanent projection when connected via USB power, also showing battery power option.

Image: The alarm clock's USB charging interface in use, demonstrating its ability to charge external electronic devices.
Operating Instructions
Setting Time and Date
Specific buttons for time and date setting are typically labeled "TIME" or "SET". Refer to the button layout on your device. Generally, you will press and hold the "TIME" button to enter setting mode, then use "+" and "-" buttons to adjust values, and "TIME" again to confirm and move to the next setting (e.g., hour, minute, 12/24 hour format, year, month, day, language).
Setting Alarms
The device features a dual alarm function. Look for an "ALARM" button. Press and hold "ALARM" to enter alarm setting mode. Use "+" and "-" to set the desired alarm time (Alarm 1), then press "ALARM" to confirm. Repeat for Alarm 2. You may also be able to activate/deactivate alarms in this mode.
Snooze Function
When an alarm is sounding, touch the "LIGHT/SNOOZE" button to activate the snooze function. The alarm will pause for 5 minutes and then sound again. The snooze icon will twinkle on the display. To cancel the snooze function, press any other button.
Note: If a second alarm is set to sound while the first alarm is in snooze mode, the first alarm's snooze function will automatically stop.
Projection Function
The projection lamp on the right side of the product can project the current time and temperature onto a wall or ceiling. This is useful for viewing the time at night.
- Activation: Use the ON/OFF button for projection.
- Angle Adjustment: The projection angle can be adjusted to suit your viewing preference. Rotate the projector lens or the entire projection arm.
- Projection Direction: If the projected image is upside down or reversed, locate the "direction" button (often near the projector) to correct its orientation.
- Permanent Projection: When powered by the USB cable, the projection can be set to remain continuously on.
Backlight Function
- Battery Power: When operating on batteries, touching the "LIGHT/SNOOZE" button will illuminate the backlight for 8 seconds.
- USB Power: When powered by the USB cable, the backlight offers 4 brightness modes: light, medium, low, and off. Each touch of the "LIGHT/SNOOZE" button cycles through these modes. The backlight can also be set to remain lit continuously.
Temperature and Humidity Display
The clock displays indoor temperature and humidity. To switch between Celsius (°C) and Fahrenheit (°F), locate the dedicated button (often labeled "°C/°F" or integrated with another setting button) and press it.
USB Charging Function
When the alarm clock is powered via the USB cable, the USB port on the left side of the device can be used to charge mobile phones or other electronic devices.
Maintenance
- Cleaning: Wipe the device with a soft, dry cloth. Do not use abrasive cleaners or solvents.
- Battery Replacement: If using batteries, replace them when the display dims or functions become erratic. Ensure correct polarity when inserting new batteries.
- Storage: If storing the device for an extended period, remove the batteries to prevent leakage.
Troubleshooting
| Problem | Possible Cause | Solution |
|---|---|---|
| Display is dim or blank. | Low batteries or no power connection. | Replace AAA batteries or connect the USB power cable. |
| Projection is not visible or dim. | Projection feature is off, not enough light, or not connected to USB power. | Ensure projection is ON. Connect USB power for continuous/brighter projection. Adjust room lighting. |
| Alarm does not sound. | Alarm is not activated or volume is too low (if adjustable). | Verify alarm settings and ensure it is enabled. |
| Time/Date is incorrect. | Not set correctly or power interruption. | Reset the time and date according to the "Setting Time and Date" section. |
Specifications
| Feature | Detail |
|---|---|
| Brand | LUMIAX |
| Model | FJ3531 |
| Power Supply | 2x AAA batteries (not included) or USB power cable (included) |
| Display | Digital LED |
| Time Format | 12/24 hour |
| Temperature Unit | °C / °F selectable |
| Calendar Languages | English, German, Italian, French, Spanish, Dutch, Danish |
| USB Charger Output | 5V (specific amperage not provided, assuming standard 1A based on image) |
| Item Weight | 1 Grams |
| Dimensions (Approx.) | 13.5 cm (Length) x 8 cm (Height) x 4 cm (Width) - Based on image 61MMAifIWcL.jpg |

Image: Dimensions of the LUMIAX FJ3531 Digital Projection Alarm Clock.