1. Introduction
The Flysky FS-IA10B is a 10-channel 2.4GHz AFHDS 2A (Automatic Frequency Hopping Digital System Second Generation) receiver designed for various remote-controlled models, including airplanes, gliders, and helicopters. This manual provides essential information for the proper setup, operation, and maintenance of your FS-IA10B receiver.
Please read this manual thoroughly before using the receiver to ensure safe and efficient operation.
2. Package Contents
- 1 x Flysky FS-IA10B 10-Channel Receiver
- 1 x Bind Cable
3. Features
- 2.4GHz 10-Channel: Utilizes the second-generation automatic digital frequency system (AFHDS 2A) for reliable communication.
- Compatible Transmitters: Works with Flysky FS-i4, FS-i6, FS-i6S, FS-i6X, FS-i10, FS-GT2E, FS-GT2F, FS-GT2G, FS-it4S, FS-GT5, FS-i8, FS-TM10 transmitters.
- Applicable Models: Suitable for RC airplanes, gliders, and helicopters.
- Dual Antenna: Features two 26mm antennas for enhanced radio frequency signal reception and reliability.
- LED Indicator: A light indicator displays the receiver's power and operational status in real-time.
- Data Interfaces: Supports PWM, PPM, i.bus, and s.bus data connections.
- RSSI Support: Provides Received Signal Strength Indication.
4. Specifications
| Weight | 22 g |
| Number of Channels | 10 |
| Frequency Range | 2.4 - 2.48 GHz |
| Transmit Power | Less than 20 dBm |
| Receiver Sensitivity | -105 dBm |
| RSSI | Supported |
| Data Connection | PWM / PPM / i.bus / s.bus |
| Encoding | GFSK |
| Antenna Length | 26 mm x 2 (Dual Antenna) |
| Input Power | 4-6.5 V DC |
| Certification | CE0678, FCC |
| i-BUS Interface | Yes |
| Data Acquisition Interface | Yes |
| Dimensions (L x W x H) | 5 x 3.2 x 1.5 cm |
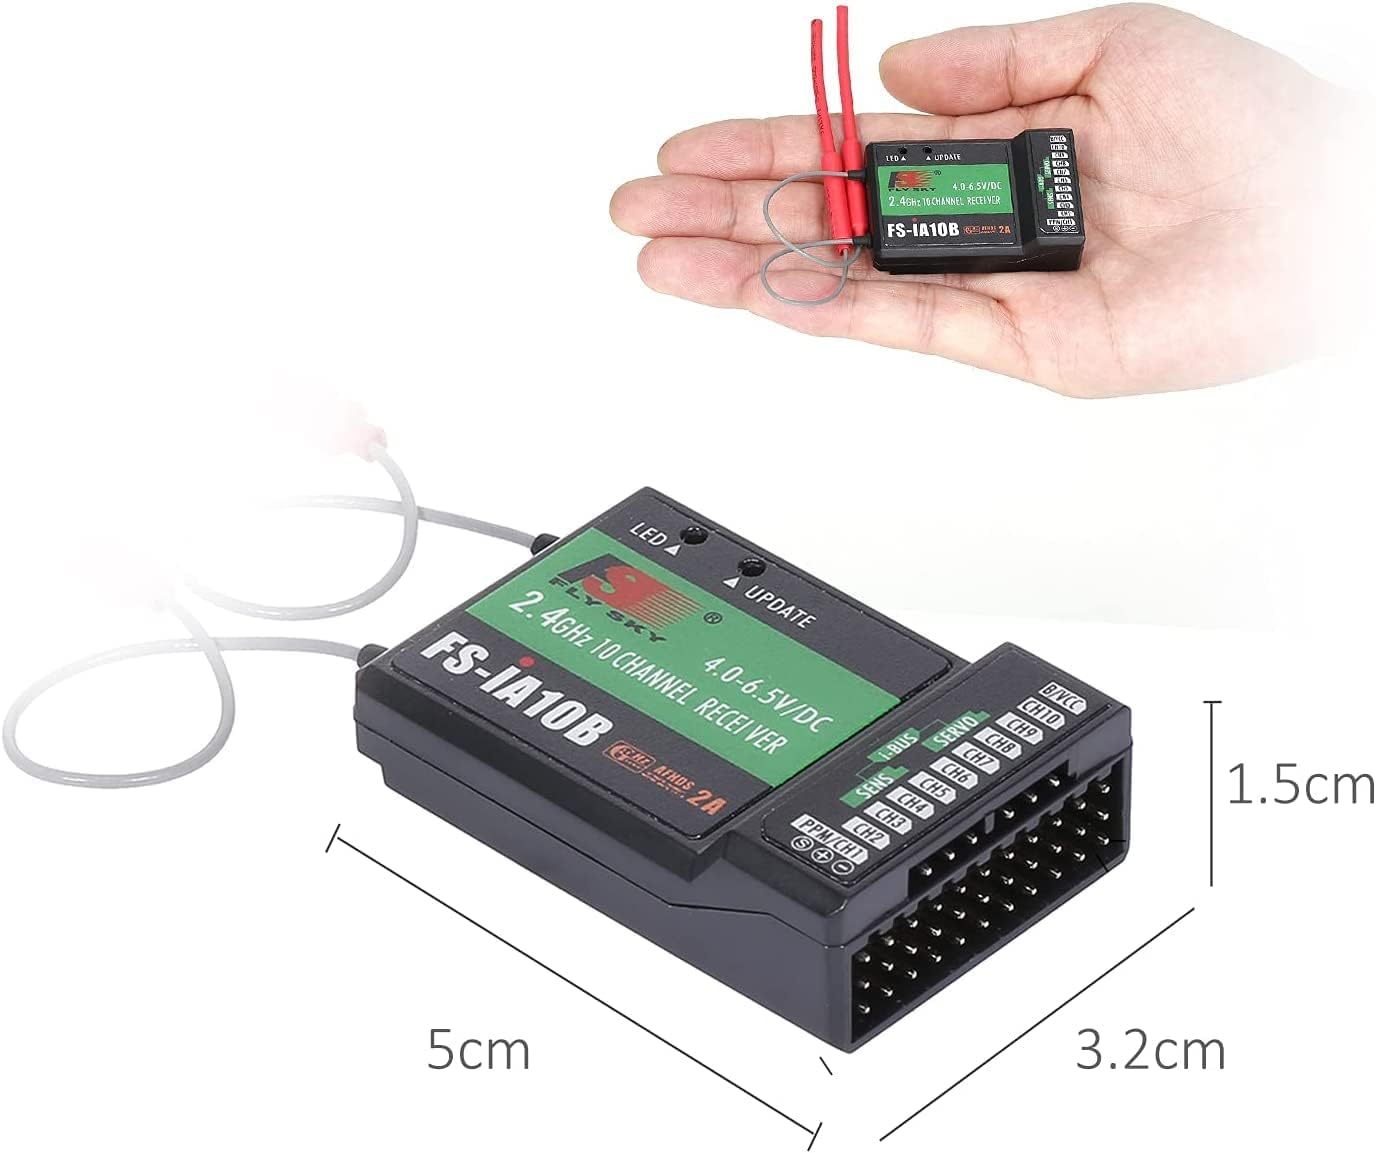
The receiver is shown held in a hand for scale, with dimensions indicated as 5cm (length), 3.2cm (width), and 1.5cm (height).
5. Setup and Binding
The FS-IA10B receiver must be bound to your Flysky transmitter before use. Follow these steps carefully:
- Prepare Transmitter: Install the battery in your 2.4G Flysky transmitter and ensure it is turned OFF.
- Connect Bind Cable: Insert the bind cable (included) into the BIND/CH3 channel port of the FS-IA10B receiver.
- Power Receiver: Connect the receiver battery (not included) to the VCC port of the receiver. Both LEDs on the receiver will flash simultaneously, indicating the receiver is in binding mode.
- Initiate Binding on Transmitter: Press and hold the bind button on your transmitter, then power on the transmitter.
- Observe Receiver LED: Observe the LED on the receiver. When the LED stops flashing and remains solid, it indicates successful binding. This process typically takes about 5 seconds.
- Complete Binding: Release the bind button on the transmitter and remove the bind cable from the receiver.
- Test System: Install the servos and other components, then perform a thorough test of all functions. If testing fails, please repeat the above steps. If testing is successful, binding is complete.
Important Note: Do not power on the receiver during the setup process to prevent loss of control. The binding procedure described above is only applicable to Flysky 2.4G products.

This diagram provides guidance on proper antenna orientation (90-degree angles) for optimal signal reception and a detailed wiring schematic connecting the receiver to a bind cable, battery, switch, and various servos (Rudder, Throttle, Elevator, Aileron) via i-BUS and PPM/CHT interfaces.

This image visually outlines the seven steps for binding the receiver to a transmitter, including connecting the bind cable, battery, and observing the LED indicator for successful pairing.
6. Operating Instructions
Once the receiver is successfully bound to your transmitter and installed in your model, ensure all connections to servos, flight controllers, or other components are secure. Power on your transmitter first, then power on your model (receiver). Always verify that all control surfaces and functions respond correctly to transmitter inputs before flight or operation.
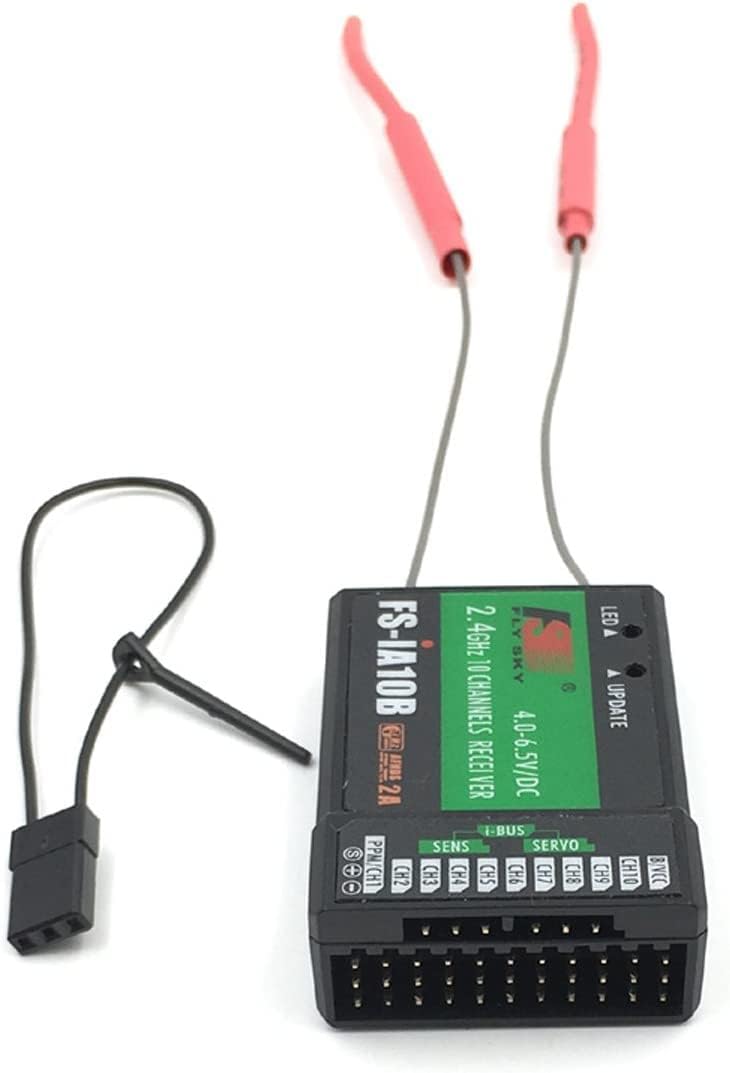
This image shows the Flysky FS-IA10B receiver from a top-down perspective, highlighting its dual antennas and clearly labeled ports for channels (CH1-CH10), PPM/CHT, i-BUS, SENS, SERVO, and B/VCC.

A detailed view of the receiver's port pins, indicating the standard S (Signal), + (Positive), and - (Negative) connections for each channel.
7. Maintenance
- Keep the receiver clean and free from dust, dirt, and moisture.
- Regularly inspect all wiring and connections for signs of wear or damage.
- Ensure antennas are not bent or damaged and are positioned correctly for optimal signal reception.
- Store the receiver in a dry, cool environment when not in use.
8. Troubleshooting
- Receiver not binding: Ensure the transmitter is a compatible Flysky 2.4G model. Verify that the bind cable is correctly inserted into the BIND/CH3 port and that the receiver battery is providing adequate power. Repeat the binding steps carefully.
- No signal/intermittent signal: Check antenna placement and ensure they are not obstructed or damaged. Verify that the transmitter and receiver are within range and that there are no major sources of interference nearby.
- Incorrect servo response: Confirm that servos are correctly plugged into the appropriate channels on the receiver. Check transmitter settings for channel assignments and servo directions.
- LED not lighting up: Check the power connection to the receiver. Ensure the battery is charged and connected correctly to the VCC port.
9. Safety Information
- Always operate RC equipment responsibly and in accordance with local laws and regulations.
- Ensure your model is safe to operate and all components are functioning correctly before each use.
- Keep a safe distance from people, animals, and property when operating RC models.
- Never operate RC equipment near power lines, busy roads, or airports.
- Disconnect the battery from the model when not in use to prevent accidental activation.
10. Warranty and Support
For warranty information and technical support, please refer to the documentation provided with your purchase or contact your retailer. Keep your proof of purchase for any warranty claims.