
homeasy HOLDER-2IN1
homeasy Wall Mount Mop and Broom Holder Instruction Manual
Introduction
This manual provides detailed instructions for the installation, operation, and maintenance of your homeasy Wall Mount Mop and Broom Holder. Please read this manual thoroughly before installation and use to ensure proper function and safety.
Safety Information
- Ensure the mounting surface is clean, dry, and structurally sound before installation.
- Do not exceed the maximum weight capacity for each installation method: 10 kg (22 lbs) for self-adhesive, and 15 kg (33 lbs) for screw drilling.
- Keep small parts and tools out of reach of children during installation.
- Wear appropriate safety gear (e.g., eye protection) if using power tools for screw drilling.
Package Contents
Verify that all components are present before beginning installation.
- homeasy Mop and Broom Holder unit(s)
- Self-adhesive pads (for no-drill installation)
- Screws and wall anchors (for screw drilling installation)
- Decorative screw caps
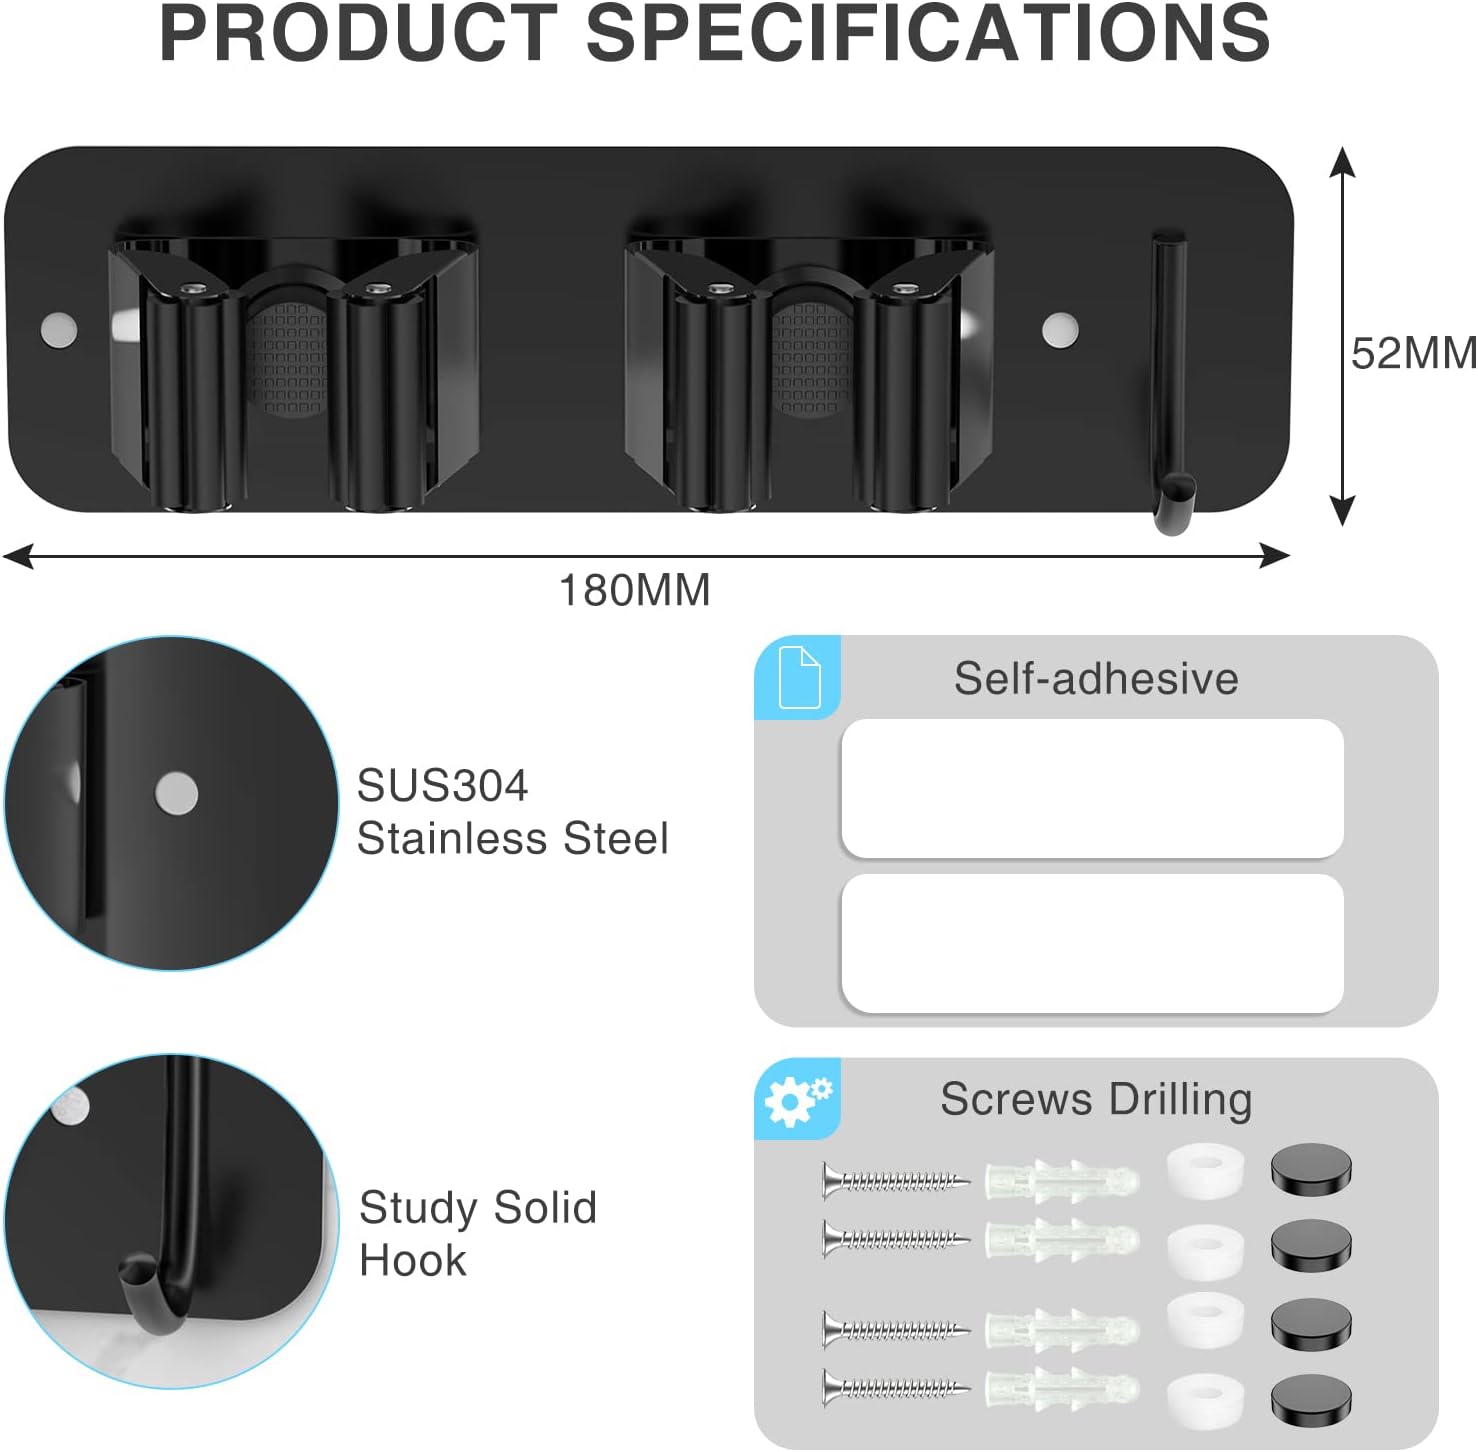
Image: Components of the homeasy Mop and Broom Holder, showing the main unit, self-adhesive pads, screws, and wall anchors.
Setup: Installation Instructions
Your homeasy Mop and Broom Holder offers two installation methods: self-adhesive (no drilling) and screw drilling. Choose the method best suited for your wall surface and desired load capacity.
Method 1: Self-Adhesive Installation (No Drilling)
This method is suitable for smooth, non-porous surfaces such as ceramic/marble tile, smooth wood, smooth glass, and smooth metal surfaces. Maximum load capacity: 10 kg (22 lbs).
- Clean the Surface: Thoroughly clean the desired wall surface with a damp cloth and ensure it is completely dry. Remove any dust, grease, or moisture.
- Apply Adhesive: Carefully peel off the protective film from the back of the self-adhesive pad(s).
- Position and Press: Align the holder in the desired position on the clean, dry wall. Press firmly against the wall for at least 30 seconds to ensure good adhesion.
- Wait: Allow the adhesive to cure for 24 hours before hanging any items on the holder. This ensures maximum bond strength.

Image: Visual guide for self-adhesive installation, showing cleaning the surface, peeling the film, pressing the holder, and waiting 24 hours.
Method 2: Screw Drilling Installation
This method is suitable for painted walls, rough walls, wallpaper walls, and uneven walls. It provides a stronger hold. Maximum load capacity: 15 kg (33 lbs).
- Mark Positions: Hold the holder against the wall in the desired location and use a pencil to mark the drilling points through the screw holes.
- Drill Holes: Using a drill, create holes of 5-6mm diameter at the marked positions.
- Insert Anchors: Gently tap the wall anchors into the drilled holes until they are flush with the wall surface.
- Mount Holder: Place the holder over the anchors and insert the screws. Tighten the screws securely with a screwdriver.
- Apply Caps: Cover the screw heads with the provided decorative caps for a finished look.

Image: Visual guide for screw drilling installation, showing marking, drilling, inserting anchors, screwing the holder, and applying caps.

Image: Diagram illustrating which wall types are suitable for self-adhesive (smooth surfaces) and screw drilling (rough or painted surfaces) installations.
Installation Video Guide
Video: An official installation guide demonstrating both self-adhesive and screw drilling methods for the homeasy Mop and Broom Holder.
Operating Instructions
The homeasy Mop and Broom Holder is designed for easy and secure storage of various tools.
- To Insert a Tool: Push the handle of the mop, broom, or other tool into the petal-shaped gear. The triangle-buckle and gear will automatically adjust to grip the handle securely.
- To Remove a Tool: Simply lift the handle upwards to release it from the grip.
- Using Hooks: Utilize the integrated hooks for hanging smaller items such as rags, brushes, or other accessories.

Image: Close-up view demonstrating the easy insertion and removal of a tool from the holder, showcasing the anti-slip grip.

Image: Various items like brooms, mops, and kitchen utensils stored efficiently using the holder and its hooks.
Maintenance
To ensure the longevity and optimal performance of your homeasy Mop and Broom Holder, follow these simple maintenance guidelines:
- Cleaning: Wipe the stainless steel surface with a soft, damp cloth. For stubborn marks, use a mild soap solution and rinse thoroughly. Avoid abrasive cleaners or scouring pads, which can damage the finish.
- Inspection: Periodically check the mounting screws (if applicable) to ensure they remain tight. For self-adhesive installations, verify that the holder is still firmly attached to the wall.
- Rust Prevention: The holder is made of SUS304 stainless steel, which is rust-resistant. However, prolonged exposure to harsh chemicals or standing water should be avoided to maintain its appearance.
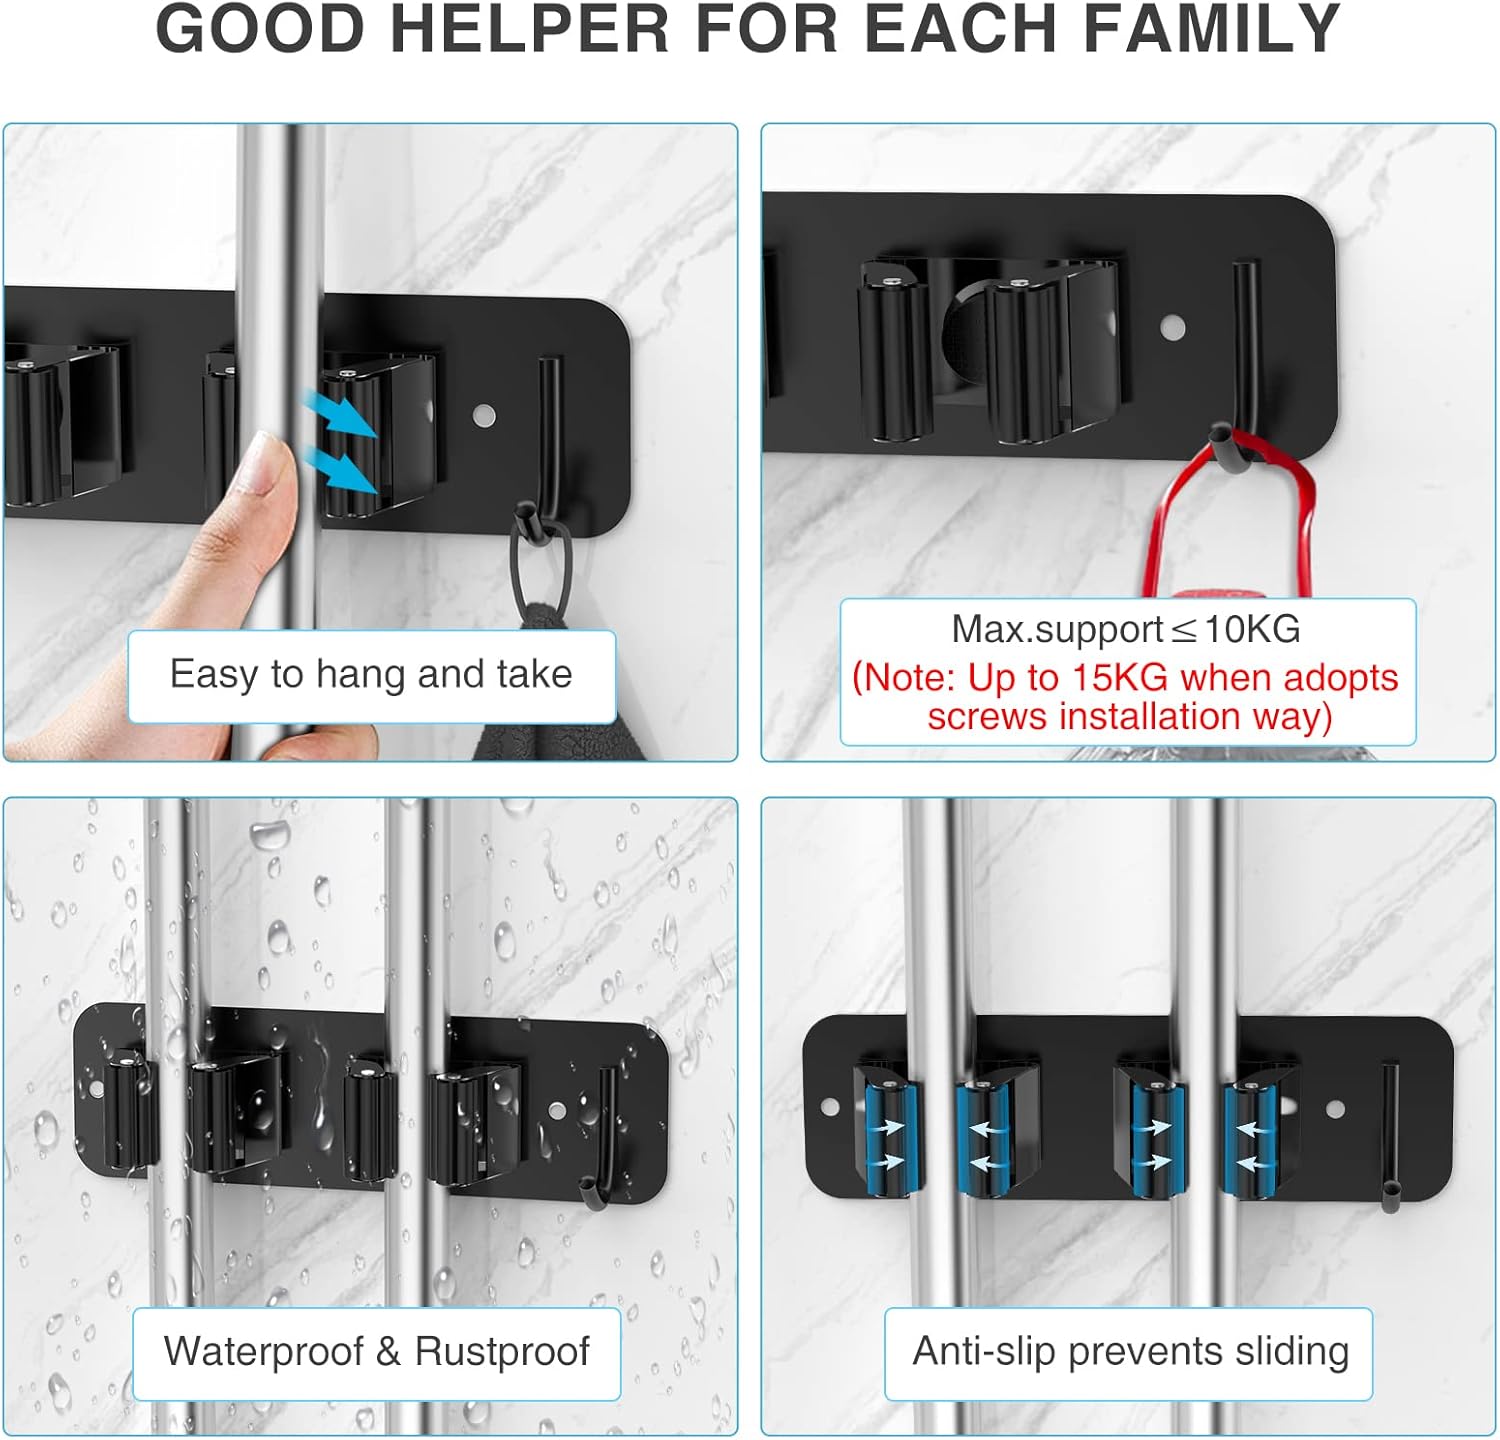
Image: The holder shown with water droplets, illustrating its waterproof and rustproof properties for easy cleaning and durability.
Troubleshooting
| Problem | Possible Cause | Solution |
|---|---|---|
| Holder detaches from wall (self-adhesive) | Surface not clean/dry; adhesive not cured for 24 hours; weight limit exceeded; unsuitable wall surface. | Re-clean and dry surface, reapply new adhesive pads, wait 24 hours before use. Ensure weight limit is not exceeded. Consider screw drilling for rough or painted walls. |
| Tools slide out of grip | Tool handle too thin for the grip; grip mechanism worn. | Ensure the tool handle is within the appropriate diameter for the grip. If the grip is worn, contact customer support for assistance. |
| Holder feels loose (screw drilling) | Screws are not fully tightened; wall anchors not properly installed. | Tighten screws securely. If still loose, remove, re-drill, and re-install anchors and screws. |
Specifications
| Feature | Detail |
|---|---|
| Material | SUS304 Stainless Steel |
| Color | Black |
| Special Feature | Rust Resistant |
| Product Dimensions | 2.05"D x 7.09"W x 2"H |
| Mounting Type | Wall Mount (Self-adhesive or Screw Drilling) |
| Self-Adhesive Max. Load | 10 kg (22 lbs) |
| Screw Drilling Max. Load | 15 kg (33 lbs) |
| Item Weight | 372 Grams (13.1 ounces) |
| Model Number | HOLDER-2IN1 |
Image: Product specifications diagram, including dimensions (180mm width, 52mm height), material (SUS304 Stainless Steel), and solid hook design.
Warranty
homeasy products are manufactured to high-quality standards. For specific warranty details and terms, please refer to the product packaging or contact homeasy customer support. This warranty typically covers defects in materials and workmanship under normal use.
Support
If you have any questions, require assistance with installation, or encounter any issues with your homeasy Mop and Broom Holder, please contact our customer support team. You can typically find contact information on the product packaging or on the official homeasy website.
For further information, visit the homeasy Store on Amazon.
Ask a question about this manual
Ask about setup, troubleshooting, compatibility, parts, safety, or missing instructions. Manuals+ will review the question and use this page’s manual context to help answer it.