1. Introduction
This user manual provides comprehensive instructions for the installation, operation, and maintenance of the BSTUOKEY WiFi Access Control Keypad (Model: CF1-EM-Wifi). This device is designed to offer secure and convenient access control through multiple methods including fingerprint, RFID card, password, and mobile application. Its robust IP66 waterproof design makes it suitable for various indoor and outdoor applications.
2. Product Overview
The BSTUOKEY WiFi Access Control Keypad is a versatile security device featuring a touch-sensitive keypad with backlight, a fingerprint sensor, and an RFID card reader. It integrates with the TUYA mobile application for remote management and monitoring. The unit is designed for durability with an IP66 waterproof rating.

Figure 2.1: Front view of the BSTUOKEY WiFi Access Control Keypad, showing the numeric touch keypad, fingerprint sensor, and indicator light.

Figure 2.2: Close-up of the keypad highlighting the indicator light, touch keyboard, card area, and fingerprint area with backlit keys for visibility in low light.
Key Features:
- Multiple Access Modes: Supports password, RFID card (125Khz EM Card), fingerprint, and mobile APP (TUYA App) unlocking.
- High User Capacity: Accommodates up to 1000 users, including 100 fingerprint users.
- Wireless Connectivity: Integrated WiFi for remote control and management via smartphone (2.4 GHz network required).
- Durable Design: IP66 waterproof rating, suitable for outdoor installation.
- Backlit Keys: Touch-sensitive keypad with backlight for easy operation in low-light conditions.
- Wiegand Interface: Supports Wiegand 26/34 input and output for integration with external access control boards.
- Event Logging: Ability to check door opening records via the mobile application.

Figure 2.3: Visual summary of key features: 2.4G WiFi network, Mobile APP Access, 1000 user capacity, 100 Fingerprint user, and IP66 waterproof rating.
3. Package Contents
Upon opening the package, verify that all items listed below are present and in good condition.

Figure 3.1: The access control keypad shown alongside 10 RFID card stickers, which are included as a gift.
- WiFi Access Control Keypad Unit
- Mounting Screws and Wall Plugs
- User Manual
- 10 x 125Khz RFID EM Cards
4. Specifications
| Feature | Specification |
|---|---|
| Model Number | CF1-EM-Wifi |
| Brand | BSTUOKEY |
| User Capacity | 1000 (100 Fingerprint Users) |
| Card Type | 125Khz RFID EM Card |
| Operating Voltage | 12V DC |
| Waterproof Rating | IP66 |
| Connectivity | 2.4 GHz WiFi |
| Material | ABS Case, Plastic |
| Dimensions | 105mm x 72mm x 24mm (approx. 5 x 3.66 x 2.13 inches) |
| Weight | 9.1 ounces (0.26 Kilograms) |

Figure 4.1: Product dimensions, showing the keypad's height, width, and depth.
5. Setup and Installation
5.1 Wiring Diagram
The access control keypad requires connection to a 12V DC power supply and an electric lock. Additional components like an exit button may also be integrated. Please note that the power supply, electric locks, and exit button are not included in the package and must be purchased separately.

Figure 5.1: Detailed wiring diagram showing connections for power supply, various electric locks (gate, strike, bolt, magnetic), and an exit button.
| Wire Color | Function |
|---|---|
| Red | DC + (Power Input) |
| Black | GND (Ground) |
| Blue | Relay NO (Normally Open) |
| Purple | Relay Common |
| Orange | Relay NC (Normally Closed) |
| Yellow | OPEN (Exit Button Input) |
| Green | Data 0 (Wiegand Output) |
| White | Data 1 (Wiegand Output) |
| Grey | Alarm Output |
| Brown | Contact Input (Door Sensor) |

Figure 5.2: Back view of the keypad with labeled wires for connection.
5.2 Physical Installation
- Prepare Mounting Location: Choose a suitable location near the door, ensuring it is within range of your 2.4 GHz WiFi network.
- Drill Holes: Use the provided mounting template (if available, otherwise refer to dimensions in Specifications) to mark and drill holes for mounting screws and wiring.
- Connect Wiring: Route the necessary wires through the wall and connect them according to the wiring diagram (Figure 5.1 and Table 5.1). Ensure all connections are secure and insulated.
- Mount Keypad: Secure the keypad to the wall using the provided screws.
- Power On: Connect the 12V DC power supply to the system. The keypad should power on and indicate readiness.
6. Operating Instructions
6.1 Initial Setup and App Connection
The BSTUOKEY keypad integrates with the TUYA Smart or Smartlife mobile application for advanced features and remote management. Ensure your smartphone is connected to a 2.4 GHz WiFi network during the initial pairing process.
- Download App: Download the "TUYA Smart" or "Smartlife" app from your smartphone's app store (iOS App Store or Google Play Store).
- Register/Login: Open the app and register a new account or log in to an existing one.
- Add Device: In the app, select "Add Device" or the "+" icon. Follow the on-screen prompts to add a new access control device.
- Pairing Mode: On the keypad, enter the pairing mode (refer to the specific sequence in the included paper manual, typically by pressing a combination of keys or holding a key). The keypad's indicator light will typically flash to indicate pairing mode.
- Connect Device: Confirm the device in the app. The app will guide you through connecting the keypad to your WiFi network.
- Confirmation: Once successfully connected, the app will confirm the pairing, and the keypad's indicator light will change to a steady green.
Video 6.1: Demonstrates the process of adding the access control keypad to the mobile application and setting up various access methods.
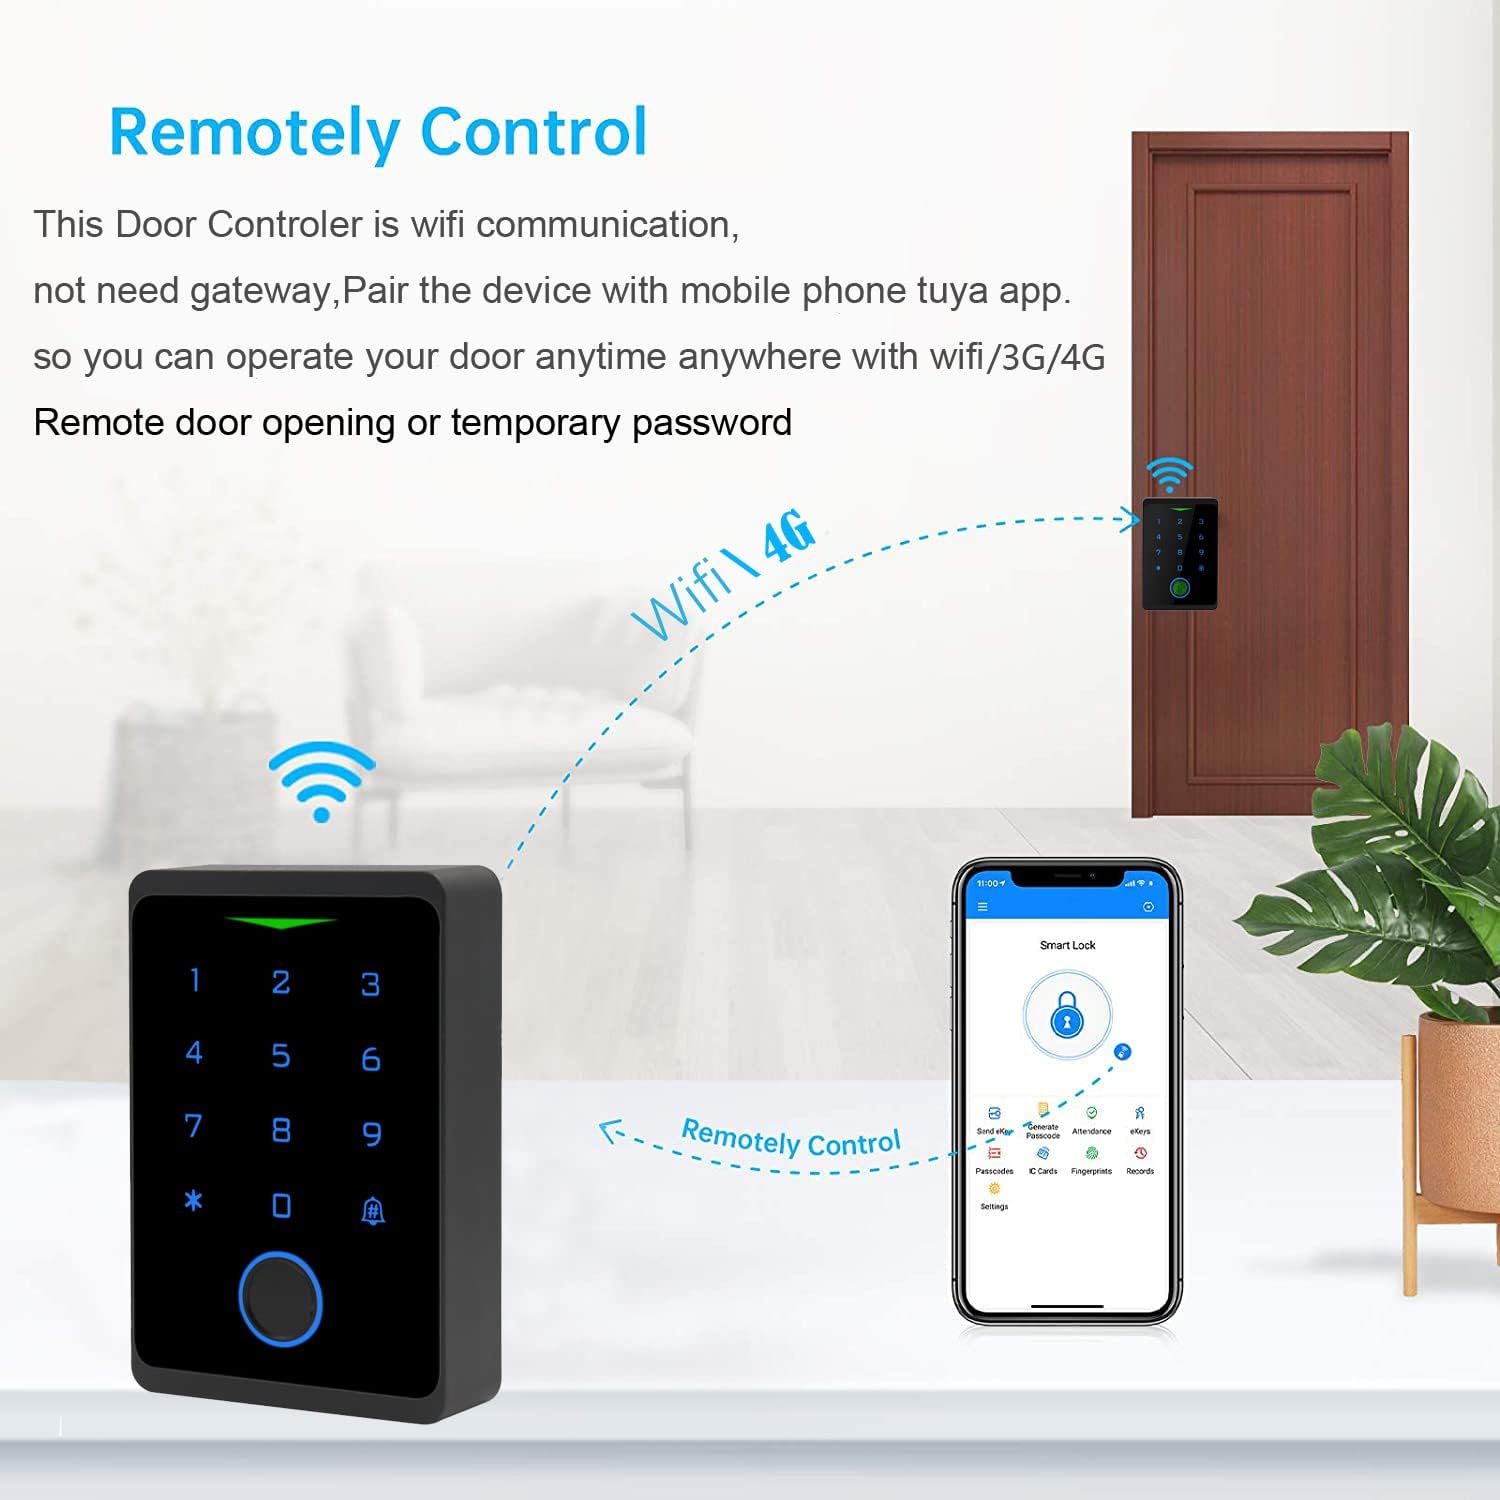
Figure 6.2: Illustration showing the keypad being remotely controlled via the mobile application over WiFi/3G/4G networks.
6.2 Managing Users and Access Methods
The mobile application allows for easy management of users and their respective access credentials.
6.2.1 Adding Fingerprints
- In the app, navigate to the device settings and select "Fingerprint Management".
- Tap "Add Fingerprint" and follow the on-screen instructions to register a new fingerprint by repeatedly placing and lifting the finger on the keypad's sensor until registration is complete.
6.2.2 Setting Passwords
- From the app's device settings, select "Password Management".
- Choose to set a public password or a private password for specific users. Enter the desired password and confirm.
6.2.3 Adding RFID Cards
- In the app, go to "Card Management".
- Select "Add Card" and then present the 125Khz RFID EM card to the keypad's card reading area until it is successfully registered.
6.3 Unlocking the Door
The keypad supports multiple methods for unlocking the door:
- Password Unlock: Enter your registered password on the keypad and press the '#' key.
- RFID Card Unlock: Present a registered RFID card to the card reading area on the keypad.
- Fingerprint Unlock: Place a registered finger on the fingerprint sensor.
- Mobile APP Unlock: Open the TUYA Smart app, select the device, and tap the unlock icon. This can be done remotely via WiFi/3G/4G/5G networks.

Figure 6.3: Illustration of the four unlocking methods: password, RFID card, fingerprint, and Tuya APP.
7. Maintenance
- Cleaning: Wipe the keypad surface with a soft, damp cloth. Avoid abrasive cleaners or solvents that could damage the finish or electronic components.
- Firmware Updates: Regularly check the TUYA Smart app for any available firmware updates for your device to ensure optimal performance and security.
- Battery Check (if applicable): Although the main unit is powered by 12V DC, if any connected components (e.g., wireless sensors) use batteries, ensure they are checked and replaced as needed.
- Waterproof Integrity: Periodically inspect the installation area for any signs of water ingress or damage to the seals, especially for outdoor installations. Despite its IP66 rating, proper installation is crucial for long-term durability.
8. Troubleshooting
| Problem | Possible Cause | Solution |
|---|---|---|
| Keypad not powering on. | No power supply or incorrect wiring. | Check 12V DC power connection and verify wiring according to the diagram. |
| Cannot connect to WiFi. | Incorrect WiFi password, 5GHz network, or out of range. | Ensure correct WiFi password, connect to a 2.4 GHz network, and move the keypad closer to the router. |
| Fingerprint not recognized. | Finger not placed correctly, dirty sensor, or fingerprint not registered. | Ensure finger is clean and covers the sensor completely. Re-register fingerprint if necessary. |
| RFID card not working. | Card not registered or incorrect card type. | Ensure the card is a 125Khz EM card and is properly registered in the app. |
| Door does not unlock. | Incorrect code/fingerprint/card, lock malfunction, or wiring issue. | Verify credentials. Check connections to the electric lock. Test the lock independently if possible. |
9. Warranty and Support
For warranty information and technical support, please refer to the documentation provided with your purchase or contact BSTUOKEY customer service directly. Keep your purchase receipt as proof of purchase for warranty claims.
Manufacturer: BSTUOKEY
Model: CF1-EM-Wifi
Date First Available: September 27, 2021


