
Tera HW0010
Tera HW0010 Barcode Scanner User Manual
Model: HW0010 | Brand: Tera
1. Introduction
Thank you for choosing the Tera HW0010 Barcode Scanner. This manual provides detailed instructions for setting up, operating, maintaining, and troubleshooting your device. Please read this manual carefully before use to ensure optimal performance and longevity of your scanner.
2. Package Contents
Please verify that all items listed below are included in your package:
- Tera HW0010 Barcode Scanner
- USB Charging Cable (Type-C)
- 2.4G USB Wireless Dongle
- User Manual (this document)
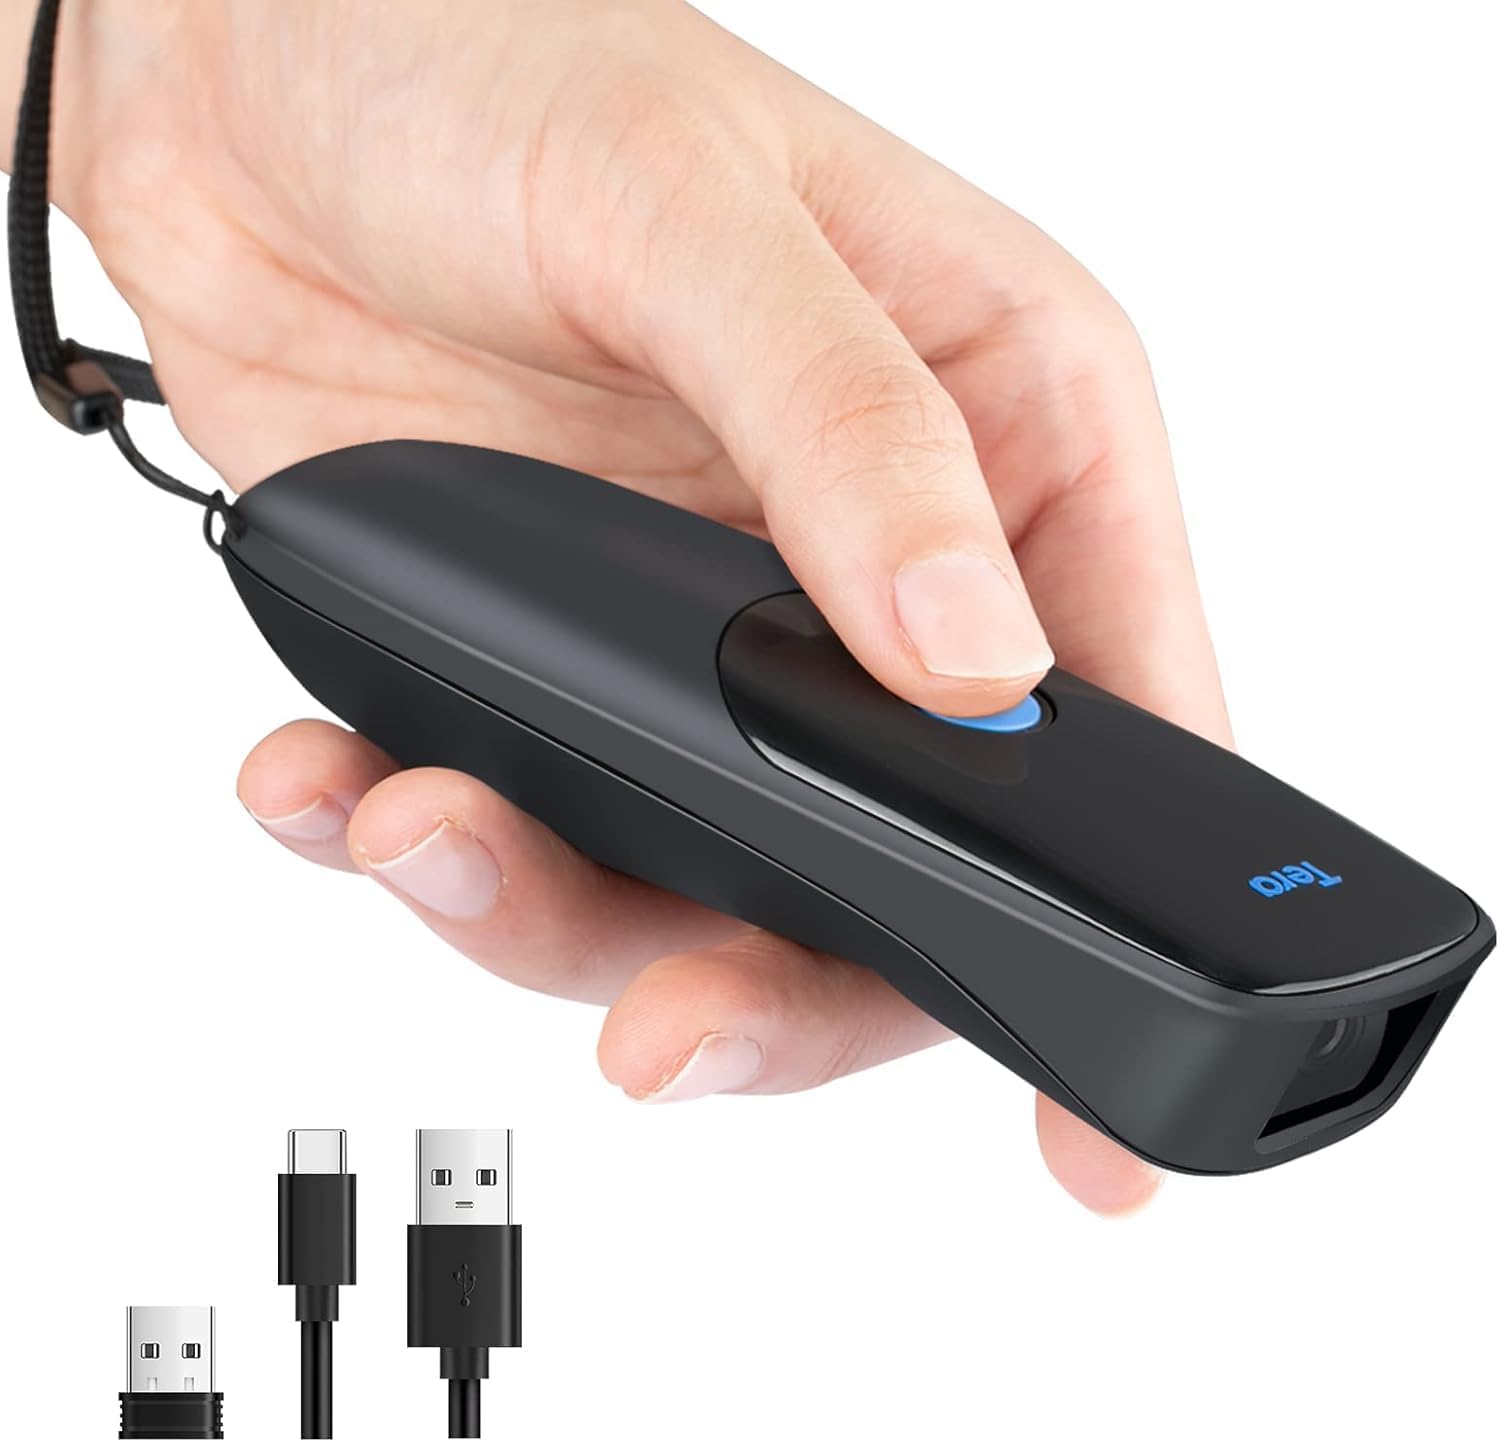
Tera HW0010 Barcode Scanner and included accessories.
3. Setup
The Tera HW0010 Barcode Scanner offers three connection methods: Bluetooth, 2.4G Wireless, and USB Wired. Choose the method that best suits your needs.

Multiple Connection Methods: USB Wired, Bluetooth, and 2.4G Wireless.
3.1. Bluetooth Connection
This method is ideal for connecting to smartphones, tablets, or computers with built-in Bluetooth.
- Turn on the scanner.
- Scan the 'Bluetooth Pairing' barcode from the manual (or the quick setup guide). The scanner will enter pairing mode.
- On your device (smartphone, tablet, or computer), go to Bluetooth settings and search for available devices.
- Select 'Tera HW0010' (or similar name) from the list to pair.
- Once paired, the scanner will emit a confirmation beep.

Bluetooth Connection: The scanner can connect to smartphones or tablets via Bluetooth.
3.2. 2.4G Wireless Connection
This method uses the included USB dongle for wireless connection to computers.
- Insert the 2.4G USB wireless dongle into an available USB port on your computer.
- Turn on the scanner. It should automatically connect to the dongle.
- The scanner will emit a confirmation beep once connected. No driver installation is typically required.

2.4G Wireless Connection: The scanner connects wirelessly to a laptop via the included 2.4G USB dongle.
3.3. USB Wired Connection
For a direct and stable connection, use the USB cable.
- Connect one end of the USB cable to the scanner's Type-C port.
- Connect the other end of the USB cable to an available USB port on your computer.
- The scanner will power on and be ready for use. No driver installation is typically required.

USB Wired Connection: The scanner connects directly to a laptop via USB cable.
3.4. System Compatibility
The Tera HW0010 Barcode Scanner is compatible with a wide range of operating systems, functioning as a standard keyboard input device.
- Operating Systems: iOS, Android, Linux, Windows, Mac OS
- Applications: Excel, Word, Notepad, and other applications that accept keyboard input.

Universal System Compatibility: Compatible with iOS, Android, Linux, Windows, and Mac OS.
3.5. Multi-Language Keyboard Support
The scanner supports various international keyboard layouts to ensure correct data input for different languages.

Multi-Language Keyboard Support: The scanner supports various keyboard layouts including English, German, Spanish, Italian, French, Japanese, Belgian, Portuguese, and Dutch.
4. Operating Instructions
4.1. Basic Scanning
To scan a barcode, point the scanner's window at the barcode and press the trigger button. A successful scan will be indicated by a beep and the data appearing on your connected device.
4.2. Japanese Character Support
The scanner is capable of correctly reading QR codes that contain Japanese characters (Kanji, Hiragana, Katakana). Ensure your system's keyboard input settings are configured for Japanese if you intend to scan such codes.

Japanese Character Support: The scanner can correctly read QR codes containing Japanese characters (Kanji, Hiragana, Katakana). Examples of supported QR code content include 'Tera Direct Store Barcode Scanner', 'Tera Barcode Reader!!', 'Money Clip Mail Order 10010', and 'group001 Niijima'.
4.3. Adding Scan Time (Prefix/Suffix)
You can configure the scanner to add a timestamp as a prefix or suffix to the scanned barcode data. Refer to the detailed setup barcodes in the included quick setup guide for this configuration.

Adding Scan Time as Prefix/Suffix: Scan data can be appended with a timestamp.
4.4. Data Transmission Modes
The scanner supports two data transmission modes:
- Instant Upload Mode: Scanned data is immediately transmitted to the connected device.
- Storage Mode: Scanned data is stored in the scanner's internal memory and can be uploaded in bulk later. This is useful when out of range of the connected device.
Refer to the quick setup guide for barcodes to switch between these modes.
4.5. Supported Barcode Types
The Tera HW0010 supports a wide range of 1D and 2D barcode symbologies, including those on LCD screens, and can decode blurry or slightly damaged codes.

Excellent Decode Function: Supports various 1D and 2D barcodes, including those on LCD screens, blurry, or damaged codes.
2D Codes: QR Code, Aztec Code, Codablock F, DOT_CODE, HANXIN, Maxicode, MicroPDF417, Micro QR Code, PDF417, DataMatrix, and QR codes containing Japanese characters.
1D Codes: Codabar, Code128, Code11, Code32, Code39, Code93, EAN/UPC, EAN-8, EAN-13, GS1 DataBar Expanded, GS1 DataBar Limited, GS1 DataBar Omnidirectional, Interleaved 2 of 5, Matrix 2 of 5, Industrial 2 of 5.
5. Maintenance
5.1. Battery Charging
The scanner is equipped with a 1200mAh rechargeable battery, providing up to 12 hours of continuous operation and 2160 hours of standby time.

1200mAh Large Capacity Battery: Provides extended working hours.
To charge the scanner, connect it to a power source using the provided USB Type-C cable. A full charge typically takes 3-4 hours.

Charging Recommendations: Use a 5V/1A charger. Do not use USB PD power adapters.
Important: Do not use USB Power Delivery (PD) power adapters or cables for charging, as this may damage the device. Use a standard 5V/1A USB charger.
5.2. Cleaning
To clean the scanner, use a soft, dry cloth. Do not use abrasive cleaners or solvents, as they may damage the device's surface or internal components.
6. Troubleshooting
| Problem | Possible Cause | Solution |
|---|---|---|
| Scanner does not turn on. | Low battery. | Charge the scanner for 3-4 hours. |
| Scanner does not connect via Bluetooth. | Not in pairing mode; device's Bluetooth off; out of range. | Ensure scanner is in pairing mode. Turn on device Bluetooth. Move scanner closer to device. |
| Scanner does not read barcodes. | Barcode damaged/unreadable; incorrect symbology enabled; scanner not aimed correctly. | Try scanning a different barcode. Ensure correct symbologies are enabled (refer to manual for setup barcodes). Aim the scanner directly at the barcode. |
| Scanned data is incorrect or incomplete. | Incorrect keyboard layout; data transmission error. | Ensure the correct keyboard layout is set on your device and scanner. Try switching data transmission modes (instant/storage). |
| Scanner beeps continuously. | Error state or specific setting activated. | Refer to the full manual for specific beep codes or perform a factory reset (scan the 'Factory Reset' barcode). |
7. Specifications
| Feature | Detail |
|---|---|
| Model Number | HW0010 |
| Dimensions | 10 x 45 x 125 mm; 210 g |
| Connectivity | USB Wired, 2.4GHz Wireless, Bluetooth |
| Supported OS | Smartphones, Tablets, Desktops, Laptops (iOS, Android, Linux, Windows, Mac OS) |
| Battery Capacity | 1200mAh |
| Continuous Working Time | Up to 12 hours |
| Standby Time | Up to 2160 hours |
| Charging Time | 3-4 hours |
| Charging Input | Recommended 5V/1A (Max 5V/1.2A) |
| Supported 1D Codes | Codabar, Code128, Code11, Code32, Code39, Code93, EAN/UPC, EAN-8, EAN-13, GS1 DataBar Expanded, GS1 DataBar Limited, GS1 DataBar Omnidirectional, Interleaved 2 of 5, Matrix 2 of 5, Industrial 2 of 5 |
| Supported 2D Codes | QR Code, Aztec Code, Codablock F, DOT_CODE, HANXIN, Maxicode, MicroPDF417, Micro QR Code, PDF417, DataMatrix, Japanese character QR codes |
8. Warranty Information
Tera products typically come with a standard manufacturer's warranty. Please refer to the warranty card included in your product packaging or visit the official Tera website for detailed warranty terms and conditions specific to your region. Keep your purchase receipt as proof of purchase for warranty claims.
9. Customer Support
If you encounter any issues or have questions regarding your Tera HW0010 Barcode Scanner that are not covered in this manual, please contact Tera customer support through the following channels:
- Online Support: Visit the official Tera website for FAQs, troubleshooting guides, and contact forms.
- Email Support: Refer to your product packaging or the official website for the customer support email address.
When contacting support, please provide your product model number (HW0010) and a detailed description of the issue.
Related documentsHW0010


Ask a question about this manual
Ask about setup, troubleshooting, compatibility, parts, safety, or missing instructions. Manuals+ will review the question and use this page’s manual context to help answer it.