
Introduction
Thank you for choosing the Bellemave Twin Size House Loft Bed with Slide and Blackboard. This manual provides essential information for the safe assembly, operation, and maintenance of your new loft bed. Please read all instructions carefully before assembly and retain this manual for future reference.
Safety Information
WARNING: Failure to follow these warnings and instructions could result in serious injury or death.
- Always follow the manufacturer's recommended mattress thickness and dimensions.
- Ensure all connections are tight before use. Periodically check and tighten as necessary.
- Do not allow children under 6 years of age on the upper bunk.
- Prohibit more than one person on the upper bunk.
- Always use the ladder for entering and exiting the upper bunk.
- Do not attach or hang items to any part of the bunk bed that are not designed for use with the bed; for example, but not limited to, hooks, belts, and jump ropes.
- Keep these instructions for future reference.
- Use of power tools for assembly is not recommended as it may damage the frame.
Parts List
Before assembly, verify that all parts listed below are present. If any parts are missing or damaged, do not proceed with assembly. Contact customer support for assistance.
- A: Bed Frame Side Rails (2)
- B: Bed Frame End Panels (2)
- C: Roof Frame Sections (4)
- D: Ladder Steps (3)
- E: Slide Sections (2)
- F: Blackboard Panel (1)
- G: Bed Slats (20)
- H: Support Legs (4)
- (Note: This is a generic list. Refer to your specific packaging for exact part identification.)
Hardware List
Ensure all hardware components are accounted for before beginning assembly.
- 1: Bolts (various sizes)
- 2: Washers
- 3: Nuts
- 4: Allen Wrench (included)
- 5: Screwdriver (recommended, not included)
- (Note: This is a generic list. Refer to your specific packaging for exact hardware identification.)
Setup and Assembly Instructions
Estimated assembly time: 0.5 hour. Two people are suggested for assembly. Avoid using power tools.
Step 1: Unpack and Organize
Carefully unpack all components and lay them out on a clean, soft surface (e.g., a carpet or blanket) to prevent scratches. Identify all parts and hardware using the provided lists.
Step 2: Assemble the Bed Frame Base
Connect the Bed Frame Side Rails (A) to the Bed Frame End Panels (B) using the appropriate bolts and washers. Hand-tighten all connections initially. Ensure the frame is square before fully tightening.

Image: Initial assembly of the bed frame, showing the basic structure.
Step 3: Attach Support Legs and Ladder
Secure the Support Legs (H) to the corners of the bed frame. Attach the Ladder Steps (D) to the designated side of the bed frame. Ensure the ladder is firmly attached and stable.
Step 4: Install Bed Slats
Place the Bed Slats (G) across the bed frame, ensuring they are evenly spaced and securely fastened to the side rails. This provides the mattress support.
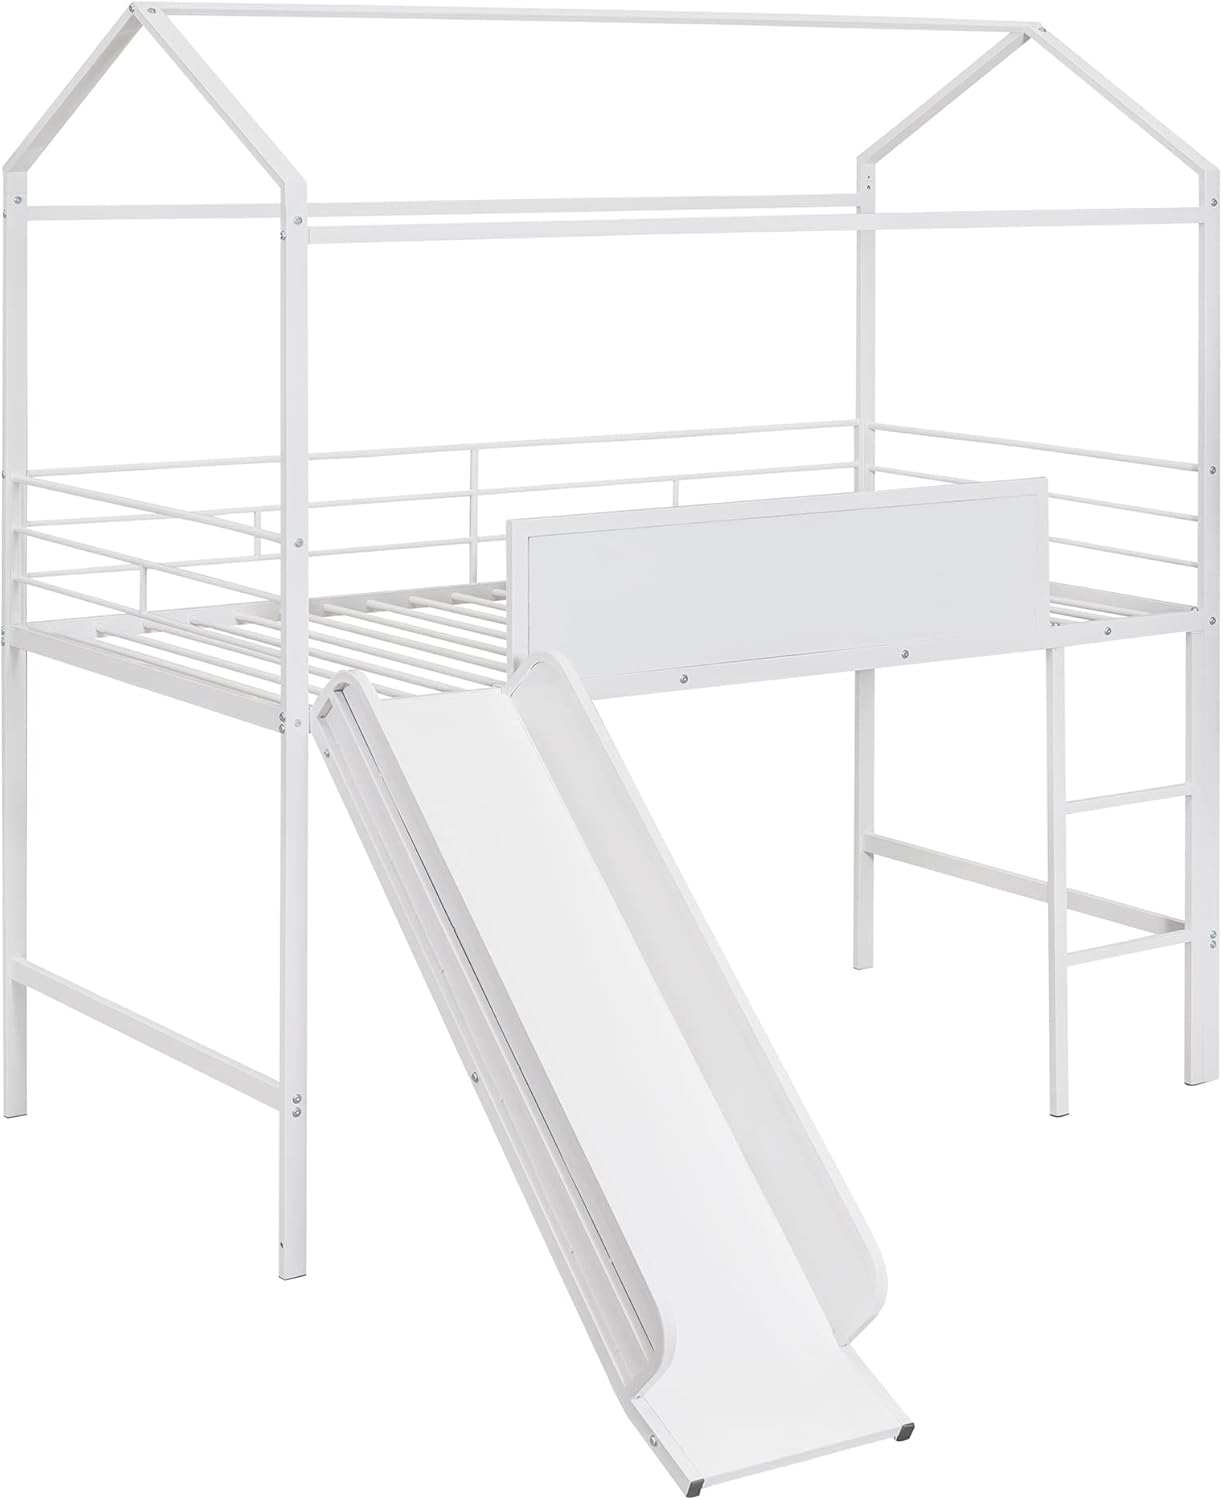
Image: Close-up of the bed frame with metal slats installed, ready for a mattress.
Step 5: Assemble the Roof Structure
Connect the Roof Frame Sections (C) to form the house-shaped roof. Attach the completed roof structure to the top of the bed frame, securing it with the provided hardware.

Image: The loft bed frame with the distinctive house-shaped roof structure visible.
Step 6: Attach the Slide and Blackboard
Secure the Slide Sections (E) to the designated opening on the bed frame. Ensure the slide is stable and properly angled. Attach the Blackboard Panel (F) to the side rail as shown in the diagrams.

Image: The fully assembled loft bed, showcasing the slide and blackboard panel.
Step 7: Final Tightening and Inspection
Once all components are assembled, go back and fully tighten all bolts and connections. Do not overtighten. Perform a final inspection to ensure the bed is stable, all parts are correctly installed, and there are no loose components.
Operating Instructions
Using the Loft Bed
- Place a twin-size mattress with a maximum thickness of 6 inches on the bed slats.
- Always use the integrated ladder for safe access to and from the loft bed.
- Ensure the weight on the bed does not exceed 250 lbs.
Using the Slide
- Supervise children when using the slide.
- Ensure the area around the slide exit is clear of obstructions.
- Only one child should use the slide at a time.
Using the Blackboard
- Use standard chalk for writing and drawing on the blackboard panel.
- Wipe clean with a damp cloth or blackboard eraser.
- Avoid using permanent markers or abrasive cleaners on the blackboard surface.

Image: The loft bed in a decorated room, highlighting the blackboard feature and slide for play.
Maintenance
- Cleaning: Wipe the metal frame with a soft, damp cloth. Avoid harsh chemicals or abrasive cleaners that may damage the finish. For the blackboard, use a damp cloth or blackboard eraser.
- Hardware Check: Periodically (e.g., every 3 months) check all bolts, screws, and connections to ensure they are tight. Re-tighten if necessary to maintain stability and safety. Do not overtighten.
- Inspection: Regularly inspect the bed for any signs of wear, damage, or loose parts. If any issues are found, discontinue use and contact customer support.
Troubleshooting
| Problem | Possible Cause | Solution |
|---|---|---|
| Bed feels wobbly or unstable. | Loose hardware connections. | Check and tighten all bolts and screws. Ensure the bed is on a level surface. |
| Parts do not align during assembly. | Incorrect orientation of parts or overtightened bolts. | Loosen all connections, re-orient parts as per instructions, and then gradually tighten. Do not fully tighten until all parts are in place. |
| Squeaking noises. | Loose connections or friction between metal parts. | Tighten all hardware. Apply a small amount of silicone spray or lubricant to contact points if necessary. |
| Blackboard not erasing cleanly. | Using incorrect writing tools or residue buildup. | Ensure only standard chalk is used. Clean with a damp cloth or specialized blackboard cleaner. |
Specifications
| Product Type | House Loft Bed |
| Model Number | B0BN3T5LQX |
| Overall Product Dimensions | 77.6"L x 40.6"W x 83"H |
| Overall Product Weight | 88 LBS |
| Weight Capacity | 250 lbs |
| Number of Slats | 20 |
| Recommended Mattress Thickness | 6 inches |
| Recommended Age | > 6 years old |
| Material | Metal and MDF |
| Color | White |
| Assembly Required | Yes |
| Estimated Assembly Time | 0.5 hour |
| Suggested Number of People for Assembly | 2 |
| Country of Origin | Vietnam |
Image: The overall Bellemave House Loft Bed, providing a visual reference for the dimensions listed in the specifications.
Warranty and Support
Bellemave products are designed for quality and durability. For specific warranty information, please refer to the documentation included with your purchase or visit the official Bellemave website. If you have any questions, require replacement parts, or need assistance with assembly or troubleshooting, please contact Bellemave customer support.
Contact Information: Please refer to your purchase receipt or the Bellemave official website for the most current customer support contact details.


