
1. Introduction
Thank you for choosing the BOYA BY-M1V2 Wireless Lavalier Microphone System. This ultracompact and easy-to-use 2.4GHz wireless microphone system is designed to provide high-quality audio for a variety of applications, including video recording, vlogging, live streaming, and interviews. It supports up to two people recording simultaneously, making it ideal for content creators using cameras, DSLRs, smartphones, tablets, and camcorders.
Please read this manual carefully before operating the product to ensure proper use and to maximize its performance. Keep this manual for future reference.
2. Package Contents
The BOYA BY-M1V2 system includes the following items:
- 2 × BY-M1V-TX Transmitters
- 1 × BY-M1V-RX Receiver
- 1 × 3.5mm TRS to TRS Output Cable for Cameras
- 1 × 3.5mm TRS to TRRS Output Cable for Smartphones
- 3 × USB-C Charging Cables
- 2 × Fur Windshields
- 1 × Carrying Pouch

Figure 2.1: All components included in the BY-M1V2 package.
3. Product Components
Familiarize yourself with the various parts of the BY-M1V2 system:
BY-M1V-RX Receiver
- USB-C Charging Port: For charging the receiver.
- 3.5mm Headphone Output: For real-time audio monitoring.
- Status Indicator: Displays power, pairing, and charging status.
- 3.5mm TRS Line Output: Connects to cameras, smartphones, or other recording devices.
- Mono/Stereo Switch: Toggles between mono and stereo output modes.
- Power/Pair Button: Powers the unit on/off and initiates pairing.
- Belt Clip: For attaching the receiver to clothing or camera hot shoe.
BY-M1V-TX Transmitter
- USB-C Charging Port: For charging the transmitter.
- Noise Cancellation Button (NR): Activates/deactivates noise reduction.
- Status Indicator: Displays power, pairing, and charging status.
- 3.5mm Mic In Jack: For connecting an external lavalier microphone (not included).
- Built-in Omnidirectional Mic: Captures audio directly.
- Gain Control (+/- buttons): Adjusts microphone input level (7 levels).
- Power/Mute/Pair Button: Powers the unit on/off, mutes/unmutes, and initiates pairing.
- Belt Clip: For attaching the transmitter to clothing.
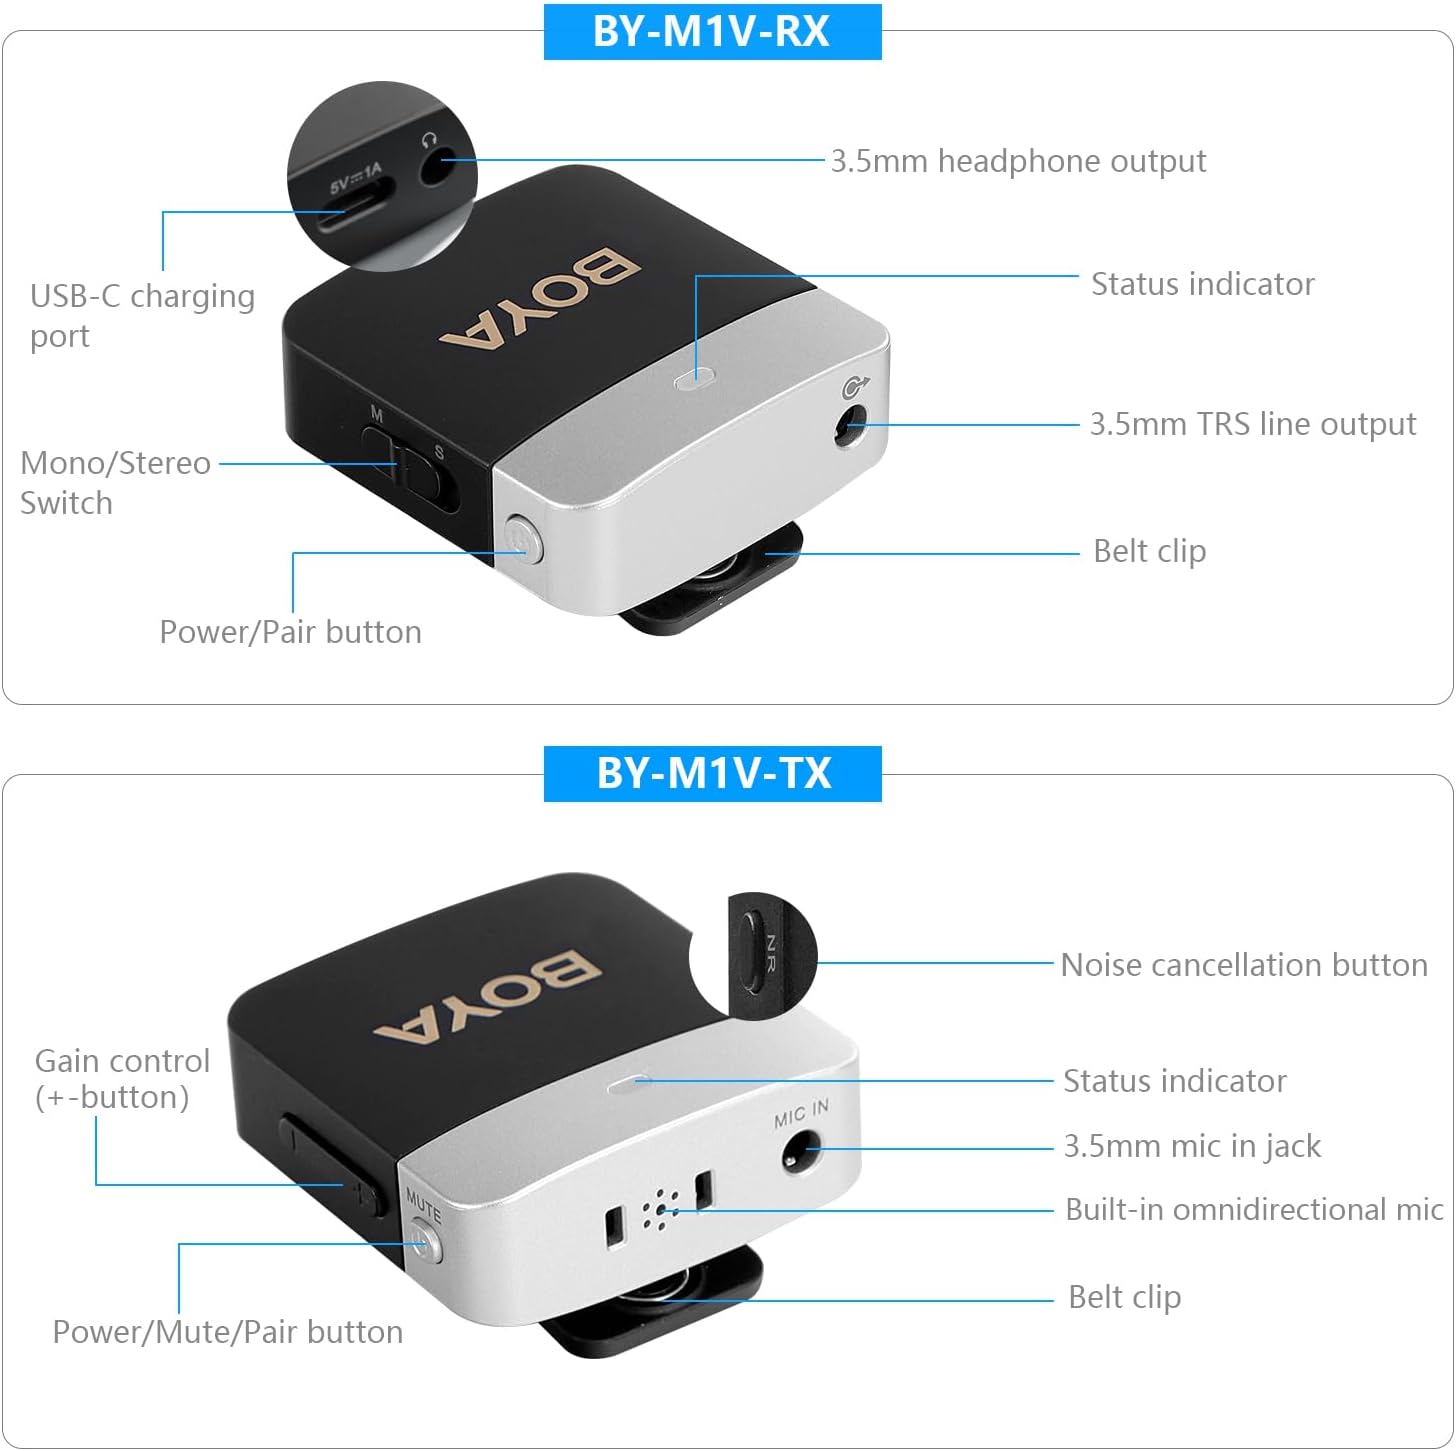
Figure 3.1: Detailed view of the receiver and transmitter components.
4. Setup Guide
4.1 Charging the Devices
Before first use, fully charge the transmitter(s) and receiver.
- Connect the supplied USB-C charging cables to the USB-C ports on the transmitter(s) and receiver.
- Plug the other end of the cables into a USB power adapter (5V/1A recommended).
- The status indicator will show charging status (e.g., solid red while charging, off when fully charged).
- A full charge takes approximately 1.5 hours and provides up to 6 hours of working time.
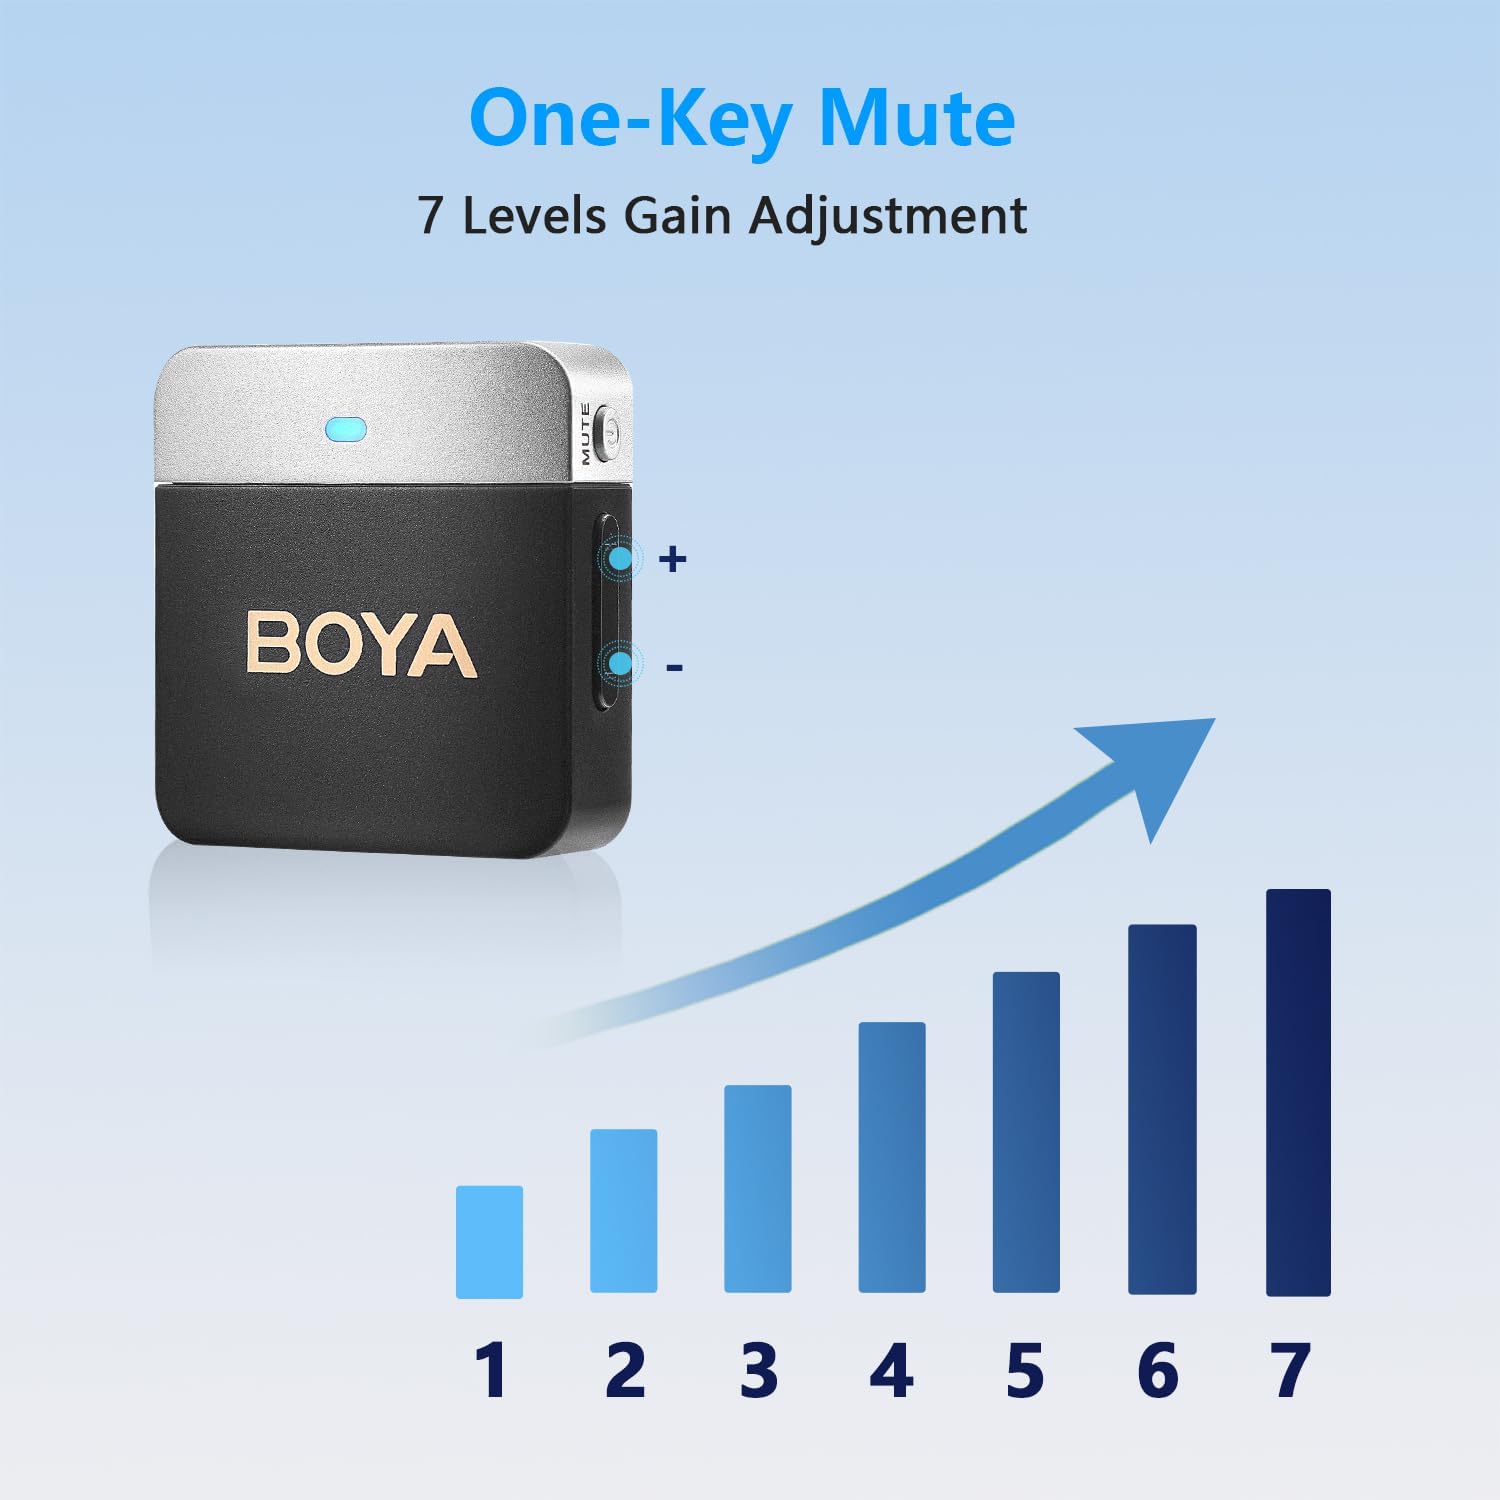
Figure 4.1: Compact design and battery life information.
4.2 Pairing the Transmitter and Receiver
The units are pre-paired at the factory. If they lose connection or you are pairing new units:
- Power on both the transmitter(s) and the receiver by pressing and holding their respective Power/Pair buttons.
- The status indicators will blink slowly, indicating they are searching for each other.
- Once successfully paired, the status indicators on both units will turn solid blue.
4.3 Connecting to Your Device
The BY-M1V2 system offers wide compatibility:
- For Cameras/DSLRs/Camcorders: Use the supplied 3.5mm TRS to TRS output cable. Connect one end to the receiver's 3.5mm TRS Line Output and the other end to your camera's microphone input.
- For Smartphones/Tablets: Use the supplied 3.5mm TRS to TRRS output cable. Connect the TRS end to the receiver's 3.5mm TRS Line Output and the TRRS end to your smartphone's 3.5mm headphone/microphone jack. For devices without a 3.5mm jack (e.g., newer iPhones, USB-C Android phones), a suitable adapter (sold separately) will be required.

Figure 4.2: Connectivity options for different recording devices.
5. Operating Instructions
5.1 Power On/Off
- Power On: Press and hold the Power/Pair button on both the transmitter(s) and receiver until the status indicator lights up.
- Power Off: Press and hold the Power/Pair button on both the transmitter(s) and receiver until the status indicator turns off.
5.2 Gain Adjustment
The transmitter features 7 levels of gain adjustment to optimize audio input levels and prevent distortion.
- Use the + and - buttons on the side of the transmitter to increase or decrease the gain level.
- Adjust the gain while monitoring your audio to achieve clear sound without clipping.
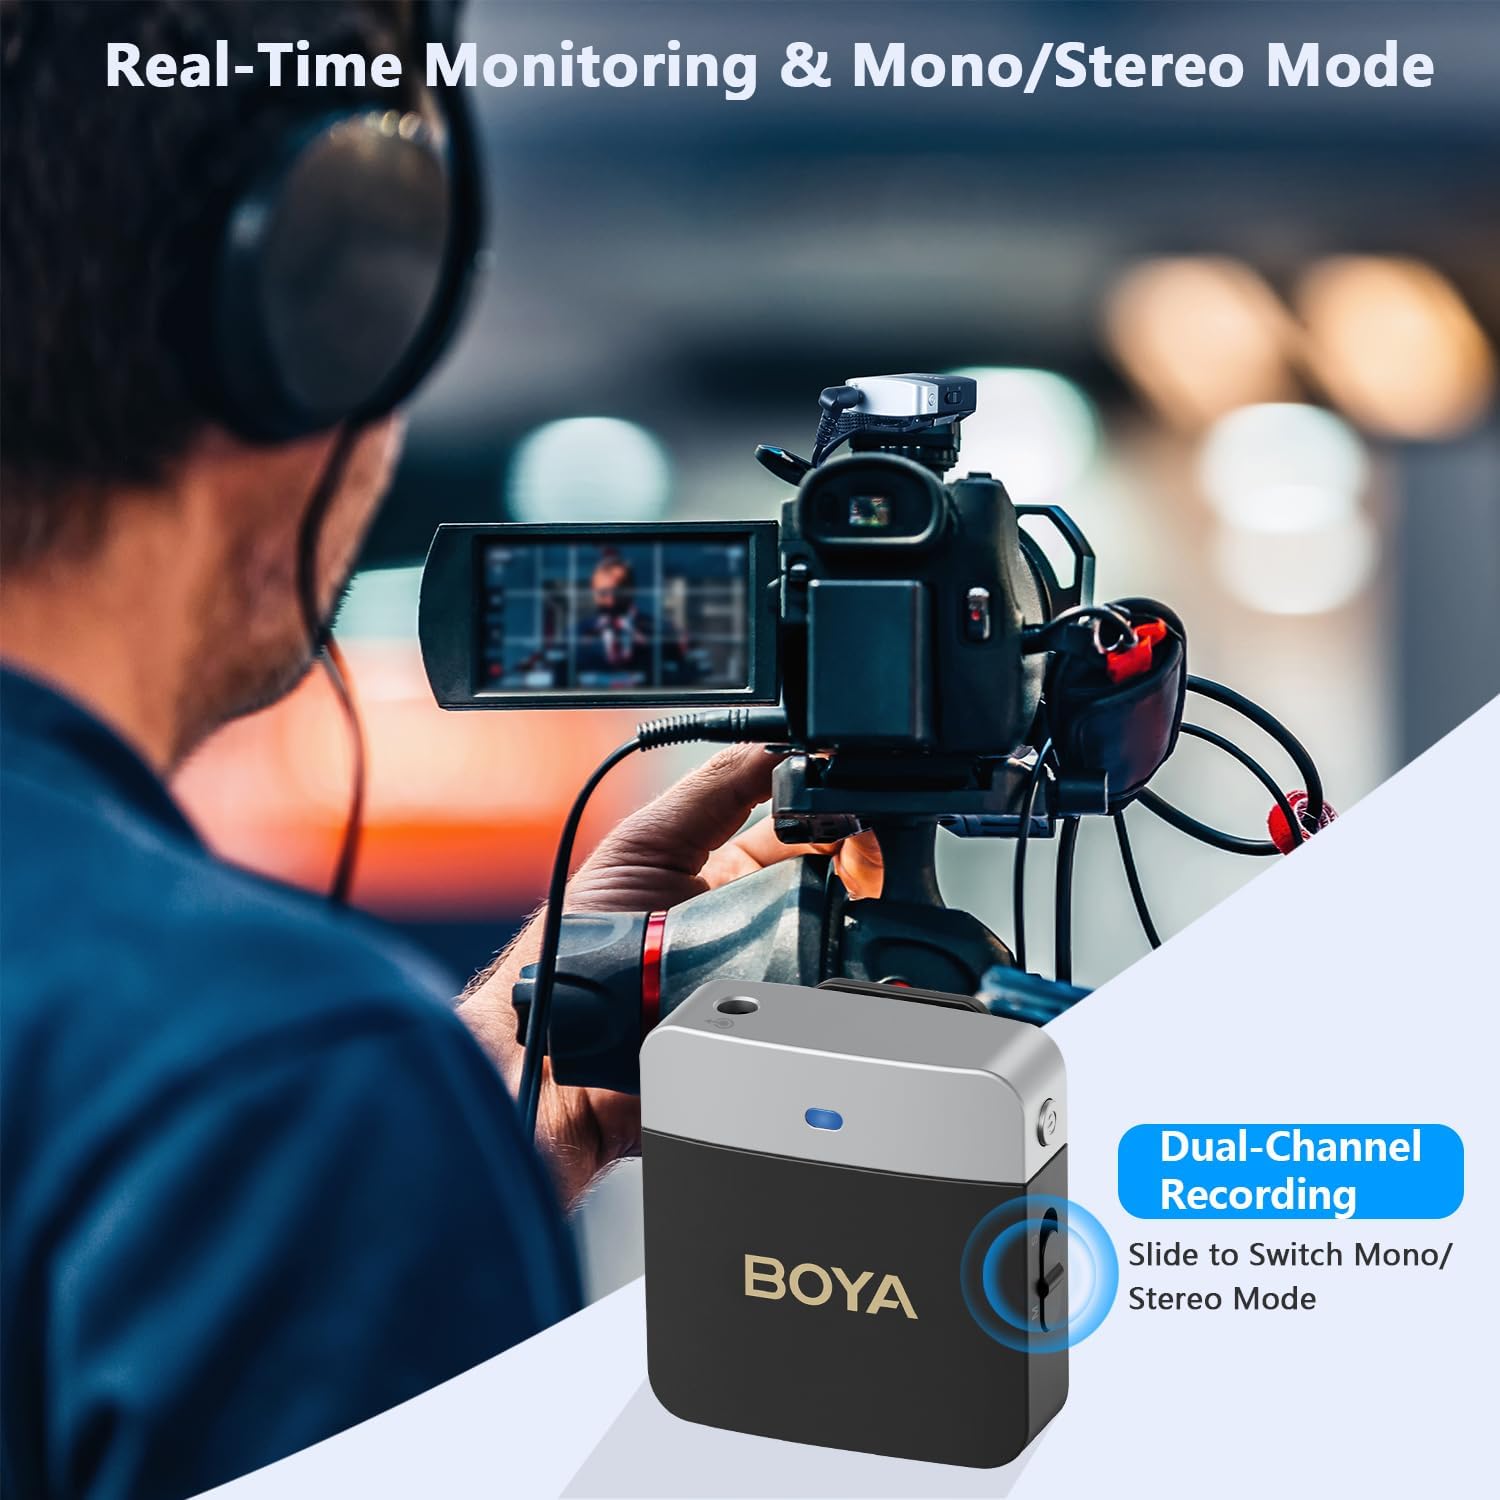
Figure 5.1: Gain adjustment controls on the transmitter.
5.3 Noise Cancellation (NR)
The transmitter includes a noise cancellation feature to reduce ambient background noise.
- Press the NR button on the side of the transmitter to activate noise cancellation. The status indicator may change color to confirm activation.
- Press the NR button again to deactivate it.
- Use this feature in noisy environments to improve vocal clarity.
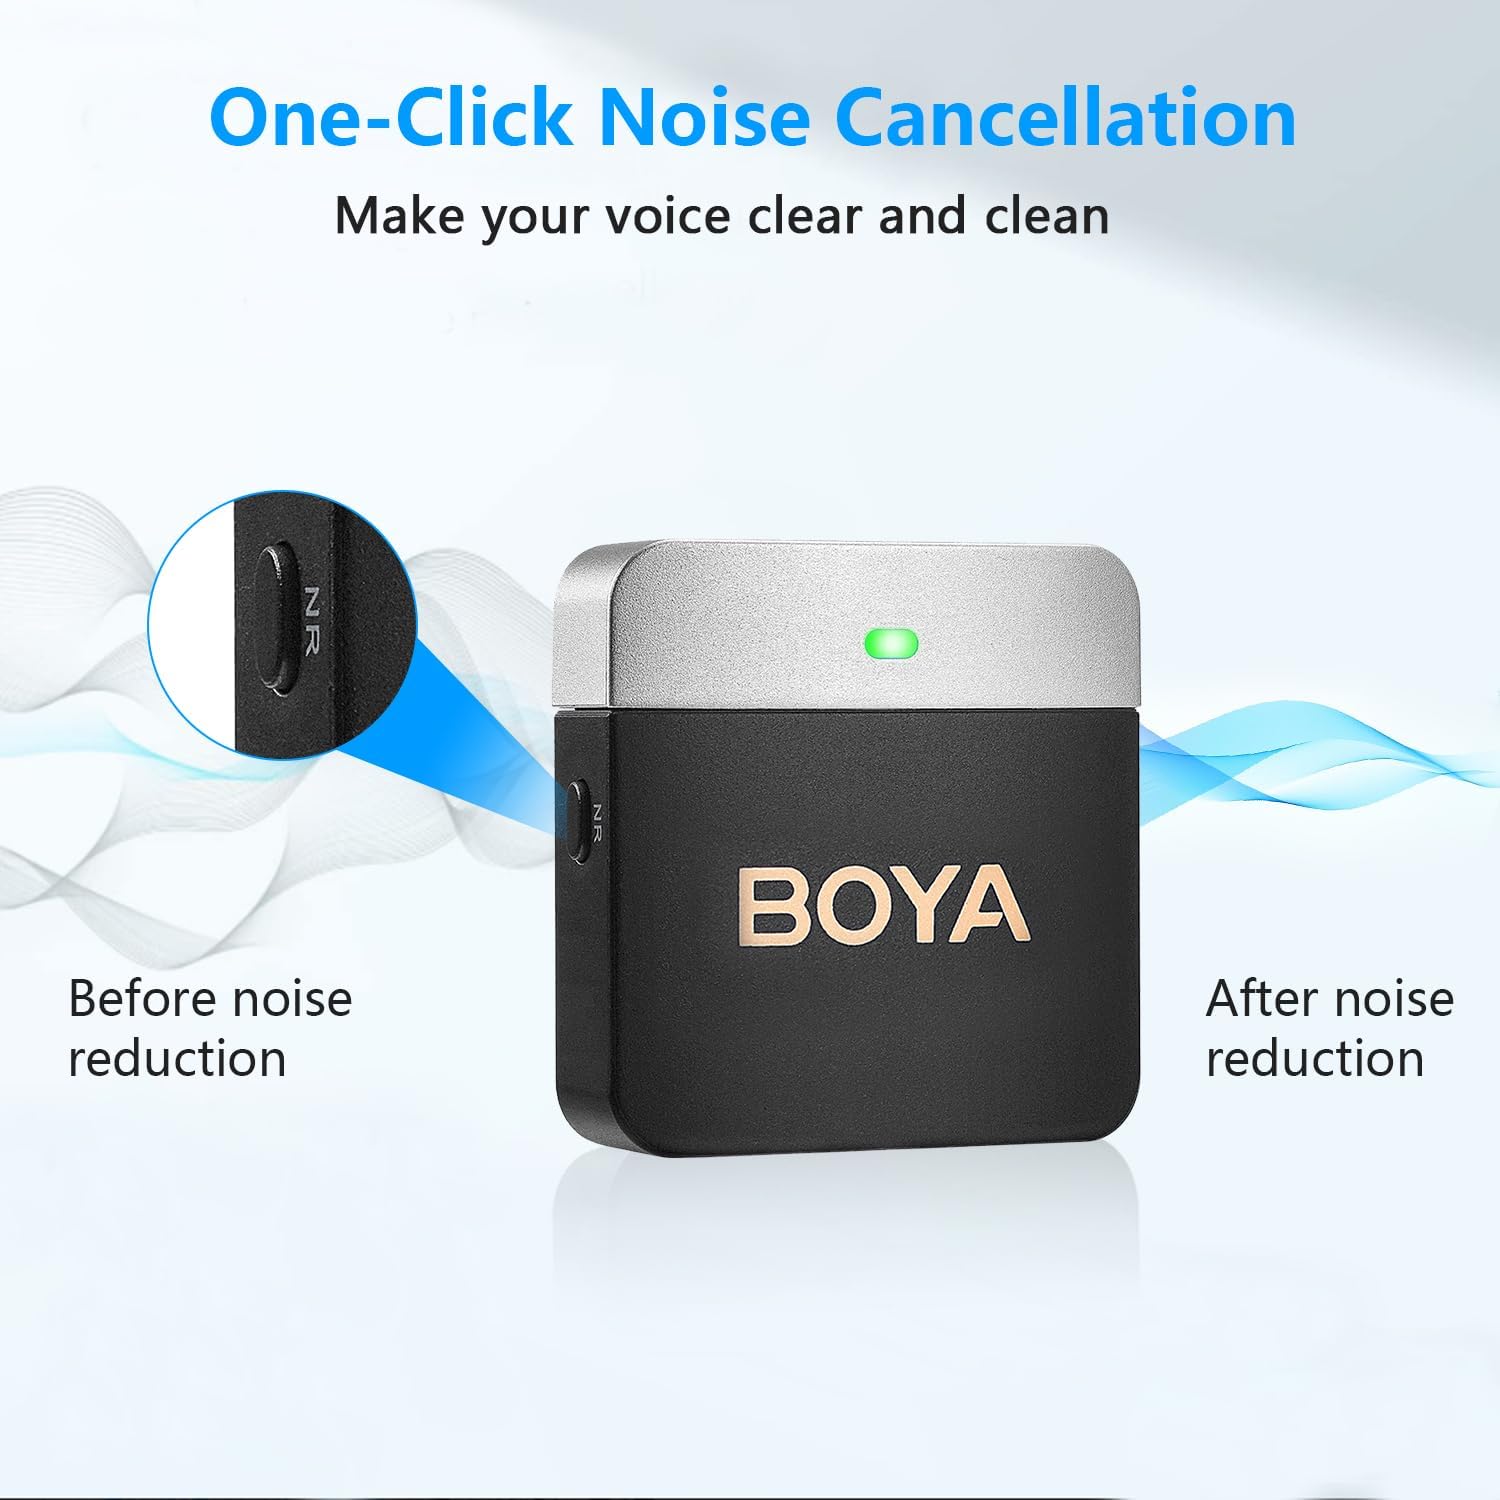
Figure 5.2: Noise cancellation feature.
5.4 Mute Function
Temporarily mute the microphone output without turning off the device.
- Short press the Power/Mute/Pair button on the transmitter to mute the microphone. The status indicator will change (e.g., blink slowly or turn red) to indicate mute status.
- Short press the button again to unmute.
5.5 Real-Time Monitoring
Monitor your audio in real-time to ensure optimal recording quality.
- Plug headphones into the 3.5mm Headphone Output jack on the receiver.
- Listen to the audio as it is being recorded to check for levels, clarity, and any interference.

Figure 5.3: Real-time audio monitoring setup.
5.6 Mono/Stereo Output
Choose between mono and stereo output modes based on your recording needs.
- Use the Mono/Stereo Switch on the receiver to select the desired output mode.
- Mono: Combines both transmitter audio channels into a single output.
- Stereo: Separates the audio from each transmitter into left and right channels, allowing for individual post-production control.
5.7 Wireless Transmission Range
The BY-M1V2 system provides a stable wireless signal transmission up to 60 meters (196 feet) in open, obstacle-free environments.
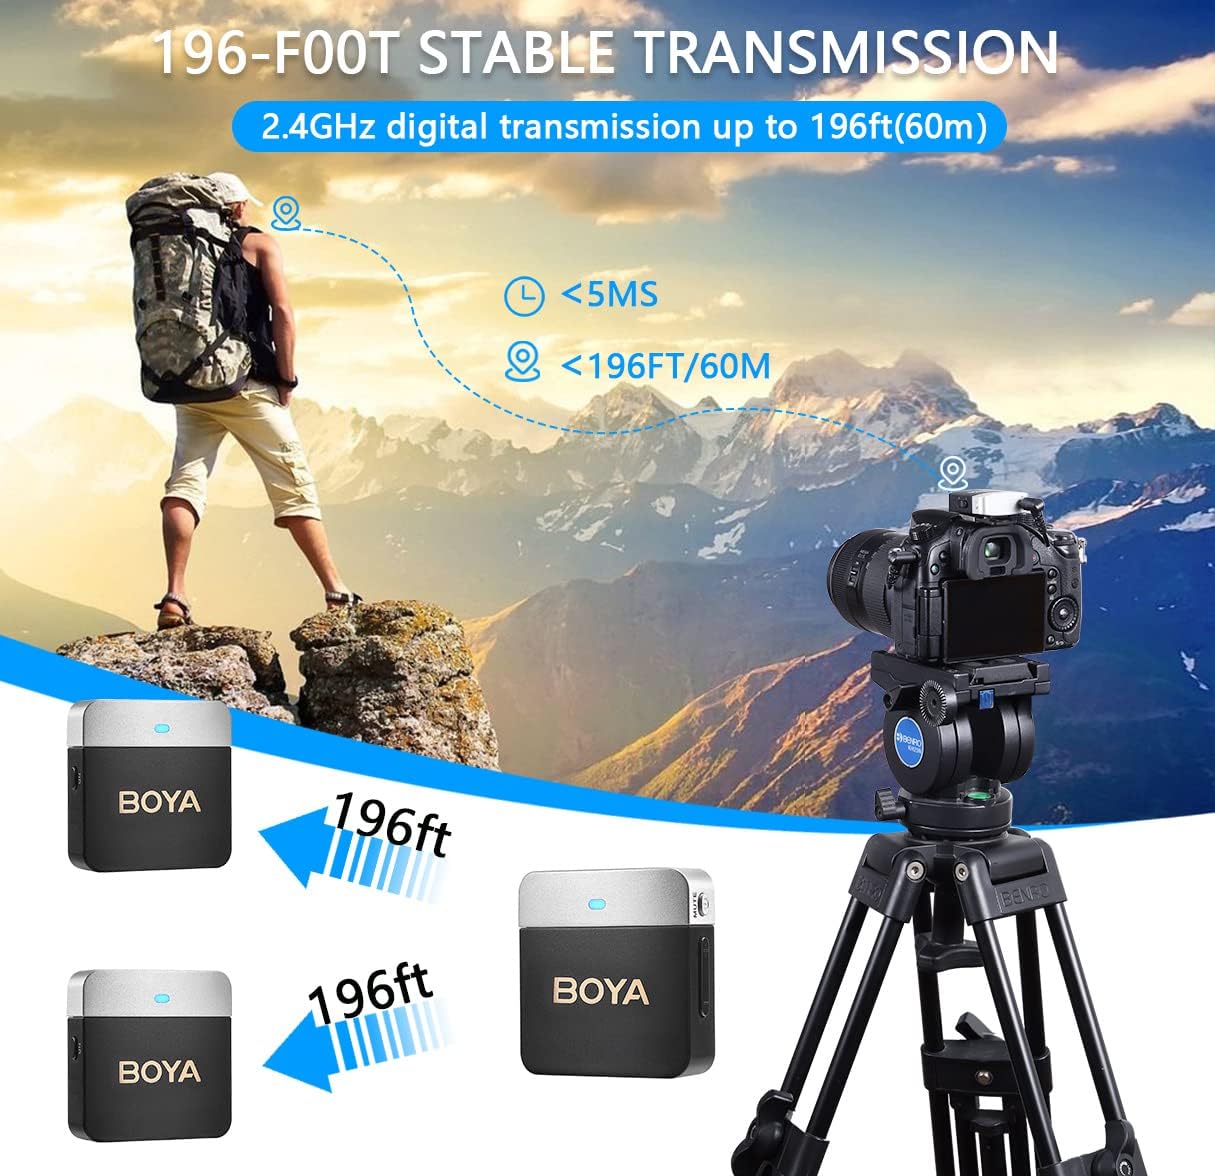
Figure 5.4: Wireless transmission range.
6. Maintenance and Care
- Keep the device dry. Do not expose it to water or excessive humidity.
- Do not disassemble the device. Repairs should only be performed by authorized service personnel.
- Store the device in a cool, dry place away from direct sunlight and corrosive materials.
- Clean the device with a soft, dry cloth. Do not use harsh chemicals or abrasive cleaners.
- Regularly charge the batteries, even if not in use, to maintain battery health.
7. Troubleshooting
If you encounter issues with your BY-M1V2 system, refer to the table below for common problems and solutions:
| Problem | Possible Cause | Solution |
|---|---|---|
| No sound or low sound level | Incorrect cable connection; low gain setting; device not paired; receiver not connected to recording device. | Ensure correct TRS/TRRS cable is used and fully inserted. Increase gain on transmitter. Re-pair transmitter and receiver. Connect receiver to camera/smartphone. |
| Audio clipping or distortion | Gain setting too high. | Decrease gain on the transmitter using the '-' button. |
| Interference or static noise | Environmental interference; distance too far; noise cancellation off. | Move away from strong electromagnetic sources. Reduce distance between TX and RX. Activate noise cancellation (NR button). |
| Short battery life | Battery not fully charged; old battery. | Ensure devices are fully charged before use. Battery life may degrade over time. |
| Cannot hear playback on iPhone when receiver is connected | iPhone audio output is routed through the connected receiver. | This is normal behavior. Disconnect the receiver to hear playback through iPhone speakers, or use headphones connected to the receiver for monitoring. |
8. Technical Specifications
| Feature | Specification |
|---|---|
| Brand | BOYA |
| Model Number | BY-M1V2 |
| Connectivity Technology | 2.4GHz Wireless |
| Number of Channels | 2 |
| Polar Pattern | Omnidirectional (Built-in Mic) |
| Signal-to-Noise Ratio | 80 dB |
| Audio Sensitivity | 30 dB |
| Wireless Transmission Range | Up to 60 meters (196 feet) without obstacles |
| Battery Type | Lithium Ion |
| Working Time | Approx. 6 hours (TX & RX) |
| Charging Time | Approx. 1.5 hours |
| Item Weight | 8.1 ounces (total package) |
| Dimensions (each unit) | 40.2 x 39.8 x 18.6 mm (approx.) |
| Compatible Devices | Camcorder, Camera, DSLR, Personal Computer, Smartphone |
9. Warranty and Support
BOYA products are designed for reliability and performance. For warranty information and technical support, please refer to the official BOYA website or contact your local distributor.
You can also find the official User Manual PDF for this product here.
For further assistance, please contact BOYA customer service through their official channels.


