
1. Product Overview
The EPEVER Tracer7810BP is a high-performance 30A MPPT solar charge controller designed for robust outdoor use. Its IP68 waterproof rating ensures durability in various environments, making it ideal for mobile and fixed solar installations. This controller efficiently maximizes power harvest from solar panels and intelligently manages battery charging to extend battery lifespan.
Key features include:
- IP68 Rated Waterproof: Designed for outdoor solar systems, suitable for RVs, trailers, boats, yachts, and other demanding applications.
- Innovative MPPT Design: Automatically detects 12V/24V DC system voltages. Features advanced Maximum Power Point Tracking (MPPT) technology with tracking efficiency no less than 99% and a maximum conversion efficiency of 98%.
- Temperature Monitor and Compensation: Equipped with a Remote Temperature Sensor Port for real-time battery temperature measurement and accurate temperature compensation, ensuring stable and consistent charging.
- Multiple Protections: Includes PV polarity reversal protection, battery reversal protection, over-voltage protection, over-discharge protection, over-temperature protection, and load short-circuit protection.
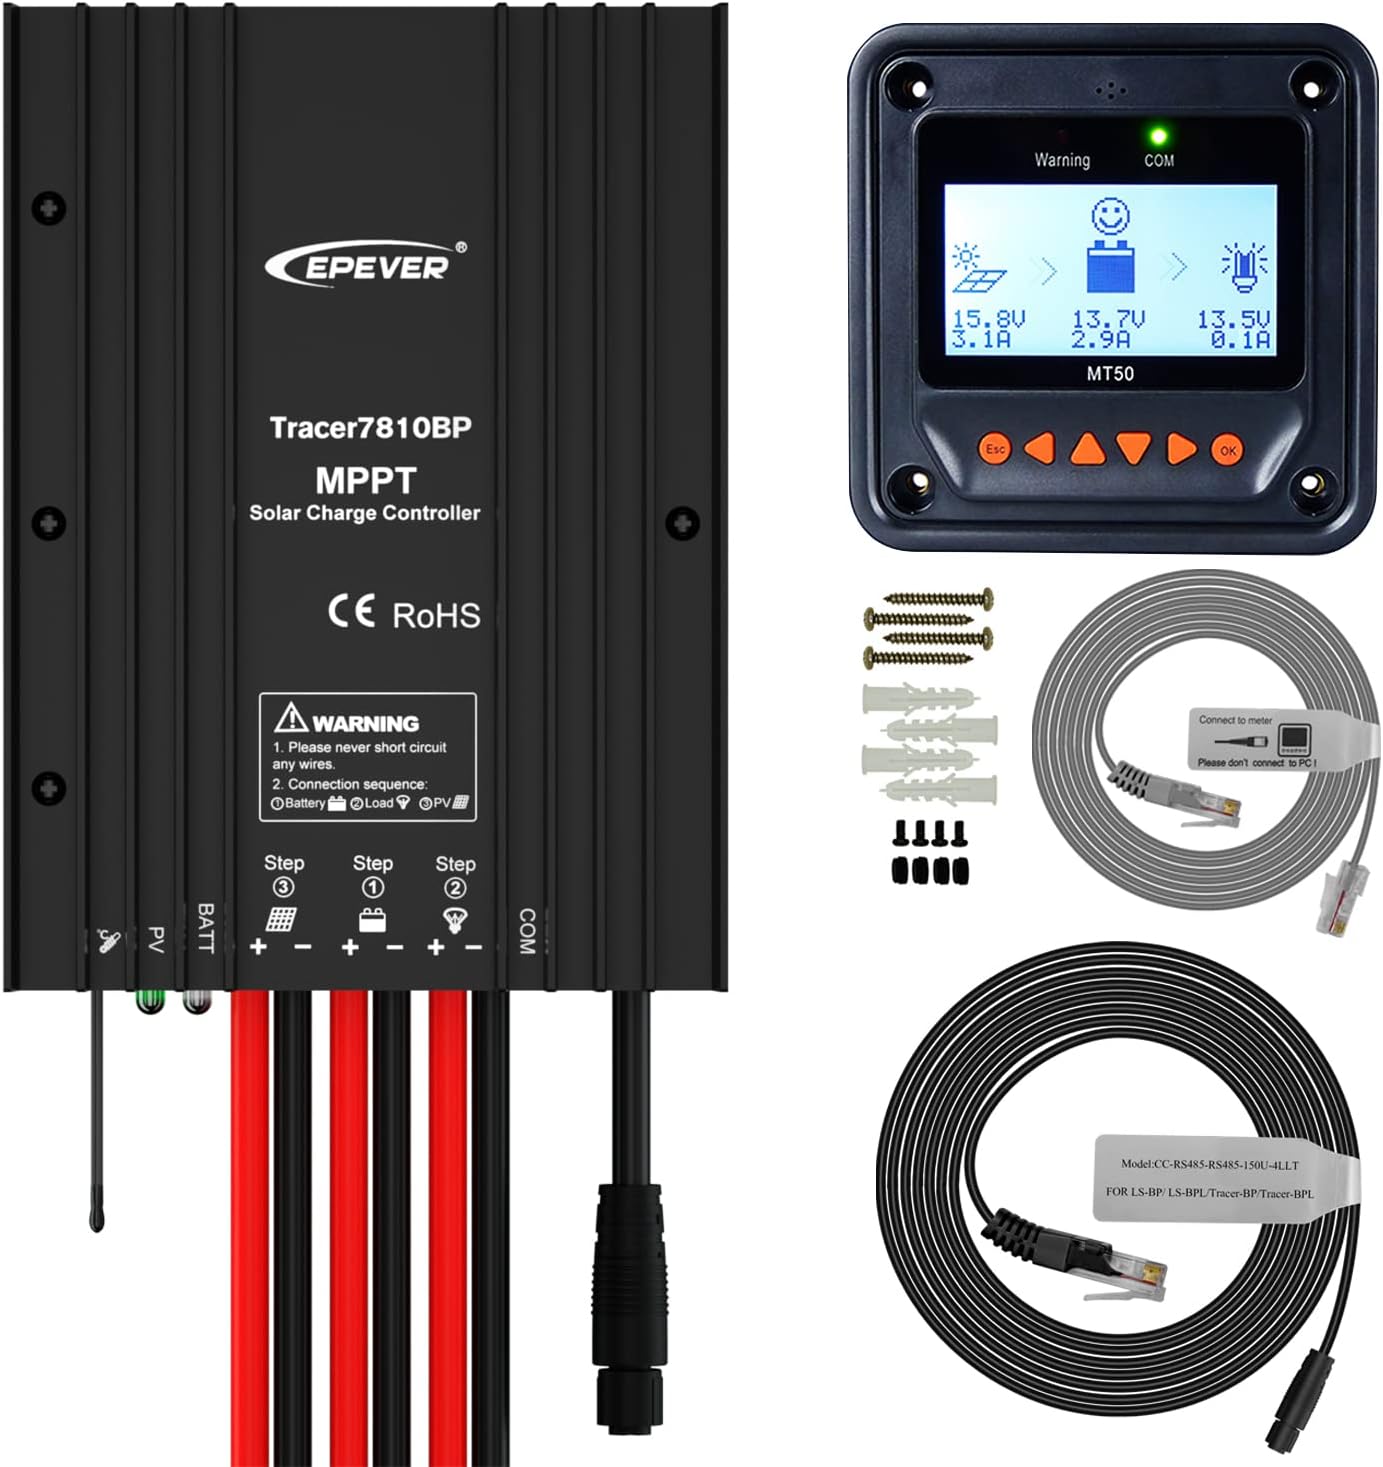
Image: EPEVER Tracer7810BP MPPT Solar Charge Controller, showing the main unit, MT50 remote meter, and included cables.
2. Setup and Installation
Proper installation is crucial for the safe and efficient operation of your solar charge controller. Always connect the battery first to ensure proper voltage detection and protection. For safety, circuit breaker connections are recommended for all circuits.
2.1 Connection Steps
- Connect the Battery: Connect the battery to the controller's battery terminals. Ensure correct polarity (+ to + and - to -). The controller will automatically detect the system voltage (12V/24V).
- Connect the Load: Connect your DC loads to the controller's load terminals. Ensure correct polarity.
- Connect the Solar Panel (PV array): Connect the solar panel to the controller's PV terminals. Ensure correct polarity.
Important Safety Note: Always connect the battery first and disconnect the solar panel last during uninstallation. Do not use an electric screwdriver for connections to avoid overtightening.

Image: Detailed connection diagram showing solar panel, battery, DC load, inverter, and the Tracer7810BP controller with recommended circuit breakers and fuses.

Image: Close-up view of the Tracer7810BP terminals, indicating Battery, Load, PV, and COM connections, along with LED indicators and temperature sensor port.
2.2 LED Indicators
The controller features LED indicators for PV and Battery status, providing quick visual feedback on system operation.

Image: Close-up of the controller's LED indicators for charging and battery status.
3. Operating the MT50 Remote Meter
The MT50 remote meter provides comprehensive monitoring and parameter setting capabilities for your EPEVER solar charge controller. It connects via an RS485 cable to the controller's COM port.

Image: The MT50 remote meter, showing its display and control buttons.
3.1 Monitoring
The MT50's monitoring screen displays real-time data such as PV voltage/current, battery voltage/current, and load voltage/current. You can navigate through different screens using the arrow buttons.
3.2 Setting Parameters
The MT50 allows you to customize various parameters, including battery type and load working mode. For lithium batteries, manual voltage settings are required as the controller does not automatically identify their system voltage.
To set parameters:
- Choose "Control para" from the menu.
- Press "OK".
- Press "OK" again.
- Set parameters (for lithium battery, select "User" and input specific values). Press "OK" to save.
- Continue setting other parameters as needed.
Note: Lithium batteries do not automatically identify system voltage. In "Rated Voltage", please select 12V or 24V for your lithium battery system. Please set the parameters under the guidance of professionals, referring to the detailed settings in the manual for your specific battery type (Li-NiCoM or LiFePO4).
Load working modes can also be set via the MT50, including Manual Control, Light On/Off, Light On+Timer, and Time Control. Refer to the manual for detailed settings on pages 21-23.
Video: A comprehensive guide to unboxing, connecting, and operating the EPEVER Tracer7810BP MPPT Solar Charge Controller with the MT50 remote meter, including parameter settings for various battery types.
4. Maintenance
Regular maintenance ensures the longevity and optimal performance of your EPEVER solar charge controller.
- Check Connections: Periodically inspect all wiring connections for tightness and corrosion. Loose connections can cause overheating and damage.
- Clean the Controller: Keep the controller's heat sink and casing clean from dust and debris to ensure efficient heat dissipation. Use a dry cloth for cleaning.
- Inspect Wiring: Check for any signs of wear, fraying, or damage to the cables. Replace damaged cables immediately.
- Battery Health: Monitor your battery's health and ensure it is within its recommended operating parameters.
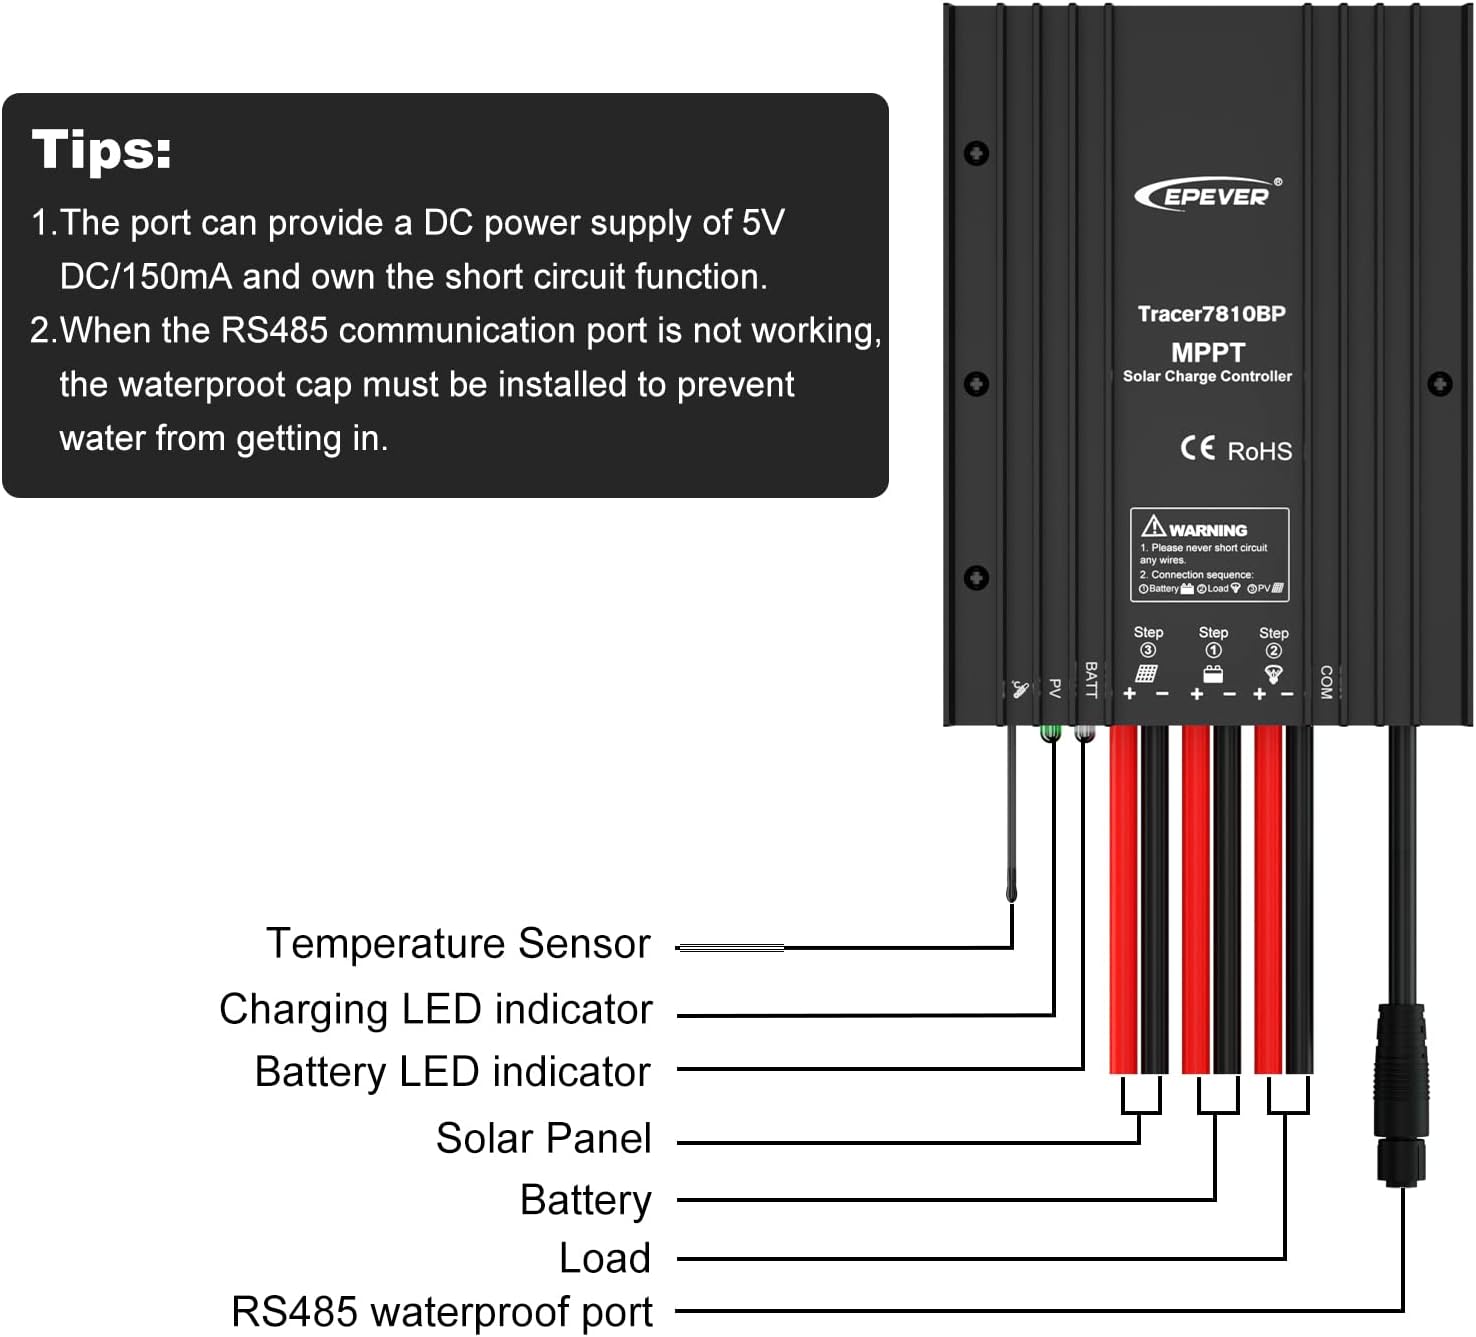
Image: The Tracer7810BP controller with water droplets, demonstrating its IP68 waterproof design, which simplifies outdoor maintenance.
5. Troubleshooting
If you encounter issues with your solar charge controller, refer to the following common problems and solutions:
- No Power/Display: Check battery connections and ensure the battery has sufficient charge. Verify all wiring is correct and secure.
- No Charging: Ensure solar panels are receiving adequate sunlight. Check PV connections and polarity. Verify PV voltage is within the controller's operating range.
- Load Not Working: Check load connections and ensure the load is not exceeding the controller's rated current. Verify load working mode settings on the MT50.
- LED Indicators: Refer to the LED indicator table in the manual for specific status and error codes. For example, a fast flashing PV LED might indicate PV overvoltage, while an orange solid BATT LED indicates undervoltage.
- Battery Overheating: Ensure the controller is installed in a well-ventilated area. Check the ambient temperature and ensure the battery is not being overcharged (verify settings).

Image: Internal view of the Tracer7810BP, highlighting its multiple protection features such as PV polarity reversal, battery reversal, over-voltage, over-discharge, over-temperature, and load short-circuit protection.
6. Specifications
| Item/Model | Tracer7810BP |
|---|---|
| Nominal system voltage | 12/24VDC Auto (Lithium battery do not automatic identification system voltage) |
| Battery input voltage range | 8.5-32VDC |
| Rated charge/discharge current | 30A |
| Rated charge power | 390W/12V, 780W/24V |
| Max PV open circuit voltage | 100V (at min operating environment temp), 92V (at 25°C environment temp) |
| MPP Voltage range | (Battery voltage+2V)~72V |
| Battery Type | Lead-acid Sealed (Default)/Gel/Flooded/User, Lithium battery: LiFePO4/Li-NiCoMn/User |
| Temperature compensation coefficient | -3mV/°C/2V (Lithium battery don't have temperature compensation coefficient) |
| Communication | RS485 |
| Working environment Temp. | -40°C ~ +50°C |
| Enclosure | IP68 |
| Overall Dimension | 153.3x105.5x12.1mm |
| Mounting hole size | 3.5mm |
| Mounting hole spacing | 120x94mm |
| Power cable | 10AWG(6mm²) |
| Net weight | 1.26kg |
Table: Detailed technical specifications for the EPEVER Tracer7810BP MPPT Solar Charge Controller.
7. Warranty and Support
EPEVER products are backed by a manufacturer's warranty. For specific warranty terms, duration, and support procedures, please refer to the warranty card included with your product or visit the official EPEVER website. For technical assistance, troubleshooting beyond this manual, or to inquire about replacement parts, please contact EPEVER customer support directly.


