
Lightbiz P150D
Lightbiz LED Closet Light Instruction Manual
Model: P150D
Introduction
Thank you for choosing the Lightbiz LED Closet Light with Charging Station. This versatile lighting solution provides convenient, dimmable, and motion-sensing illumination for various indoor spaces. Designed for ease of use and energy efficiency, this manual will guide you through the setup, operation, and maintenance of your new LED lights.
Product Features
- Storable Multi-Device Charging Station: Features a built-in 800mAh rechargeable battery. The organizer charging stand can charge three LED lights simultaneously via USB, or each light can be charged individually. It also serves as a storage solution to keep your desktop tidy. Non-slippery bottom ensures stability.
- Dimmable and Timing Functions: Comes with a remote control for adjusting brightness and setting timers. In "ON" mode, the light remains on and is controllable by remote. Brightness can be set to 50% or adjusted steplessly using the +/- buttons. Timer functions include 10, 30, 60, or 120 minutes. (Note: Remote control does not work in "Auto Mode").
- Motion & Night Sensor: Equipped with two sensor modes: Night Mode and Day Mode. Lights detect human motion within 10ft/120° and automatically turn on. They shut off approximately 15 seconds after no motion is detected.
- Easy Installation: Offers two simple installation methods. Built-in strong magnets allow direct attachment to any iron surface. Alternatively, use the included 3M adhesive tape and metal strip for secure placement on any flat, non-iron surface. No screws required.
- Wide Applications: Ideal for bedrooms, closets, cabinets, workshops, garages, stairwells, hallways, storage rooms, and more.
Package Contents
Please check the package to ensure all items are present:
- 5 x Lightbiz LED Closet Lights
- 1 x Charging Station
- 1 x Remote Control
- 1 x USB Charging Cable
- 5 x 3M Adhesive Tapes with Metal Strips
- 1 x User Manual (this document)
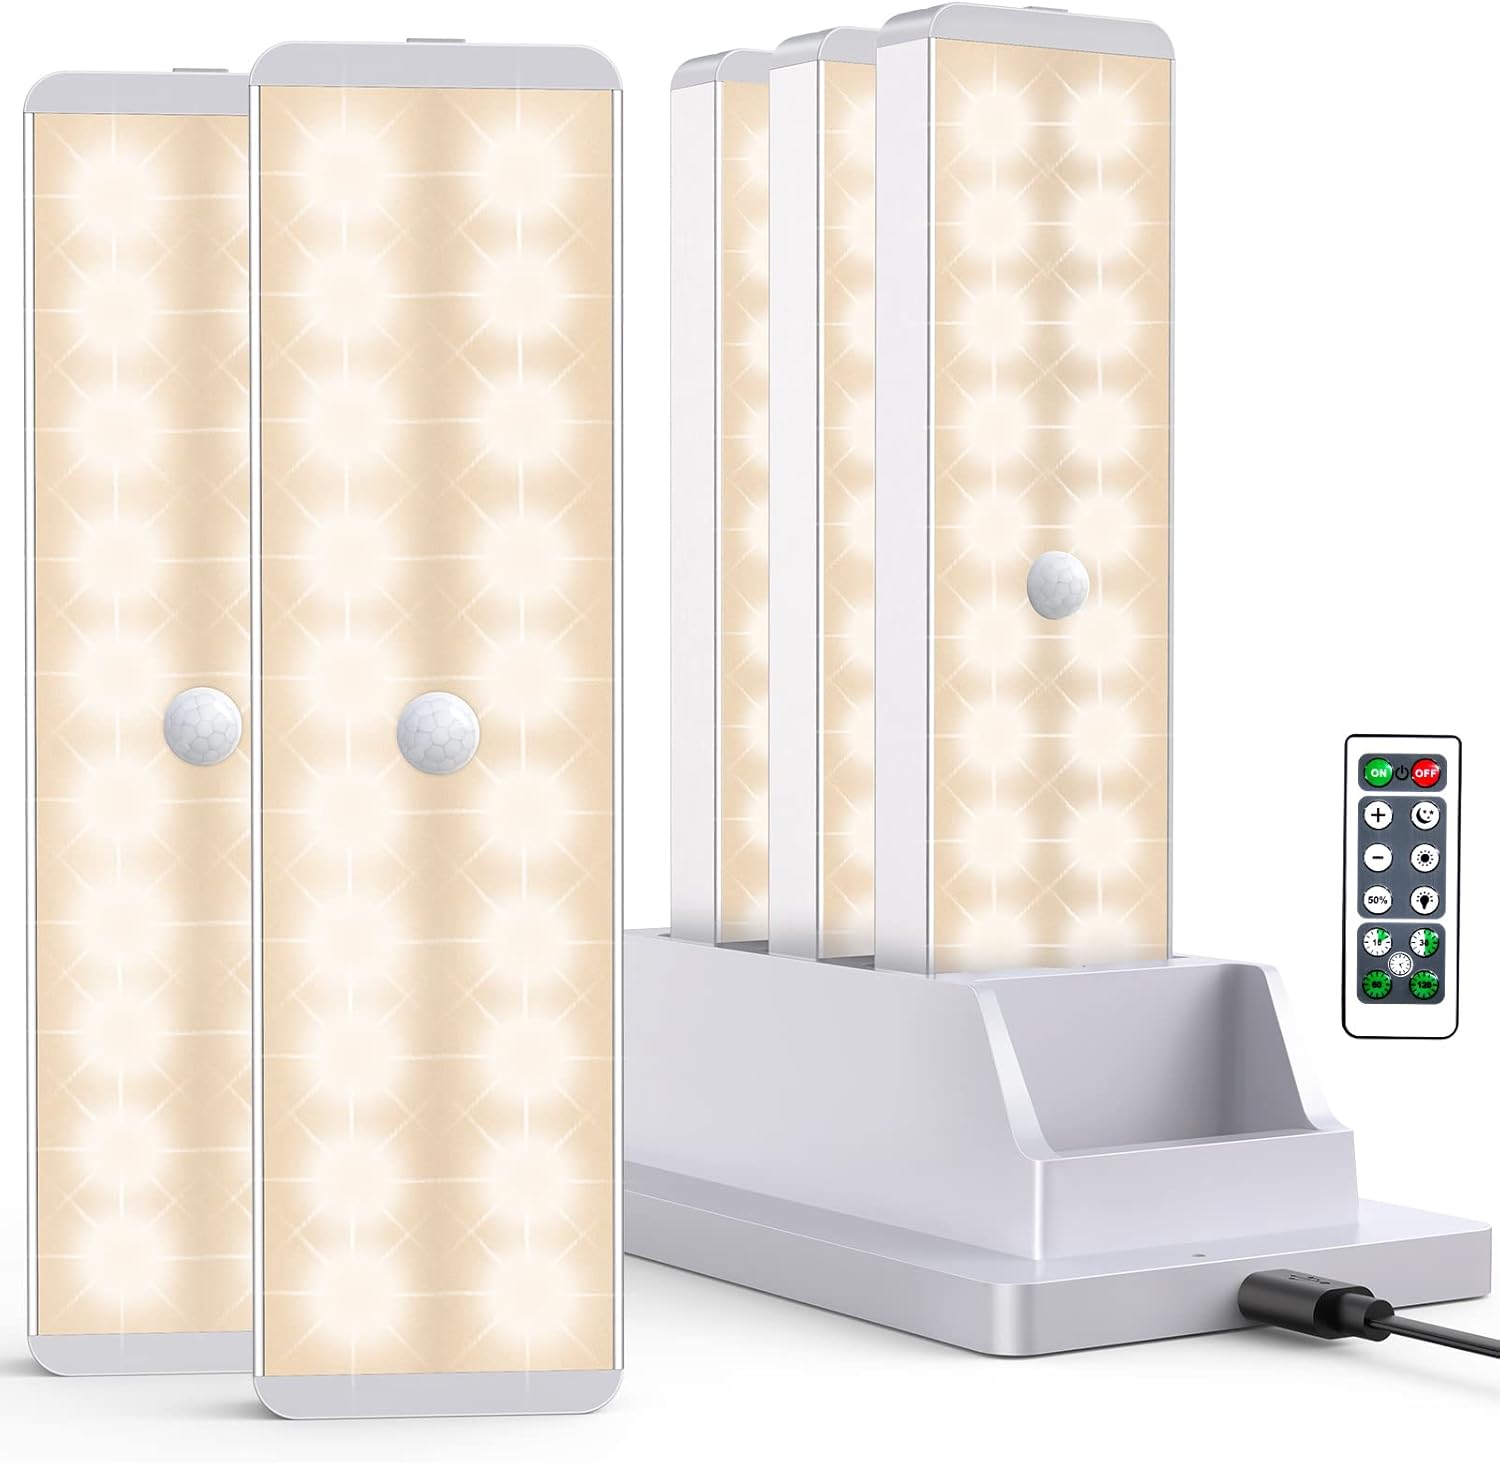
Image: Overview of the Lightbiz LED Closet Light set, including five light bars, the charging station, and the remote control.
Setup
1. Charging the Lights
Before first use, fully charge all LED lights. The built-in 800mAh rechargeable battery provides 10-20 days of use in induction mode after a full charge.
- Connect the USB charging cable to the charging station and a power source (e.g., computer, USB charger, power bank).
- Place the LED lights into the charging slots on the station. The indicator light on the charging station will show red while charging and turn blue when fully charged.
- Each light can also be charged individually by connecting the USB cable directly to the light.

Image: The charging station with LED lights inserted, showing the USB connection and charging indicator lights (red for charging, blue for charged).
2. Installation
The Lightbiz LED Closet Lights offer two simple installation methods:
- Magnetic Attachment: Each light has a built-in strong magnet. Simply attach the light directly to any iron product or surface.
- Adhesive Tape: For non-iron surfaces, peel off the protective film from the 3M adhesive tape attached to the metal strip. Stick the metal strip firmly onto the desired flat surface. Then, the LED light can be magnetically attached to this metal strip. For best adhesion, clean the surface with rubbing alcohol before applying the tape.

Image: Demonstrates the two installation methods: direct magnetic attachment to a metal surface (like a refrigerator) and using the adhesive metal strip for non-metal surfaces (like under a cabinet).
Operating Instructions
1. Power ON/OFF and Mode Selection
Each light has a physical button for basic control:
- Power ON/OFF: Long press the button for 3 seconds to turn the light on or off.
- Change Mode: Single press the button to cycle through the three operating modes:
- Mode 1 (Blue Indicator): Night Mode - Auto-on when motion is detected in dark conditions.
- Mode 2 (Red Indicator): Day Mode - Auto-on when motion is detected in both dark and daytime conditions.
- Mode 3 (Red & Blue Indicator): Always On Mode - The light will remain on continuously.

Image: Diagram illustrating the three cycle modes (Night, Day, Always On) with corresponding indicator light colors and examples of use in different environments.
2. Remote Control Functions
The included remote control provides enhanced functionality for the lights when they are in "ON" mode (Mode 3 - Always On). The remote does not control lights in motion sensor modes (Mode 1 or 2).
- ON/OFF: Press the green "ON" button to turn lights on, and the red "OFF" button to turn them off.
- Brightness Adjustment:
- Press the "50%" button for 50% brightness.
- Use the "+" and "-" buttons for stepless dimming to achieve your desired brightness level.
- Timer Function: Set the lights to automatically turn off after a specified duration:
- 10 minutes
- 30 minutes
- 60 minutes
- 120 minutes

Image: Illustrates the remote control and its functions, including brightness adjustment and timer settings, with lights installed under kitchen cabinets.
Maintenance
- Cleaning: Wipe the lights and charging station with a soft, dry cloth. Do not use abrasive cleaners or immerse in water.
- Battery Care: To prolong battery life, avoid fully discharging the lights frequently. Recharge them when the brightness noticeably diminishes.
- Storage: If storing the lights for an extended period, charge them fully and then store in a cool, dry place. Recharge every 3-6 months to maintain battery health.
Troubleshooting
| Problem | Possible Cause | Solution |
|---|---|---|
| Light does not turn on. | Battery is low or depleted. | Charge the light using the charging station or USB cable. |
| Motion sensor not working. | Light is in "Always On" mode or "Night Mode" in a bright environment. | Ensure the light is in "Day Mode" for motion detection in all lighting conditions, or "Night Mode" in a dark environment. Check for obstructions blocking the sensor. |
| Remote control not working. | Light is in motion sensor mode (Mode 1 or 2). Remote battery is dead. | Switch the light to "Always On" mode (Mode 3) using the physical button. Replace the remote control battery if necessary. |
| Lights fall off after installation. | Surface not clean or adhesive not strong enough. | Ensure the surface is clean and dry before applying the 3M adhesive tape. Press firmly for 30 seconds. If the surface is not iron, ensure the metal strip is used. |
| Short battery life. | Frequent activation in high-traffic areas or "Always On" mode. | Consider using "Night Mode" in areas that are only dark at night to conserve battery. Recharge more frequently if used in "Always On" mode. |
Specifications
| Feature | Detail |
|---|---|
| Brand | Lightbiz |
| Model Name | P150D |
| Color | Warm White |
| Material | Acrylonitrile Butadiene Styrene, Aluminum, Iron |
| Product Dimensions | 6"L x 1.2"W x 4.8"H |
| Power Source | Battery Powered (1 Lithium Ion battery included) |
| Special Features | Dimmable, Timer, Rechargeable, Motion Sensor |
| Control Method | Remote Control |
| Light Source Type | LED |
| Brightness | 150 Lumen |
| Wattage | 2 watts |
| Voltage | 9 Volts |
| Unit Count | 5 Count |
| Indoor/Outdoor Usage | Indoor |
| Water Resistance Level | Not Water Resistant |
Warranty & Support
Lightbiz provides a 1-year warranty for this product.
If you encounter any issues, such as missing components (USB cable, magnet tapes) or other problems, please contact us directly via email. We are committed to offering a replacement or solution after confirming the issue. Your satisfaction is our priority.
Ask a question about this manual
Ask about setup, troubleshooting, compatibility, parts, safety, or missing instructions. Manuals+ will review the question and use this page’s manual context to help answer it.